How to Record Video Clips on a Computer

Making records of your computer operations in this contemporary time has become a much-needed advantage to every computer user because it helps in saving and editing an operation one has worked on to be saved as a video file for future use and reference. Screen recording allows you to capture what is happening on your screen for future playback or as I said earlier "future reference". Whether you're watching a presentation or webinar that you might want to view again or putting together a video game tutorial, capturing what happens on your screen can have several important uses. People also often use this feature when working to perfect their act on complex software. Screen recording can be done with different software that suits the user. Some of them are Xbox game bar, Mac OS screenshot tool, Demo creator, OBS studio, Free cam, Camtasia, Movavi, wikiHow, DemoAir, Webcam Video recorder. Etc. This list will be what we will discuss extensively in this article.
Now, let's talk about screen recording first and its prerequisites. They are:
- File size: Large files are bulky, hard to send, and difficult to store. The longer your screen record lasts, the longer your saved file will be, which can cause problems with future playback.
- Resolution: You can record video on a computer in various resolutions, depending on the settings on your monitor and your video recorder. If you screen record at a high resolution, you may find that your file size increases more quickly.
- Available storage: How much data can you store? Some free screen recording software will limit the size of the file you can save to the platform. In other cases, the limitations of your storage solution may limit your recording.
Check the specific limitations of your screen recording software before you begin recording.
Why Will You Need to Record Video Clips on A Computer with Xbox Game Bar?
Here, we are going to talk about "why" you'll need to record your video clips with the Xbox game bar. The Xbox Game Bar was designed specifically to record clips of video games, but it's also useful for any type of video capture.
How to Record Screen with Xbox Game Bar?
It doesn't take any specialized knowledge to take a screenshot in Windows, it is just simple and quick, but to record video on the computer is the harder part. However, Microsoft has made this feature easier with the use of a built-in video capture tool called the Game bar.
Now, before a computer user decides to use the game bar, first make sure that the feature has been enabled.
To do this in Windows 10, navigate to settings > Gaming > Xbox > Game bar and activate the switch to enable Xbox game bar. Also, if you have an Xbox controller or Xbox 360 controller with the right driver, you can trigger Game Bar through the Xbox button on the gamepad. To enable this feature, click the checkbox for Open Xbox Game Bar using this button as a controller. From the screen, you can as well change any of the keyboard shortcuts associated with taking a screenshot, recording a video, and opening the Game Bar.
Again, almost the same steps are applicable in Windows 11, navigate to Settings > Gaming > Xbox Game Bar. To use an Xbox controller or Xbox 360 controller, turn on the switch for Open Xbox Game Bar using the button as a controller. In Windows 11, you can’t change any of the keyboard shortcuts at the windows settings screen; you’ll have to do that through the settings in the Xbox Game Bar app itself.
Detailed Steps to Record Screen
The first step is to open the app that you would like to capture. You can begin a recording from most Windows and applications, but you can't start a record from the File Explorer, Windows desktop, or Windows apps like Weather. The shortcut to opening the Game bar is by pressing Win + G.
After this, different games Widgets will appear with choices for controlling your audio and video, capturing screenshots, and checking your Xbox social account. Also, the name of your present file, window, or app as the origin of the video record is displayed on the pane.
By clicking on the camera icon, you will capture a simple screenshot. Also, by clicking the button for Start Recording you will record your screen actions. Next time press Alt + Win + R to immediately start your recording instead of navigating to the Game Bar pane.
Also note that when capturing screen actions as a beginner, the Game bar requires your authorization as a P.C user. Simply do this by clicking the checkbox next to enable gaming features for this app to record gameplay. With this, you can now conduct different screen activities you would like to record. The game bar widget that disappears after clicking on the screen is interchanged with a mini floating bar on the top-right corner of the screen, and you can use it to control the recording as you desire.
Click the button for Recording on the floating bar to stop recording. A notification will appear informing you that the game clip was captured. Open the notification by clicking on it to see your video.
Click the button for Play to view the video. Also, you can retrieve your video from File Explorer, which by default is C:\Users\[userID]\Videos\Captures. If you are not comfortable with the default saving location for video records, you are free to switch to another location. Navigate to Settings > Gaming > Captures and click the button for Open folder and select another folder.
How To Enable Background Recording?
There are specified methods of doing this in different P.C Windows. Now, In Windows 10, navigate to Settings > Gaming > Captures and turn on the switch for Record in the background while I’m playing a game. When you are still here, click the drop-down menu for Record the last to modify the duration to somewhere from 15 secs to 10 mins.
In Windows 11, go to Settings > Gaming > Captures and turn on the switch to Record what happened. Here, you can set the max recording length to 30 minutes, 1 hour, 2 hours, or 4 hours.
Make sure not to miss a moment another time. Open Game Bar and click the button for Record last 30-sec, and a video is produced depending on the number of minutes or seconds you set. To do this, you first must permit the computer to record your background activities.
How to Customize Game Bar?
Customizing the Game bar means that a user can watch your video records, regulate what widgets pop up, and configure a range of settings straight away through the Game Bar. Just press Win + G to open the Game Bar. Open the Show All Captures link in the Capture Widget to view the compilation of all your recorded videos. You can then select a video you would like to play. This is as easy as it could be.
Windows enables you to configure what widgets appear when the Game Bar is turned on. Shut down the window for any widget that you are not interested in from the Game Bar display. From the upper widget toolbar, click the Widget menu icon to the right of the Xbox logo to choose the widgets you would like to utilize. Also, you can turn some widgets on or off by clicking the suitable icon on the upper widget toolbar.
By clicking the Settings gear at the right end of the upper widget, you can check and modify the accounts, theme, shortcuts, notifications, recording options, and other Game Bar controls. This is the only location where Windows 11 users can tweak Game Bar shortcuts.
Game Bar Workaround
If you encounter problems with Game Bar, or the tool doesn’t allow you to record video on a computer, the best solution is to look at Microsoft's Troubleshoot Xbox Game Bar on the Windows web page. However, if you get an error that your device does not match with the hardware conditions for capturing clips, there is a workaround.
Suppose you cannot replace your video card or PC hardware; your next best option is to enlist the help of an intermediary utility called Game DVR Config. Download the GameDVR_Config.exe file from the utility’s GitHub page. Open it to check the box for Force software MFT (16 FPS + VBR) at the configuration screen. That's the configuration for its smooth operation.
In Windows 10, right-click on the Taskbar and select Task Manager. In Windows 11, right-click on the Start button and select Task Manager. If necessary, click the More details link. Under the Processes tab, select Gamebar Presence Writer, then click End Task. Try Game Bar again to see if it now lets you capture your screen activity.
MacOS Screenshot Tool
Since the release of Mojave, macOS now has a built-in screenshot tool—like what you might find in Windows—that allows you to take screengrabs with the click of a button. To open the screenshot tool, navigate to Launchpad > Other > Screenshot, or use the keyboard shortcut Shift + Command + 5. Mac computers come with their screen-recording quality on macOS Mojave and higher.
How to use it?
- Open the application or window you wish to record and press Command+ Shift + 5 to open the screen-capture tool of the system. The bottom toolbar allows you to decide whether to capture a custom portion of the screen, just the selected window or the entire screen. Video options include recording a custom portion or the entire screen.
- Then click the button for Options and select where you want to save your recording and set up a countdown timer to begin the recording. If you are recording external audio or your voice, ensure that you have confirmed the option to use your Mac’s microphone.
- Click on the Record Selected portion or Record Entire Screen to start recording. A button indicating Recording appears on the menu bar on the upper side of the screen. To stop the recording, click the same button and a compact of your recording will be saved to your monitor. To play the screen recording file on your default video player, double-click on it.
- The QuickTime on a Mac allows you to initiate the screen recording directly. QuickTime is used to relay synchronized graphics, video, sound, music, and text. It is described as a suite, or a group, of applications, plug-ins, and files. It can be used as an image viewer, movie player, virtual reality (VR) tool, and audio player. Click on the QuickTime Player to open and then go to File > New Screen Recording. If this is your first time doing it, you will be required to open System Preferences to permit QuickTime Player to capture your screen. Navigate to your settings and check the box to give the right permissions. Use QuickTime to begin a new recording. You can then use Mac’s recording tool.
DemoCreator
Wondershare DemoCreator is an easy-to-use video editing and screen recorder tool that is ideal for creating tutorials, gaming vlogs, presentation recordings, demo videos, and any other information related to sharing videos. Capture screen, audio, camera, and edit them on separate tracks. DemoCreator is more than a simple screen capture program as it also includes cursor effects, green screen, AI matting technology, and 10000+ video templates and resources. Videos made with DemoCreator can be transferred as MP3, MOV, GIF, or MP4 and uploaded to social media.
 Secure DownloadSecure Download
How to use (Steps)
- Download DemoCreator
If you are new to Wondershare DemoCreator, go to the official website and download DemoCreator for a free trial. It is compatible with Windows 10, Windows 8, Windows 7, and macOS v10.15 and above if you use Mac OS.
- Launch the Game
Now, launch the game you wish to play and record. Adjust the visual settings of the game as per your PC’s capability.
- Open DemoCreator
Once the software is downloaded, click on the desktop icon to open it.
- Record game
DemoCreator will provide you with different recording options. Select “Record Game” to record your PC game.
- Adjust the settings
In this step, you must select the game that you are going to record. Then set the frame rate that your computer is capable of handling. For a high-quality video, set the frame rate to 120 fps. You can also adjust the settings of your recording devices. You can choose the in-built or an external microphone or webcam.
- Start recording
Once all the settings have been adjusted, press the red button to start your recording. Once you are done, press F10 to stop the recording. You will enter the video editor, and the audio and video track will be presented automatically. Here, you can play around with different editing tools to make your video more attractive for the viewers.
Features
- Screen Recording: DemoCreator is one of the best screen recorders you can find. It provides you with a lot of options for recording the screen. It allows you to select Screen size, system audio, external mic, and webcam for recording the screen.
- Screen Drawing Tool: Unlike other screen recording tools, DemoCreator allows you to draw, write and highlight the screen while recording it. So, there is no need to do it in post-editing. Which will save you time and effort.
- Video Editing: Apart from its cool recording feature, it allows you to edit your videos and make them perfect for your viewers. You can simply add, cut, or rearrange the video according to your requirement.
- Cursor Highlighting: DemoCreator enables you to highlight your cursor using magnify, highlight, and Spotlight cursors to make it easier for your viewer to understand.
- Transitions: Several amazing transitions can be used in your videos to make your video stand out and engaging. DemoCreator comes with a wide variety of cool transitions such as cube, fade, Flash, and many more to choose from.
- Titles: Choose from an extensive variety of titles to use in your screen recording. DemoCreator library contains opening titles, descriptive titles, and ending titles. You can easily use these titles by dragging and dropping them into your video.
OBS studio
The free OBS Studio operates with macOS, Linux, and Windows, and has a load of features in a single program. Use the floating control panel on this program to start and stop your recording. OBS Studio enables you to record video on computer, audio, and your microphone along the way. The program then saves the recording as an MP4 file. Also, you can broadcast your video live or opt into Studio Mode for adding fades, cuts, and other transitions to the video.
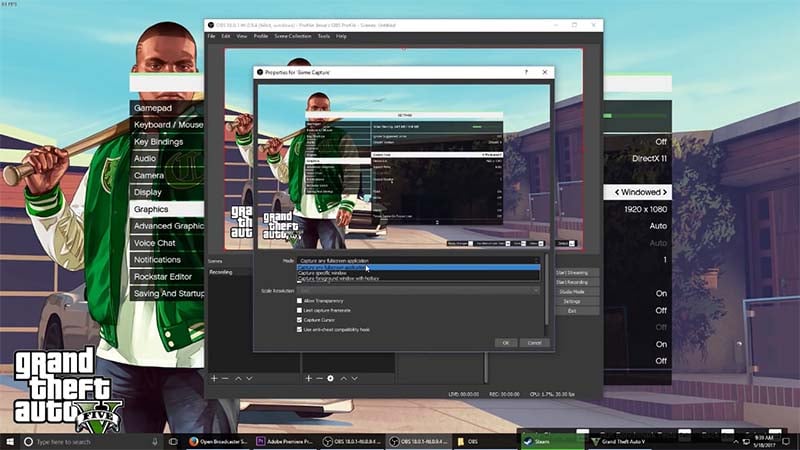
How to use OBS to record video clips?
Step 1: Run the auto-configuration wizard
If you are using OBS for the first time or would like to kickstart as soon as possible, follow the instructions in the Auto-Configuration Wizard. It will automatically assess your system and try to search for settings that your PC can withstand. This includes recording or streaming, bitrate, resolution, streaming provider, encoder, among others. The settings can always be changed manually later.
The wizard will appear the first time you run OBS. To run it again, click on Tools -> Auto-Configuration Wizard.
Step 2: Set up your audio devices
OBS Studio is programmed to record your monitor microphone and audio by default. You can confirm this by checking the volume meters found at the mixer unit of the main OBS Studio window. If you notice that the wrong device is being recorded or they are not moving, go to Settings -> Audio and manually select the devices.
macOS users: If you are on macOS, you will require another app to record computer audio. This is because of restrictions in macOS that offer no direct record techniques of computer audio devices.
Step 3: Test your stream and record settings
Countercheck your settings to ensure that they are set in the manner you want them. Go to Settings -> Output. Press the button for Start Streaming or Start Recording. It is highly recommended that you run a test for some minutes to ensure that there are no issues instead of jumping into your first recording or stream.
Features
- Screen Capture: Through the OBS Studio, you can record video on a computer in HD quality and broadcast it instantly. This quality enables you to share your screen with your audience any time you want to reveal whatever is happening on your screen. Also, the ability of the screen to capture enables gamers to share their experiences with the world.
- Video Recording: There are no frustrating time limitations when capturing videos using OBS studio. Also, both the webcam and a microphone are accepted as a video source and an audio source respectively.
- Freedom to Set Hotkeys: Through OBS Studio, you can set up hotkeys hence navigating effortlessly across different features. The program enables you to set hotkeys for a variety of actions, like muting audio inputs, switching between the scenes, pushing to talk, starting, or stopping recording, and live streaming, among others.
- Ability to Manage Quality: OBS Studio enables you to choose the quality of video capture. You can decide the resolution you want to set or use your monitor’s default resolution. Additionally, you can pick the number of frames per second (fps) anytime. OBS Studio enables you to record high-quality content through audio-visual mixing and real-time screen capture.
- Intuitive Audio Mixer: OBS Studio enables you to choose from the streaming options which include surrounding sound, single-channel, multichannel, and multilanguage. These features allow you to activate live translation thus using multiple languages to broadcast a single video. Each source has separate filters which include noise suppression, noise gate, and gain, courtesy of the intuitive audio mixer offered by this program.
- Powerful Configuration Options: The live broadcasting application offers configuration options to add new sources, copy the ones that already exist, and manage their properties without any discomfort. It allows input from various sources including images, window captures, text, capture cards, webcams, microphones, among others.
FREE CAM
Though it remains capable for most needs, Free Cam is indeed an essential screen recorder for Windows users. This program records your screen action and audio, then saves it as a WMV file.
How to use it?
- Just click the New Recording button and highlight the area of the screen you would like to capture, it can either be a single application, window, or the entire screen.
- Then click the button for Record to start recording and then press Esc when you are through. Your recording will appear in a preview window where you can edit it. You can add it to YouTube directly or simply save it as a video file.
Features
- Share Videos Right Away: Free Cam application permits you to save your screencast in your work area or immediately share it on YouTube. You can change volume, add blur in or become dull impacts, or quiet sounds in chosen portions of the video with this Free Cam recorder.
- Fine-tune Your Videos: After you record your screen, you effectively can remove unnecessary parts of the video with this Free Cam recorder. Use the device's inherent sound and video manager to transform your draft video into a balanced video exercise.
- Save as video: The output of this Free Cam recorder will be a WMV video of HD quality (720p). You can utilize the video in introductions, email it to your partners and understudies, or post it via online media.
Camtasia
This is a screen Recorder and Video Editor. Camtasia makes it simple to record and create professional-looking videos on Windows and Mac.

How to Camtasia record video clips?
- Click the "Record the screen" button. This is in the upper-left corner of the Camtasia window.
- Choose the recording area: You can create a custom-sized recording area by clicking the Custom button. A dashed line will appear around the area that will be recorded.
- Select your audio and video input: Use the Audio menu to toggle system sounds on or off. If toggled On, system alerts and beeps will be recorded with your presentation.
- Start recording: Press the REC button or the F9 hotkey. A countdown will appear on the screen. Once it disappears, everything that you do on the screen and everything you say will be recorded.
- End your recording: Once you are finished with your presentation, press F10 to stop the recording.
Features
- Automatic audio leveling: With automatic audio leveling, your videos will still sound better no matter the number of audios you upload to the timeline.
- Supporting themes with logos or other images: Themes in Camtasia have been updated so you can now include your images or logos.
- Editable keyboard shortcuts: Camtasia has keyboard shortcuts that can be customized easily. These shortcuts enable you to personalize your workflow using settings easily understandable to you.
Movavi
Movavi is an all-in-one video maker, perfect for remote work and distance learning. This software can be used to create videos and presentations, make screencasts, record tutorials, convert files, and much more.
How to use it?
- Add or drag the video to the software
From the File menu, you can add a video to the software or directly drag the video to the ‘Drag your files here’ window. If adding multiple videos, then you can use drag and drop features to change the order.
- Customizing the video
Go ahead with splitting the video or removing the unnecessary parts. You can do this by using the split feature. It will break the video into two or multiples. Deleting unnecessary parts, right-click on a clip, and choose the delete option available from the context menu. When you use the left and right markers on the slider, you can cut the clip.
- Adding artistic effects
With this feature, you can choose from auto saturation, auto contrast, white balance, and magic enhancement, to name a few.
- Adding the title
You must only click on the titles button >>> choose the title style on the settings button. Once you pick the style, go to the drop-down menu >click on add > select the area where you want to add this title.
- Adding custom audios or sounds
Click on the media button >>>drag files to the location “drag your files here on Window” and “drag this file to the timeline”.
- Saving the video file
Now go ahead with saving the project file. For that, go to the File menu> pick the option "save project" as the specified folder on the hard disk.
Features
- 1. Availability of the cut/split videos, merge/join video clips, smooth transitions, and rearrangement of the sequence
- Available options for giving creative and artistic touch along with filters to the video
- Lots of audio effects for the transformation of the sound along with the background music
- Options for inserting text, and creating attractive looking captions, watermarks, or titles
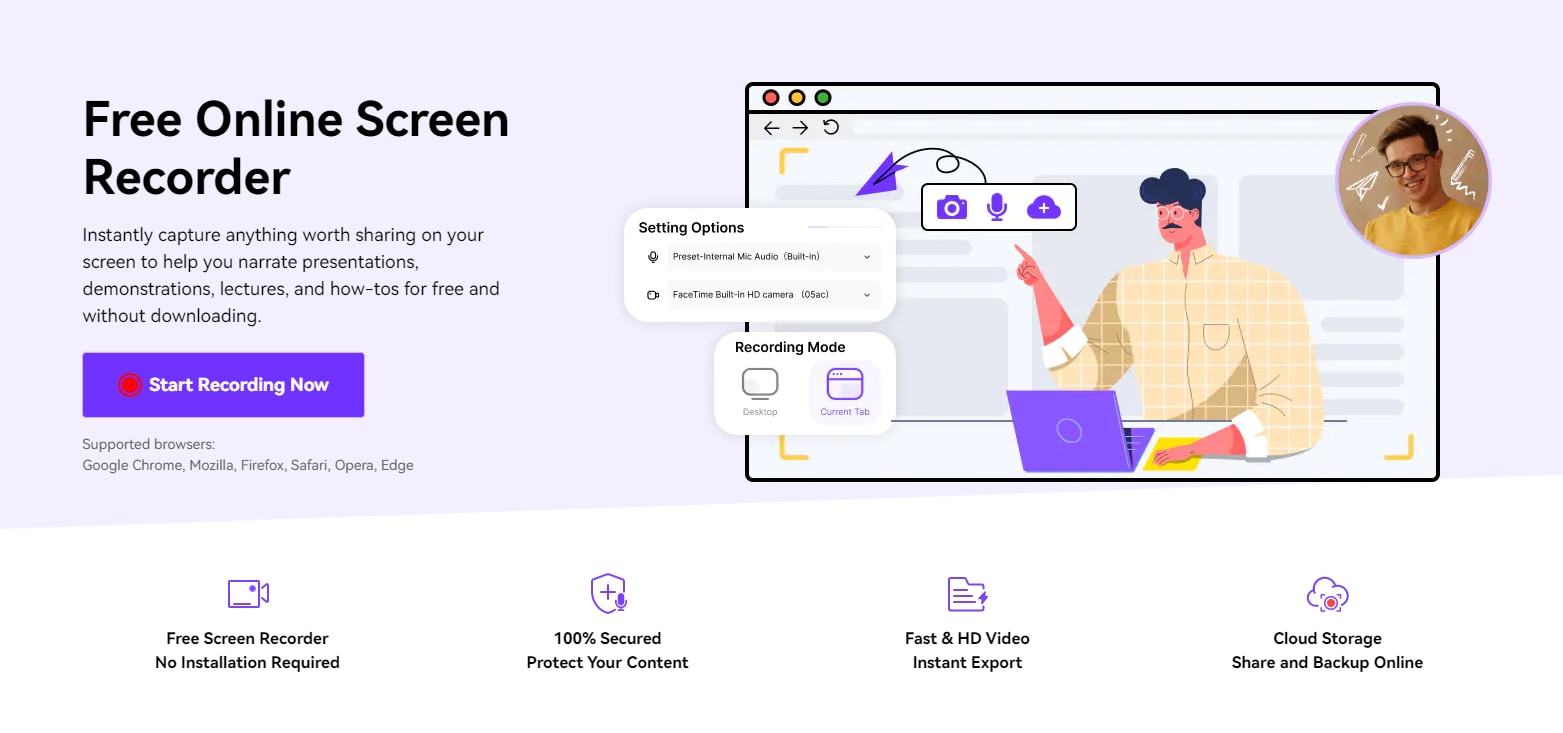
WEBCAM VIDEO RECORDER
Webcam Video Recorder is an online app for recording video and taking pictures right in your browser. This simple app has flexible video and audio settings. It can process your files quickly and allows you to work with files of any length.
How to use webcam video (using the Windows Camera app)
- Open the Camera App
- Locate and launch the Camera App.
- Configure the Recording Options
- Select your input devices. Adjust your settings.
- Record Your Video
Press the Record button. Follow along with your script, then hit Stop when you’re finished.
- Upload Your Video
Upload your video to the storage location for your course development.
DemoAir
DemoAir is a new cloud-based online screen recorder for Chrome netizens. It offers direct options to record video on a computer and supports the use of a webcam and microphone during the video recording. DemoAir, allows you to capture video messages of your camera, microphone, screen, or both, edit and share your videos. Produce informative videos by recording the whole screen, webcam, or your tab. Personalize it by adding your voice and face; auto-save to Google Drive. Videos created with DemoAir can be exported as MP4 and shared to YouTube, Gmail, or link copied for everyone. It’s a much more efficient way of communicating.
Secure AccessSecure AccessIn conclusion, this is a detailed article on the various methods of screen recording your computer device. You can decide to use the one that suits you most. I hope this article goes a long way to help you achieve your goals.


