Top 8 Free Screen Recorder
Screen casting is quickly becoming one of the best ways to create videos. But to effectively record a video of what is happening on your computer's screen, you need to have the right tool for the job. As screen flow videos become one of the most popular marketing and communication tools, it follows that a lot of screen recorder tools have been developed to facilitate screen recording.
And as you can guess, some of them are not very effective. This guide outlines some of the most effective of these free tools to make it easier for you to find the one that suites your needs best. These free screen recorders include the following;
1. OBS Studio
OBS Studio is not just a free screen recording software. It is one of the most powerful gameplay recorders that can also be used to stream videos directly to online video sharing sites like YouTube and Twitch. It is also one of the few solutions that is completely free without limiting the duration of the video you can record or adding a watermark to the recorded video. OBS Studio is completely free to use because it is open-source software.
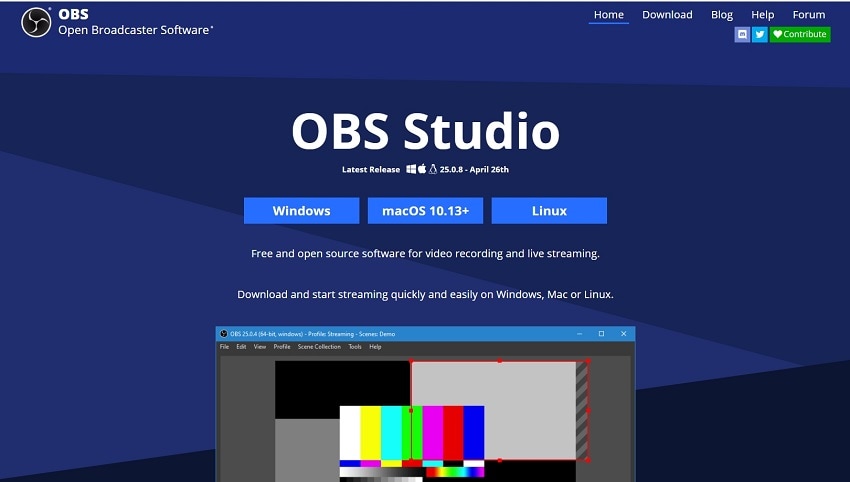
It offers a variety of recording and streaming features but it lacks robust editing features. Therefore, if you would like to edit a video that you recorded using OBS Studio, you will have to invest in a video editing program.
Step 1. Launch the app and it will take a couple of moments to load based on your system specifications. While you are installing the app, it will ask you to install a few plug-ins to make everything work.
Step 2. The dashboard will give you a range of options and you should know there are a very few free screen recorders that are able to offer such a wide range. You will need to add scenes and then add the source for recording.
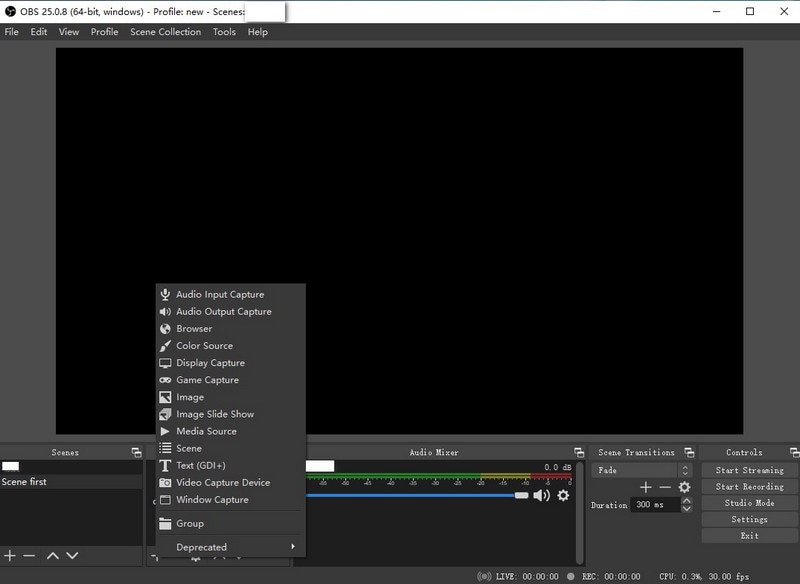
You can also hit the Settings tab on the right to set all your preferences.
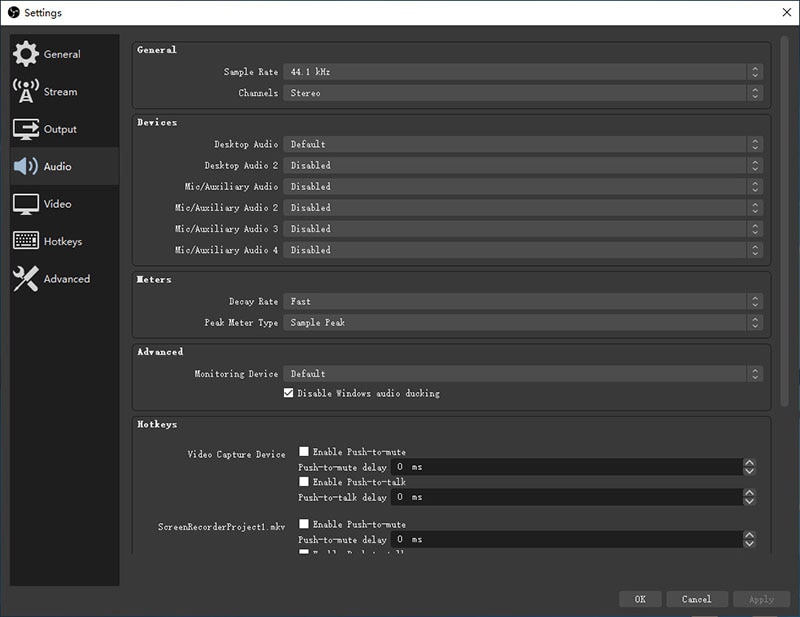
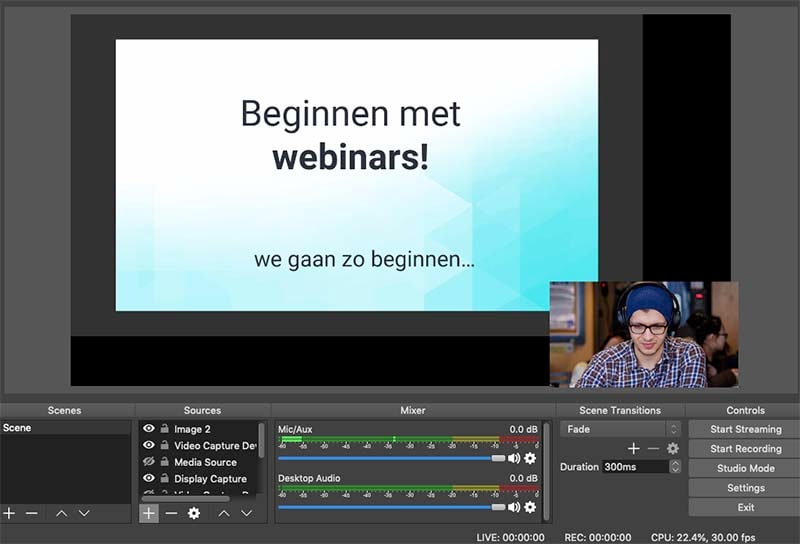
Step 3. Once everything is done, you can hit the Start Recording/Start Streaming button based on your project. The software comes with no time limit or any subscription service.
Pros
- It is completely free to use with no watermark or time limit
- You can steam videos directly to Twitch, YouTube, DailyMotion, Mixer and many more
- It comes with a pretty useful audio mixer
Cons
- There is no way to pause the recording
- It lacks a built-in video editor
- It has a complicated user interface that may be hard for beginners to navigate
2. ShareX
ShareX is another free screen recorder for PC that is completely open source program. This means that you can record a video of any duration using ShareX and there will never be a limit, nor will the video have a watermark. But as useful as ShareX is, it wasn't developed for the average user. It can therefore be relatively complicated, but once you figure out where everything goes and how everything works, it is a very useful solution.
Step 1. Once you have installed and completed the ShareX setup, it’s time to launch the app and just start working on it. The UI that you will get here is highly intuitive and quite smooth.
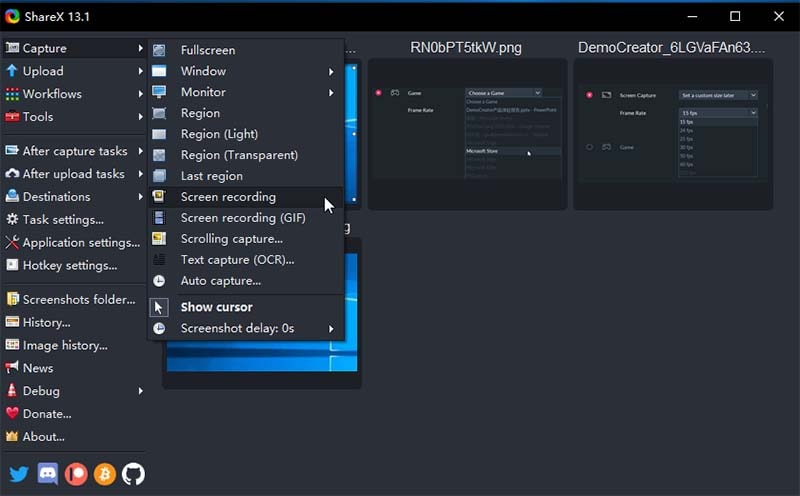
Step 2. Before you start working on your project, this free screen recorder for Windows will require you to set up a few preferences. On the left pane, you will see Application Settings tab, and here, you will get a wide range of options to configure.
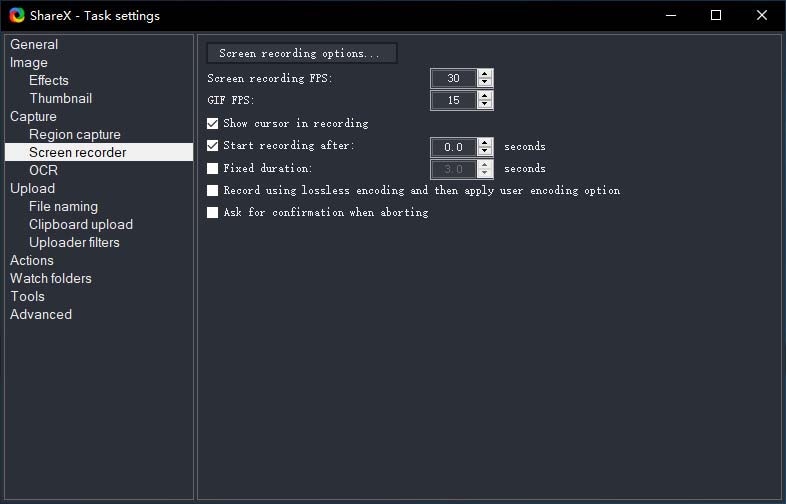
You will also need to configure a few task settings by going to that tab and the dashboard is quite easy to navigate around.
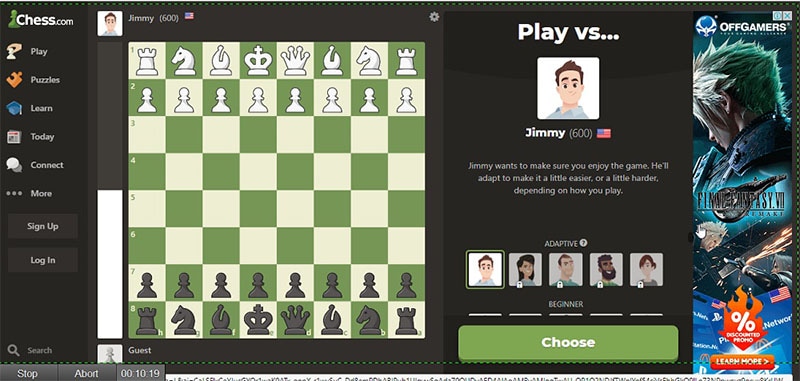
Step 3. Based on the hotkeys that you have set, you can operate the app without even reaching out to the mouse. For example, in this case, we have configured the F8 key to launch the app; here is what you will get when you will launch the app. Select the area you want to record, and it will start recording, instantly.
Pros
- ShareX allows you to record the full screen or a customized section of the screen
- You can export the videos to as many websites as you want
- You can also create hotkeys that you can use to simplify he recording process
- It supports importing music, videos and photos into the project
- You can also add custom watermarks and color effects while recording
Cons
- It is not ideal for gameplay recording
- It is not designed for the average user and therefore it can be difficult to navigate
- It doesn't support webcam recording
- It lacks a built-in video editor
3. FreeCam
FreeCam is a rare type of free screen recording program. This is because apart from having one of the simplest and fastest recording process in the market, it is also one of the only ones that comes with a built-in video and audio editor. One of the other things we love about FreeCam is the simple, intuitive interface that you can only find on some of the most expensive paid tools. It is also completely free to use, meaning that there will be no watermark, a limit on the duration of the recording or any ads to deal with.
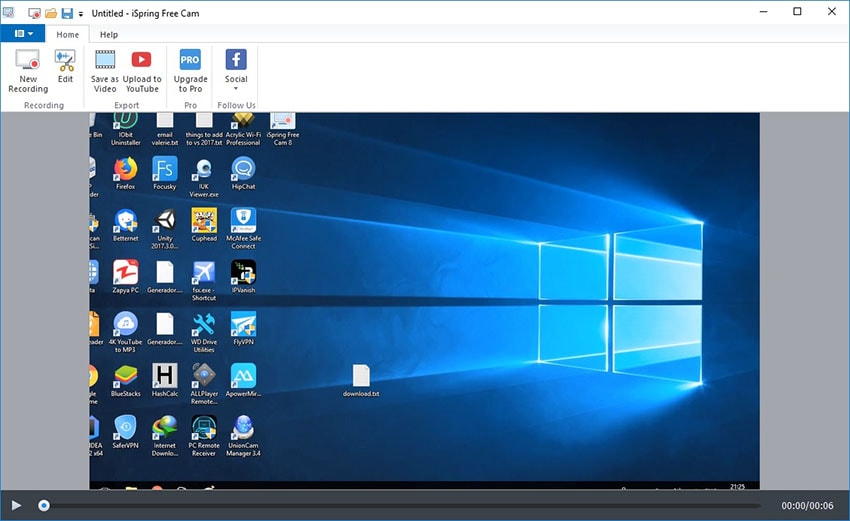
Step 1. After the installation is complete, launch the FreeCam app. If you are on an older spec-sheet, the app will take a few moments to load. It will give you a very intuitive UI on the startup with all the options clearly laid out.

Step 2. To start recording, you will need to click on the New Recording button, and it will give you a selection tool to select the screen to record. You can record full screen or go for a selected area.
Step 3. From the control center, you can click on the gear icon to access the Settings window. Configure it as you need, and then hit the red Record button on the control center.

You will also need to press the same button to stop the recording. It will take you to the integrated editor to tweak a few things.
Pros
- It is completely free with no watermarks or time limits
- You can record the microphone as well as the computer sounds
- All recorded videos are in high resolution
- Videos are in WMV format and can be uploaded directly to YouTube
- You can use the in-built editor to delete unwanted video fragments
- It has a wide array or audio effects and you can also remove background noise
Cons
- Recordings are only in WMV format
- It doesn't support webcam recording
4. Ezvid
Of all the tools we will take a look at on this list, Ezvid is probably the easiest to use. This is because it comes with a very simple to user interface and has also taken extra care to ensure that the process of recording the screen and exporting the video is as fast as it can be. As matter of fact, depending on the duration of the video, you may be able to record and upload video to YouTube in just minutes. This is one of the reasons why Ezvid is particularly preferred by most gamers and movie fans.
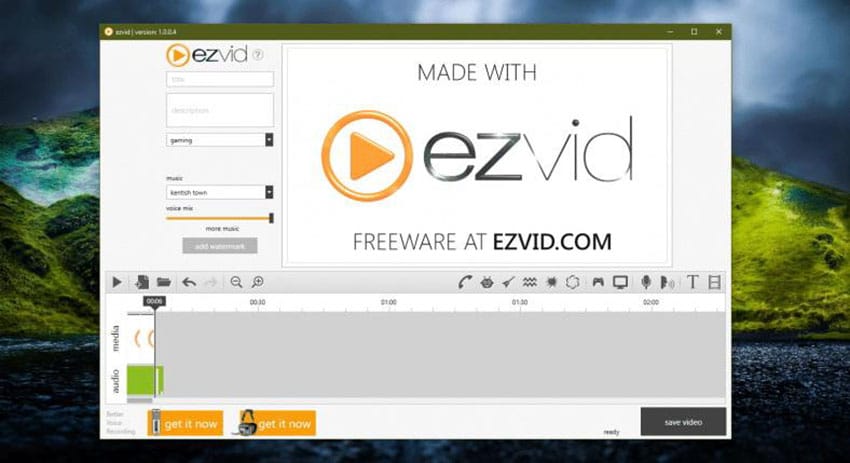
Step 1. The app will be installed in no time, and once you have completed the installation process, the app will be launched automatically. It will greet you with a very intuitive dashboard that will also be easy to navigate around.
Step 2. To start recording and working on a new project, you will need to click on the monitor icon present on the toolbar. It will give you a few more options to configure and start recording.
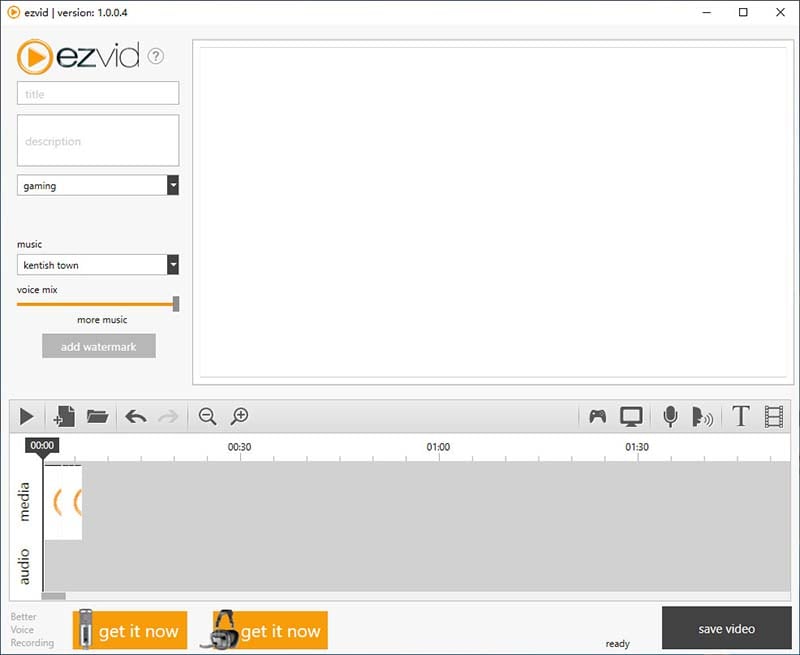
If you are a heavy user, Ezvid also offers a tab to set up Advanced Settings. Here, you will be able to find some options that will allow you an overall better recording.
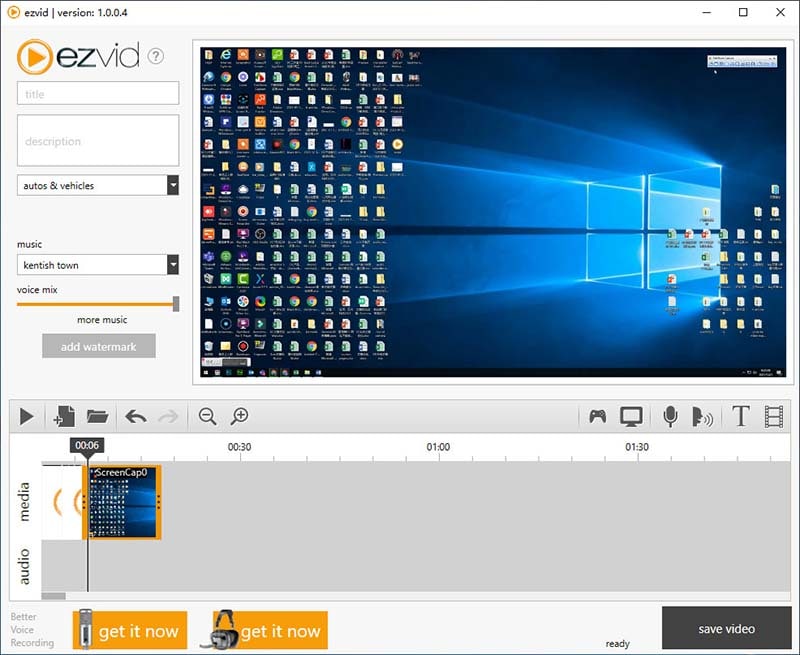
Step 3. Once you hit the Capture Now button, it will give you a timer of 3 seconds and then the video will start to record. If you are looking for a free screen recorder Windows 10, it’s one of the best ones that you can go for.
Pros
- Videos can be uploaded to YouTube instantly
- It has a simple, easy to navigate user interface
- All videos are recorded in high quality resolution of 1280 x 720 p HD
- It comes with computer-generated speech that can be useful for narrative purposes
Cons
- You may not be able to record games in full screen mode
- It has been known to have minor bugs and inconsistencies
5. Apowersoft Free Online Screen Recorder
If you would rather not download a screen recorder to your computer, then Apowersoft is a good web-based solution to consider. This tool, like all the others we will see on this list is completely free to use. It is however unique because the whole process of recording and exporting the videos can be complete on any browser. But since it is not a desktop tool, you can probably already guess that it may not come with too many additional features.
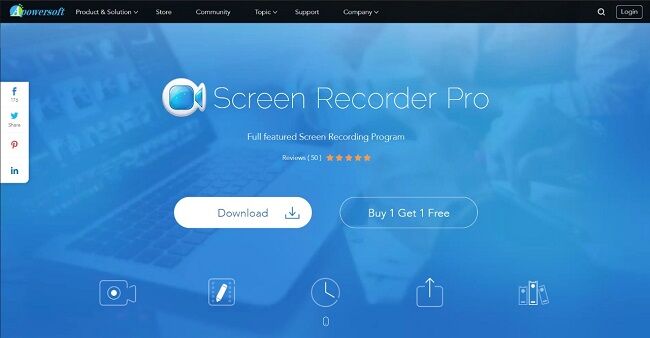
1. Unlike the other apps mentioned in this list, Apowersoft is a web-based screen recorder. However, the webpage will give you an option to download the web app.
Once you have downloaded the app and launched it, you will get this control center and a selection tool to select the recording area.
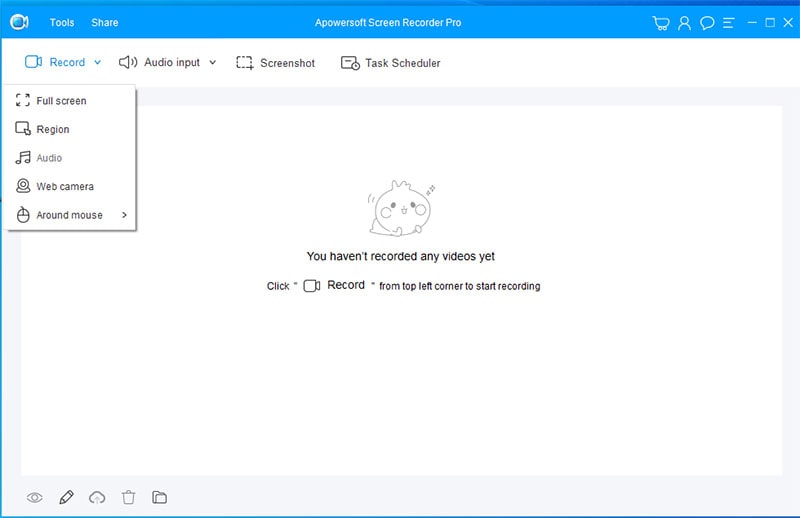
2. On the control center, right next to the monitor icon, you will get a pop-up menu to configure a few options.
If you click on the monitor icon, the pop-up menu will give you the options to configure the recording area.
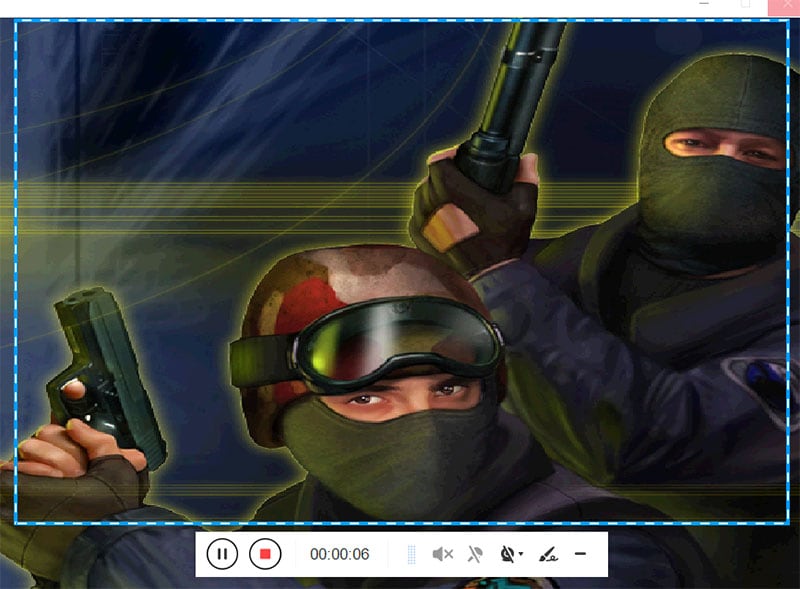
3. Once configured, you will need to click the red REC button to start recording. The gear icon on the control center will also allow you to configure multiple preferences along with setting up the hotkeys.
Pros
- It can record the screen and the webcam at the same time
- You also have the option to annotate the videos during the recording, adding colors, notes, shapes and even icons
- It is completely free and you don't have to install a program on your computer to use it
Cons
- It lacks most of the advanced features of any other tool
6. Windows 10 Game Bar
The Game Bar is a screen recording tool that come pre-installed in Windows to help capture screenshots and videos. Even though it can only be used to record the apps and may not be able to record the full screen or a section of it, the Windows 10 Game Bar is still and ideal free solution for gameplay recording. It is also only available for Windows 10 and your computer will have to meet the necessary hardware requirements to use it.
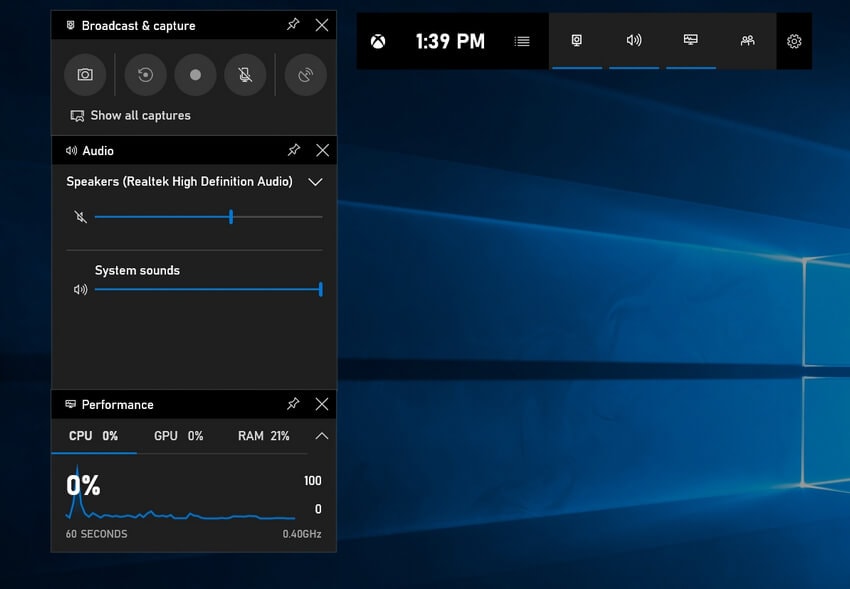
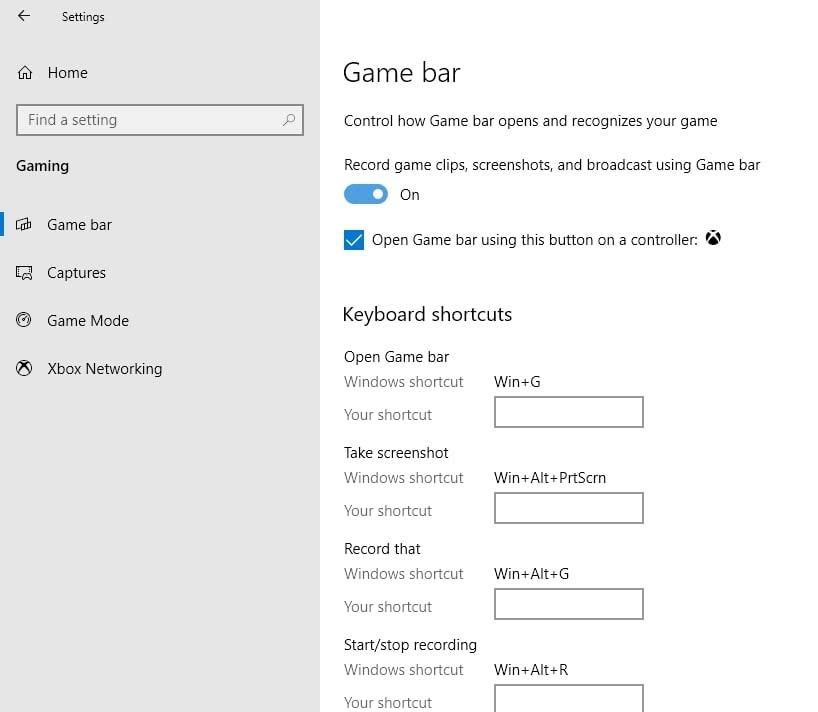
Step 1. All the Windows computers come pre-installed with the Game Bar, and you can start recording your desktop without any app. To set up the tool, you will need to head to the Settings app and then go to the Gaming section.
Further, you can go to the Captures and set up some advanced settings related to the video that you are about to record.
Step 2. Before you hit the Win+G, you should tweak a few settings. The audio recording should be set to All as it will be set to Games by default.
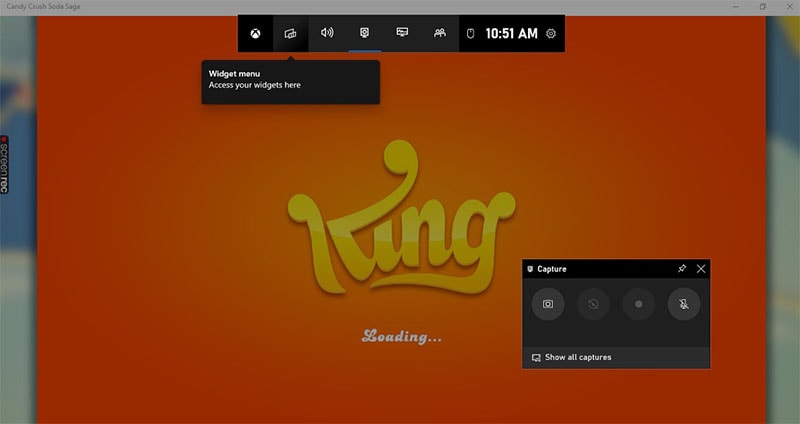
Step 3. Now, you can use this best free screen recorder for Windows 10 by clicking on the Rec icon. You can also start recording by pressing the Win+Alt+R combination.
Pros
- You don't have to install any software to use it
- You can easily turn on the microphone while recording to easily capture the audio or narration
- It allows users to trim any unwanted parts of the video at the beginning and end
- It doesn't limit the length of video you can record and doesn't add a watermark to the recorded video
Cons
- You can't use it to record the full screen, webcam or a section of the screen. It will only record a certain app.
- There is no "pause" button
- It has very limited editing features
7. QuickTime
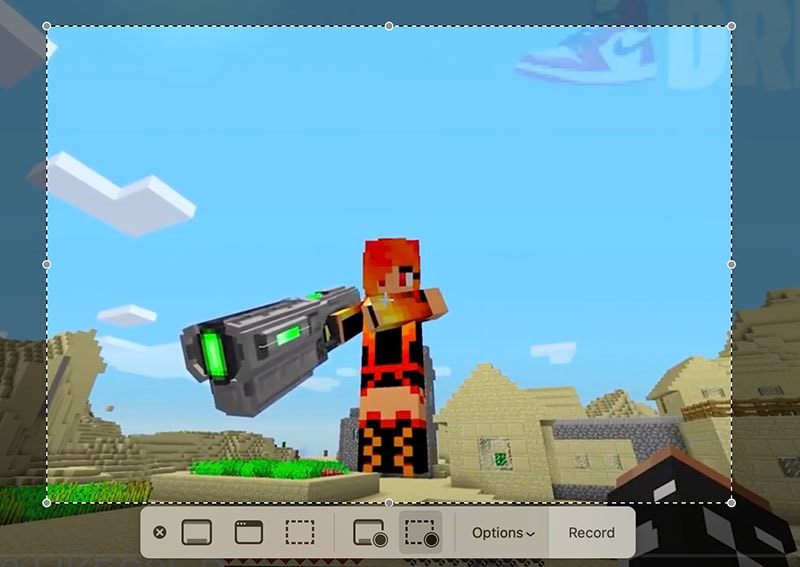
QuickTime is the built-in Mac recorder that you can use to record the screen on Mac computers for free. QuickTime is free, you don't have to install any programs on your computer and it is very easy to use. It uses the same controls as you would see on a CD or DVD player. It is therefore, very familiar and very easy to use, allowing you to record the screen and export the recorded the videos quickly and easily.
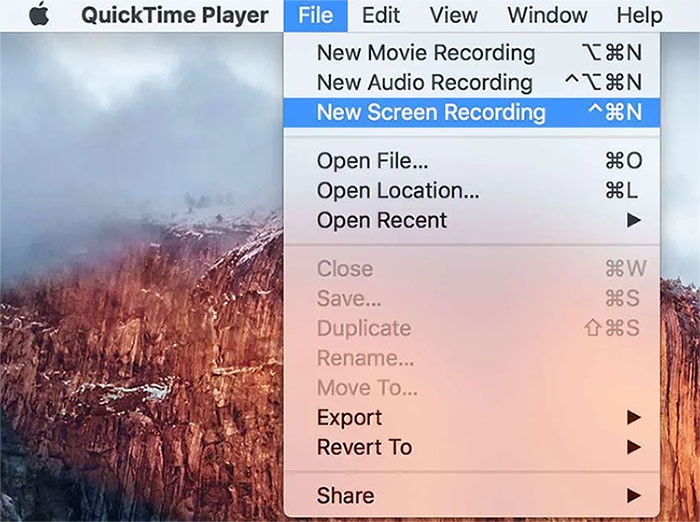
Step 1. For Mac users who want to use the straightforward free screen video recorder, QuickTime is the best solution. If your computer doesn’t come pre-installed with QT, you can download it from the App Store. From the dock, you can launch the app. Or, right-click to directly get to New Recording that your project demands.
Step 2. It will give you a simple control center with basic options, and the app will also allow you to record webcam footage along with audio.
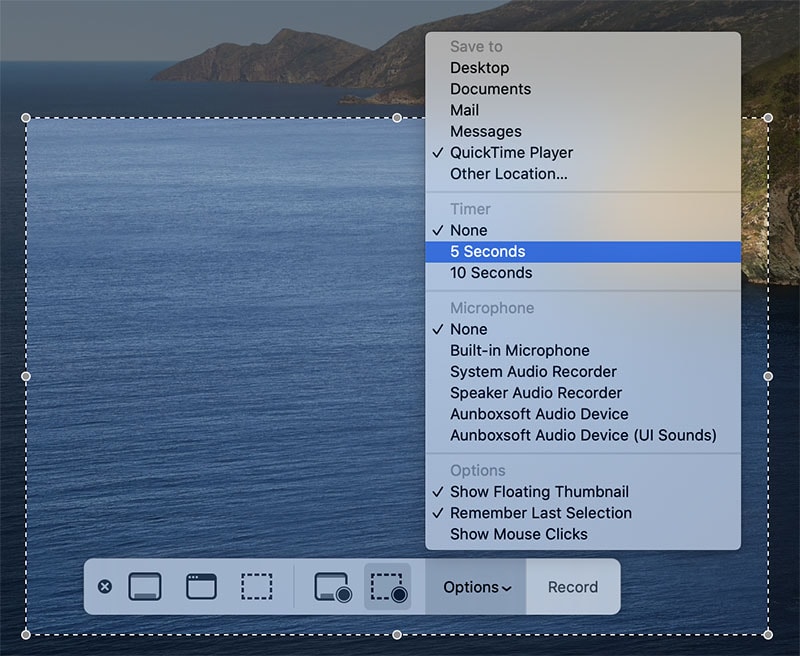
The drop-down menu next to the Rec button will also give you the option to add mouse clicks to your recorded video.
Step 3. Once all the preferences are set, it’s time to hit the Rec button and start working on your project. You can stop the recording from the taskbar.
Pros
- You don't need to download any programs to use it
- It is completely free to use and doesn't add a watermark
- You can record audio to the screen
Cons
- It has limited recording and editing capabilities
- Works only on Macs
8. Monosnap
Moonsnap is another free tool that can be useful for taking screenshots and transferring them to the cloud. It is a simple tool to use, allowing you to record the screen and share it in just minutes. It also offers numerous ways to annotate the screenshots.
Step 1. As you will launch the app from the menu, it will be launched in a few moments. You will see the app icon appearing on the bottom-right.
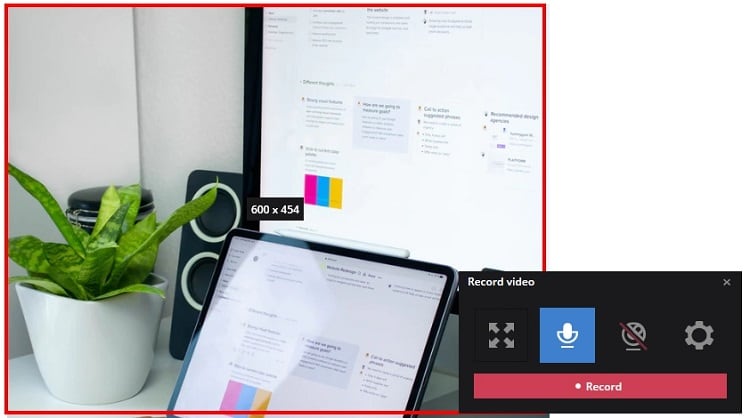
Step 2. Here, you will need to right-click on this icon to find a range of options, and to start a new project, click on Record Video.
Step 3. It will then give you a control center with a plethora of options that will give you the option of setting up the camera, mic, recording area, etc. Seeing such features, we can say it’s one of the best free screen recorders that you can find on the internet right now.
Pros
- It can record the whole screen or a part of it
- It is completely free to use
- It comes with a built-in cloud storage service to make it easy to share the recordings
Cons
- The recording and editing features are pretty basic
- It hasn't been updated in a while
The free screen recording software above can all be useful when you want to record the screen with no watermark. The one you choose will be informed by the type of video you would like to record. For instance, if you want to record gameplay in great quality, then OBS Studio might be a better choice than QuickTime.


