DemoCreator User Guide
How to use Wondershare DemoCreator? Learn the step by step guide below
DemoCreator User Guide
-
Get Started - Mac
-
Video Recording - Mac
-
Video Editing - Mac
-
Keyboard Shortcuts - Mac
-
Audio Recording - Mac
-
DemoCreator Effects - Mac
-
Export & Share - Mac
-
Audio Editing - Mac
-
New Demo Mode - Mac
DemoAir User Guide
-
DemoCreator Cloud Service - Get Started
-
Video Creation Mode
-
Export&Share
FAQs
Basic Video Editing
After the files have been imported, you can begin modifying them. The following is a list of some of the benefits that will be available to you:
- 1. Add Media to Timeline
- 2. Trim Video Clips
- 3. Crop Video Clips
- 4. Split Video
- 5. Cut Video Clips
- 6. Resize Videos
- 7. Rotate Video Clips
- 8. Change the Video Speed
- 9. Delete Media
- 10. Playback Resolution
- 11. SnapShot
- 12. Voice Recorder
- 13. Add Marker
- 14. Composting
- 15. Record Hotkeys
- 16. Toggle Track Output and Track Lock
- 17. Batch Processing and Grouping Clips
- 18. Freeze Frame
- 19. Export
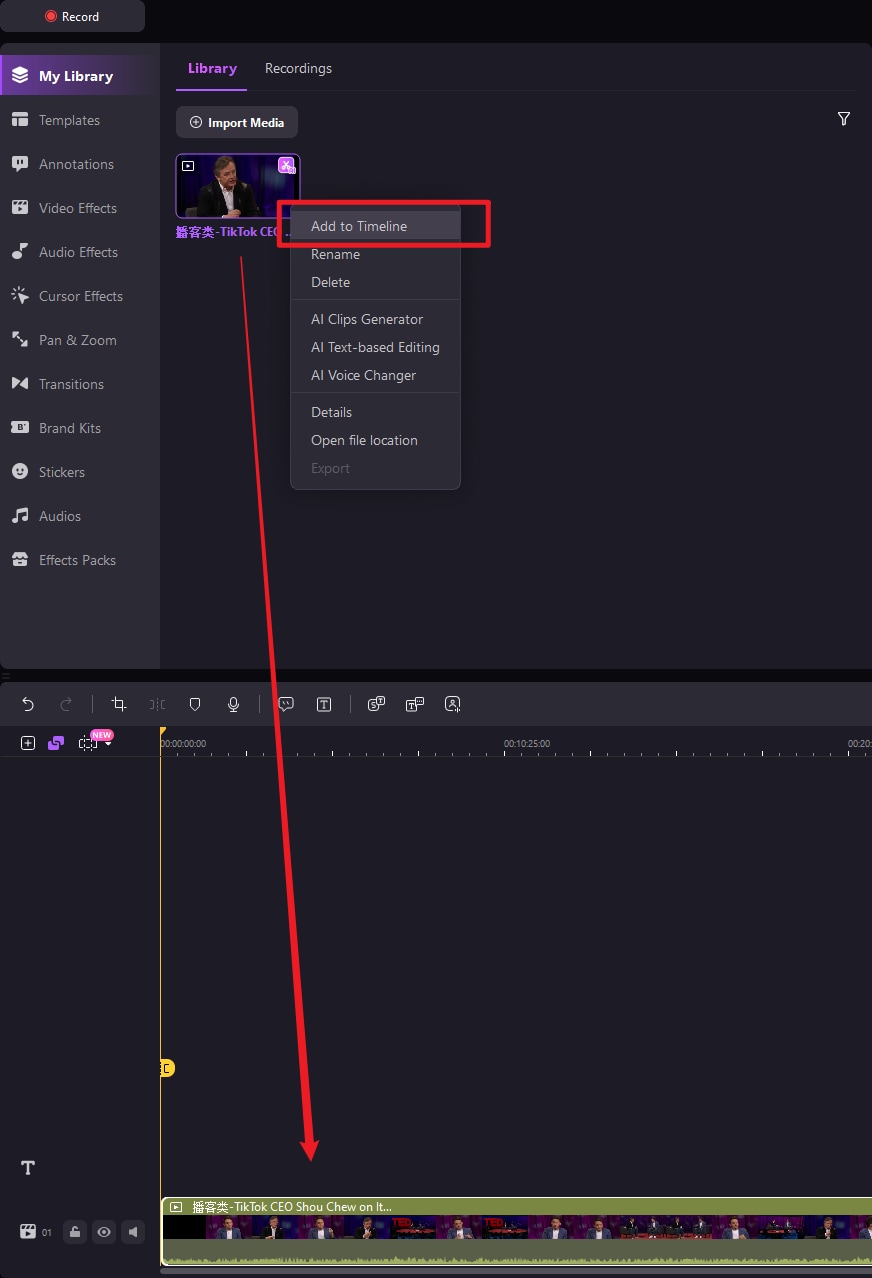
1. Add Media to Timeline
You can use a few different approaches when adding media to your timeline. If you double-click the file, you will be able to preview it.
Approach 1: Simply move files from the Media Library to the timeline or the Preview Window using the dragging and dropping method.
Approach 2: To add a media file to the timeline, right-click the file and choose "Add to Timeline at Playhead."
2. Trim Video Clips
Step: To trim your video, first select it from the toolbar, then move the mouse to the edge of the video, and then drag it either forward or backward.

3. Crop Video Clips
Using the Crop option, you can reduce the size of your movie. Make sure the Crop button is selected.
Step: You can modify the section of the footage that you wish to crop down to in the popup that pops up when you click the crop button. After that, use the OK button to complete the transaction.

4. Split Video
Your video can be cut up into individual parts, and each of those clips can then be edited independently. How to do it:
Step 1: Position the Playhead over the portion of the clip that you want to divide.
Step 2: You can split a clip by selecting it, right-clicking on it, and selecting the Split option from the menu that appears, or you can click the fourth symbol on the toolbar or the playhead.

5. Cut Video Clips
Step 1: Select "Cut" from the context menu that appears when you right-click on the clip you wish to cut.

Optional Steps
Step 2: Position the playhead well before a portion of the clip you wish to trim, then divide the clip in half. This will allow you to cut the segment.
Step 3: Move the playhead to the conclusion of the segment you want to cut, and then divide the track once again. After dividing the clip in half twice, you will have three separate clips at your disposal.
Step 4: You can drag the central clip to a new spot or right-click it and pick the Cut menu item.
Note: the zoom slider lets you see your history in various ways.

6. Resize Videos
Step: Simply click the clip, hold the mouse button, and drag the purple frame around the preview board to modify the video size. Alternatively, you can go to the settings tab and adjust the % of Scale.

7. Rotate Video Clips
Step 1: Choose the video clip you want to rotate on your timeline, then make the necessary adjustments to the Rotation parameters in the properties box.

Step 2: You have the additional option on the Preview Board to rotate the clip by using the middle handle.
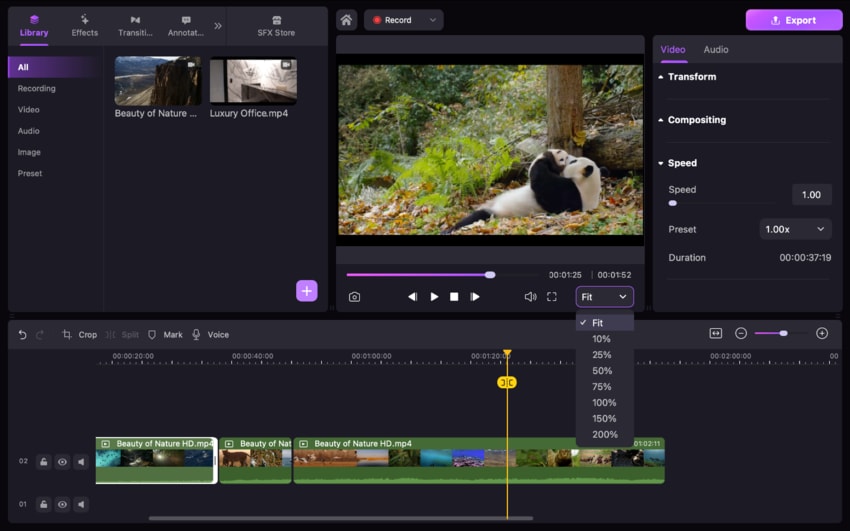
8. Change the Video Speed
Step: To accelerate or decelerate the playback of media, choose the video clip in the timeline, and then modify the speed setting in the properties section to get the desired effect.

9. Delete Media
Step: You can erase a clip from your timeline by selecting the clip you wish to get rid of and then pressing the Delete key on your keyboard. Alternatively, you can right-click on the clip, then pick the Delete option.

10. Playback Resolution
Step: When you right-click on the video inside the preview window, you will get a drop-down menu where you can select the playback resolution.
11. SnapShot
To capture a still snapshot of a video sequence, click the Snapshot icon below the Preview Window. You will discover a link to the picture in the following location: C:/Users/admin/Documents/DemoCreator.

12. Voice Recorder
Step: Make a recording of yourself talking using VoiceOver. This is an excellent method for providing visitors with more information. Simply click the button labeled Voice Over that is located in the toolbar. You can even play back your video while you are recording this audio track at the same time.
Note: Please ensure that your audio recording equipment (in this case, a microphone) is properly connected to your computer before you begin.

13. Add Marker
Step 1: A checkbox lets you mark pivotal moments in a video. Select the marker icon in the toolbar to add a new marker to the timeline.

Step 2: You can add a marker by right-clicking the video and selecting the option from the context menu.

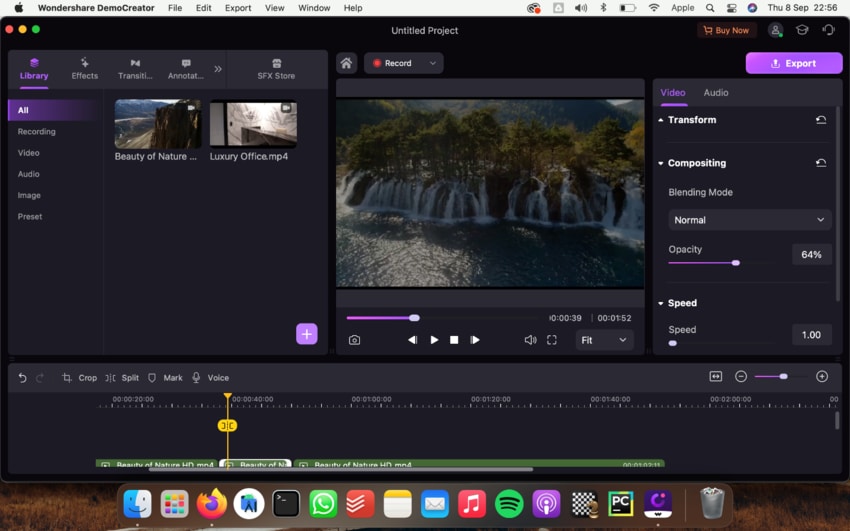
14. Composting
Step: You can access various effects, including Darken and Color Dodge, when you use the Blending mode. You also can modify the opacity of a picture that is being superimposed. To utilize this function, go to the Property Area and click on the Compositing button.
15. Record Hotkeys
When you are recording a video and using a number of different hotkeys, it is crucial to ensure that the viewers are aware of which hotkey is being used at any time.
Step: To enable the HotKey Tips, go to the top right of the property area and click on the tab labeled "HotKey Tips." You can customize your hotkeys' size, filter, location, style, color, and opacity settings.
Note: You will only see hotkeys in the films you export; they will not display in the recordings you create while making them.
16. Toggle Track Output and Track Lock
Step 1: You can decide whether or not a track will be included in the exported movie by using the button labeled "track output," which can be toggled on and off.

Step 2: You can determine whether or not a track can be edited by turning the track lock on and off using the toggle button.

17. Batch Processing and Grouping Clips
You can easily apply a series of transformations, effects, and format conversions to a large number of clips all at once with the assistance of clip groups and batch editing.
You can make as many selections of clips as you want and then use one click to add a transition, scale, rotation, blending, or any other effects available.

18. Freeze Frame
You can use a freeze frame to accentuate a certain picture or operation in your video.
Step: Create a frozen picture that is 2 seconds long by right-clicking on a video track and selecting the Freeze Frame option.

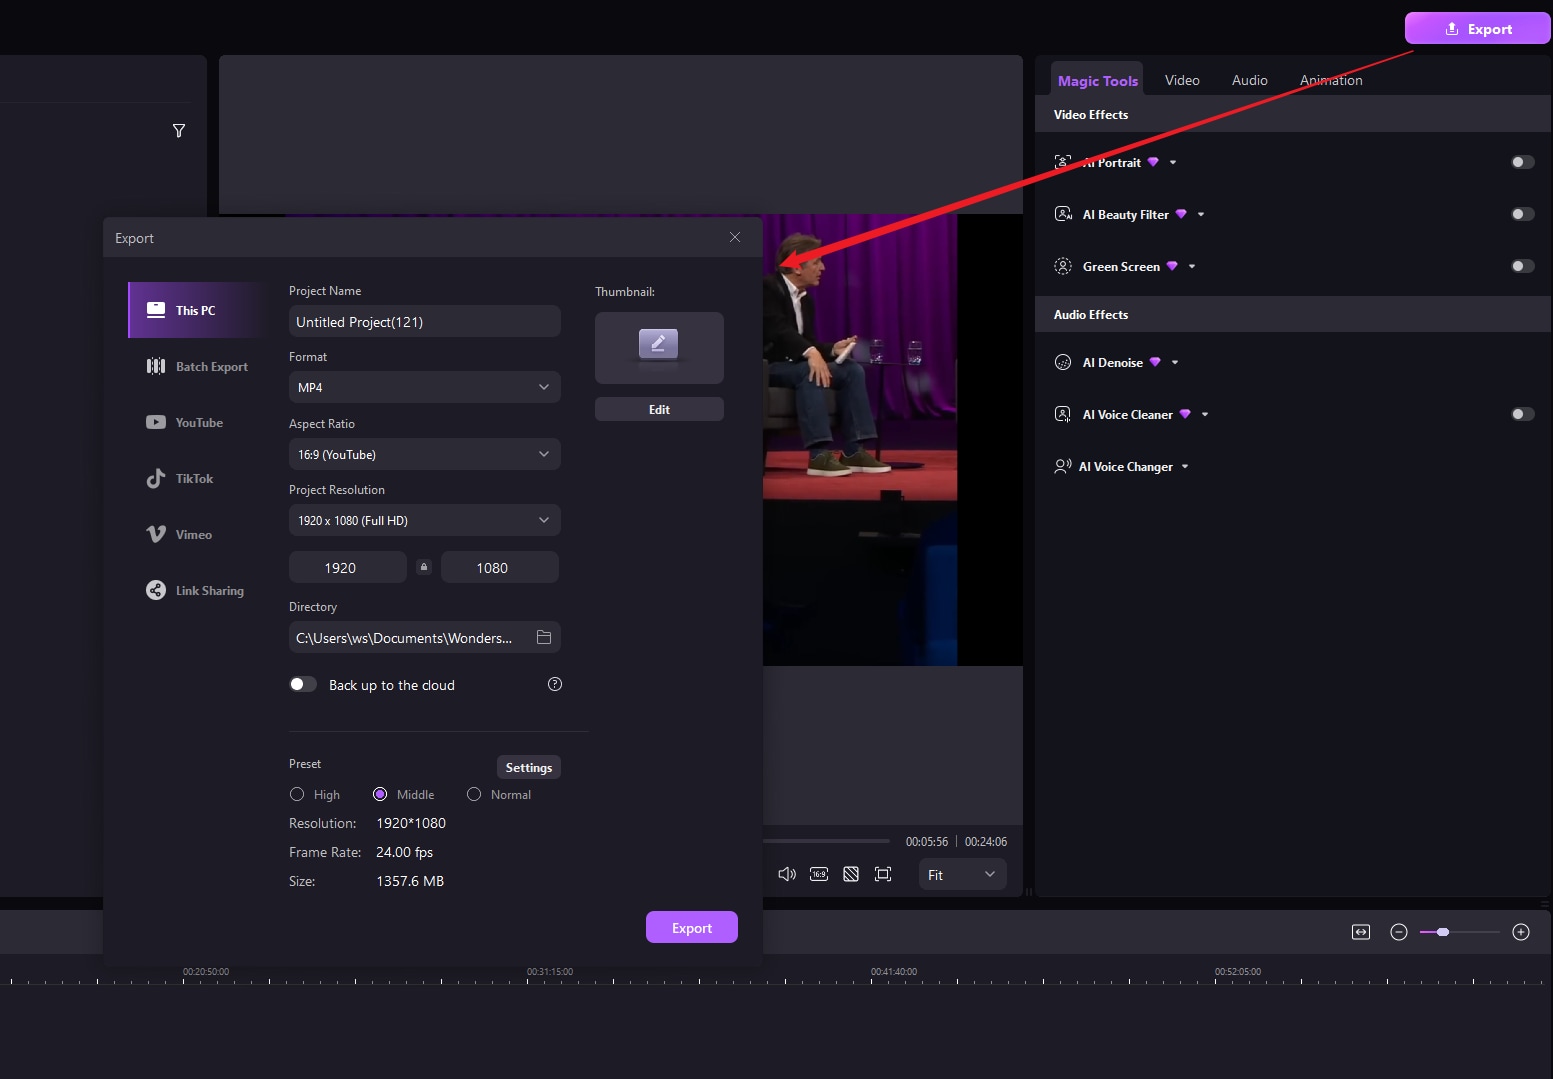
19. Export
When making edits to your video, you can export it as an MP4, WMV, AVI, MOV, GIF, or MP3 file.
Step 1: You will have the option of naming your movie and selecting a place to save the output file before you export it.
Step 2: Within this Export box, you will also have the ability to change the resolution of your video, as well as its frame rate, bitrate, and other options.
Step 3: Click the Export button after you have completed configuring everything.