DemoCreator User Guide
How to use Wondershare DemoCreator? Learn the step by step guide below
DemoCreator User Guide
-
Get Started - Mac
-
Video Recording - Mac
-
Video Editing - Mac
-
Keyboard Shortcuts - Mac
-
Audio Recording - Mac
-
DemoCreator Effects - Mac
-
Export & Share - Mac
-
Audio Editing - Mac
-
New Demo Mode - Mac
DemoAir User Guide
-
DemoCreator Cloud Service - Get Started
-
Video Creation Mode
-
Export&Share
FAQs
How to Create A Presentation Video
In this guide, you will learn to use DemoCreator 6 to create presentation videos. DemoCreator 6 has a stable recording feature and various virtual video effects, go ahead and try it!
- Phase 1: Webcam, Microphone, and Volume Settings
- Phase 2: Change Virtual Background
- Phase 3: Import Clips
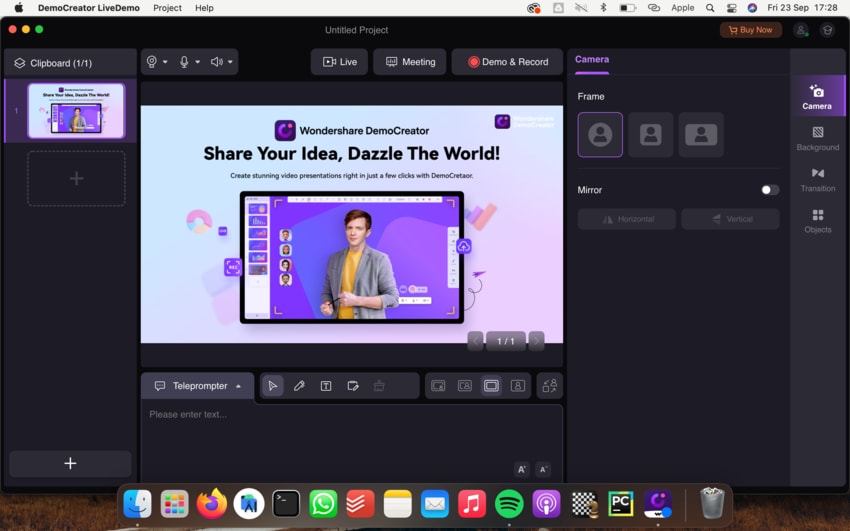
Phase 1: Webcam, Microphone, and Volume Settings
Note: In the first place, kindly ensure that the camera, microphone, and sound have the appropriate permissions configured.
Step 1: When another lens effect software uses the webcam or the external camera, you can select a camera from the "Webcam (External Camera)" icon configuration settings.
Note: The virtual camera feature will provide you with several unexpected outcomes.
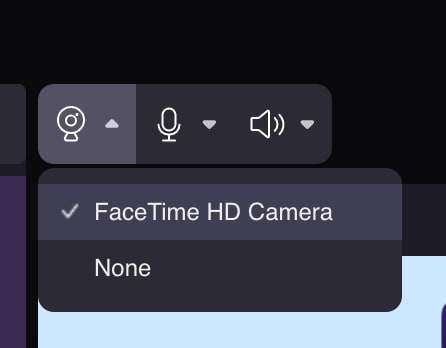
Step 2: If you like using the effects available in the FaceTime HD Camera while preparing the presentation or explainer video, you should attempt to run the FaceTime HD Camera and click on the lens effect you prefer.
Tip: Check that the effect you chose was applied accurately to the photographs you took.
Step 3: Then, pick "FaceTime HD Camera" from the choices that appear when you click the Webcam icon. You will discover that the picture of your character has already been changed to reflect what is shown on the Snap Camera.
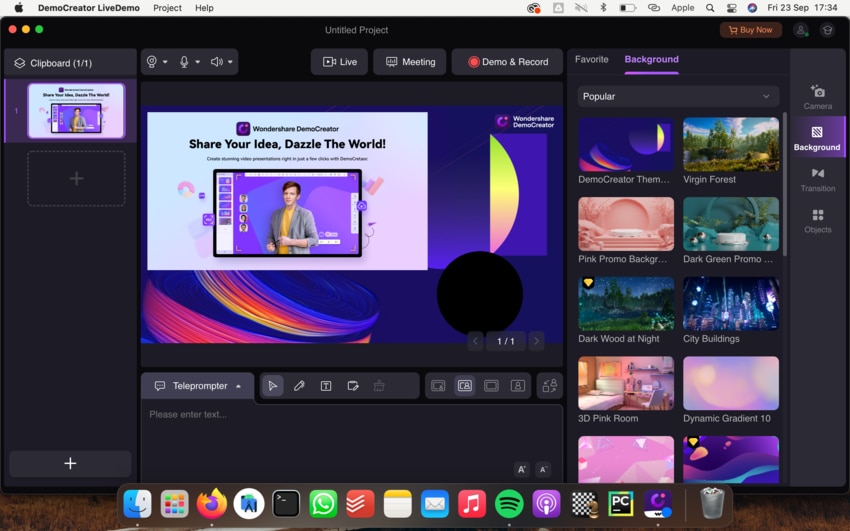
Phase 2: Change Virtual Background
In addition, the Demo Mode of DemoCreator includes various sound effects, transition effects, and objects.
Important to Remember: When you are producing videos, it will be easier to get the desired effect if you explore the effects under "Background", "Sound", "Transition", and "Object".
Step 1: Then download those effects and mark them as Favorite.
Step 2: Choose a virtual backdrop that you like the look of, and then click to use that background for the movie that you are presenting.
Phase 3: Import Clips
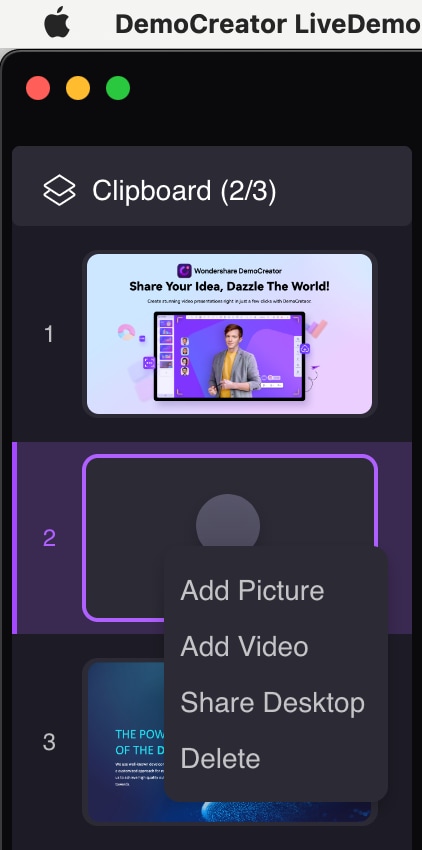
Step 1: Import additional media assets, like your PowerPoint presentation, photos, and video clips.
Step 2: You will discover a list of them on the "Clipboard", You are free to rearrange the order of the clips by dragging and dropping them with your mouse.
Step 3: When you have finished importing PowerPoint files, a box will appear asking you to choose which clips, if any, you want to import.
Note: Additionally, you always have the option to delete or upload a clip by right-clicking on it.