DemoCreator User Guide
How to use Wondershare DemoCreator? Learn the step by step guide below
DemoCreator User Guide
-
Get Started - Mac
-
Video Recording - Mac
-
Video Editing - Mac
-
Keyboard Shortcuts - Mac
-
Audio Recording - Mac
-
DemoCreator Effects - Mac
-
Export & Share - Mac
-
Audio Editing - Mac
-
New Demo Mode - Mac
DemoAir User Guide
-
DemoCreator Cloud Service - Get Started
-
Video Creation Mode
-
Export&Share
FAQs
V8.0 Authorization Tutorial Instructions - Mac
1. Authorization Introduction
Mac systems have high permission requirements. New users need to authorize Wondershare DemoCreator products upon first use:
- Screen Recording: Authorization is needed to record the screen and system audio.
- Camera: Authorization is required to record using the camera.
- Microphone: Authorization is necessary to record audio through the microphone.
- Accessibility: Required for recording mouse and keyboard events.
2. User Operation Guide
1. Navigate to the DemoCreator homepage > Video Recorder.
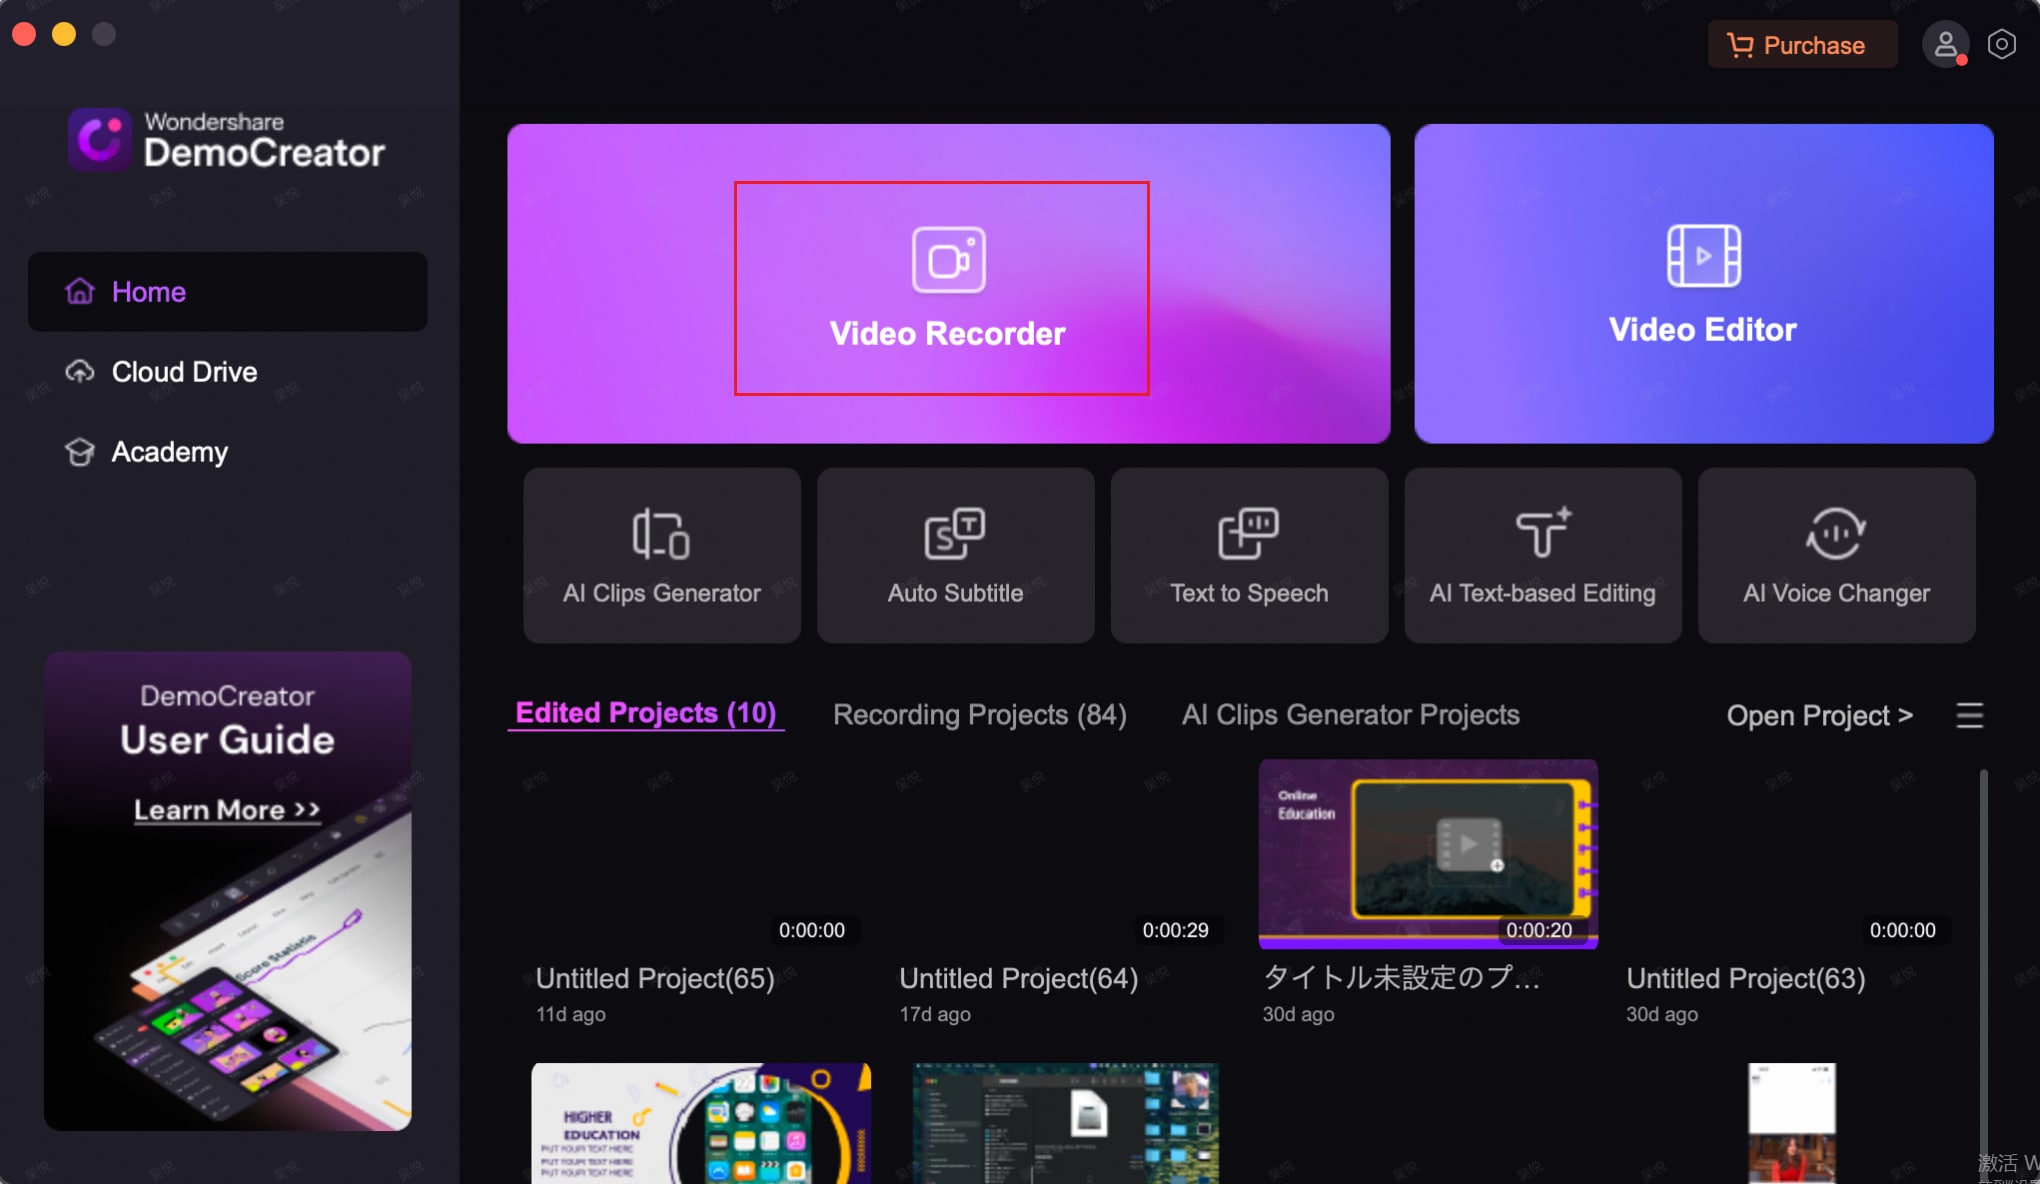
Click on Video Recorder to enter the recording function selection.
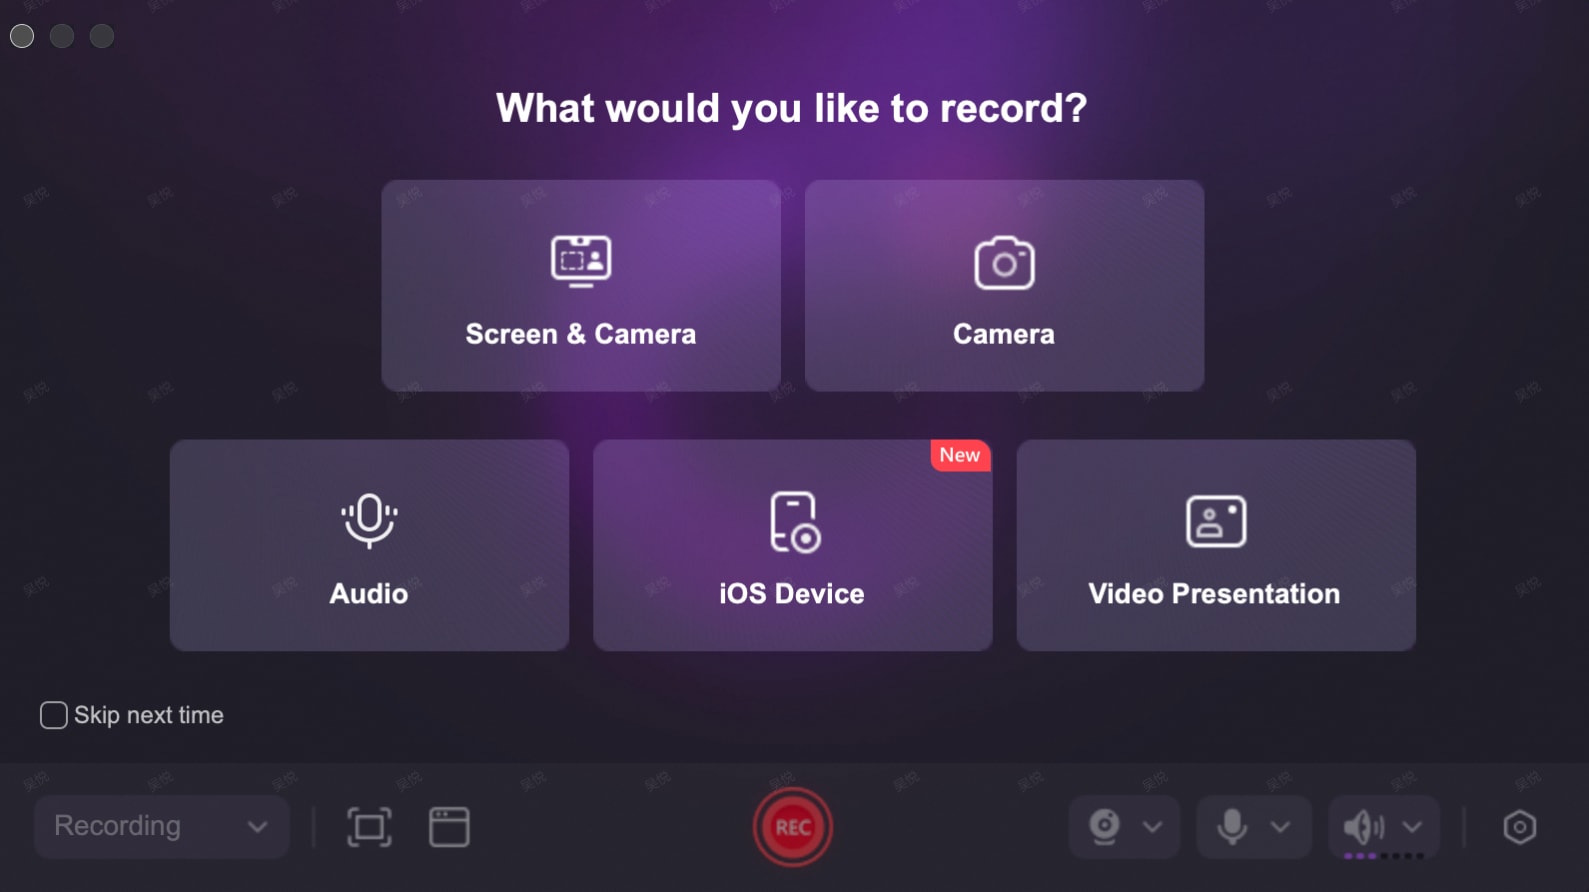
On the first click of any option under Screen & Camera, Camera, or Audio, you will enter the authorization prompt.
2. Authorization Guidance Interface:
(1) Screen Recording Authorization Process:
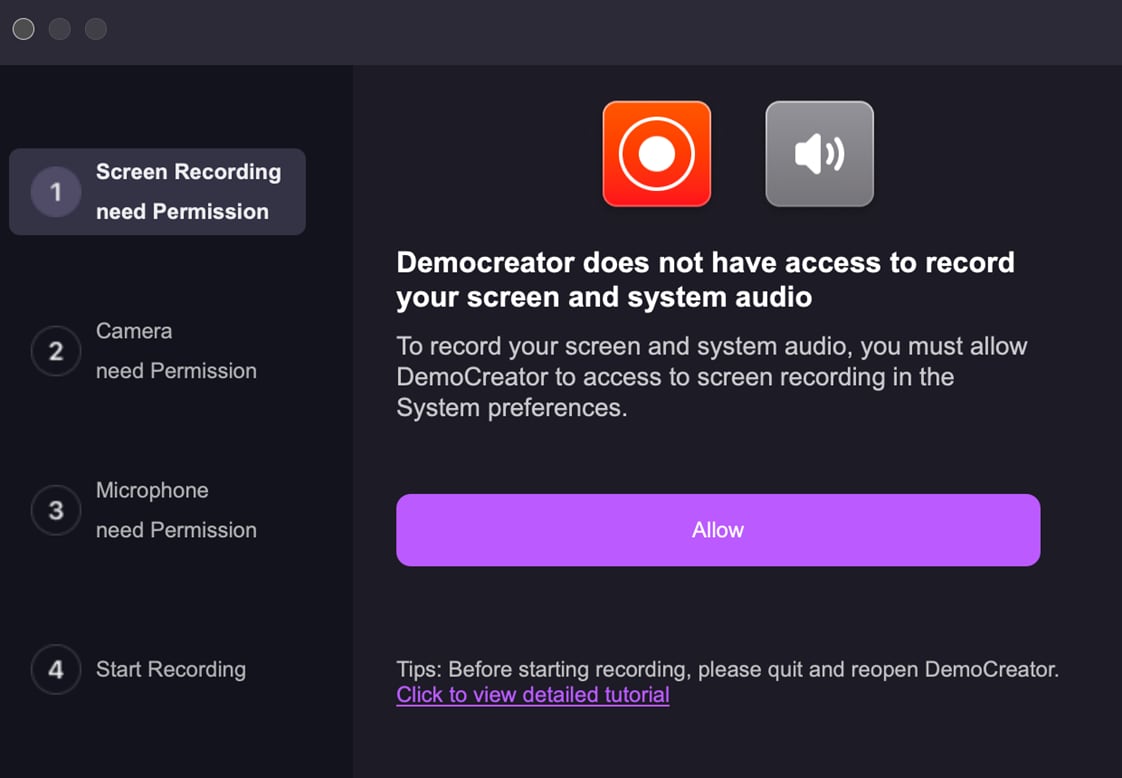
Click the Allow button to enter the screen recording interface. A prompt will appear.
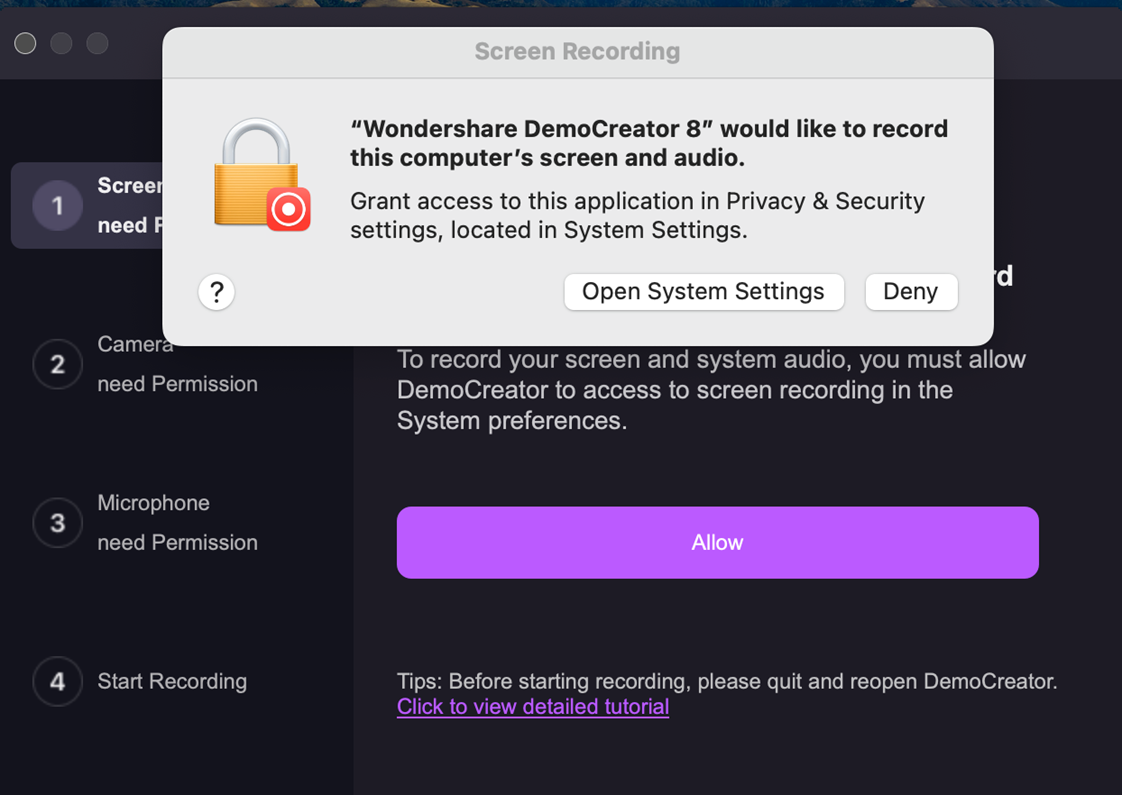
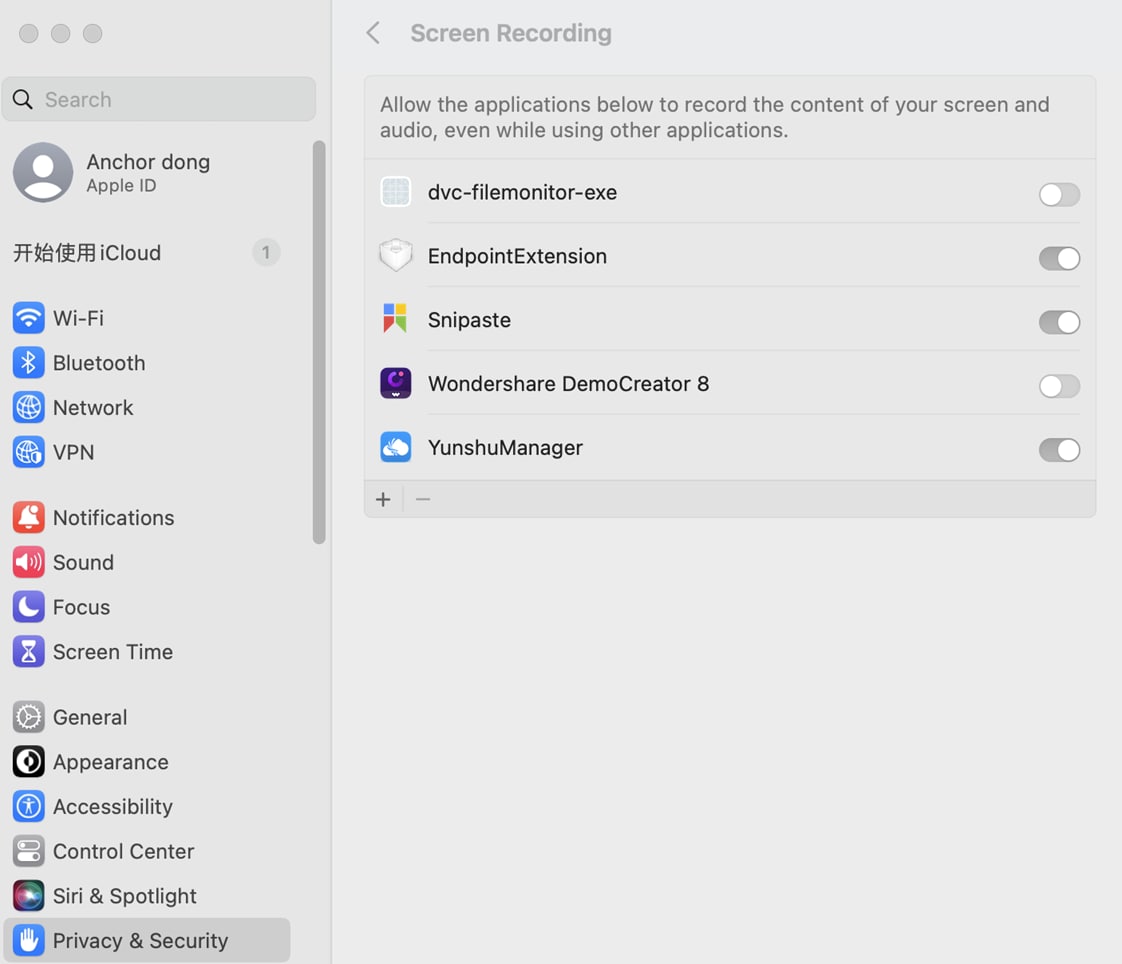
Click Open System Settings to go to Mac > System Settings > Privacy & Security > Screen Recording. Find Wondershare DemoCreator 8 and toggle the switch on.
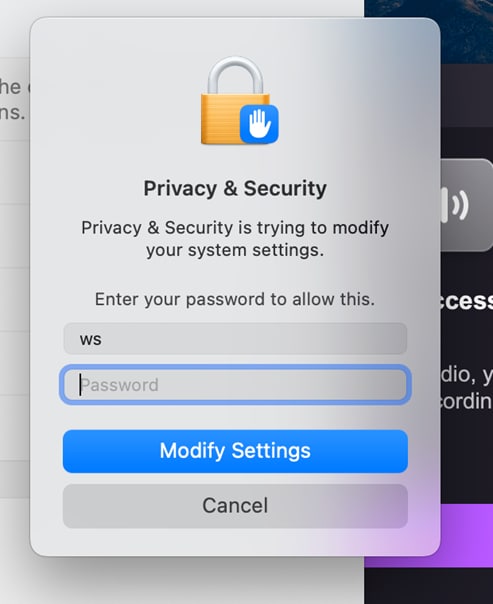
After enabling, you may be prompted to enter your system password.
You can choose Quit & Reopen or Later to restart later, but please note that a restart is necessary to gain proper authorization.

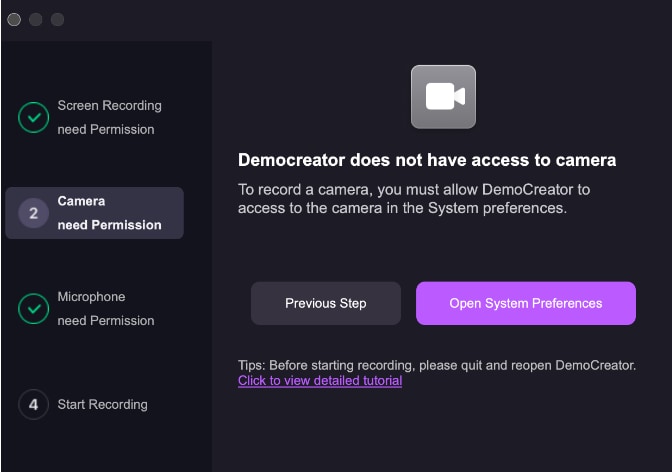
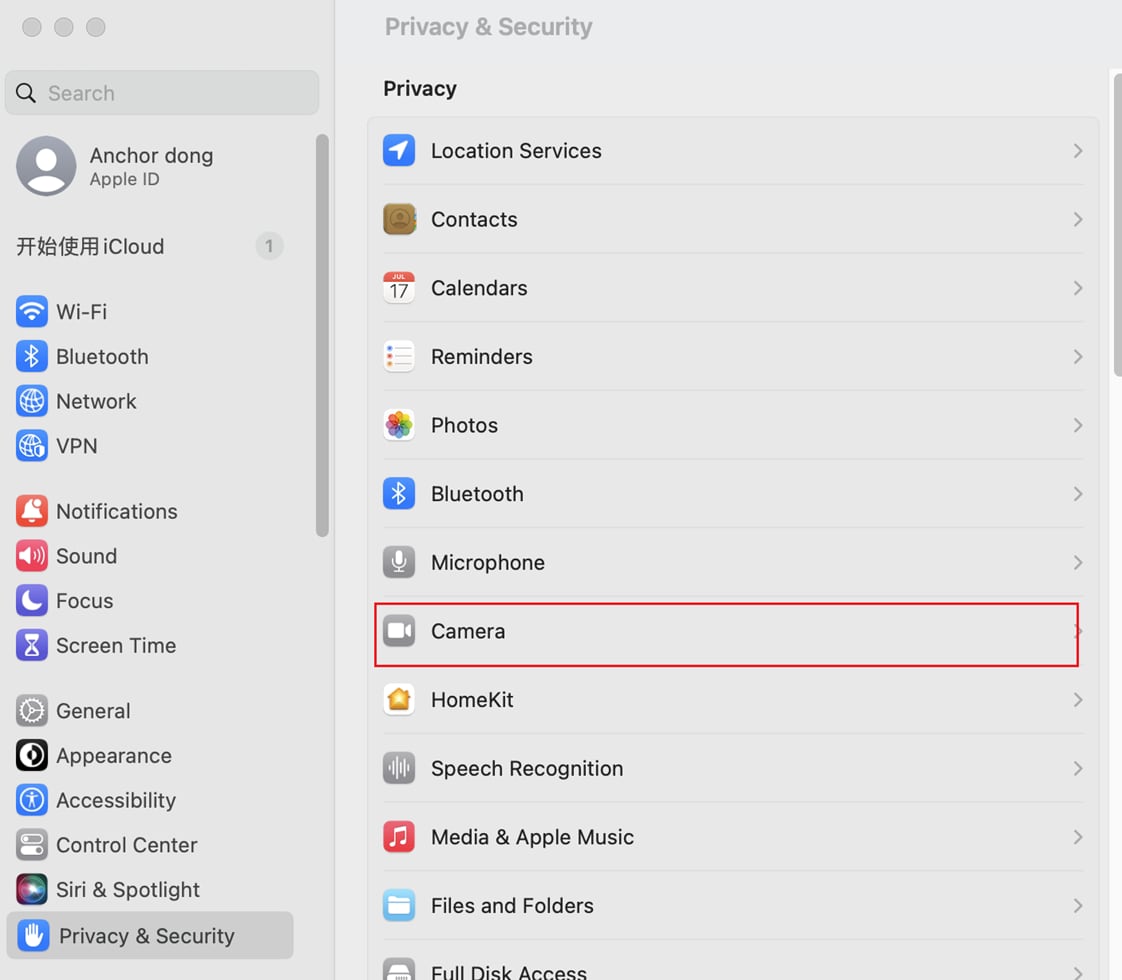
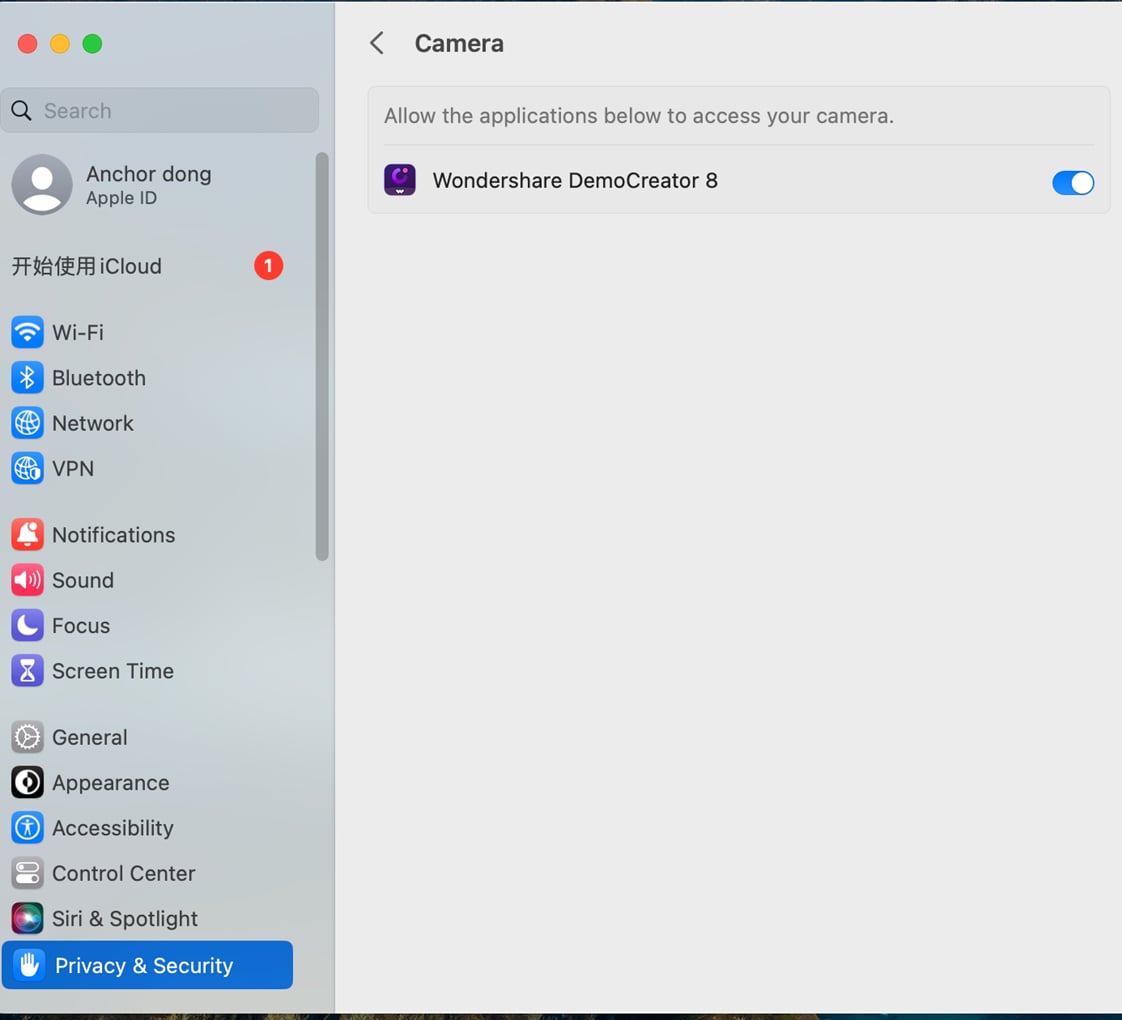
(2) Camera Authorization Process:
Click Next Step to proceed to the Camera authorization process.
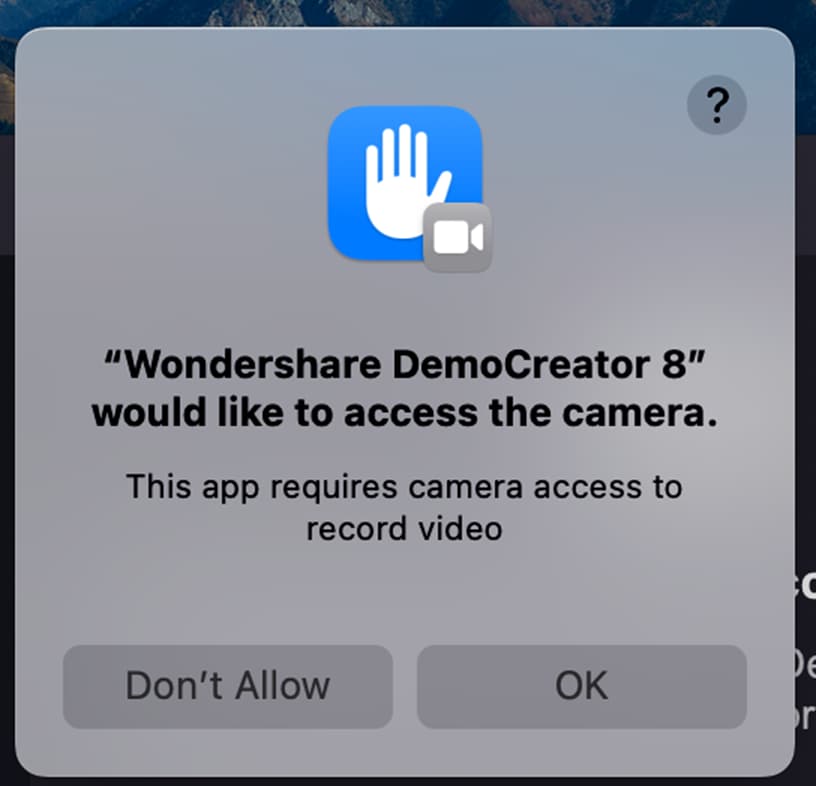
Click Allow; a pop-up will appear, click OK to grant authorization.
(If no pop-up appears, please manually authorize in Mac → System Settings → Privacy & Security → Camera.)
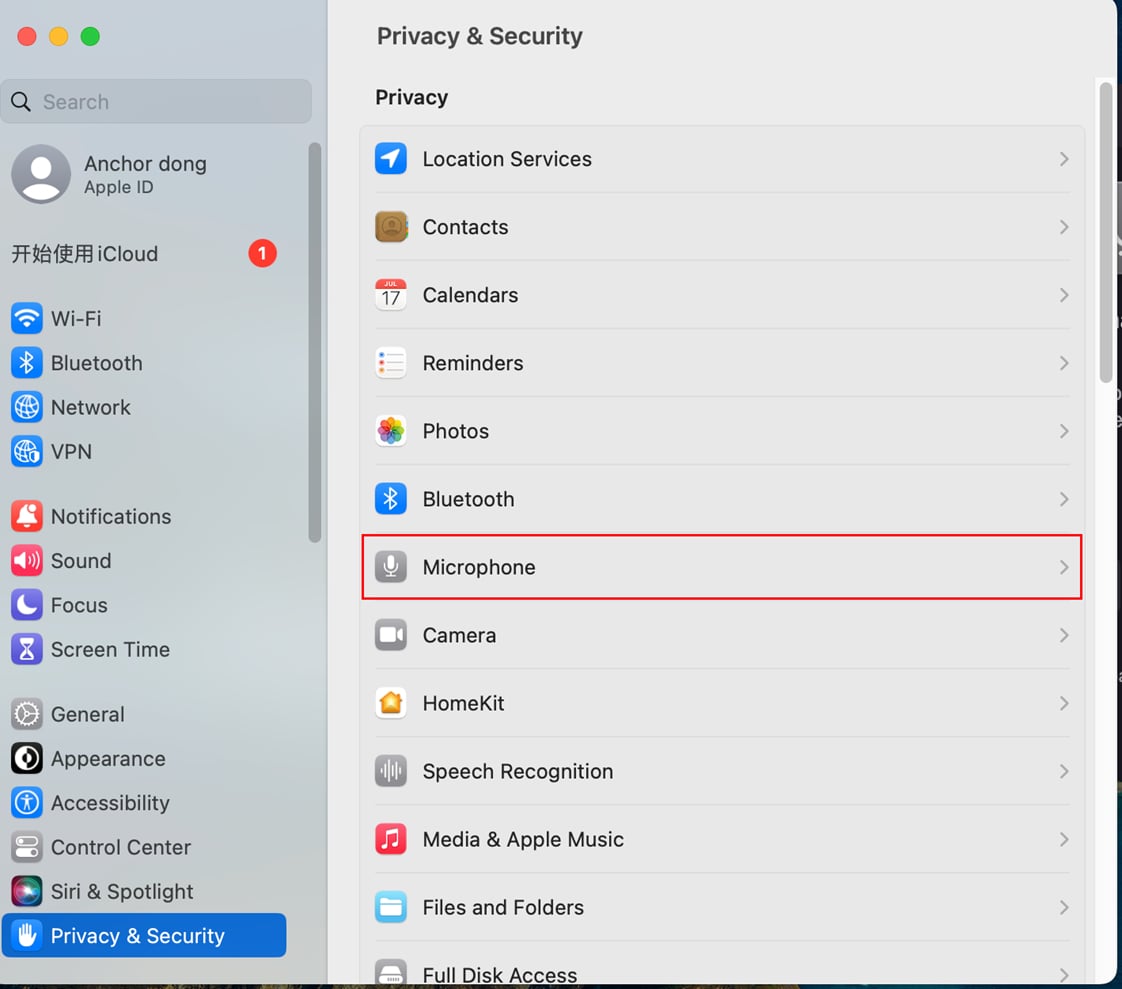
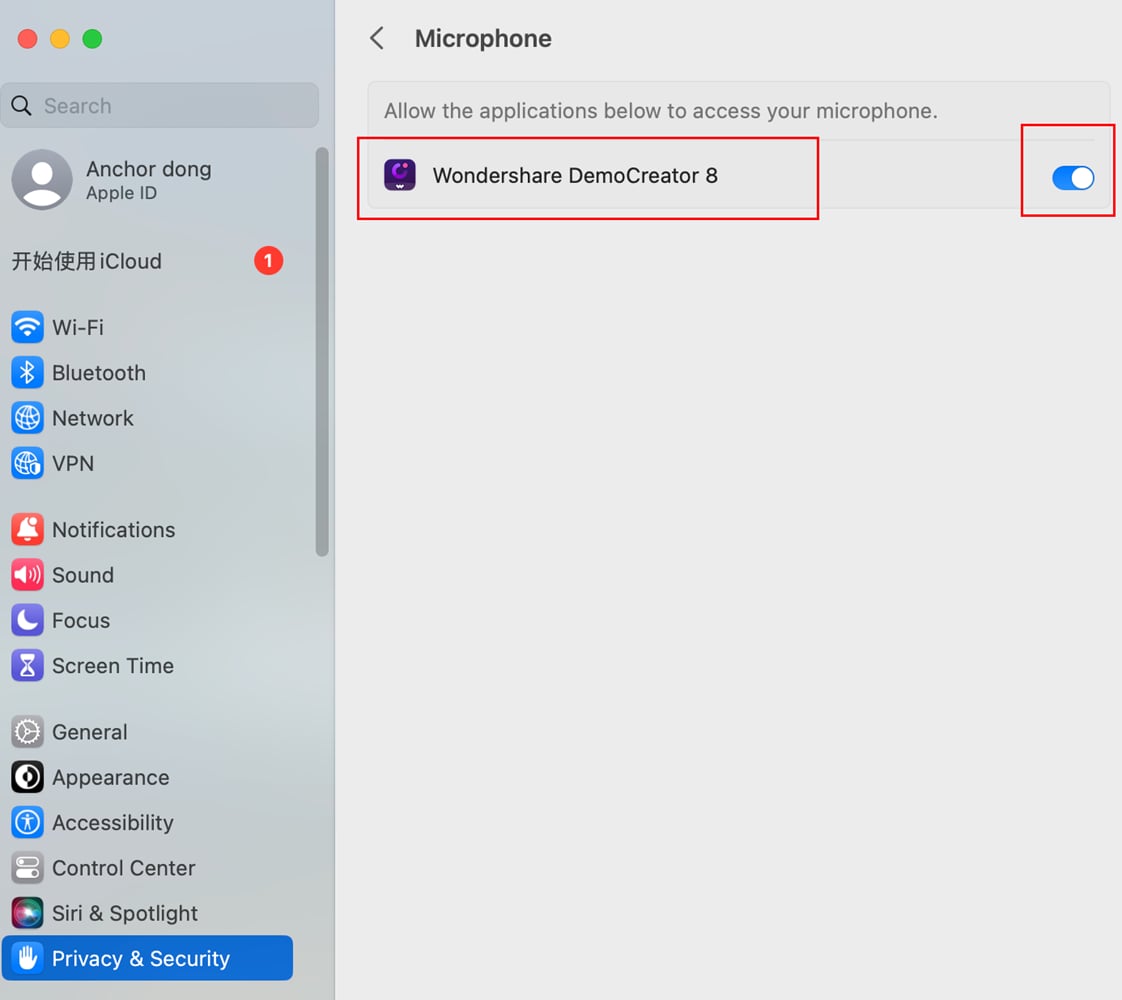
(3) Microphone Authorization Process:
Click Next Step to enter the Microphone authorization process.

A Microphone pop-up will appear, click OK.
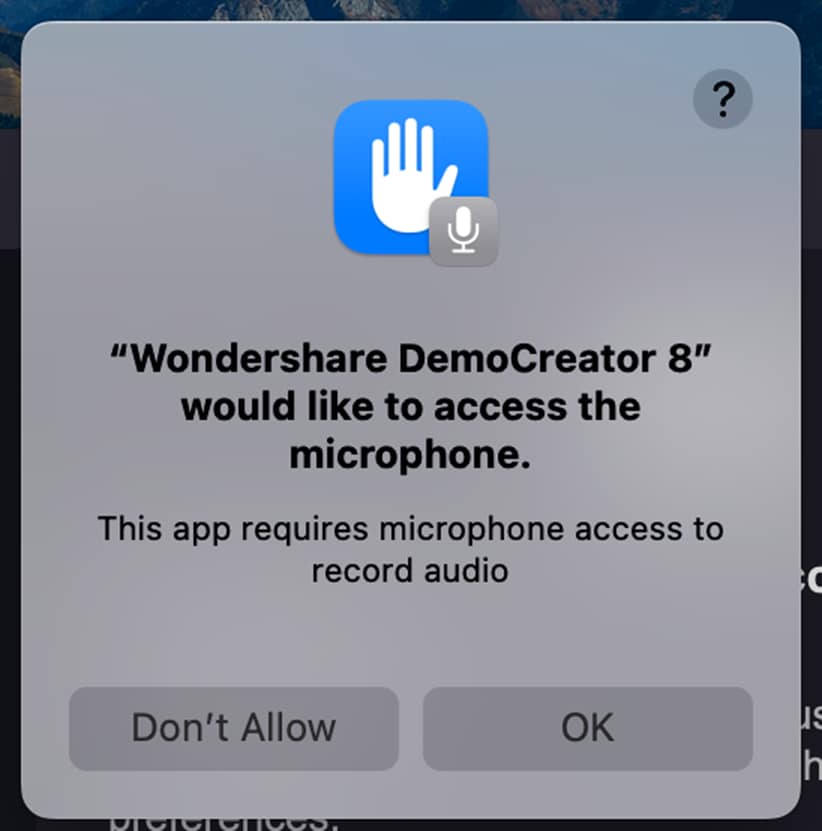
(If no pop-up appears, please manually authorize in Mac → System Settings → Privacy & Security → Microphone.)
Click Next Step; once authorization is successful, click Start Recording to record normally. It’s recommended to restart the program to ensure authorization is functioning correctly.
(4) Accessibility Authorization Process:
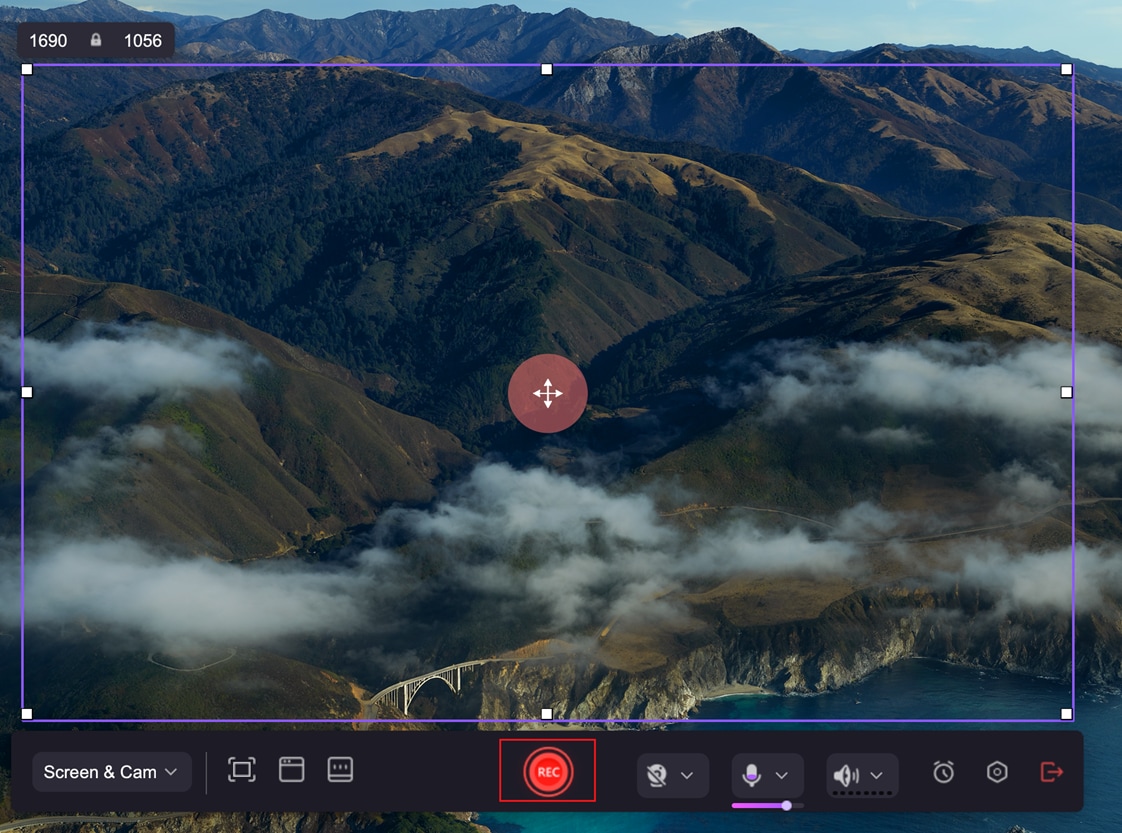
When clicking the REC button to record, an Accessibility authorization prompt will appear.

Click Yes to gain recording authorization, which will take you to the system to open Accessibility authorization.
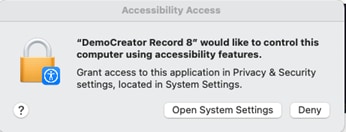
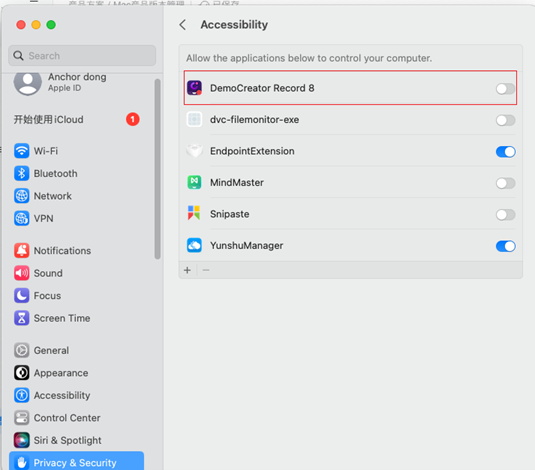
Click the Open System Settings button and toggle the Accessibility authorization on.
(If no pop-up appears, please manually enable it in Mac → System Settings → Privacy & Security → Accessibility.)
Now you can start recording on your Mac!

