DemoCreator User Guide
How to use Wondershare DemoCreator? Learn the step by step guide below
DemoCreator User Guide
-
Get Started - Mac
-
Video Recording - Mac
-
Video Editing - Mac
-
Keyboard Shortcuts - Mac
-
Audio Recording - Mac
-
DemoCreator Effects - Mac
-
Export & Share - Mac
-
Audio Editing - Mac
-
New Demo Mode - Mac
DemoAir User Guide
-
DemoCreator Cloud Service - Get Started
-
Video Creation Mode
-
Export&Share
FAQs
Export & Share
In this section, you’ll learn how to:
- 1. Export Video
- 2. Share Video
- 3. Export Audio
- 4. Batch Export
1. Export Video
Step: Click the "Export" button in the upper right corner of the screen to save your movie to your computer.
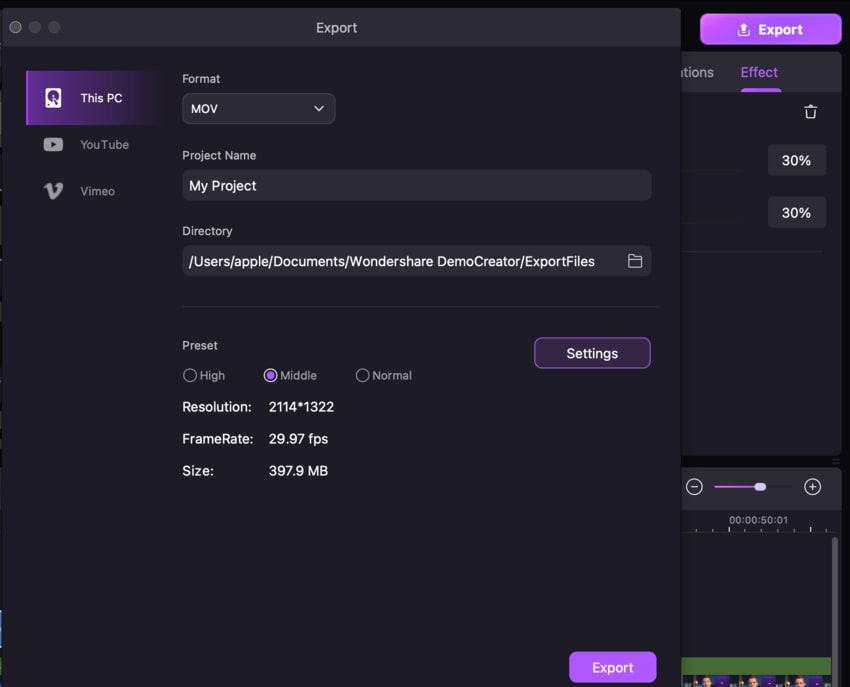
Note: Additionally, you can alter the video parameters, including the video format (Encoder, Resolution, Frame Rate, BitRate).
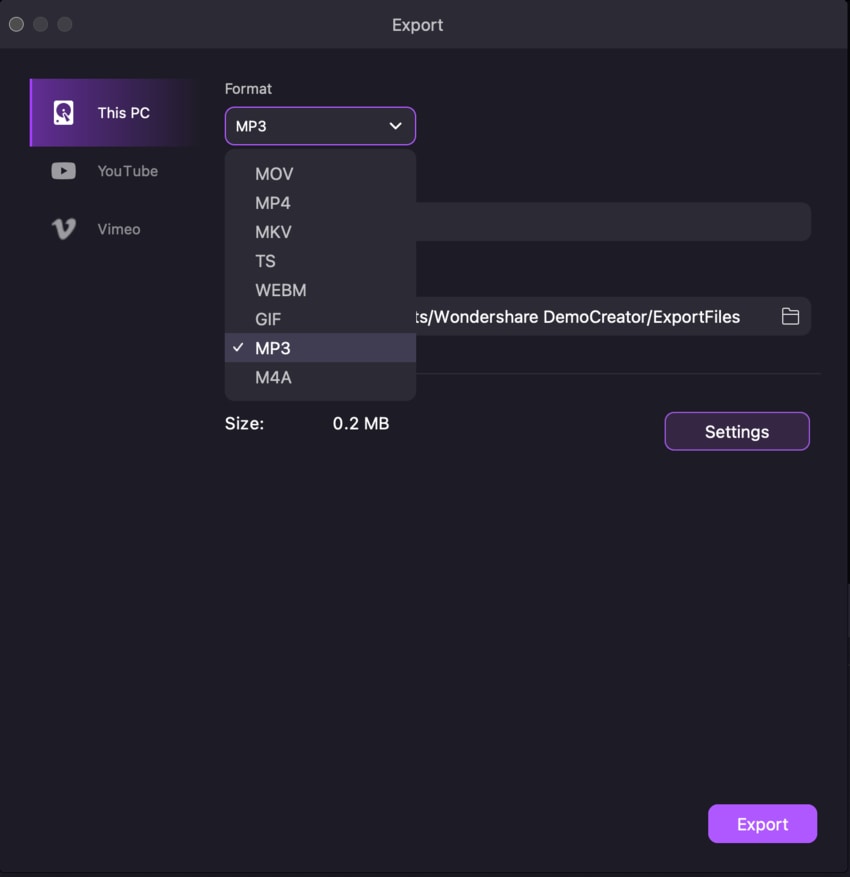
Tip: You can rename the movie and move it to a different spot on your computer before saving it. Currently, DemoCreator can produce videos in the following formats: MP4, AVI, WMV, MOV, MKV, FLV, TS, WEBM, MP3, M4A, and GIF.
2. Share Video
· Share Video on YouTube
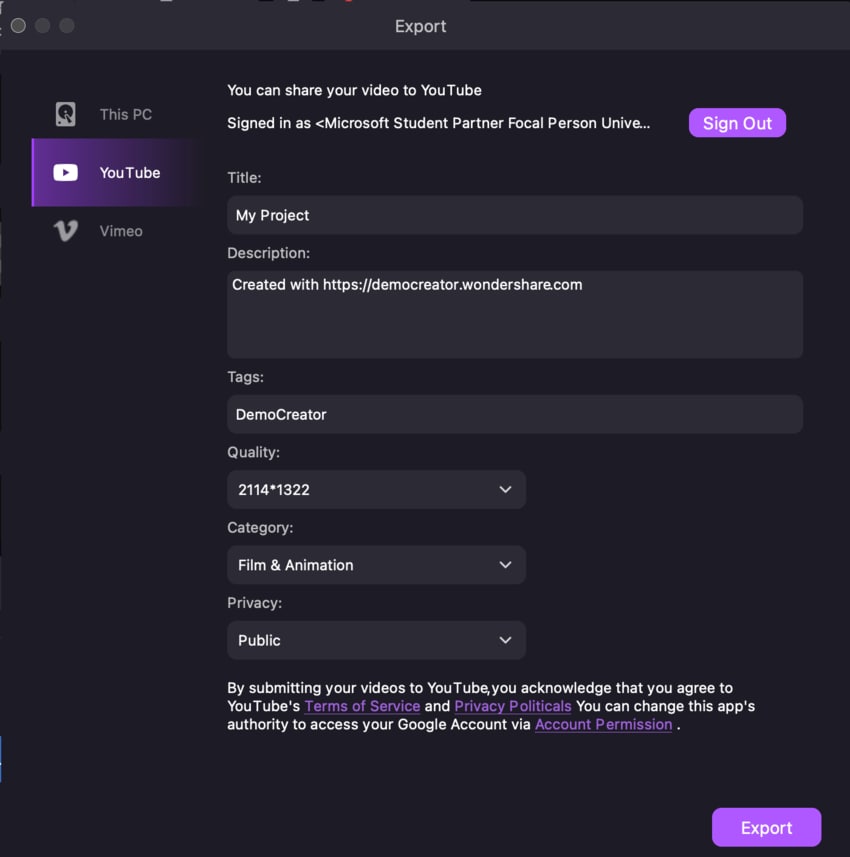
Step 1: Pick YouTube after clicking the export button and uploading the final video to the platform. Before proceeding, you will need to log into your YouTube account.
Step 2: After that, you may give the video a title, write a description, and add tags before deciding whether or not to make the video public, unlisted, or private.
· Share Video to Vimeo
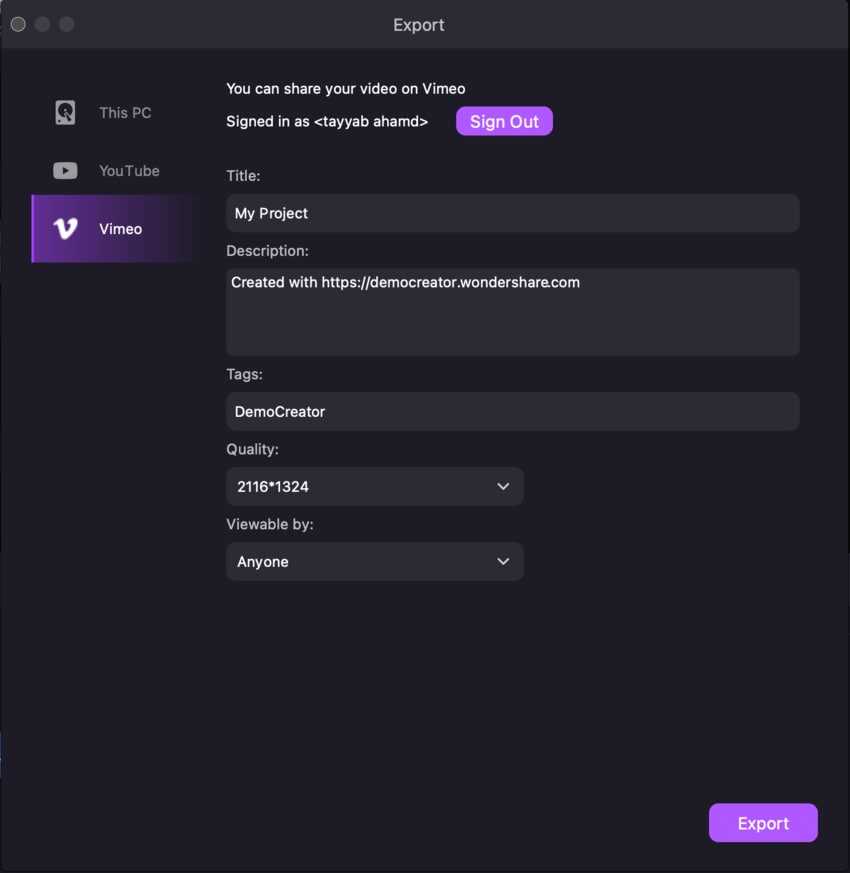
Step: To upload a completed film straight to Vimeo, pick "Vimeo" from the export menu after clicking the "export" button. Before continuing, you will need to log in with your Vimeo account.
3. Export Audio
Step: To export your changes, use the "Export" option in the Editor window. Choose MP3 as the format in the popup that pops up when you export.
4. Batch Export by Video Segments
With the new Batch Export feature, you can now easily split a long video into multiple shorter clips based on timeline markers, and export them all at once to your local device.
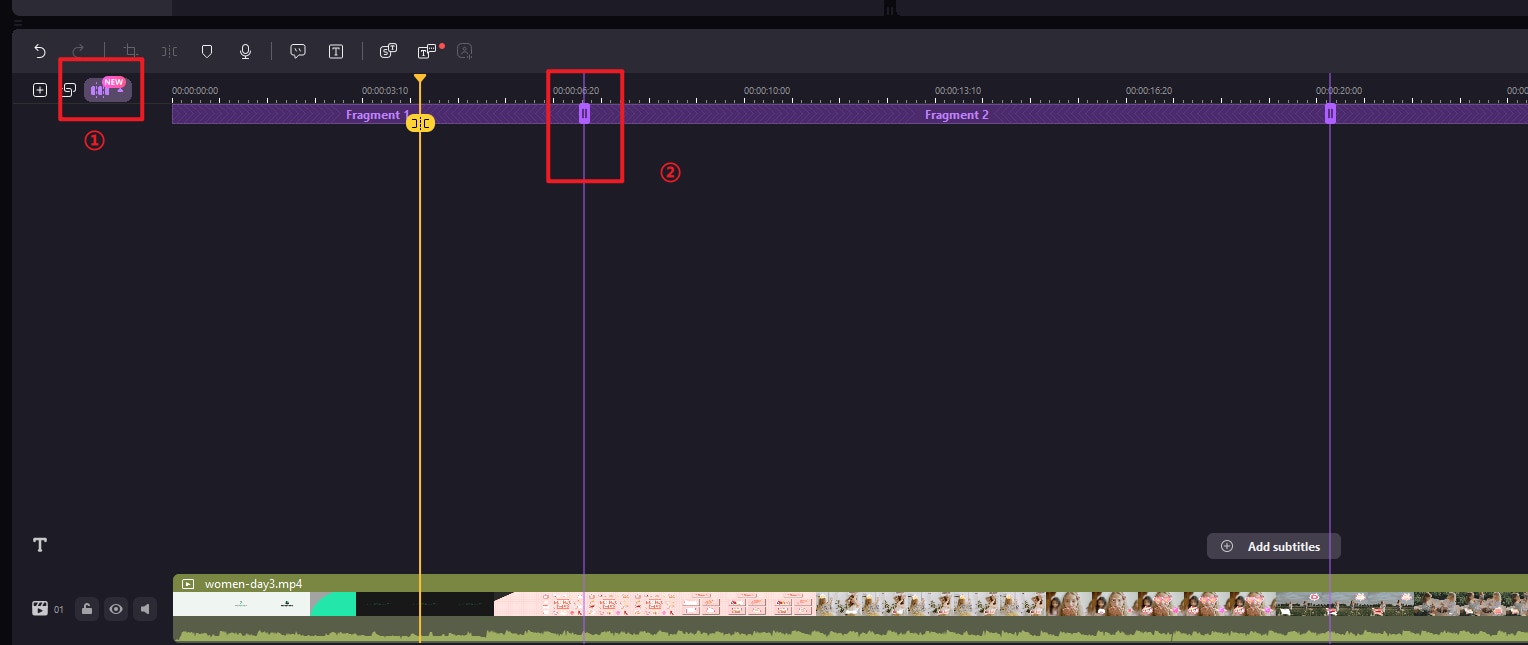
Step 1: Add Segment Markers
On the timeline, place markers at the points where you want to split the video. Each marker represents the start of a new segment.
Step 2: Batch Export
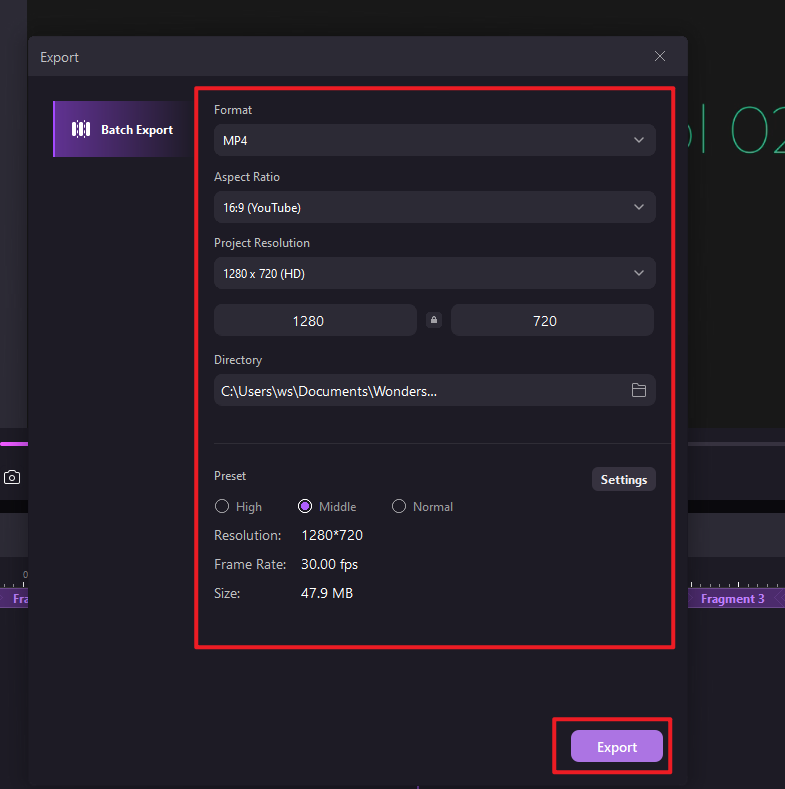
Once your markers are set, click the Batch Export option.
After clicking, you'll be taken to a settings panel where you can configure video parameters and other export details.
Once everything is set, the software will automatically divide the video into segments based on your markers and export each one as a separate video file to your local storage.

