DemoCreator User Guide
How to use Wondershare DemoCreator? Learn the step by step guide below
DemoCreator User Guide
-
Get Started - Mac
-
Video Recording - Mac
-
Video Editing - Mac
-
Keyboard Shortcuts - Mac
-
Audio Recording - Mac
-
DemoCreator Effects - Mac
-
Export & Share - Mac
-
Audio Editing - Mac
-
New Demo Mode - Mac
DemoAir User Guide
-
DemoCreator Cloud Service - Get Started
-
Video Creation Mode
-
Export&Share
FAQs
Schedule Recording
In this guide, you'll learn:
- How to schedule recording with DemoCreator
- Customize schedule recording settings
- Save settings and start recording
Recording can be started and stopped at a certain time using the schedule recording feature. Once the recording has been started, the screen and the audio will be recorded automatically. The following is a full rundown of the processes required to create an appointment recording:
Step 1: Start DemoCreator, and when the start-up box appears, pick "Schedule Recording" from the available options.
Note: After you have finished Step 1, you will be sent to the "schedule" interface.
Step 2: Here, you will be required to work on the real assignment by timing the beginning and end of your recordings and making other modifications to the recording parameters.
Step 3: When pleased with the settings, choose the "Save Settings" option from the drop-down menu.
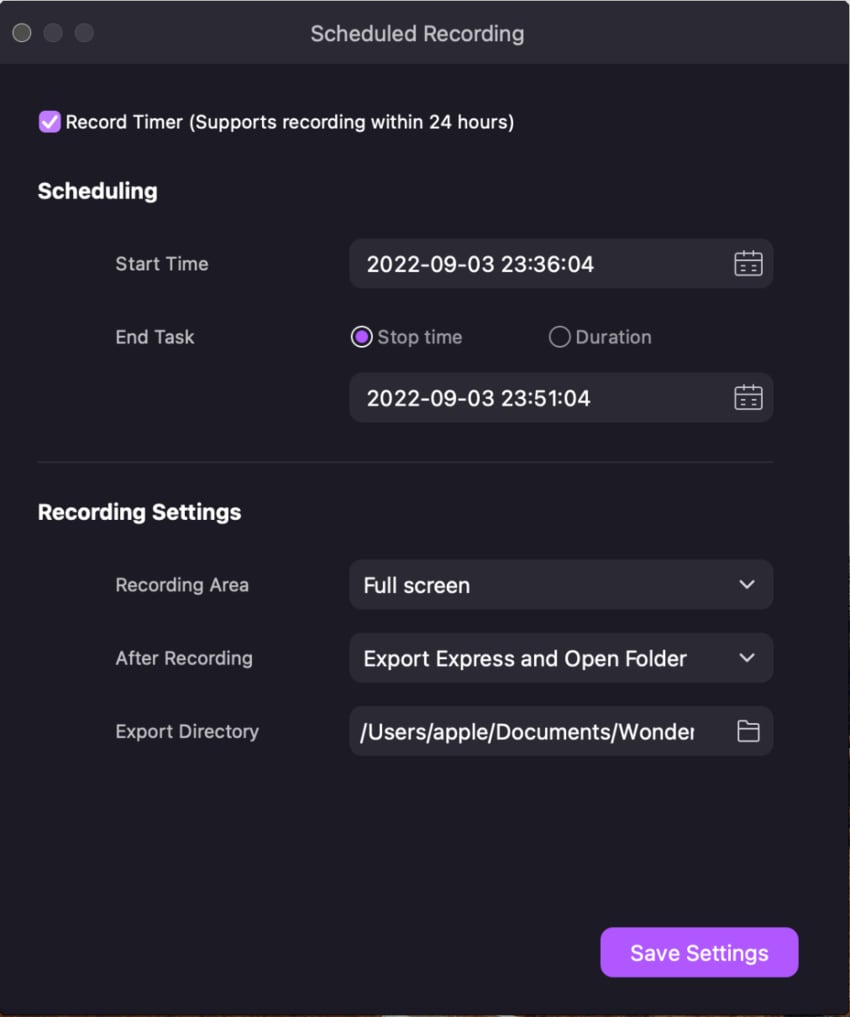
- Starting Time – Using this option, you can choose when the planned recording begins.
- Ending Task – With this option, you can choose when the planned recording stops.
- Duration – With this option, you can choose how long the planned recording will last.
- Recording Area – If you choose this option, you can pick the target recording region for scheduled recording.
- After Recording – You can either import to the editor or export and open the folder when you pick this option.
Step 4: After you have done customizing the options for the recording schedule, click the save settings button. After that, recording your schedule will begin automatically following the time you have chosen.
Pre-Requisites You Can Take When Scheduling Recording
- DemoCreator must be actively operating for the scheduled recording capability to be accessible.
- When the remote connection to a computer is lost, the scheduled recording feature on that distant computer will no longer operate.
- Press the F10 button if you wish to stop recording, even if the scheduled recording time has not yet expired.

