DemoCreator User Guide
How to use Wondershare DemoCreator? Learn the step by step guide below
DemoCreator User Guide
-
Get Started - Mac
-
Video Recording - Mac
-
Video Editing - Mac
-
Keyboard Shortcuts - Mac
-
Audio Recording - Mac
-
DemoCreator Effects - Mac
-
Export & Share - Mac
-
Audio Editing - Mac
-
New Demo Mode - Mac
DemoAir User Guide
-
DemoCreator Cloud Service - Get Started
-
Video Creation Mode
-
Export&Share
FAQs
Pan & Zoom
When videomaking, a "Pan" occurs when the camera travels from left to right, such as across two topics, and a "Zoom" occurs when the camera either physically gets closer to one section of the frame or gives the illusion of doing so, such as for a close up on a subject's head.
DemoCreator's Pan and Zoom functions allow you to create fake camera motions for these and other effects.
1. Apply Pan & Zoom Effect
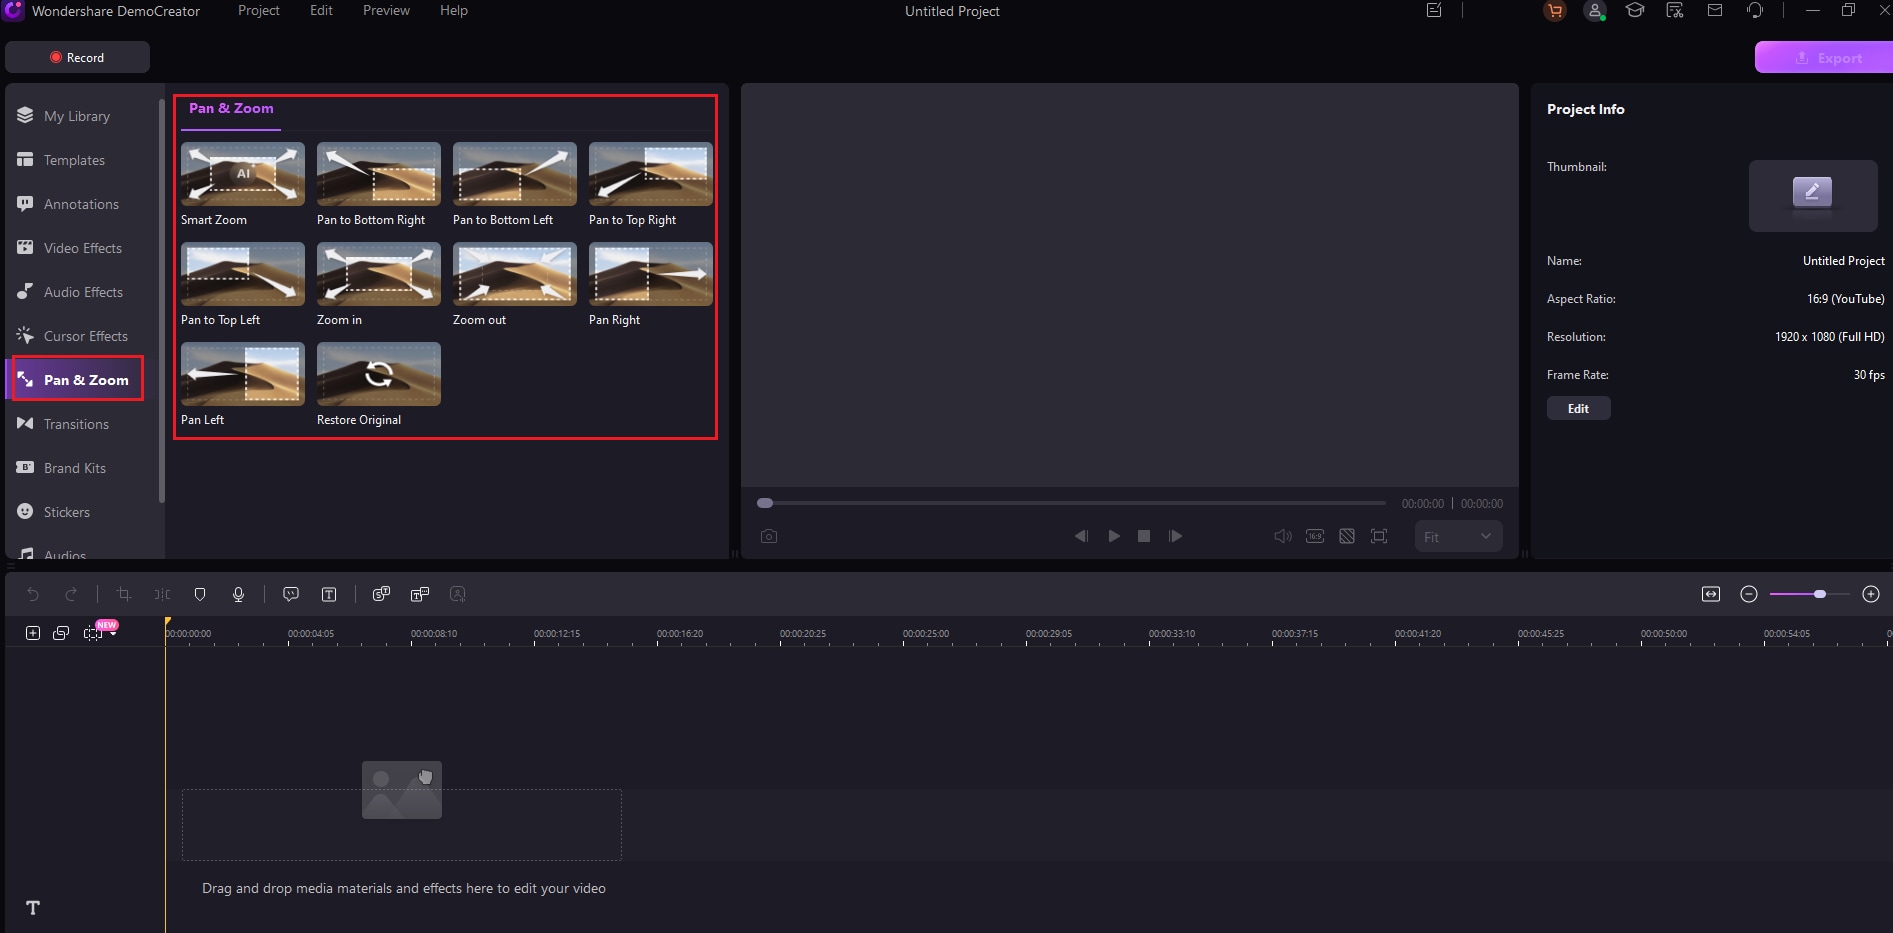
Step 1: Look for the [Pan&Zoom] option beneath the Effect Menu's Pan&Zoom menu.

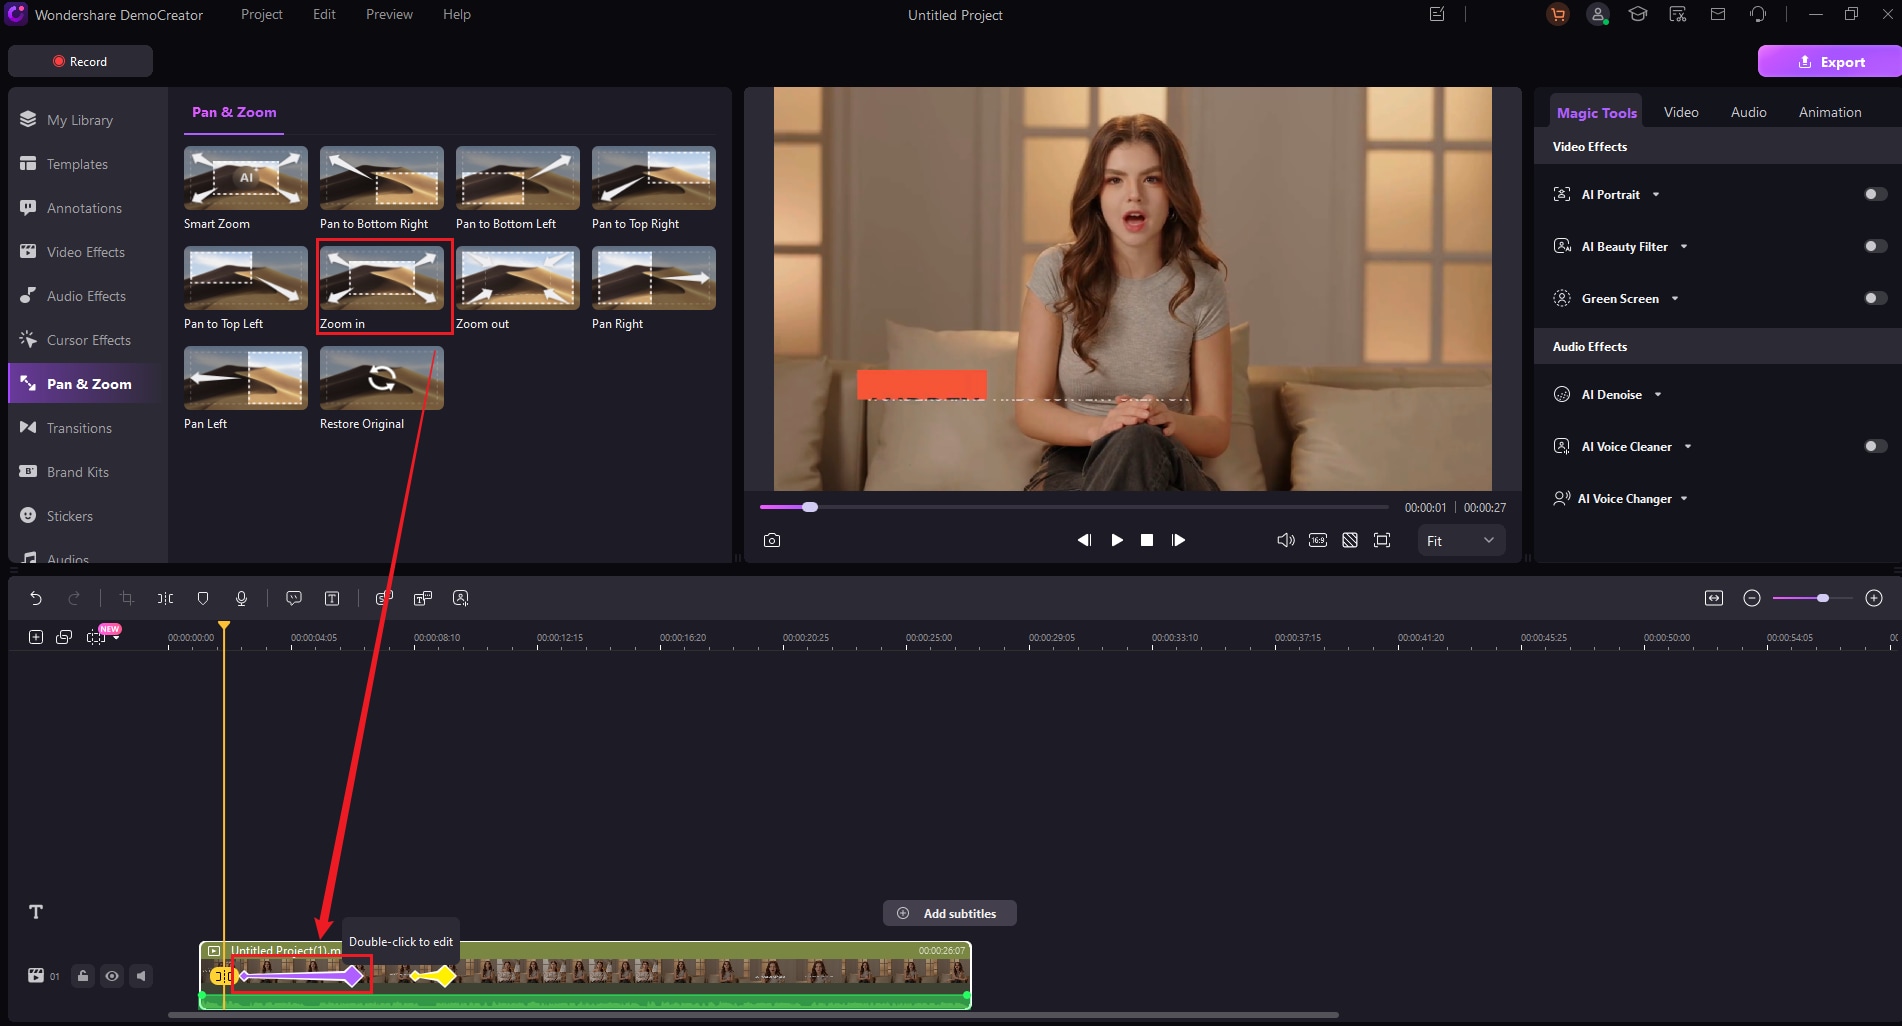
Step 2: Pull the Pan&Zoom effect onto the clip until a confirmation arrow in green indicates that it was properly inserted.

2. Pan and Zoom Editing
- Change Position – Simply click and drag the green arrow to adjust the timing of the Pan&Zoom function.
- Change Duration – Simply click and drag either end of the arrow to change the length of the arrow.
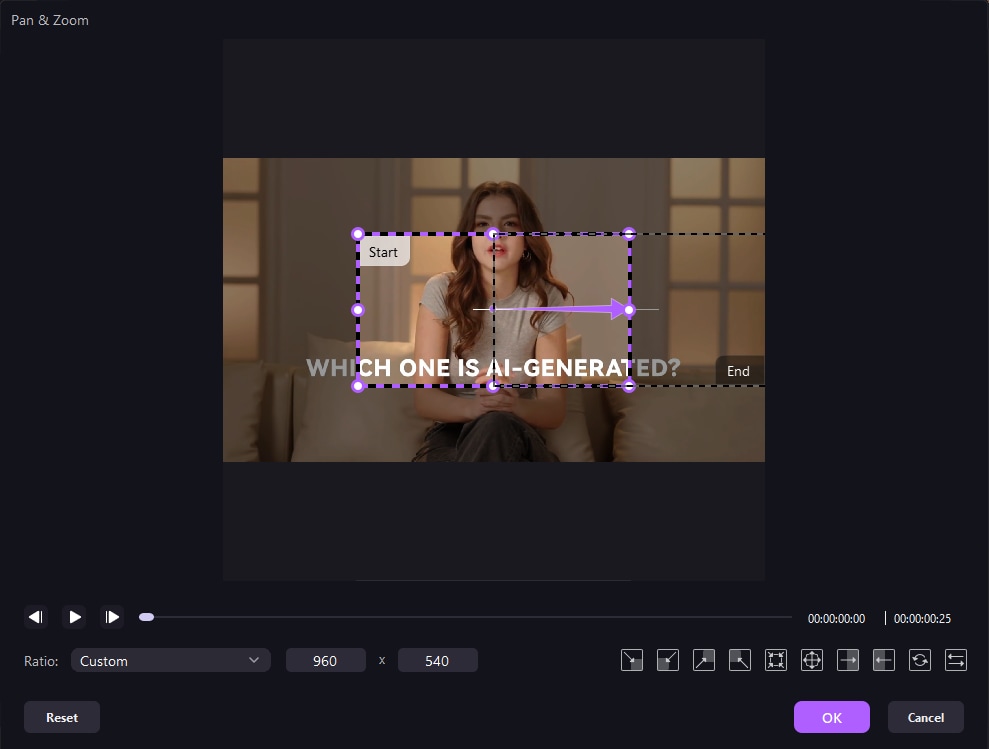
- Edit – To make changes, just double-click the green arrow. Your video will be accompanied by a start frame in purple with the word "Start" written on it and an end frame in green with the word "End" written on it.

3. Types of Pan and Zoom
1. Zoom to Bottom Right
Step: You can use this to emphasize a certain point.

2. Zoom In
Step 1: When you zoom in, you will first see the bigger green frame, and then you will see the tiny purple frame.
Step 2: You can adjust the region you wish to zoom in by dragging and hovering with your mouse.

Note: The green arrow shows the direction in which the zoom will occur.
3. Zoom Out Mode
Step 1: Head into the more expansive green frame from the more intimate purple frame.
Step 2: You can modify the region you wish to zoom out on by dragging and hovering with your mouse.
Step 3: The green arrow shows the direction that the zoom-out should go.

Tip: You can do this to show a broader scene.
4. Pan Right Mode
Step 1: The movement will be horizontal, from left to right.
Step 2: You can alter the region you wish to pan by dragging and hovering with your mouse.
Step 3: The arrow in green can determine the direction.

Note: This can be useful for switching between characters or keeping up with a fast-moving topic.
5. Pan Left Mode
Step 1: Travel across the horizontal plane from right to left.
Step 2: You can alter the region you wish to pan by dragging and hovering with your mouse.
Step 3: The arrow in green can determine the direction.

Note: This can be useful for switching between characters or keeping up with a fast-moving topic.
6. Zoom Original
Step: When you click the Zoom Original button, all the zoom settings are reset to their initial state.

7. Swap the Start and End Areas
Step: You can immediately switch the Start and finish areas by clicking the swap button in the upper right corner.


