DemoCreator User Guide
How to use Wondershare DemoCreator? Learn the step by step guide below
DemoCreator User Guide
-
Get Started - Mac
-
Video Recording - Mac
-
Video Editing - Mac
-
Keyboard Shortcuts - Mac
-
Audio Recording - Mac
-
DemoCreator Effects - Mac
-
Export & Share - Mac
-
Audio Editing - Mac
-
New Demo Mode - Mac
DemoAir User Guide
-
DemoCreator Cloud Service - Get Started
-
Video Creation Mode
-
Export&Share
FAQs
Live Streaming with DemoCreator
In new DemoCreator new 6.0, it supports to broadcast to live streaming platforms like Twitch, YouTube Live, Discord etc.
In this guide, you'll learn:
- 1. What Can DemoCreator Do with Live Streaming?
- 2. Preparations for Live Streaming in the DemoCreator
- 3. Live Streaming On Twitch with DemoCreator
- 4. Live Streaming on YouTube Live with DemoCreator
1. What Can DemoCreator Do with Live Streaming?
Streaming video is an excellent method for sharing your expertise and ideas with an audience in various locations across the globe. By conversing, sharing, and engaging in other forms of interaction, you can help spread your message and leave an impression that will remain.
DemoCreator is a robust and efficient live-streaming tool that allows you to broadcast your live material to all your preferred streaming networks concurrently. DemoCreator assists you in simplifying the process of live-streaming on Twitch, YouTube Live, and other live stream sites, making it more visually appealing and easier to remember
- Drive Action During Your Live Streams – You can encourage your audience to take action by including a call-to-action or another vital message. Several built-in features and virtual animated backdrops can help you do this.
- Engage with Your Audience in Real-Time – This text tool is useful for bringing attention to important messages across your platforms to boost interaction.
2. Preparations for Live Streaming in the DemoCreator
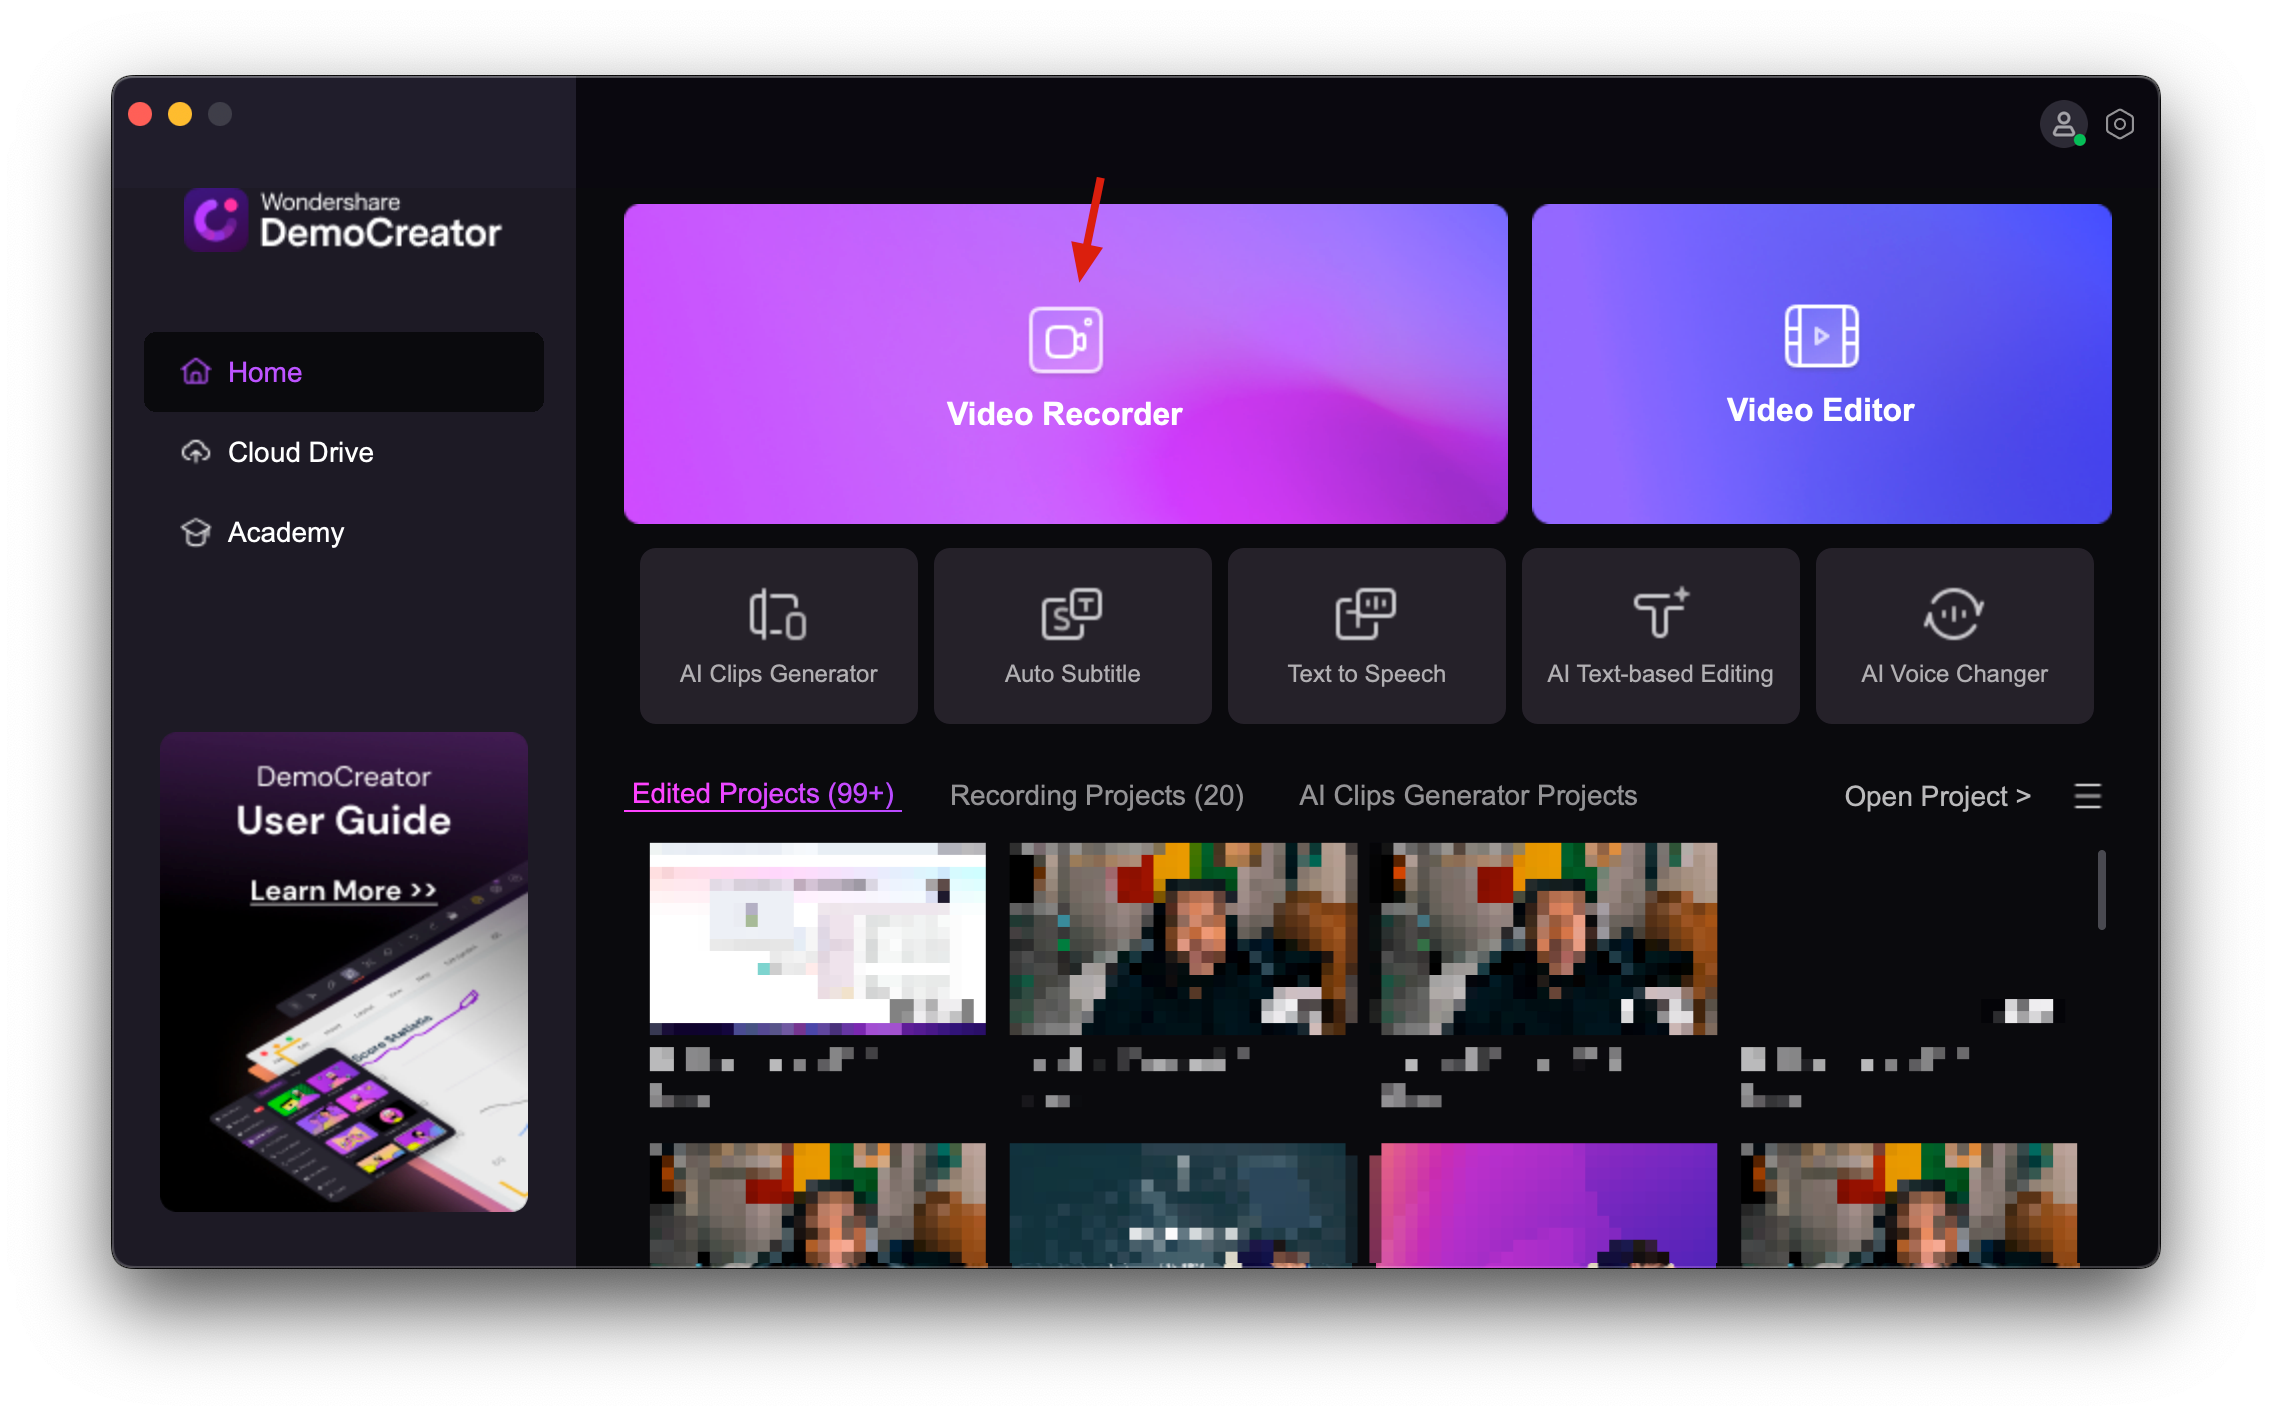
Step 1: Run DemoCreator and click the "Vider Recorder" button.
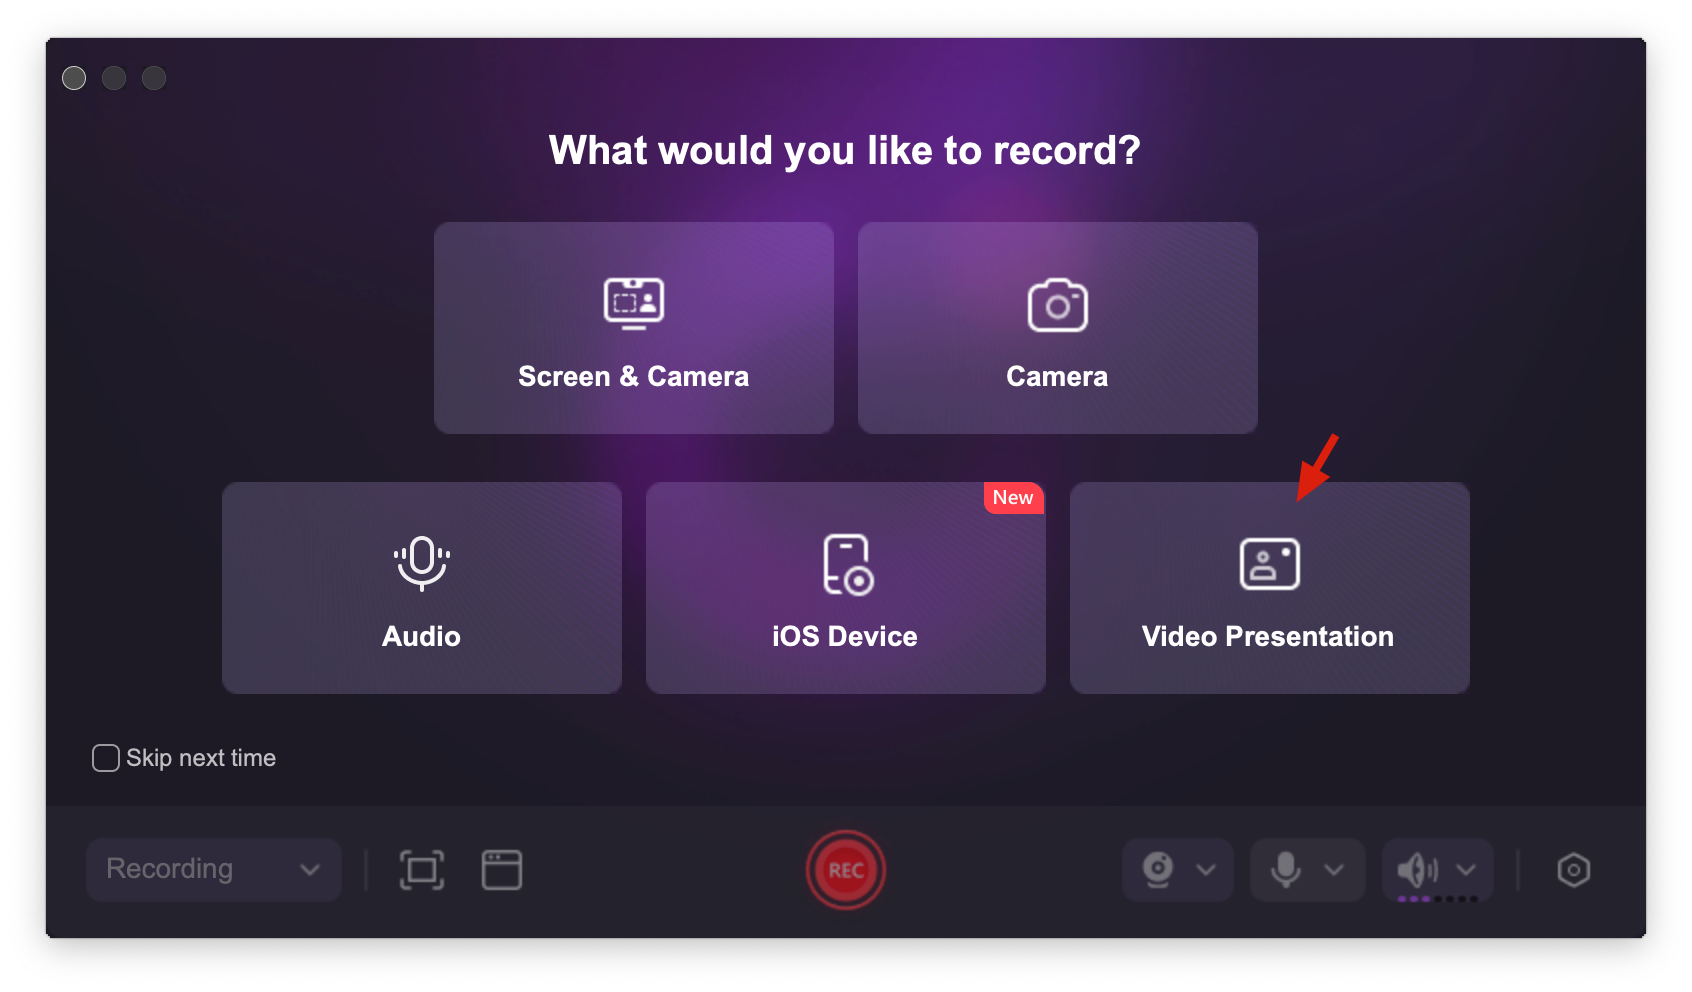
Click "Video Presentation" button.
Step 2: DemoCreator's demo mode provides access to all of the program's features, allowing you to have your material ready in no time. The following are some of the renowned features:
- Incorporate PowerPoint or other presentation material (video, audio, and still images are all supported) into your talk.
- As soon as your camera is set up, you can experiment with the CAM Effect, fine-tune your webcam's settings and provide a more polished presentation. The alternative is to use an avatar.
- You can choose between several engaging and polished options for your live stream's background using a virtual background.
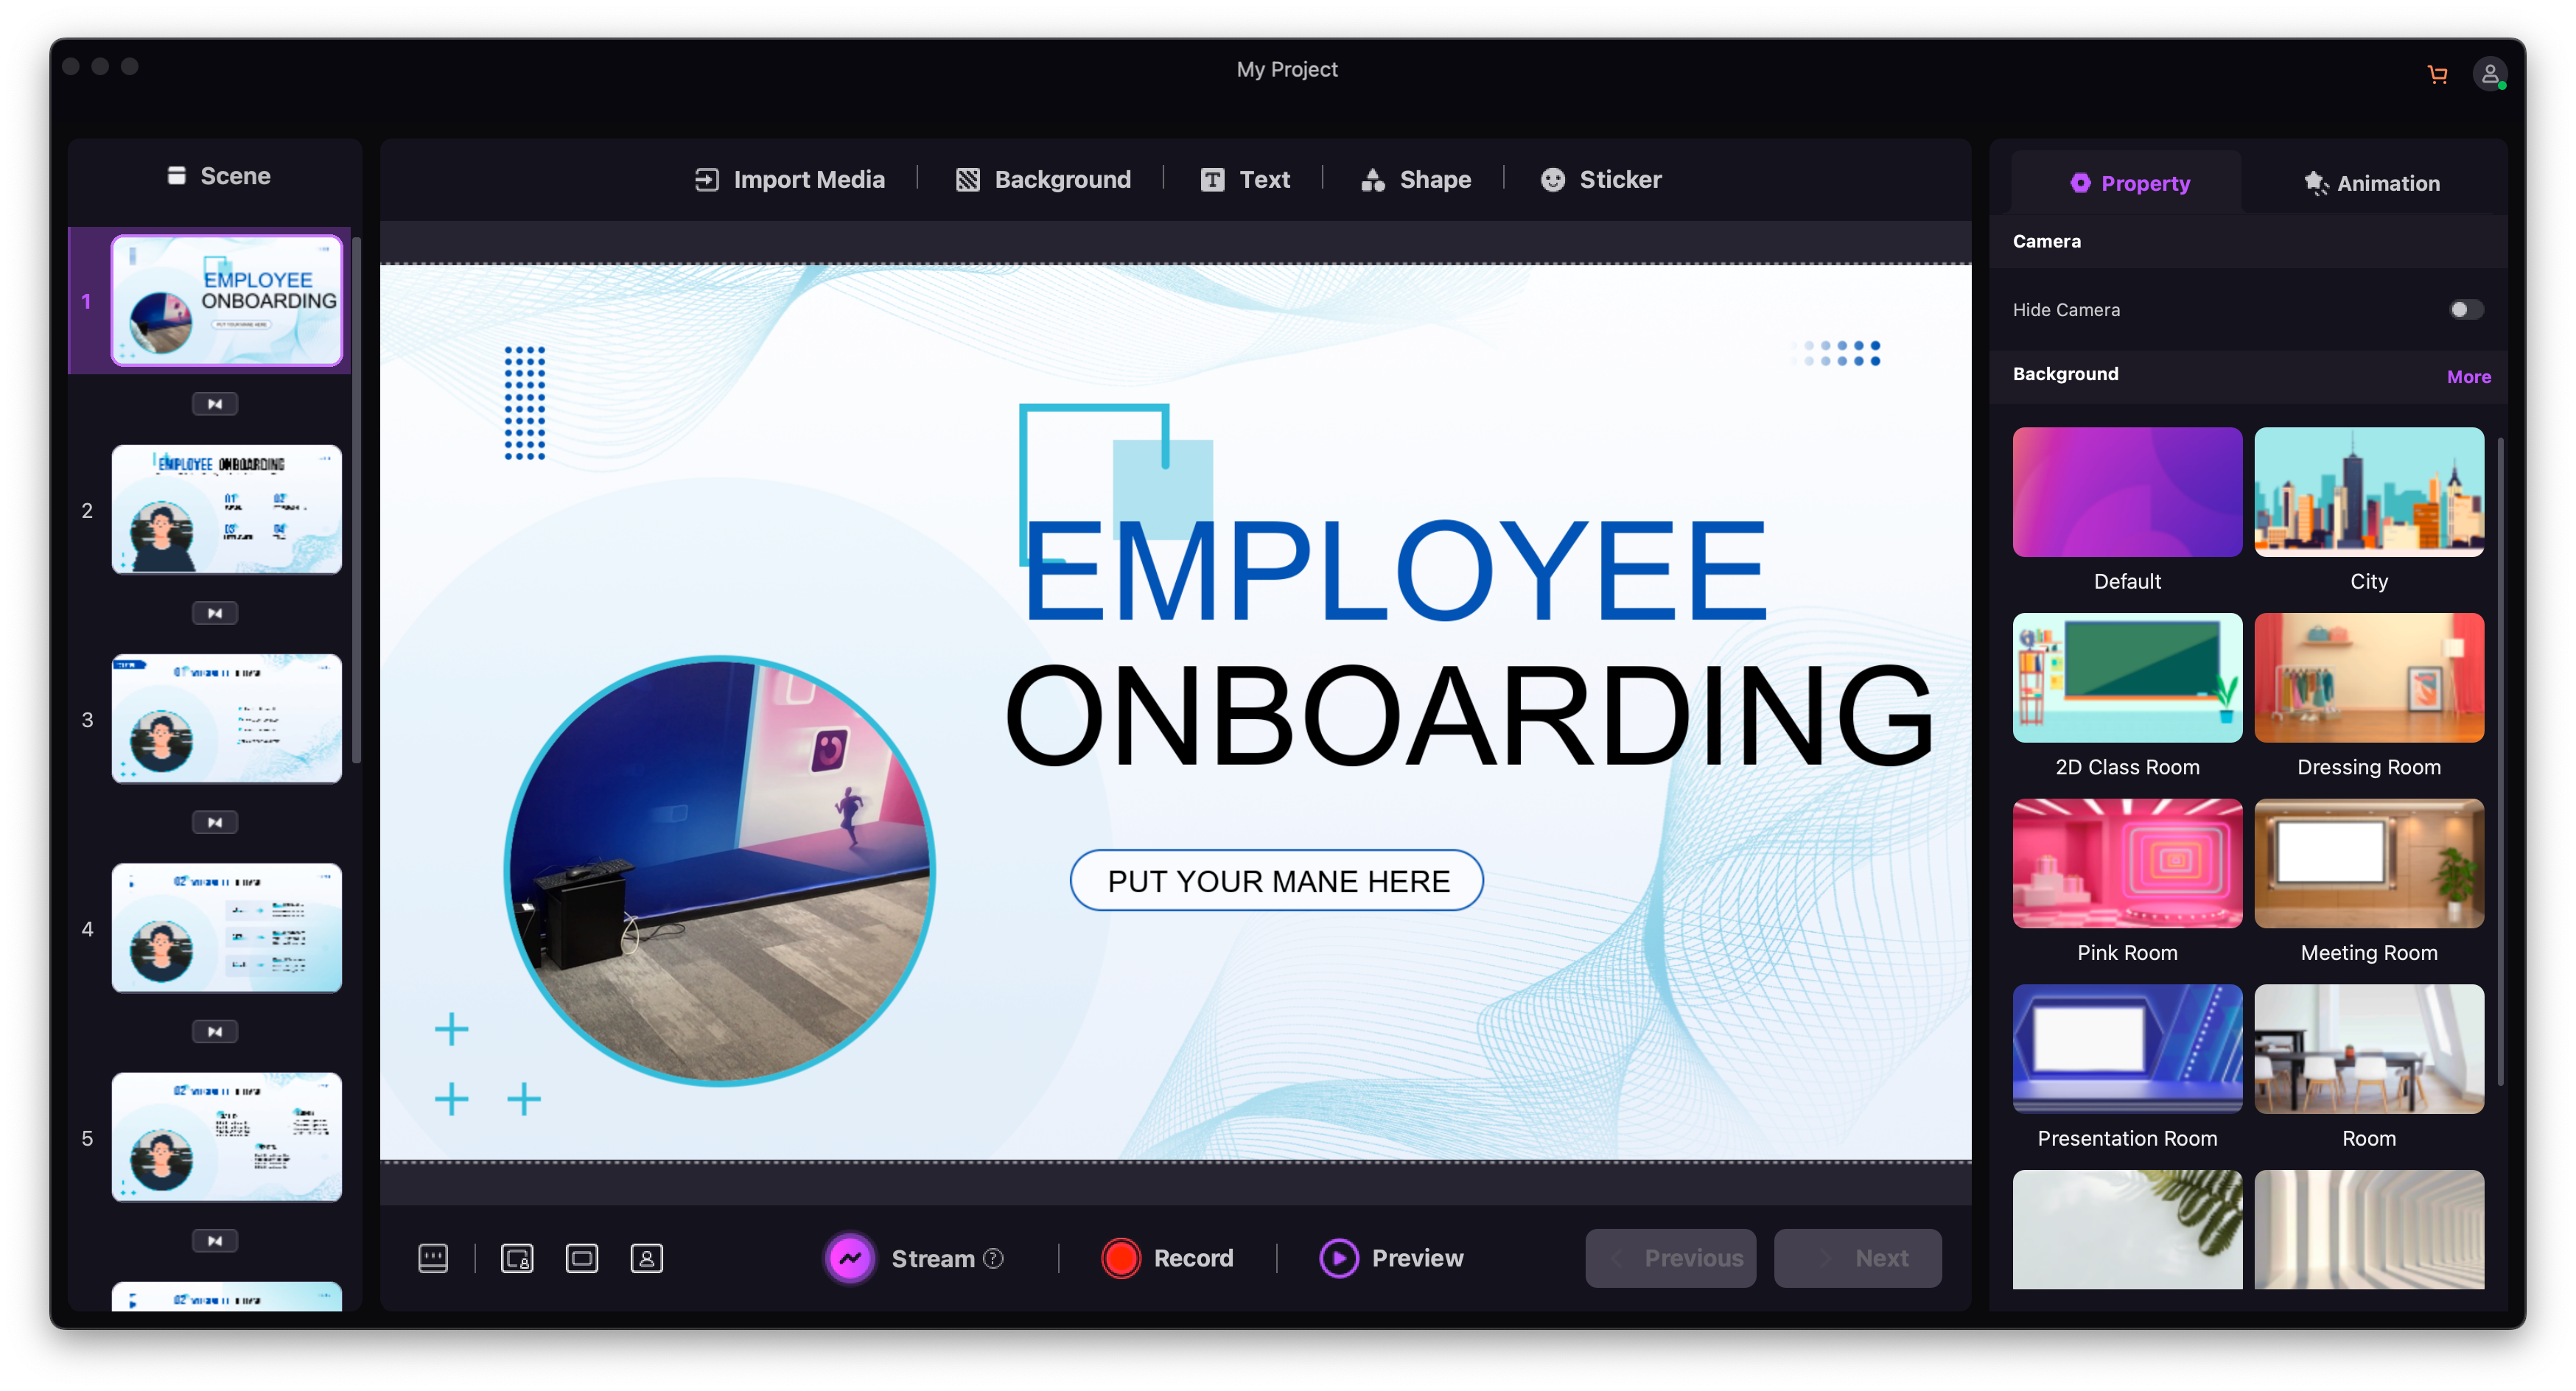
Step 3: Select the "Stream" button on the toolbar to begin the live broadcast.

3. Live Streaming On Twitch with DemoCreator
Twitch is a dynamic website used for live-streaming a wide variety of material, including but not limited to video games, entertainment, sports, and music. DemoCreator is a tool that can assist in broadcasting to several streaming services.
Important Note for Mac Users: To successfully create the connection, the Windows device must have both DemoCreator and Twitch open and running. In addition, check to see that you have completed all of the necessary preparations for live-streaming in the DemoCreator.
Step 1: Launch Twitch, adjust the inputs for the camera and microphone and locate the settings for the webcam.
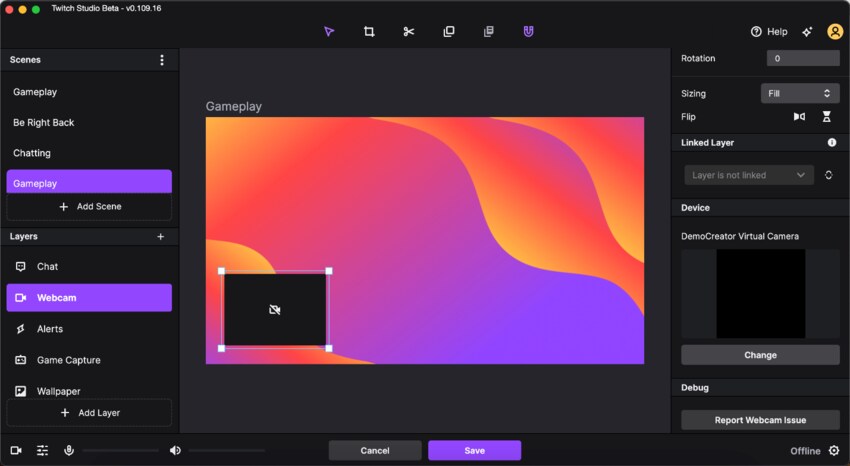
Step 2: The input for the camera should be set to "DemoCreator Virtual Camera," and then the settings should be saved.
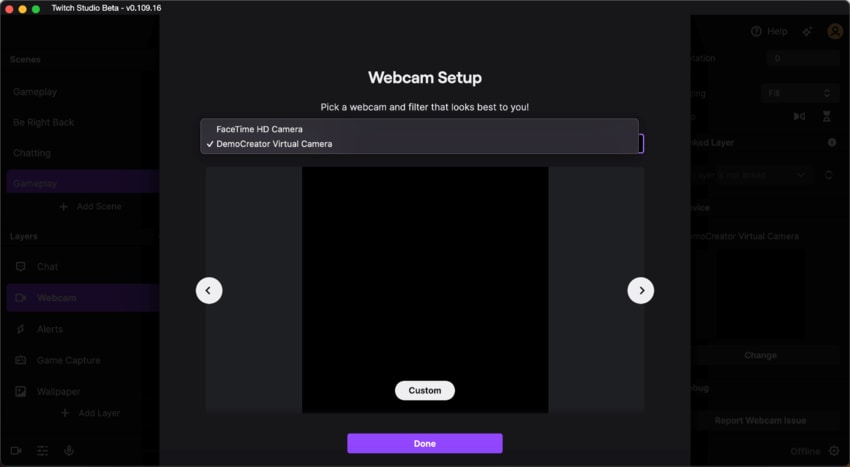
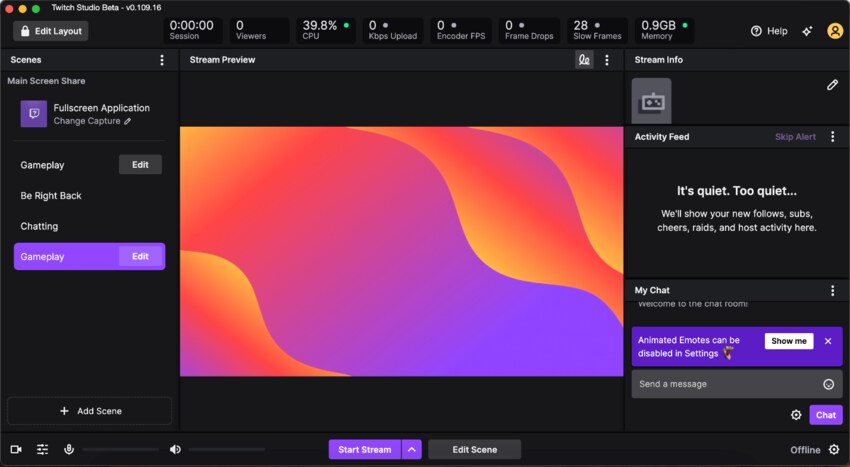
Step 3: After configuring everything, click the "Start Stream" button to begin your live broadcast on Twitch.
4. Live Streaming on YouTube Live with DemoCreator
Make sure you have completed all of the preparations for live-streaming in the DemoCreator before getting started.
The procedures required to go live on YouTube Live are outlined here:
Step 1: Go to YouTube and sign in to your YouTube account. Then, in the upper right corner of the screen, click the "Create" symbol and choose the Go Live option.
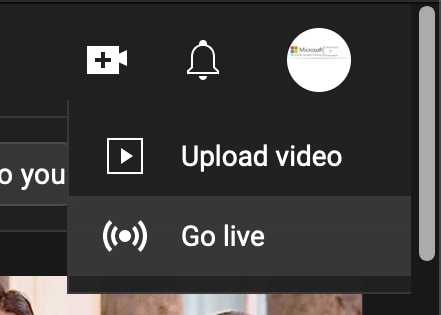
Step 2: You can go live right now or at a later date, whatever you like.
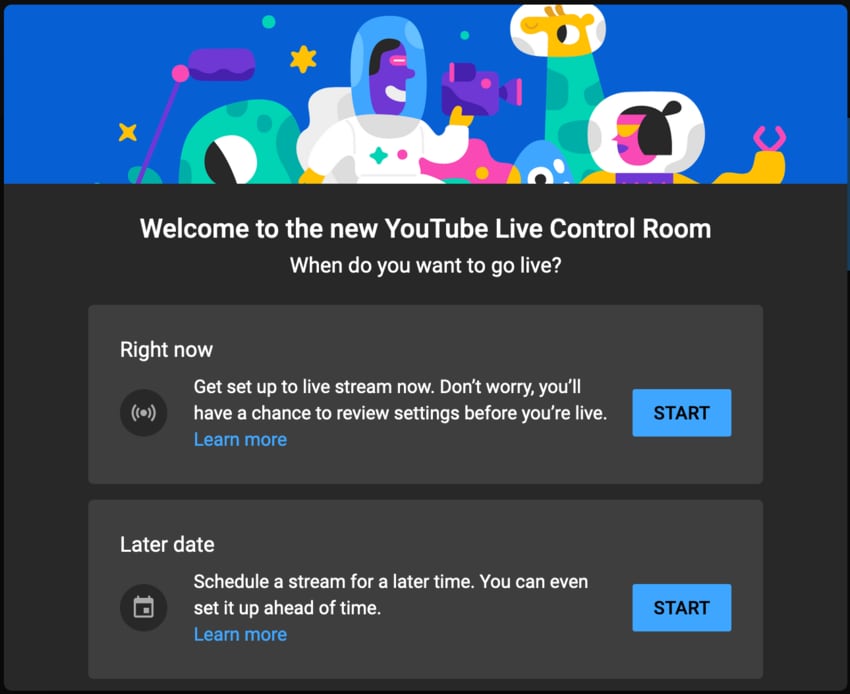
Step 3: Choose the sort of broadcast you want to start, then choose Built-in webcam and hit the Go button. Also, make sure that YouTube has access to your camera and microphone.
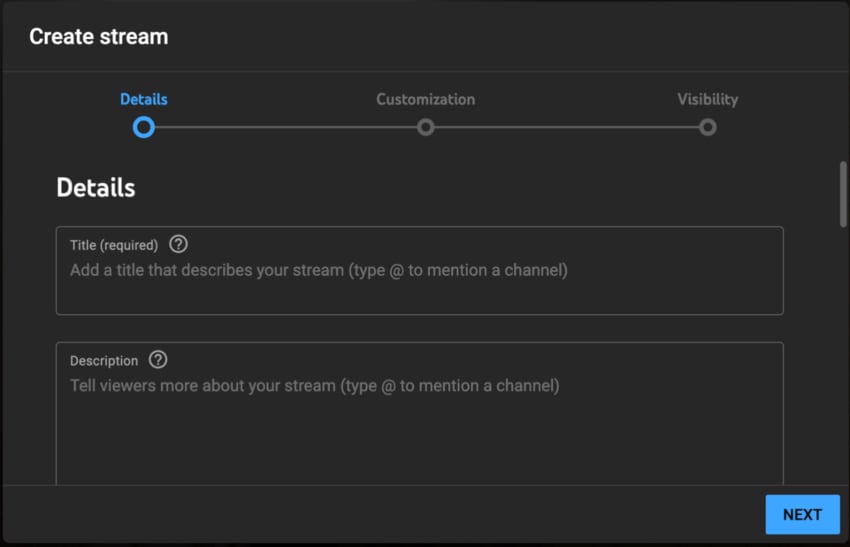
Step 4: Complete all of the stream's information, modify the stream's parameters as needed, and configure the visibility settings.
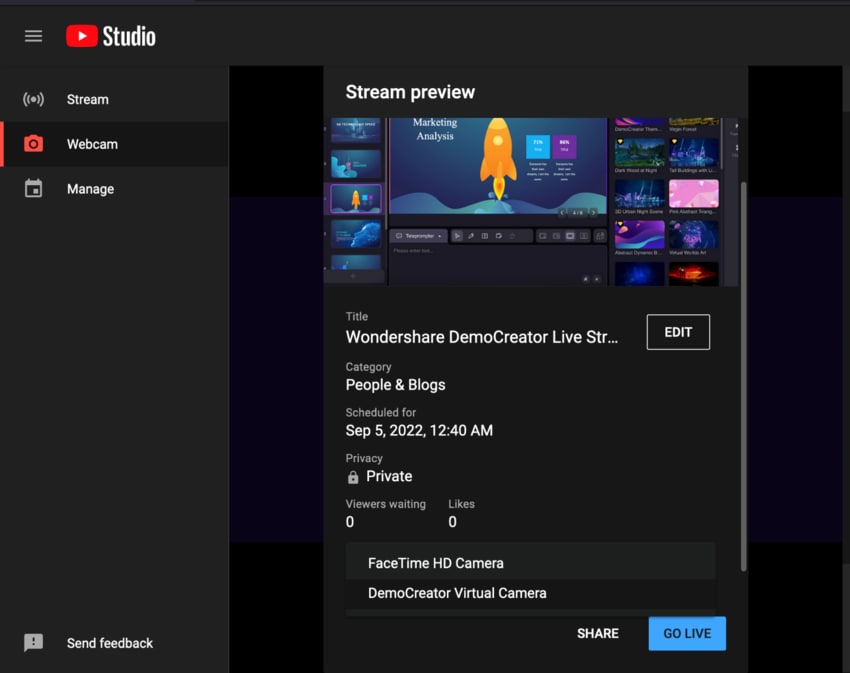
Step 5: Choose "DemoCreator Virtual Camera" from the drop-down menu found in the Stream Preview section. As soon as you select, the updated YouTube version's camera will display the same view as it does in DemoCreator.
