DemoCreator User Guide
How to use Wondershare DemoCreator? Learn the step by step guide below
DemoCreator User Guide
-
Get Started - Mac
-
Video Recording - Mac
-
Video Editing - Mac
-
Keyboard Shortcuts - Mac
-
Audio Recording - Mac
-
DemoCreator Effects - Mac
-
Export & Share - Mac
-
Audio Editing - Mac
-
New Demo Mode - Mac
DemoAir User Guide
-
DemoCreator Cloud Service - Get Started
-
Video Creation Mode
-
Export&Share
FAQs
Thumbnail Maker
Wondershare DemoCreator simplifies the process of creating professional, eye-catching thumbnails for your videos. This guide provides a step-by-step walkthrough, from uploading media to customizing and exporting your thumbnails.
In this guide, you'll learn:
- Accessing the Video Editor
- Uploading and Managing Media
- Exporting to Preview Thumbnails
- Applying and Editing Template
- Finalizing and Exporting Thumbnails
01. Accessing the Video Editor
1. Launch Wondershare DemoCreator on your Mac device.
2. Click on Video Editor from the main menu to access the editing workspace.
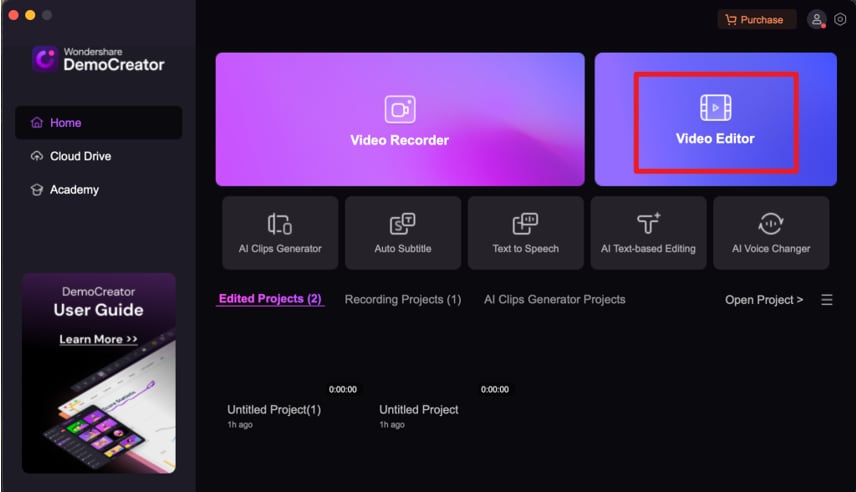
This is your starting point for creating and customizing thumbnails.
02. Uploading and Managing Media
1. Upload Media: Import your video or image files by selecting Upload Media from your device.
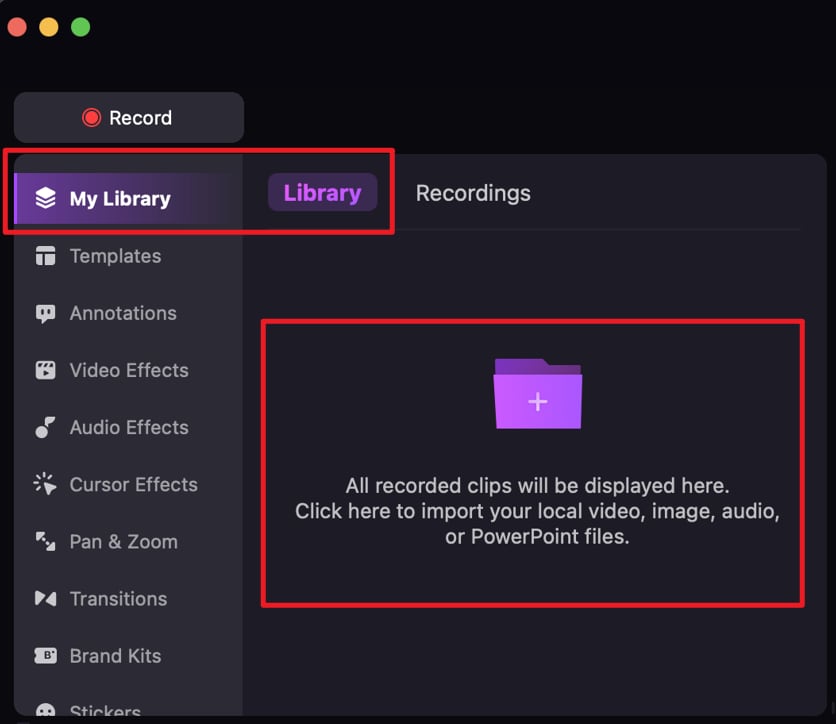
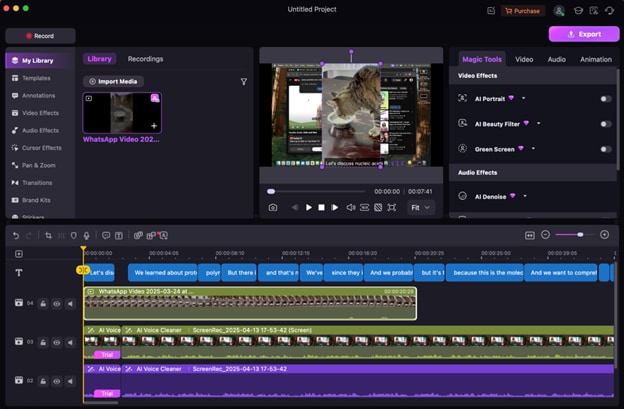
2. Add to Timeline: Click on “+” at the bottom-right corner to add the uploaded file onto the timeline to begin editing.
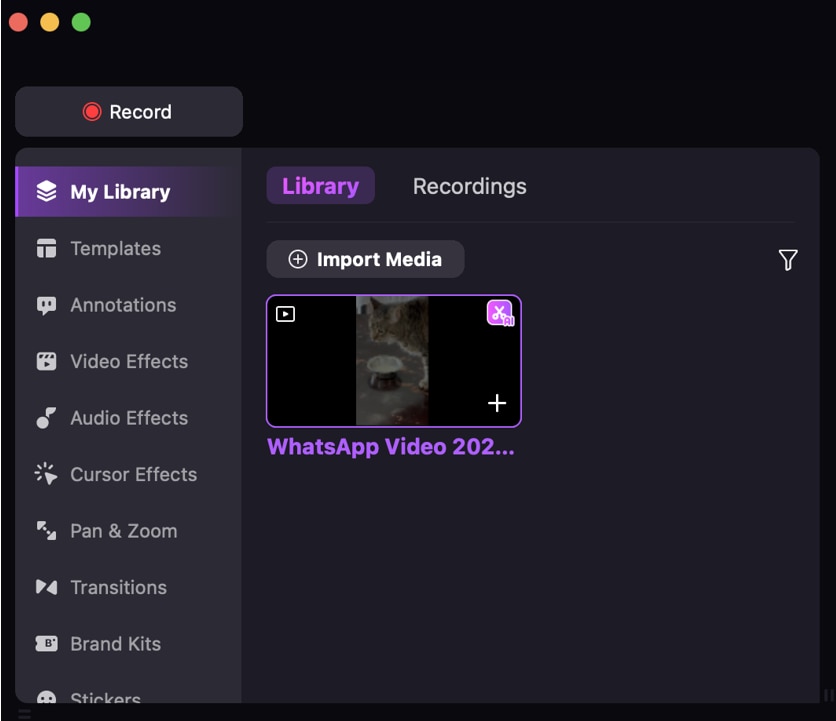

Organizing your media ensures a smooth workflow for thumbnail creation.
03. Exporting to Preview Thumbnails
1. Click on Export from the top toolbar.
2. Under This PC, DemoCreator will automatically generate a preview of thumbnails based on your video content.

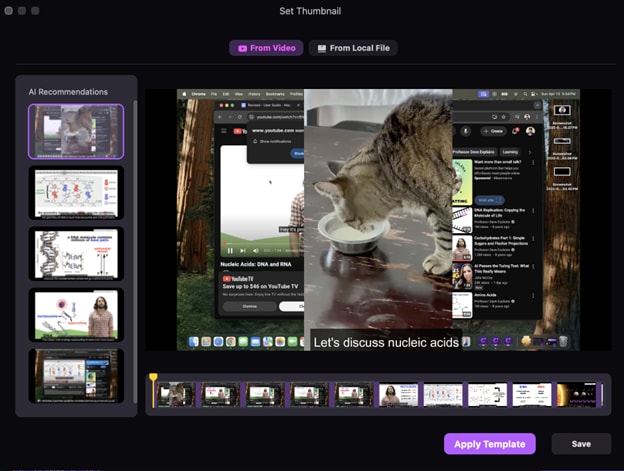
You can choose your favorite thumbnail from the AI recommendations on the left, or upload a pre-prepared cover image.
3. Choose or Upload Thumbnail. You can upload a new thumbnail from your device for a personalized touch.
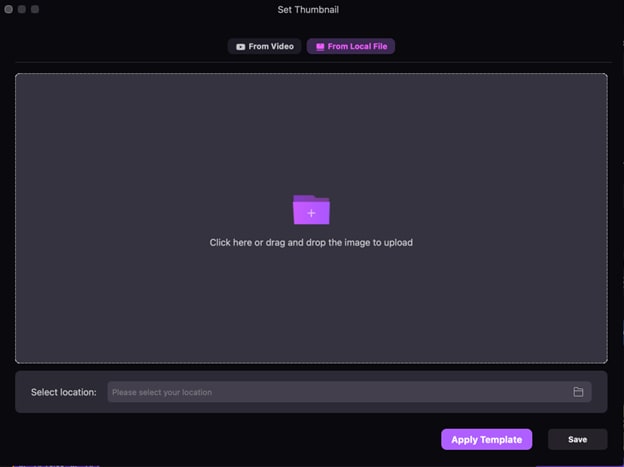
This flexibility lets you pick or create the best visual representation for your video.
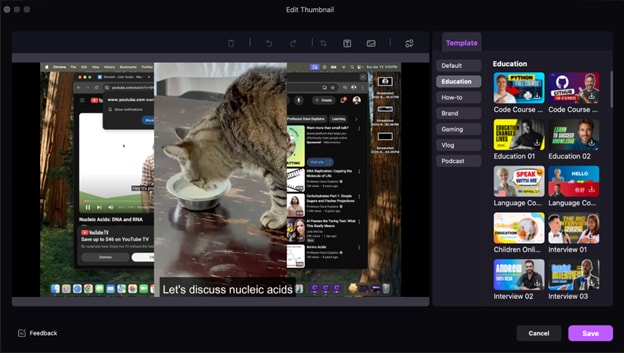
04. Applying and Editing Template
You can customize the Thumbnail.
1. Click “Apply Templates”: Choose from categories such as Education, How-To, Brand, Gaming, Vlog, Podcast, or leave it as default.
2. Preview and Replace: View the applied template and replace it with another if needed.
3. Customize the Thumbnail: Add text and modify font, color, opacity, or borders under the Text Tab.
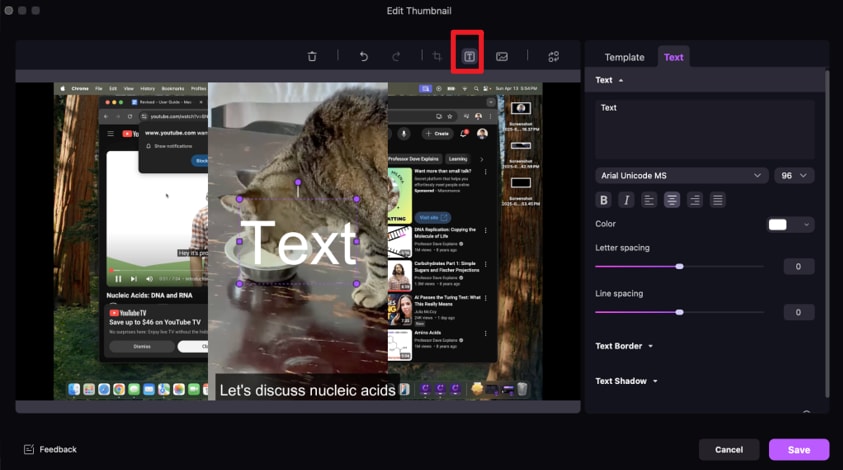
Enhance visuals by cropping, rotating, adding images, or removing the background under the Image Tab.
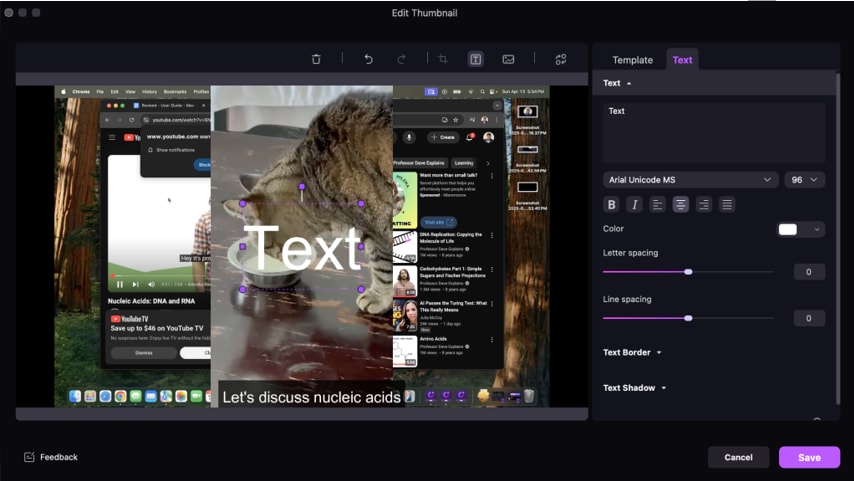
Customization allows you to align your thumbnail with your video’s theme and branding.
05. Finalizing and Exporting Thumbnails
1. Preview Final Thumbnail: Ensure all customizations are satisfactory.
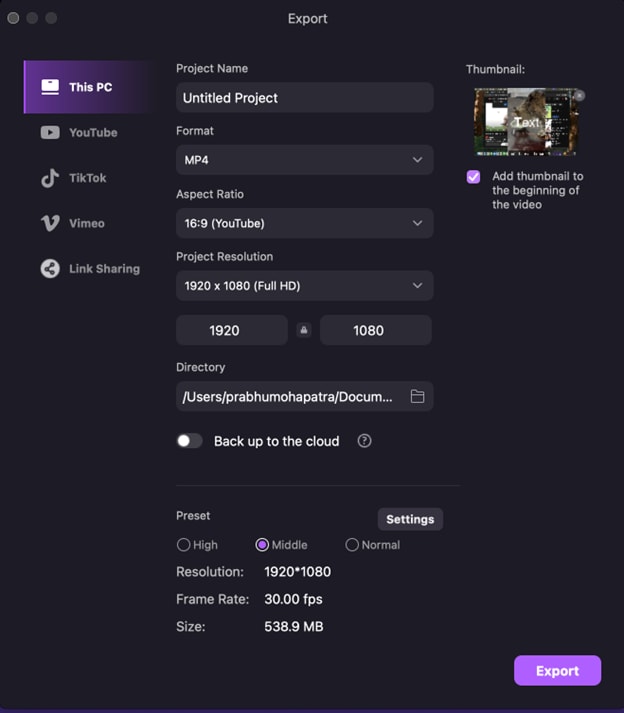
2. Export Options:
Save to your local folder.
Store in the cloud for easy access.

Your thumbnail is now ready to attract viewers and enhance your video’s appeal.

