DemoCreator User Guide
How to use Wondershare DemoCreator? Learn the step by step guide below
DemoCreator User Guide
-
Drawing Tools
-
Install & Uninstall Extension
-
Record Browser Tab
-
Get Started
-
Video Recorder
-
Video Presentation
-
Video Editing
- Import Media
- Basic Video Editing
- PIP (Picture in Picture) Mode
- Transition Effects
- Annotation
- Caption (New Auto-Caption)
- Stickers
- Filters
- AI Text-to-Speech
- AI Object Remover
- AI Vocal Remover
- AI Voice Changer
- AI Beauty Filter
- DemoCreator Templates
- Brand Kits
- Thumbnail Maker
- AI Text-Based Editing
- AI Clips Generator
-
Audio Edit
-
DemoCreator Effects
-
Export & Share
-
Keyboard Shortcuts - Windows
DemoAir User Guide
-
DemoCreator Cloud Service - Get Started
-
Video Creation Mode
-
Export&Share
FAQs
AI Voice Remover
Background noise and other unwanted sounds are enemies to the quality of a video recording, as they disrupt the message you’re conveying. If you notice this while editing your work, video editing software like Wondershare DemoCreator can assist with the sound removal. This intuitive software powers a cutting-edge AI feature called AI Voice Remover which is designed specifically for isolating and removing unwanted sounds from your footage, including background noise.
Using DemoCreator isn’t tough and the guide to follow is given below:
Step 1: Install and Launch Wondershare DemoCreator
Install the Mac version of Wondershare DemoCreator on your device and launch it afterward.
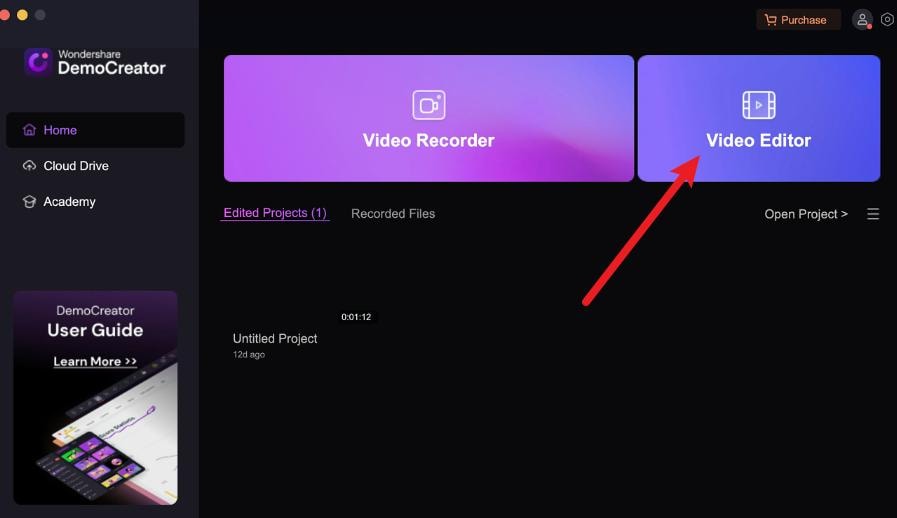
Select Video Editor when the subsequent screen below pops up.
Step 2: Import Your Video File
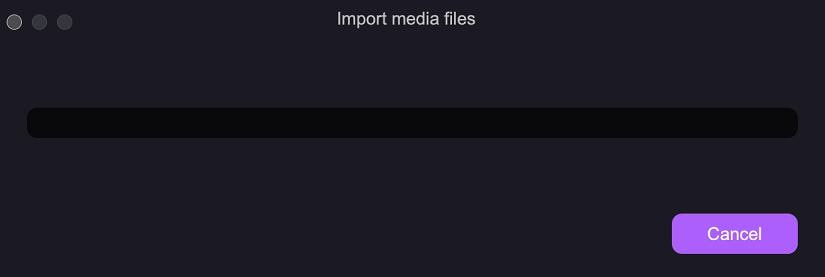
Next, upload the video you want to edit to DemoCreator. To do that, click the + on the display screen, select the video to work on, and hit the Open button to continue.

Step 3: Add Video to the Timeline
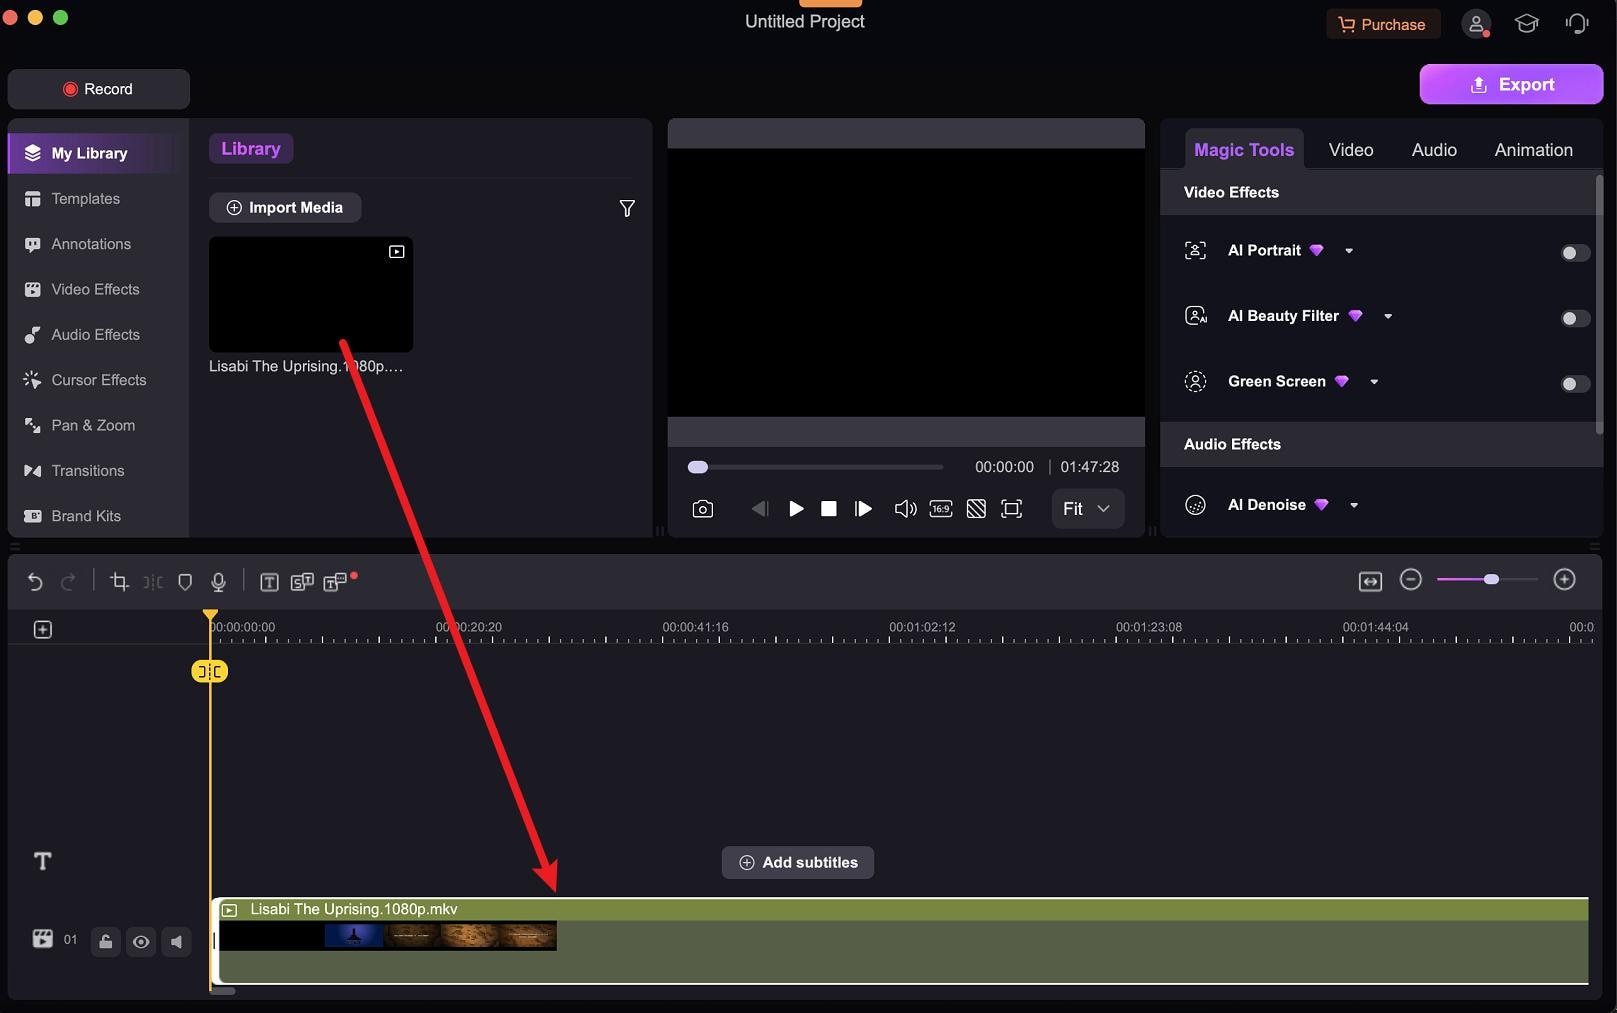
With the help of the drag-and-drop function, move the video to the editing timeline. This should be your final interface for completing this operation.
Step 4: Access Audio Effects
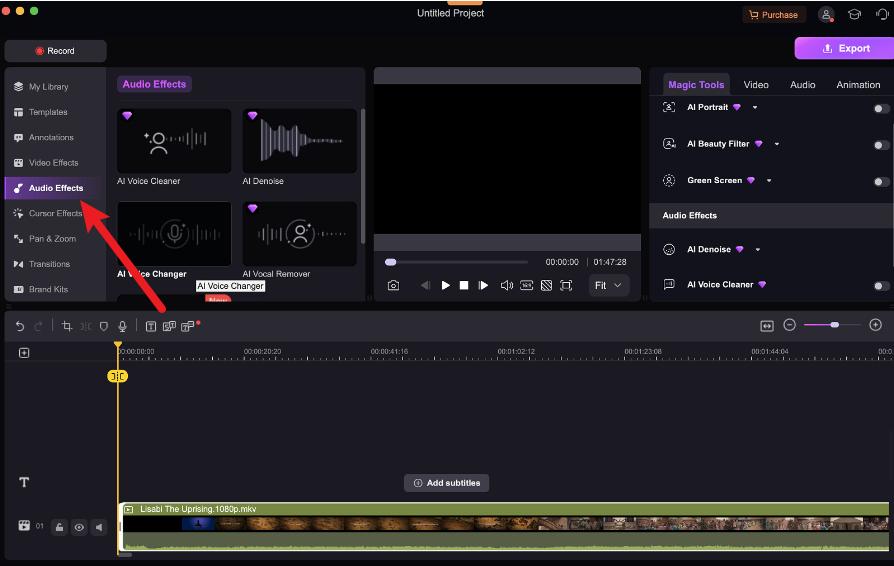
Navigate to the left side of your screen and select Audio Effects to access the AI Voice Remover option.
Step 5: Apply AI Voice Remover
Again, drag the voice remover function to the timeline where you have your video.
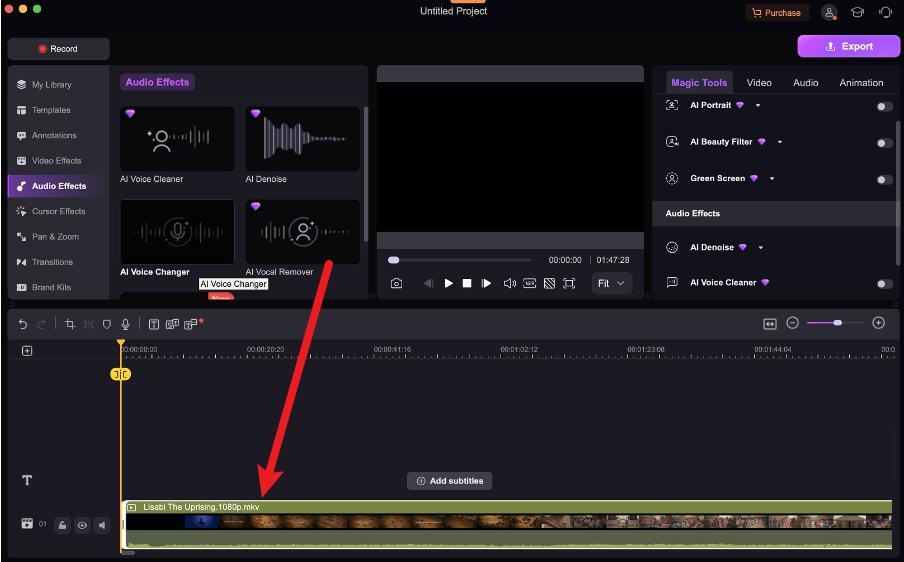
Step 6: Process and Preview Your Audio
DemoCreator will immediately work on the video to remove all unnecessary sounds, including background noise and others disrupting your sound quality.

Step 7: Preview and Export Your Edited Video
Preview the work to confirm all is properly done. Afterward, save your work by clicking on Export in the upper right corner and that’s all.

