DemoCreator User Guide
How to use Wondershare DemoCreator? Learn the step by step guide below
DemoCreator User Guide
-
Drawing Tools
-
Install & Uninstall Extension
-
Record Browser Tab
-
Get Started
-
Video Recorder
-
Video Presentation
-
Video Editing
- Import Media
- Basic Video Editing
- PIP (Picture in Picture) Mode
- Transition Effects
- Annotation
- Caption (New Auto-Caption)
- Stickers
- Filters
- AI Text-to-Speech
- AI Object Remover
- AI Vocal Remover
- AI Voice Changer
- AI Beauty Filter
- DemoCreator Templates
- Brand Kits
- Thumbnail Maker
- AI Text-Based Editing
- AI Clips Generator
-
Audio Edit
-
DemoCreator Effects
-
Export & Share
-
Keyboard Shortcuts - Windows
DemoAir User Guide
-
DemoCreator Cloud Service - Get Started
-
Video Creation Mode
-
Export&Share
FAQs
Screen&Camera Recording
Screen & Camera Recording mode records the screen, system audio, microphone, and camera simultaneously.

 Secure DownloadSecure Download
Index
1. Customize Recording Settings
① Customize Recording Area: Choose to record the full screen, custom region, or social media dimensions.
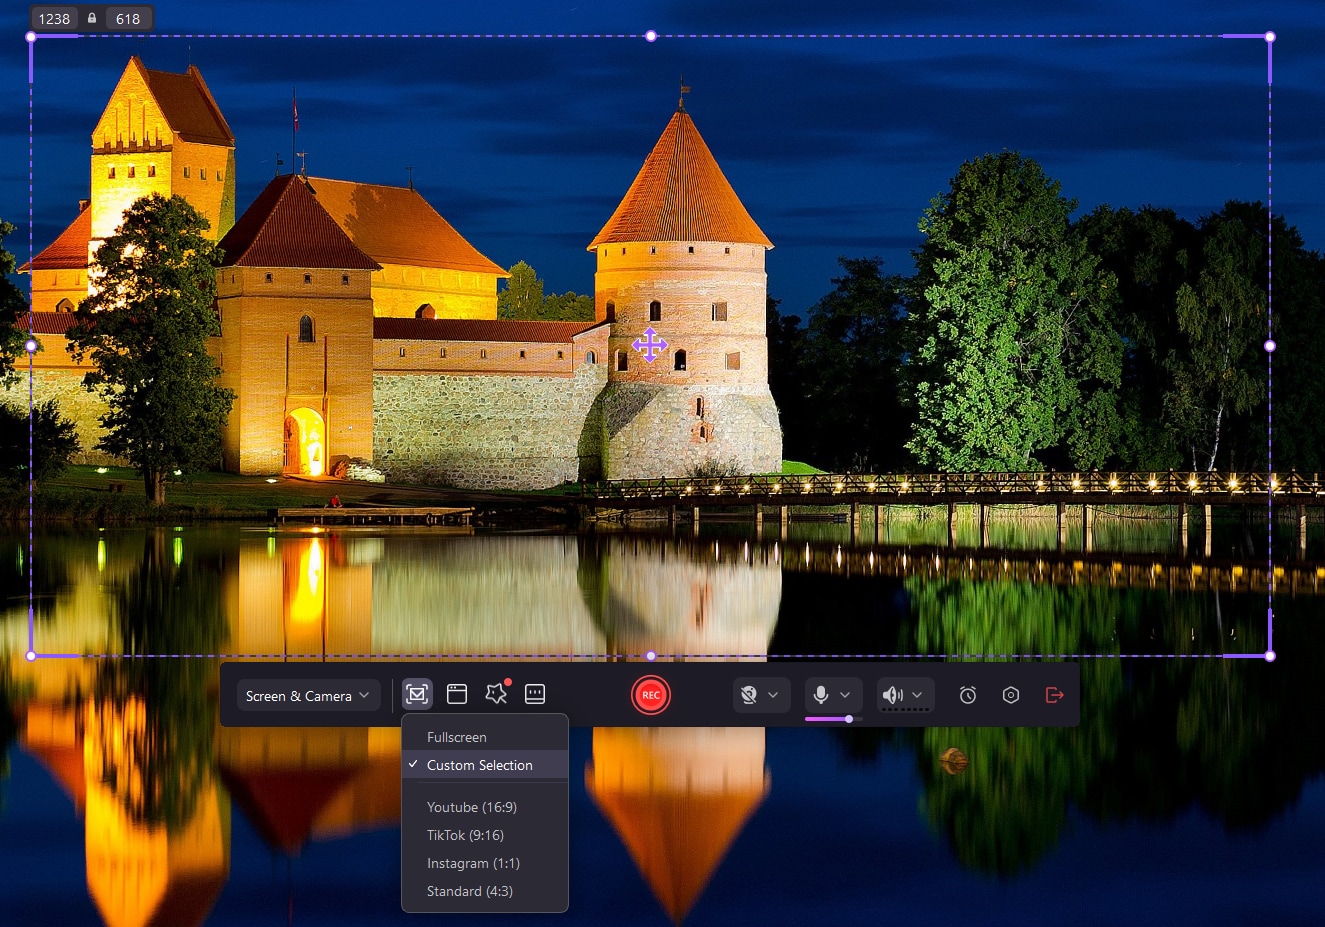
② Set Microphone & Webcam Inputs: Choose other inputs to record along with the screen. Options include webcam, microphone audio, and system audio. Check the link of your system sound, microphone, and camera. Customize the camera and audio to the best condition. And under the camera recording, you are allowed to set up the webcam mirror and the AI face recognition.
③ Window Recordings:It supports recording a selected window, ensuring only the chosen window is captured and nothing outside it.

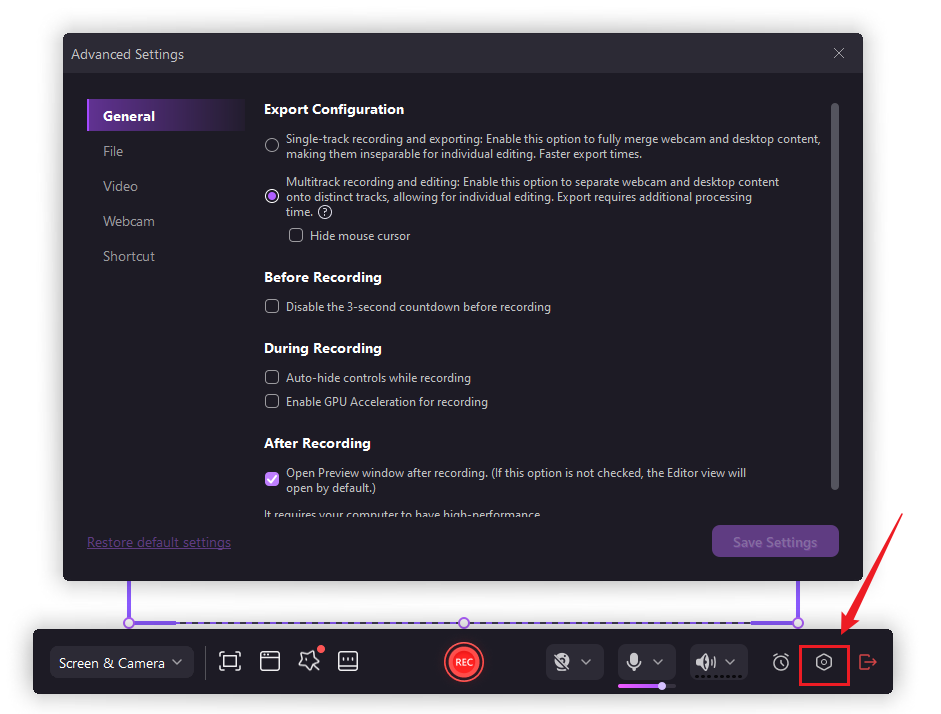
2. Export Configuration
There are 2 export configurations, Fast Merge, and Track Separation
① Fast Merge (Quick Export): Enable this option to merge webcam and desktop content fully, making them inseparable for individual editing. Faster export times.
② Track Separation(Editable Tracks): Enable this option to separate webcam and desktop content onto distinct tracks, allowing for individual editing, Export requires additional processing.
In addition, you can modify your recording presets in settings to make your recording experience more convenient.
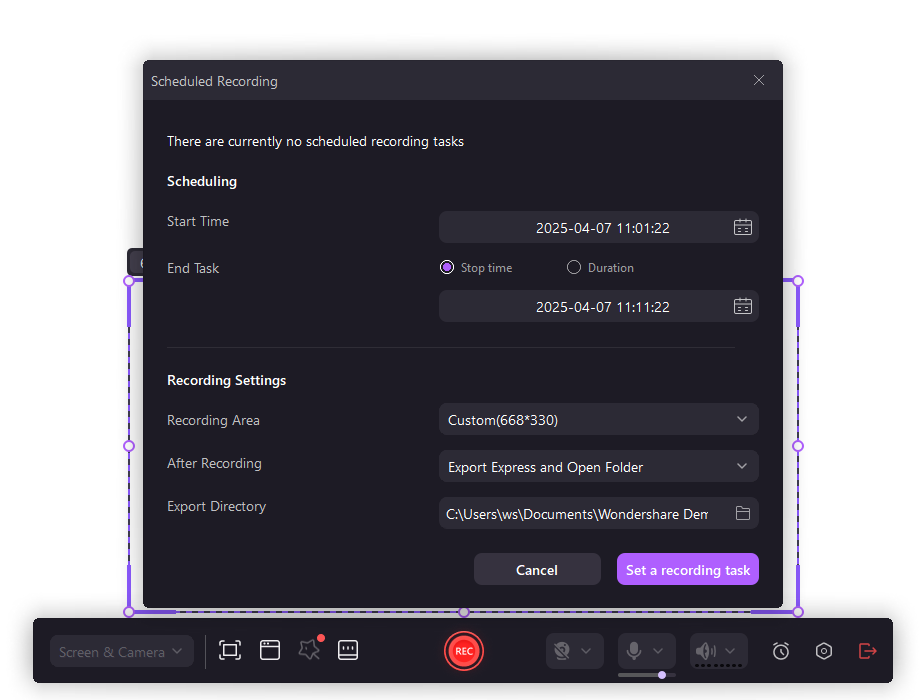
3. Schedule Recording Settings
The completion of Step 2 directs you to the "scheduling" interface, where you will have to work on the actual task by setting the start/end timings of your recordings and making additional adjustments in recording settings. Tap " Save Recording Task" when you are satisfied with the arrangements.
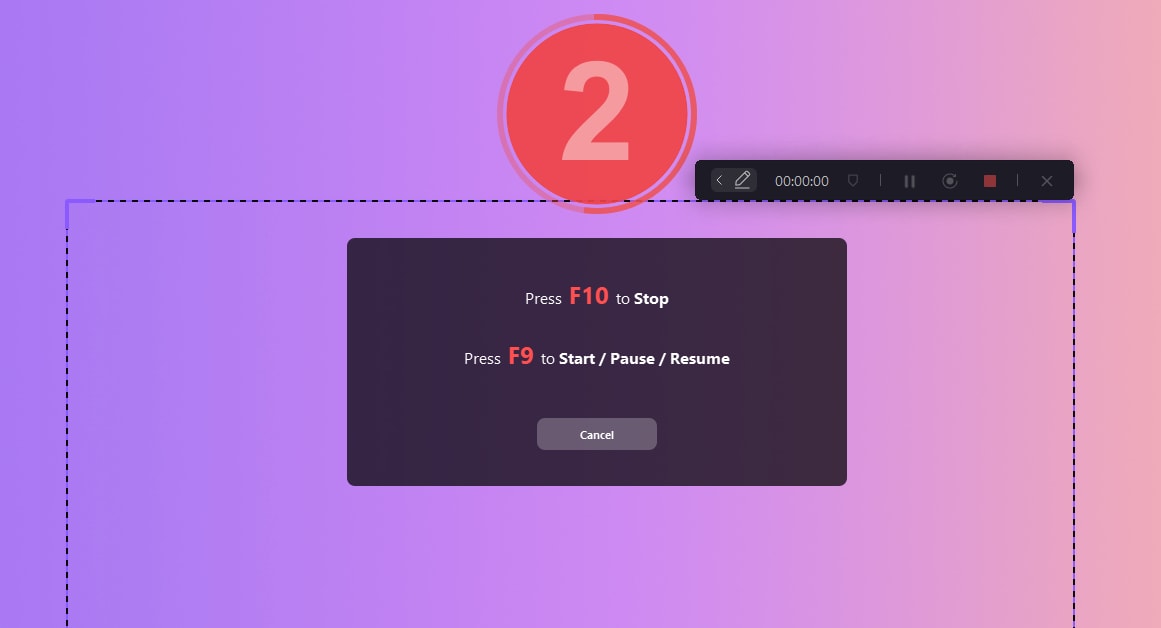
Secure DownloadSecure Download4. Start/Finish Recording
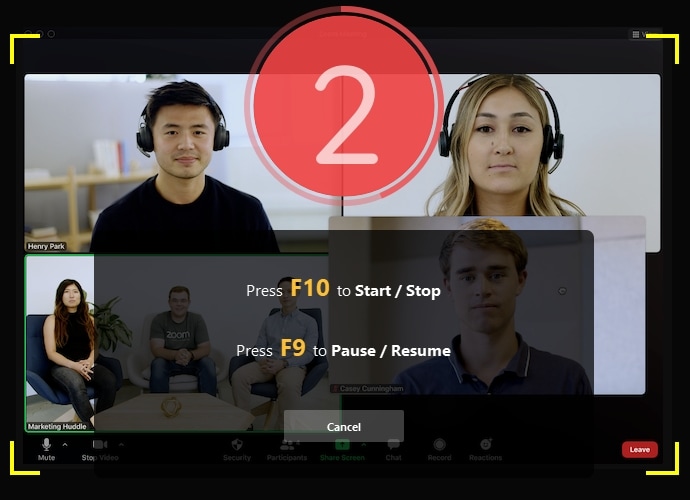
① Start: After you've finished all the settings, click the red "Rec" button or press F9 to start recording.
② Finish/Pause: If you've finished recording, press F10 to stop. Press F9 to pause/resume a recording.
5. Screen Drawing Tool
The Screen Drawing Tool helps you to draw while recording. To open it, press Shift+Ctrl+D. The screen drawing tool contains a pen, Highlight, Spotlight, Whiteboard, Stickers, etc. You can quickly write and highlight while recording.
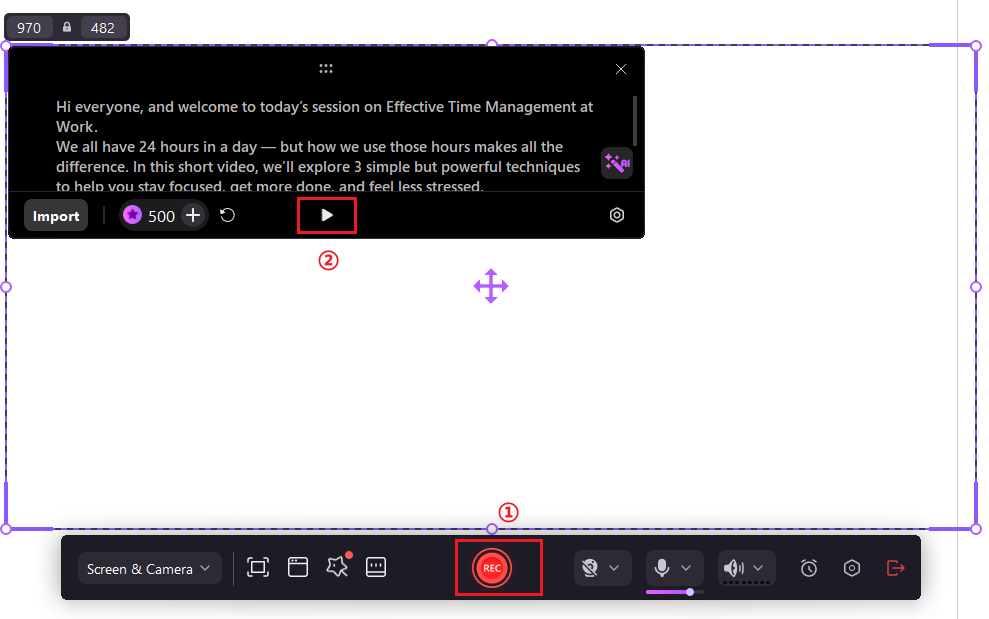
6. Teleprompter
1. First, type your script and preset your script’s color, alignment, play speed, Opacity, and polish style in the setting board. Then, try the AI function to optimize your scripts.
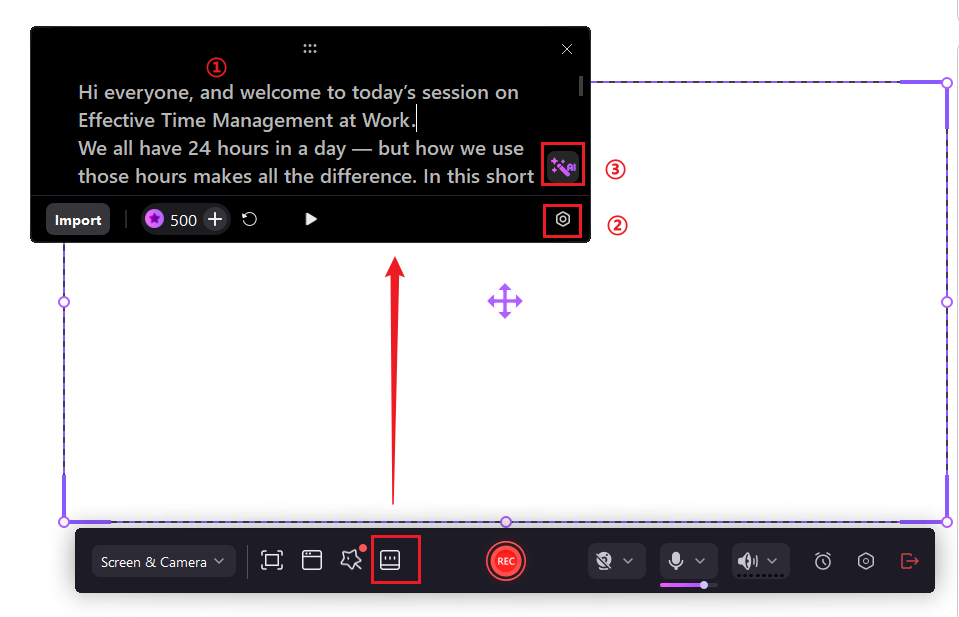
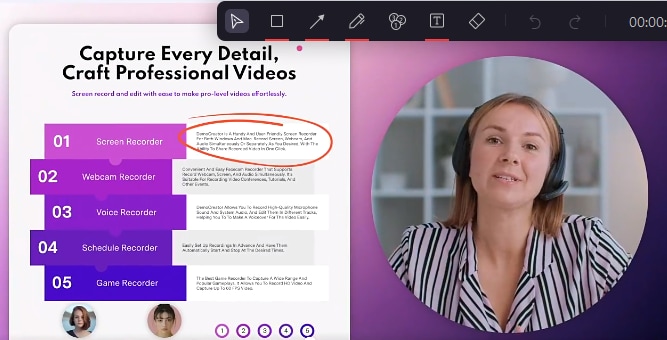
2. Click“REC”, Start Recording, and play teleprompters. Now you can record videos with teleprompters to make your presentation videos more professional
Secure DownloadSecure Download7. Supported Virtual Cameras
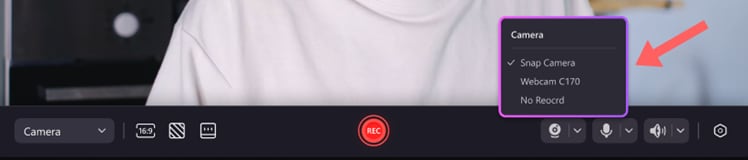
The DemoCreator program supports virtual camera recording, such as OBS, MMHMM, Xplit, Nvidia Broadcast, Snap Camera, and ManyCam. This feature allows you to deliver professional recording videos on any video platform, video conferencing app, and distance learning tool.
To connect the virtual camera, set the third-party virtual camera as webcam input in DemoCreator. Here use Snap Camera as an Example.
Supported virtual cameras
| No. | Type | Software Name | Camera | Screen | Video Quality | Minimize Virtual Camera |
| 1 | Virtual Camera | OBS Studio | Yes | Yes | Normal | Normal |
| 2 | Virtual Camera | Nvidia Broadcast | Yes | Yes | Normal | Normal |
| 3 | Virtual Camera | XSplit VCam | Yes | Yes | Normal | Normal |
| 4 | Virtual Camera | snapcam | Yes | Yes | Normal | Normal |
| 5 | Virtual Camera | CyberLink YouCam | Yes | Yes | / | Normal |
| 6 | Virtual Camera | CamTwist(Mac) | Yes | Yes | Normal | Normal |
| 7 | Virtual Camera | Lightstream Studio | Yes | Yes | Normal | Normal |
| 8 | Virtual Camera | Streamlabs obs | No | / | / | / |
| 10 | Virtual Camera | EV Virtual Camera | No | / | / | / |
| 11 | Video Recorder | mmhmm | Yes | Yes | Normal | Normal |
| 12 | Video Maker | Soom | Yes | Yes | Normal | / |
| 13 | Video Maker | Prezi video | Yes | Yes | Normal | Normal |
| 14 | Video Recorder | ManyCam | Yes | Yes | Normal | Normal |
| 16 | Video Recorder | SplitCam | Yes | Yes | Normal | Normal |
| 17 | Streaming Program | casttingo | Yes | Yes | Normal | Normal |
8. How to Record Zoom Meeting
Step 1. First, check if your system sound is the same as the selected zoom output sound.
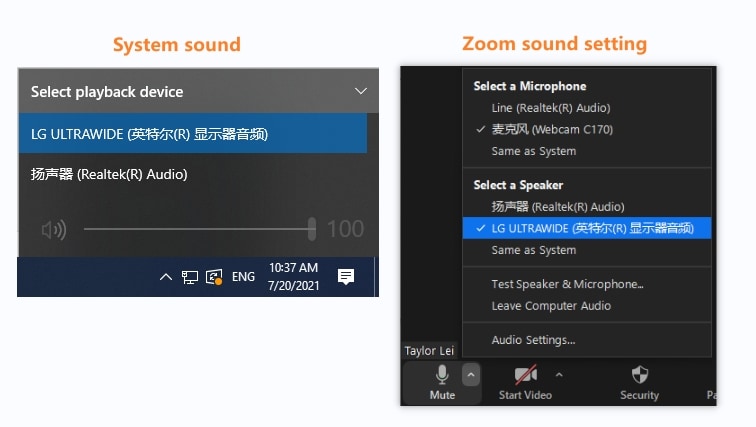
Step 2. Launch DemoCreator, and select Video Recorder. Change the recording area to record the Zoom meeting. Then click the red button or press F10 to start recording.
Step 3. When you’ve finished the recording, then it will automatically switch to the video editor panel. You can preview your recording in the preview window before exporting.
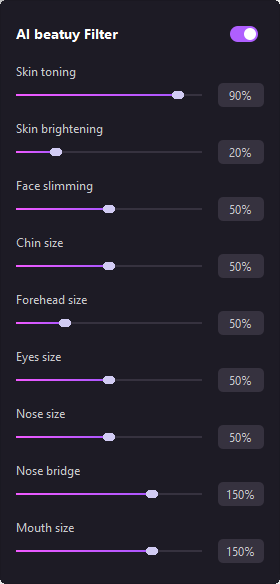
9. AI Beauty Filter
Our AI Beauty Filter can enhance your appearance for more stunning social media presence.
Step 1. Click the icon below on the float panel under the camera to enable AI Beauty Filter.
![]()
Step 2. There are many setting items that you can adjust to elevate your appearance, including skin toning, skin brightening, face slimming, chin size, forehead size, eye size, nose size, etc.
Step 3. When you’ve finished the recording, then it will automatically switch to the video editor panel. You can preview your recording in the preview window before exporting.
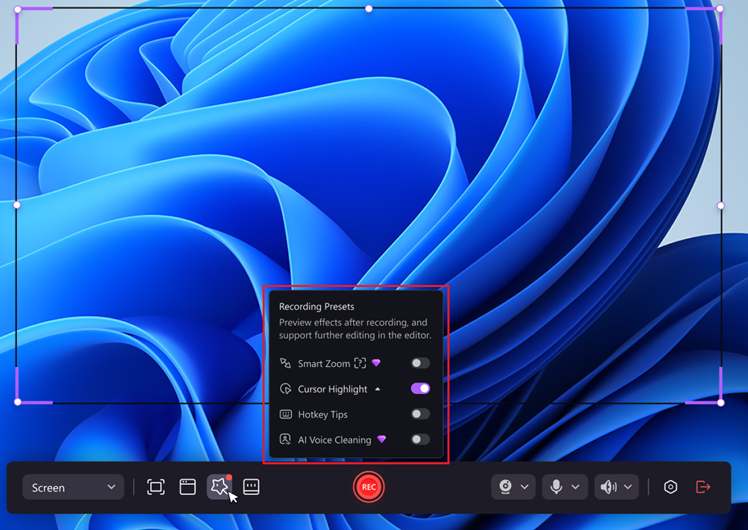
10. Magic Tool
Before recording, you can enable Smart Zoom, Cursor Highlight, AI Voice Cleaner, and Hotkey Tips. After recording, the video will automatically apply the configured tool effects.
11. AI Voice Cleaning
The AI Voice Cleaning feature helps you reduce background noises like the sounds of wind, cars, people, etc., and enhance the quality of your own voice. Leverage the power of AI to elevate the viewing experience with audio that is clean, pure, and professional. Follow these steps to enable this feature:
Step 1. Click the “Magic Tools” icon at the control panel in the Screen & Camera mode. Then enable the feature before recording.
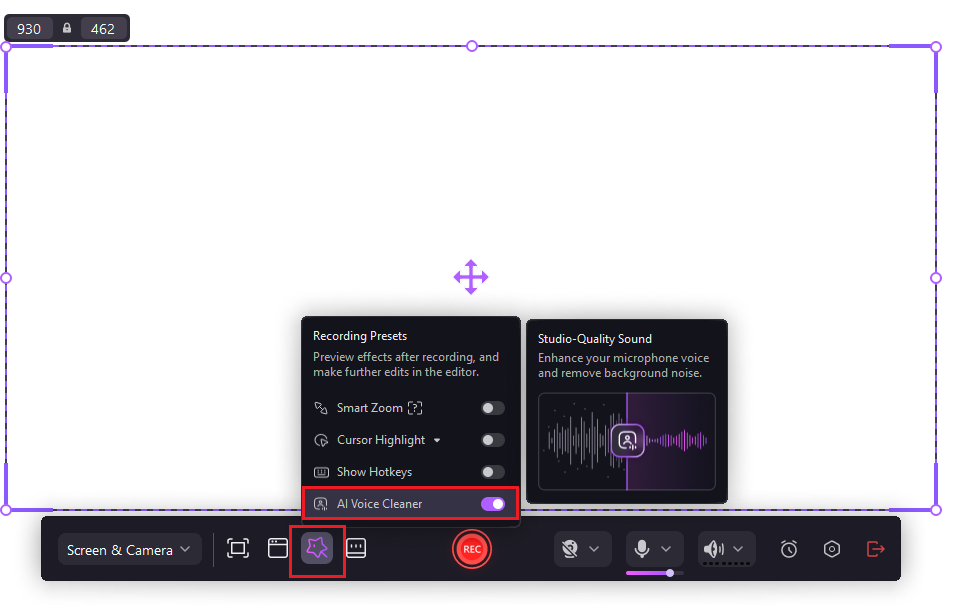
Step 2. Click the “Magic Tools” icon at the control panel in the Screen & Camera mode. Then enable the feature before recording.
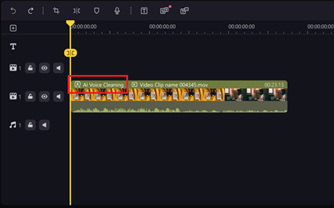
Step 3. Once you’ve finished the recording, you can adjust the noise reduction level at the control panel in DemoCreator’s video editor.
12. Cursor Highlight
Now you can enable the Cursor Highlight feature to catch your viewers’ attention before recording. No need to add cursor effects to your videos during post-editing. Follow these steps to record training videos easily:
Step 1. Click the “Magic Tools” icon at the control panel in the Screen & Camera mode. Enable the Cursor Highlight feature and select a proper color.
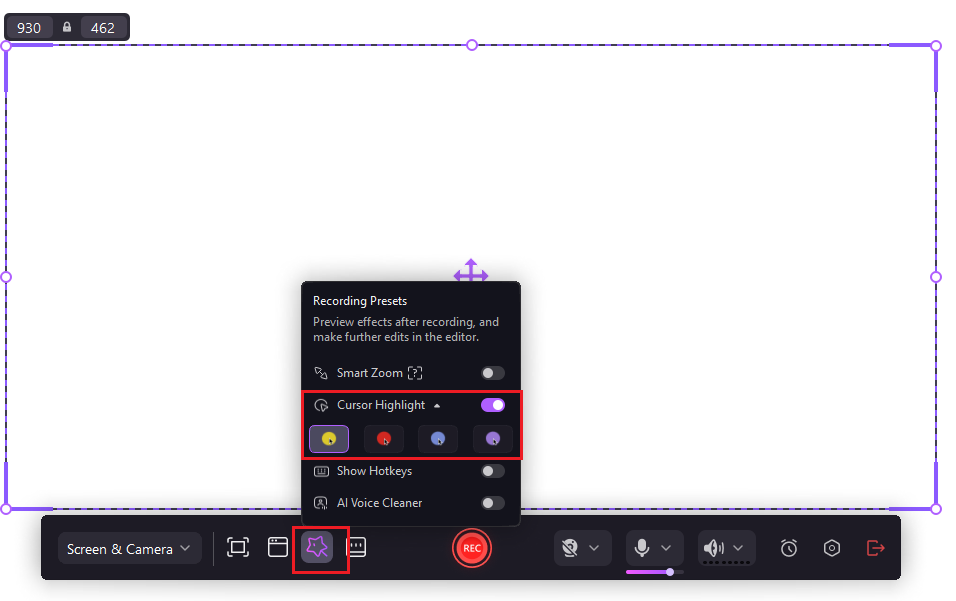
Step 2. Click “REC” to start recording.
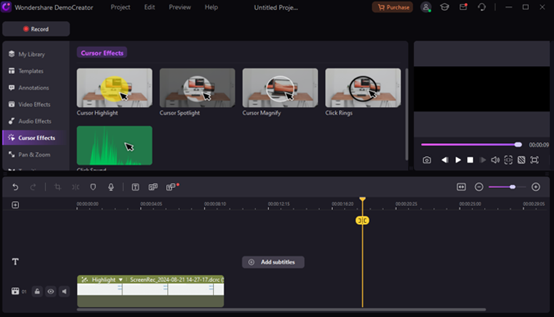
Step 3. Once you’ve finished recording, the selected cursor effect will be added to your video automatically. You can adjust relevant settings at the control panel in DemoCreator’s video editor.
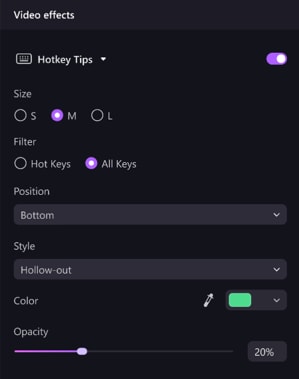
13. Hotkeys Tips
Now you can enable the Hotkeys Tips feature before recording in the Screen & Camera mode. Automatically display and highlight the hotkeys you use in your software training videos to facilitate understanding. Follow these steps to experience this convenient feature:
Step 1. Click the “Magic Tools” icon at the control panel in the Screen & Camera mode. Then enable the Hotkeys Tips feature.
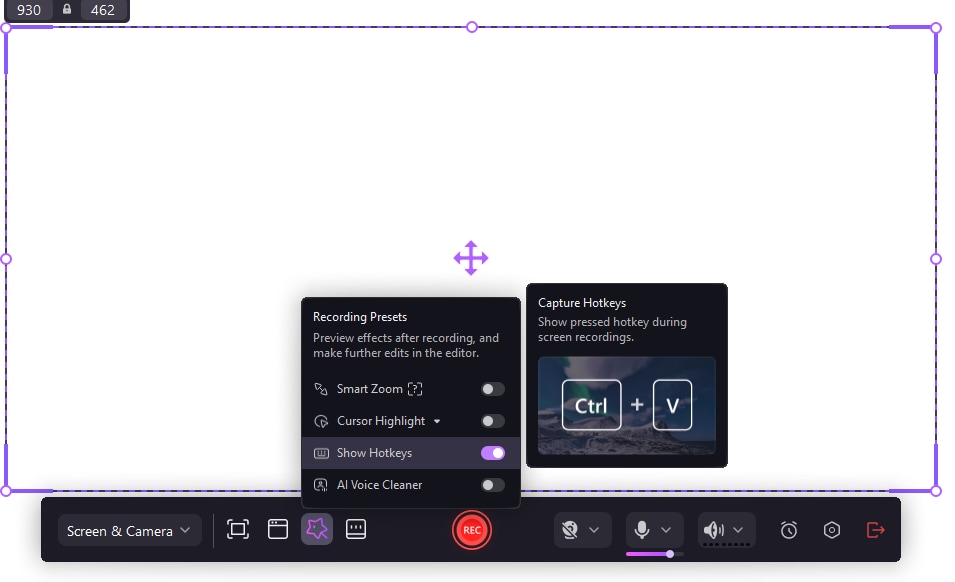
Step 2. Click “REC” to start recording.
Step 3. After recording, hotkey tips are added to your videos automatically. You can adjust relevant settings at the control panel in DemoCreator’s video editor.
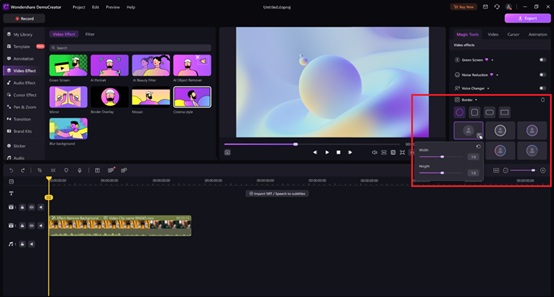
14. Camera Border
When you record your camera, you can add a camera border to elevate your presence. It’s especially useful for creating training and knowledge-sharing videos where your delivery can benefit from your image. Here are the steps to enable this feature:
Step 1. Turn on your camera and click the “Circle” or “Rectangular” icon at the floating panel to select a camera border.
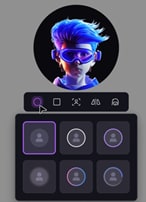
Step 2. Click “REC” to start recording.
Step 3. After recording, you can modify the camera border and adjust relevant settings as needed in DemoCreator’s video editor.
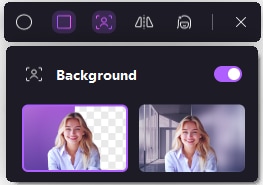
15. AI Portrait and Blur Background Features
AI Portrait removes your camera background in real time, while Blur Background instantly blurs the camera backdrop with a single click.
Secure DownloadSecure Download
