DemoCreator User Guide
How to use Wondershare DemoCreator? Learn the step by step guide below
DemoCreator User Guide
-
Drawing Tools
-
Install & Uninstall Extension
-
Record Browser Tab
-
Get Started
-
Video Recorder
-
Video Presentation
-
Video Editing
- Import Media
- Basic Video Editing
- PIP (Picture in Picture) Mode
- Transition Effects
- Annotation
- Caption (New Auto-Caption)
- Stickers
- Filters
- AI Text-to-Speech
- AI Object Remover
- AI Vocal Remover
- AI Voice Changer
- AI Beauty Filter
- DemoCreator Templates
- Brand Kits
- Thumbnail Maker
- AI Text-Based Editing
- AI Clips Generator
-
Audio Edit
-
DemoCreator Effects
-
Export & Share
-
Keyboard Shortcuts - Windows
DemoAir User Guide
-
DemoCreator Cloud Service - Get Started
-
Video Creation Mode
-
Export&Share
FAQs
Cursor Effects
The cursor effect is here to improve visibility and focus for all or part of a screen recording. With Cursor Effects, you can make your cursor stand out using highlights, spotlight, magnify, click rings, and click sound, which are especially useful if you are making tutorials and other educational videos.
 Secure DownloadSecure Download
Index
1. Recording with Cursor Effects
DemoCreator 8 has further enhanced the Cursor Effect feature, making it easier and more customizable than ever before to highlight and emphasize the cursor during your screen recordings.
Step-by-Step Guide to Adding Transition Effects in DemoCreator
Step 1: Open Wondershare DemoCreator and click the Video Recorder to select the Screen recording mode.

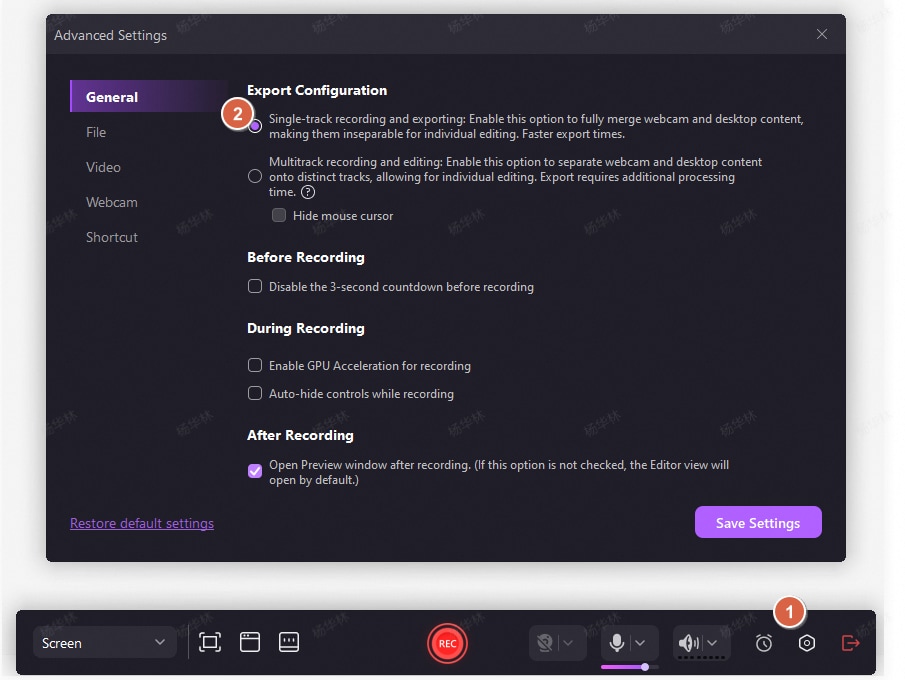
Step 2: Click the Settings icon and set up the export configuration to Single-track recording and exporting under the General tab. Click Save Settings to apply and save your changes.
Step 3: Click the REC icon to start recording. In the top-right corner, you’ll see the toolbar. Click the arrow icon to expand the options, and then select your preferred cursor effect, either the Highlight Cursor Effect or the Click Cursor Effect.
Note: The cursor effect applied during recording cannot be edited, deleted or hidden in the DemoCreator video editor.
2. Add Cursor Effects in Editing
DemoCreator also allows you to record the screen and cursor data separately, and then add the cursor effects during editing.
Step-by-Step Guide to Adding Cursor Effects After Recording
Step 1: In the Screen recording mode, click the Settings icon and set up the export configuration to Multitrack recording and editing and then start the recording as usual.
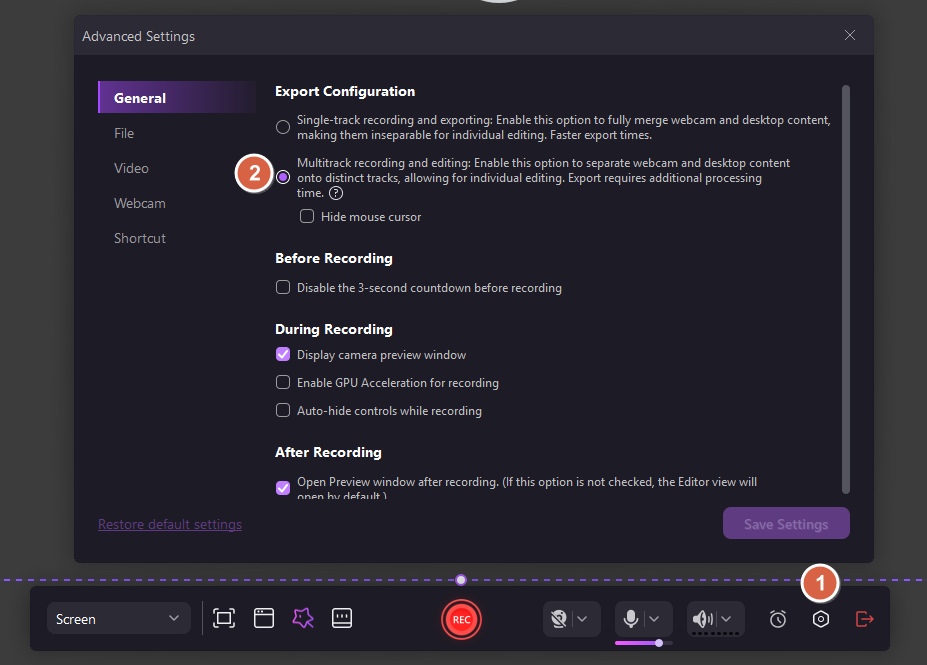
Step 2: Import the recorded videos to the timeline and locate the clip that you need the cursor effect.
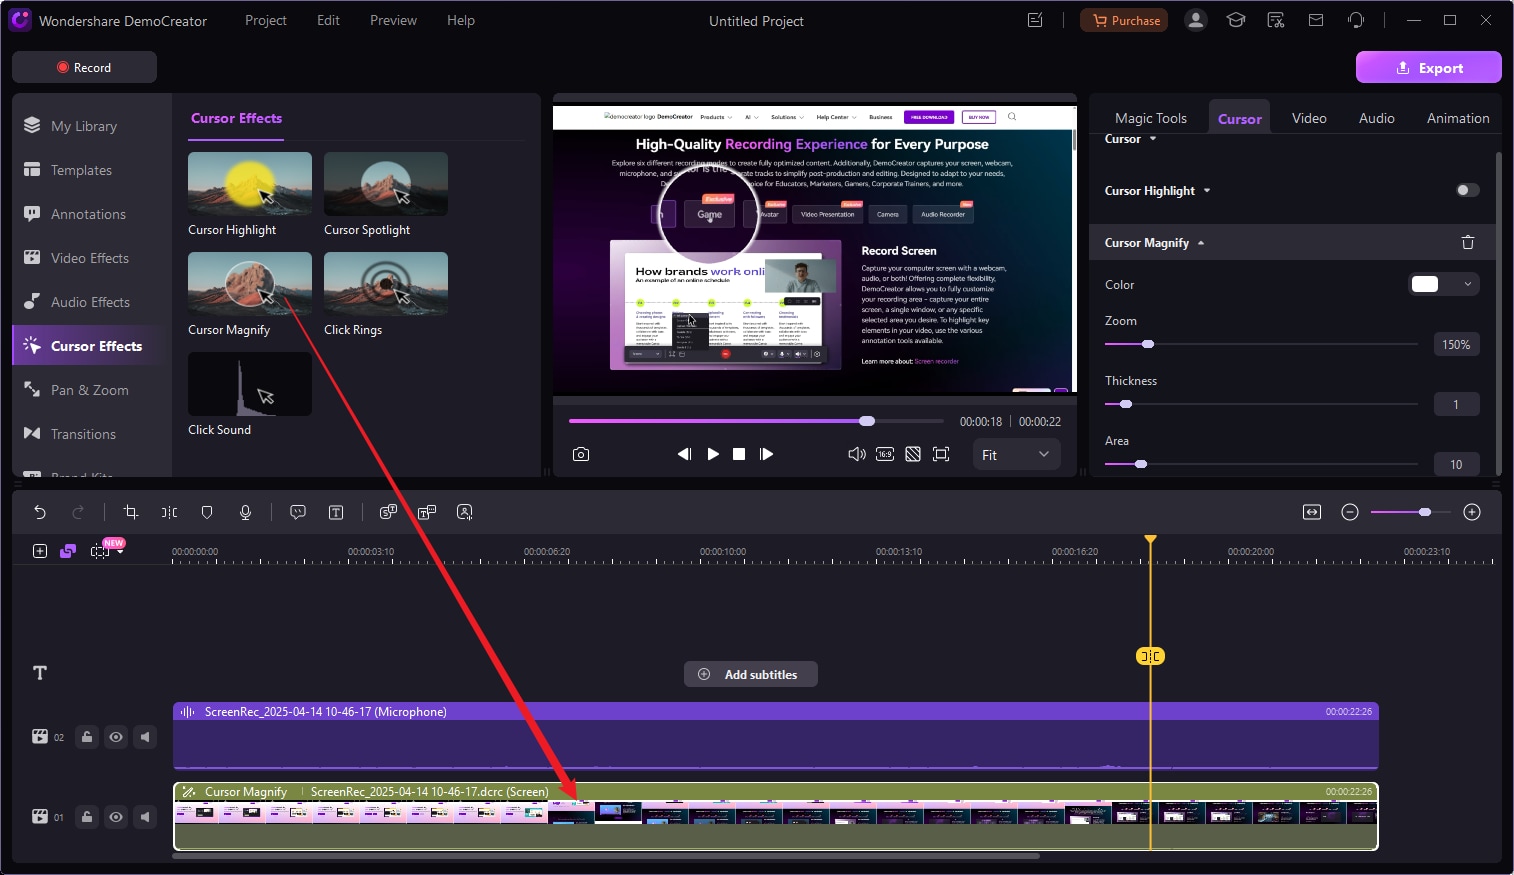
Step 3: In the left-side toolbar, find and click on the Cursor Effects tab. This will open a library of available cursor effects, including Cursor Highlight, Cursor Spotlight, Cursor Magnify, Click Rings and Click Sound.

Step 4: Browse through the available cursor effects, drag and drop the selected one onto the timeline, aligning it with the specific area where you want the effect to appear. You can preview the effect on the preview window.
Note: You can only apply cursor effect to videos recorded with DemoCreator, and the Export and Configuration settings should be Multitrack recording and editing.
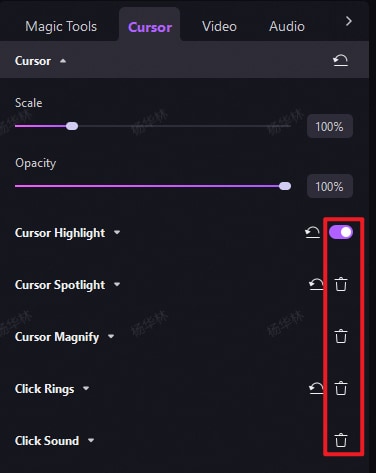
3. Adjust Cursor Effects in Editing
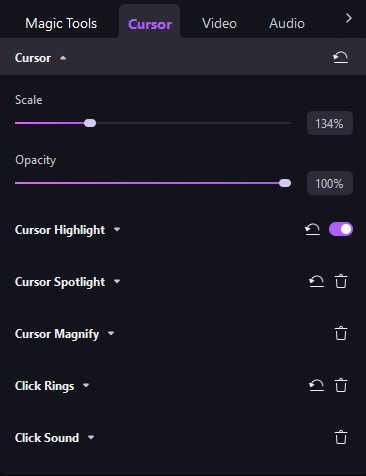
Adjust the cursor settings under the "Cursor" tab in the Properties Window. In this tab, you can use the scale slider to change the size of your cursor. Also, you can change the highlight color for your reference.
4. Hide Cursor Effect
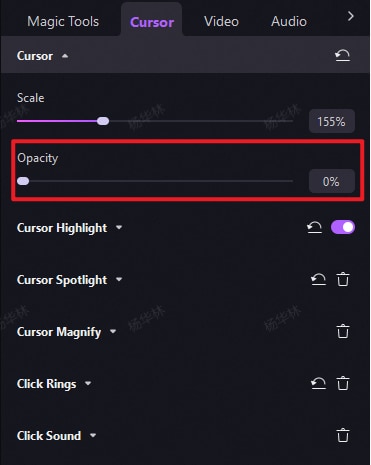
If you want to hide the Cursor, change the Opacity setting to zero under the Cursor tab.
5. Delete Cursor Effects
To delete a cursor effect, select the clip in the timeline and then go to the Cursor tab in the right menu. Depending on the effect, either click the trash icon to remove it or toggle it off.