DemoCreator User Guide
How to use Wondershare DemoCreator? Learn the step by step guide below
DemoCreator User Guide
-
Drawing Tools
-
Install & Uninstall Extension
-
Record Browser Tab
-
Get Started
-
Video Recorder
-
Video Presentation
-
Video Editing
- Import Media
- Basic Video Editing
- PIP (Picture in Picture) Mode
- Transition Effects
- Annotation
- Caption (New Auto-Caption)
- Stickers
- Filters
- AI Text-to-Speech
- AI Object Remover
- AI Vocal Remover
- AI Voice Changer
- AI Beauty Filter
- DemoCreator Templates
- Brand Kits
- Thumbnail Maker
- AI Text-Based Editing
- AI Clips Generator
-
Audio Edit
-
DemoCreator Effects
-
Export & Share
-
Keyboard Shortcuts - Windows
DemoAir User Guide
-
DemoCreator Cloud Service - Get Started
-
Video Creation Mode
-
Export&Share
FAQs
Game Recording
Step 1. Start Game Recorder Feature
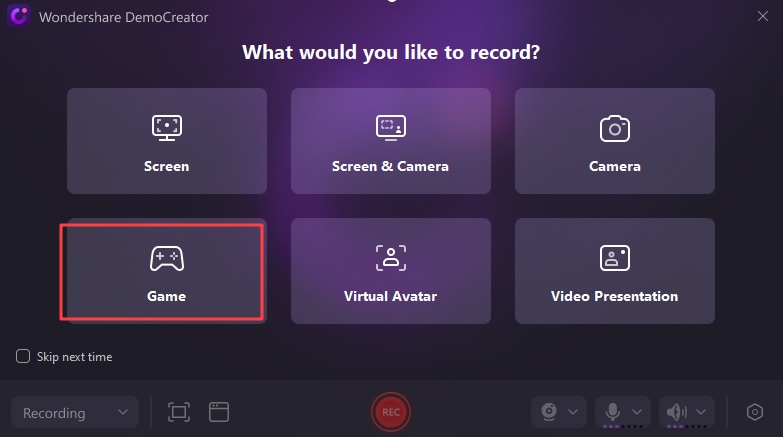
Launch DemoCreator, and select Video Recorder-Game Recording. Game recording mode lets you simultaneously record the game screen, audio, and camera. Capture the excellent moment in the game.

Step 2. Customize Recording Settings
![]()
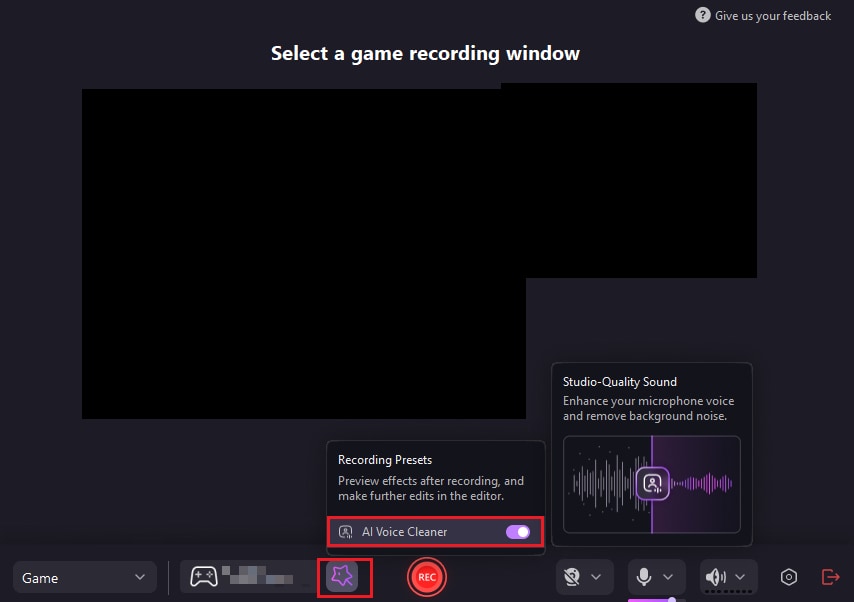
1. Select a game: First choose a game to record. Please mind that the game should be opened first.
2. Set webcam and microphone: Choose other inputs to record along with the screen. Options include webcam, microphone audio and system audio. Check the link of your system sound, microphone, and camera. Customize the camera and audio to the best condition.
3. Enable AI voice cleaning: The AI Voice Cleaning feature helps you reduce background noises like the sounds of wind, cars, people, etc., and enhance the quality of your own voice. Leverage the power of AI to elevate the viewing experience with audio that is clean, pure, and professional. Click the “Magic Tools” icon at the control panel in the Game mode to enable the feature before recording.


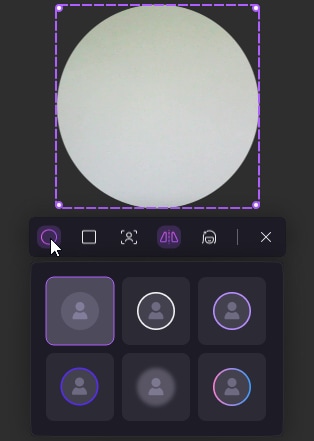
4. Add a camera border: When you record your camera, you can add a camera border to elevate your presence. Show your fans how you react to those heart-stopping boss fights in a stunning way. Turn on your camera and click the “Circle” or “Rectangular” icon at the floating panel to select a camera border.

5. Start recording: Click the red "REC" button or press F9 to start recording.
Step 3. Finish Recording
When you've finished recording, click the DemoCreator Recorder in the taskbar, then the end recording button.
Quick Tips: Press F10 to stop a recording, and F9 to start/pause/resume a recording.

 Secure Download
 Secure Download
