DemoCreator User Guide
How to use Wondershare DemoCreator? Learn the step by step guide below
DemoCreator User Guide
-
Drawing Tools
-
Install & Uninstall Extension
-
Record Browser Tab
-
Get Started
-
Video Recorder
-
Video Presentation
-
Video Editing
- Import Media
- Basic Video Editing
- PIP (Picture in Picture) Mode
- Transition Effects
- Annotation
- Caption (New Auto-Caption)
- Stickers
- Filters
- AI Text-to-Speech
- AI Object Remover
- AI Vocal Remover
- AI Voice Changer
- AI Beauty Filter
- DemoCreator Templates
- Brand Kits
- Thumbnail Maker
- AI Text-Based Editing
- AI Clips Generator
-
Audio Edit
-
DemoCreator Effects
-
Export & Share
-
Keyboard Shortcuts - Windows
DemoAir User Guide
-
DemoCreator Cloud Service - Get Started
-
Video Creation Mode
-
Export&Share
FAQs
Zoom In to Focus Attention
This intelligent functionality automatically adds zoom effects to your videos by recognizing key areas based on the speaker's actions. By reducing the need for manual tagging, enhances efficiency and highlights important content, making your presentations more engaging and impactful. Experience seamless video editing with Smart Zoom today!
1. Apply Zoom Effect
In Screen & Camera mode, click the Magic Tool in the recording panel and enable the Smart Zoom toggle in the floating panel. (Note: The Magic Tool is only available in multi-track recording.

Click "Start Recording," then record your screen as needed. Once you have finished recording, click "Stop Recording.

![]()
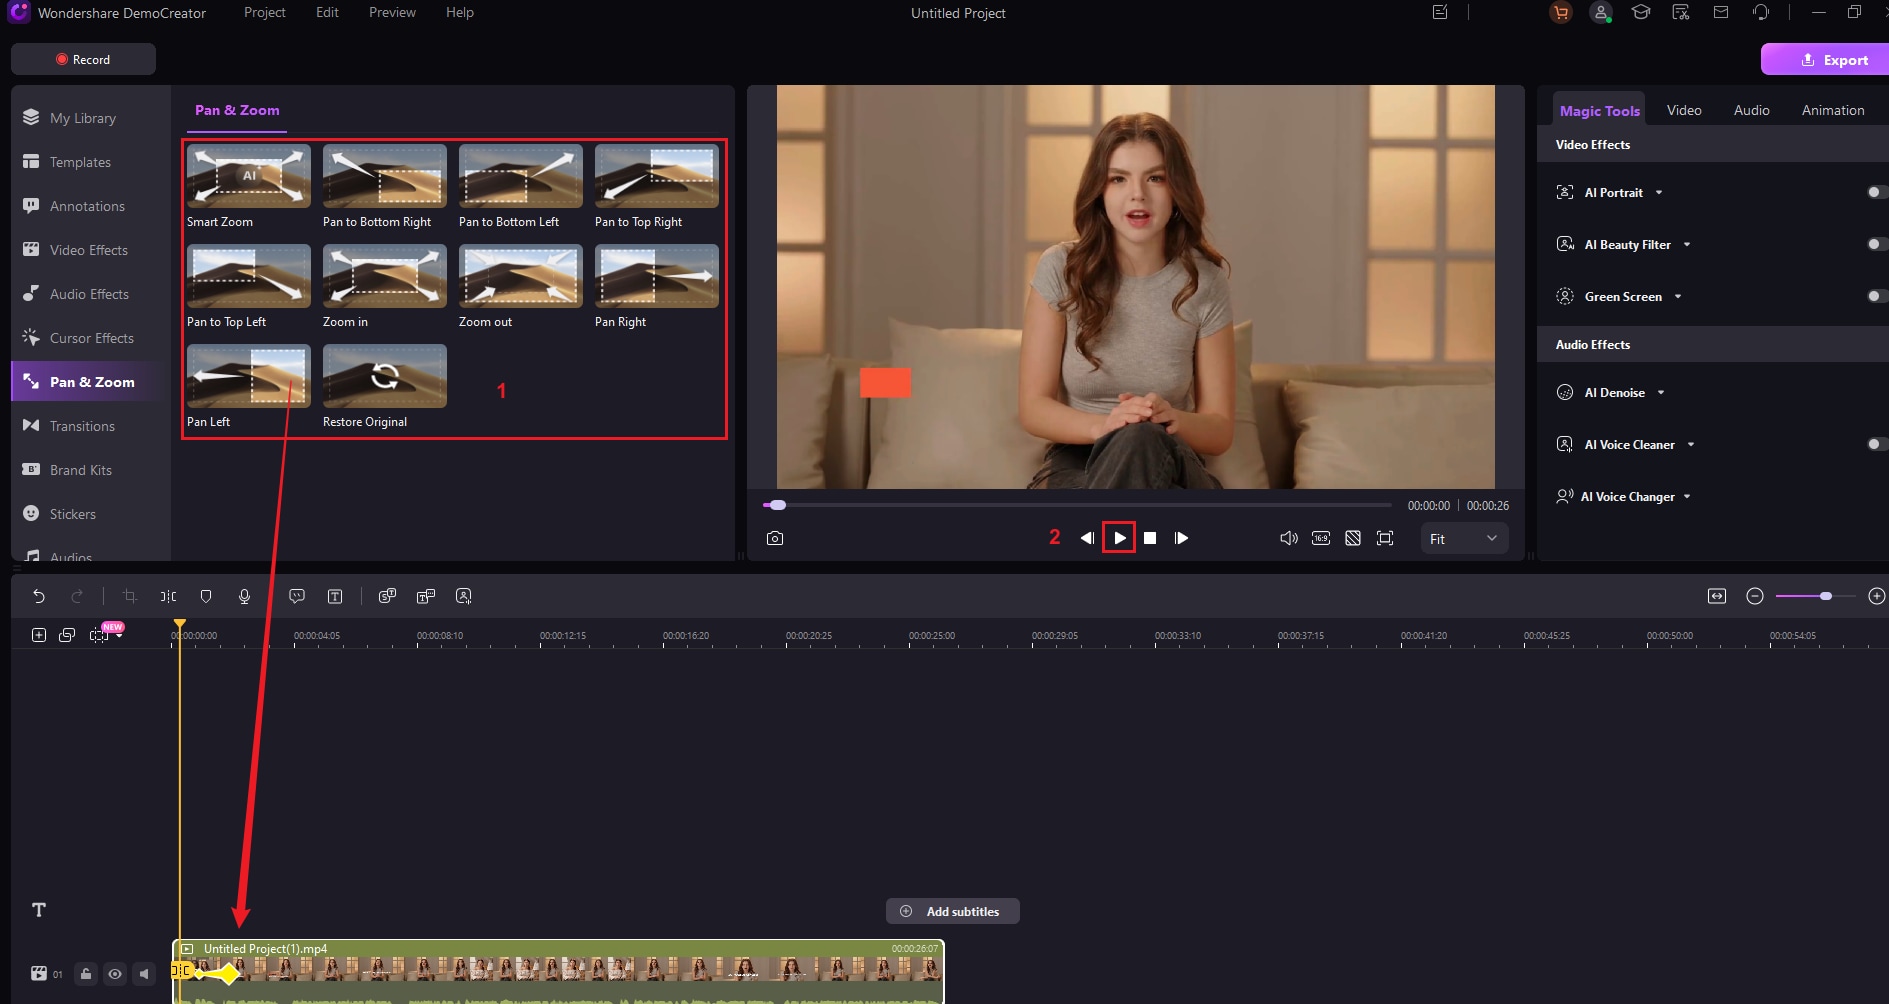
Drag the video to the timeline in the editor and apply the automatic zoom animation effect in the player preview.

Note:
To help Smart Zoom predict where to apply zoom and pan animations, please follow these tips during the recording process:
Limit clicking. Do not randomly click the screen or move around the screen unnecessarily with the mouse.
Do not randomly move the cursor. Do not randomly move the cursor or point to unnecessary areas on the screen. Try to keep the cursor in the focus area being recorded as much as possible.
Keep the cursor near when entering text. If you click a text box, move the cursor to the other side of the screen, and then start talking, Smart Zoom may not be able to predict the correct operation. If you want the audience to see the content being typed in the text box, keep the cursor inside or near the text box.
Use the mouse wheel (if applicable). Try using the mouse wheel instead of clicking or dragging the scroll bar. Smart Zoom may zoom in on the scroll bar instead of scrolling the content.
Apply zoom animations to the timeline materials in the editor.
Add Smart Zoom automatic zoom animations.

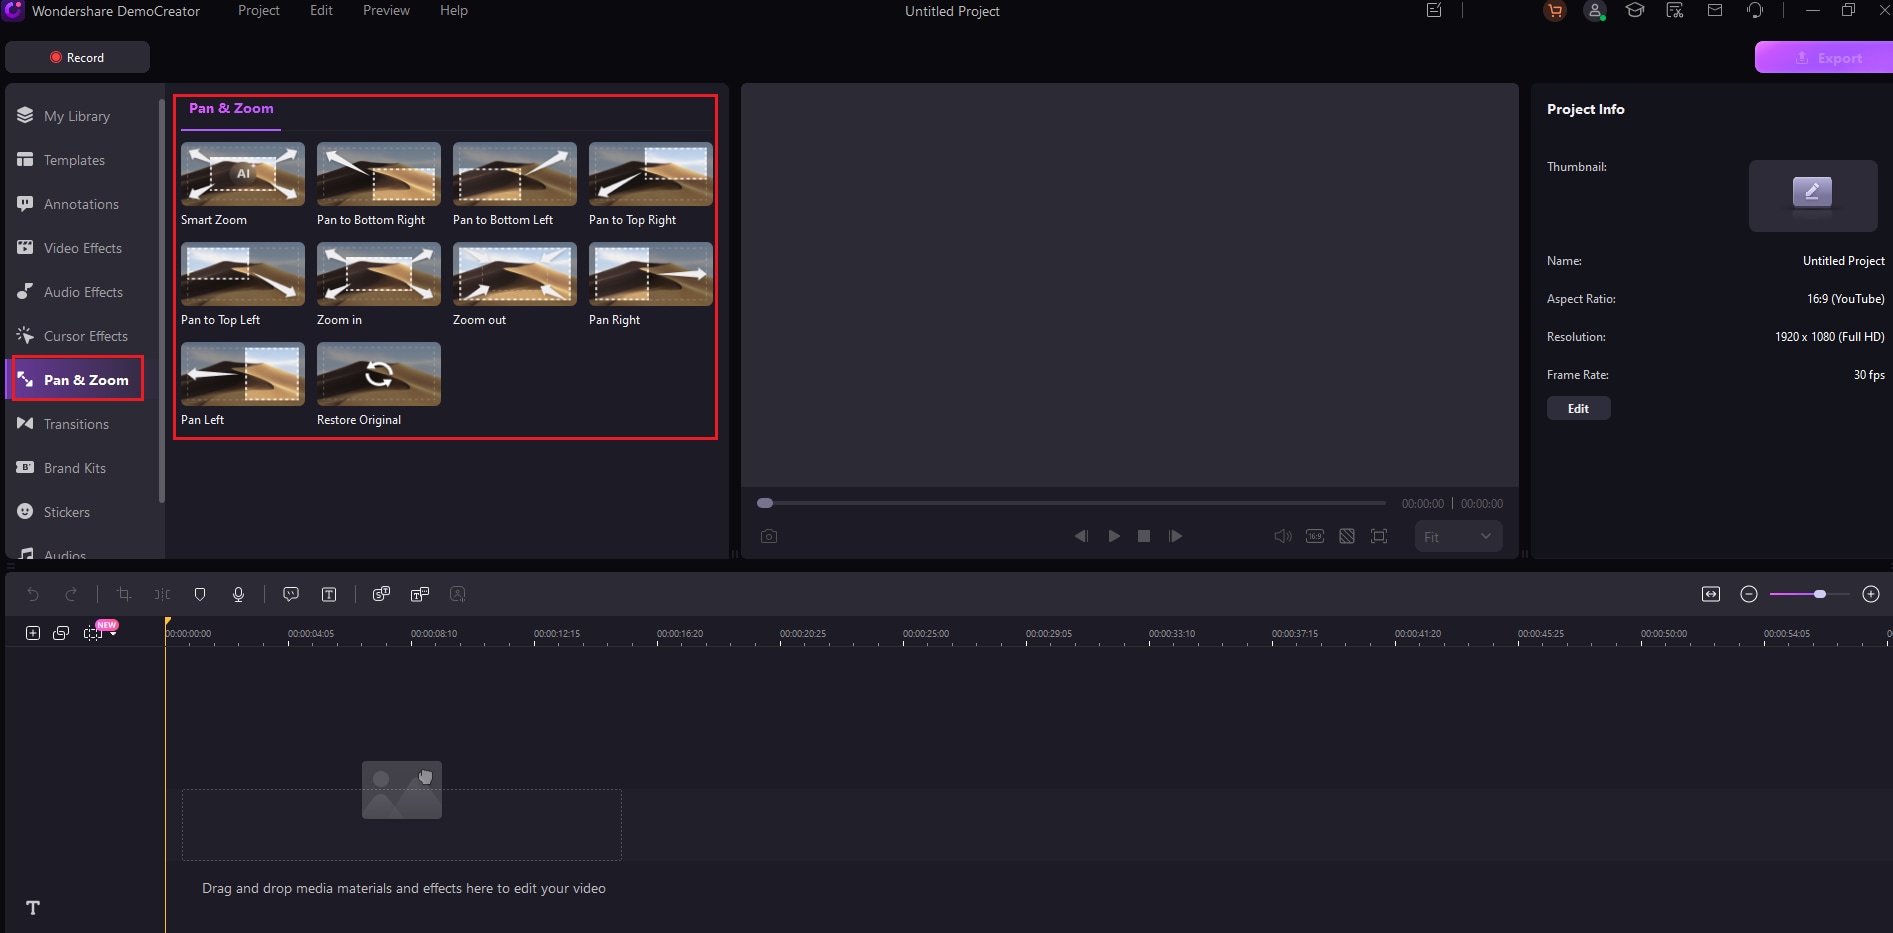
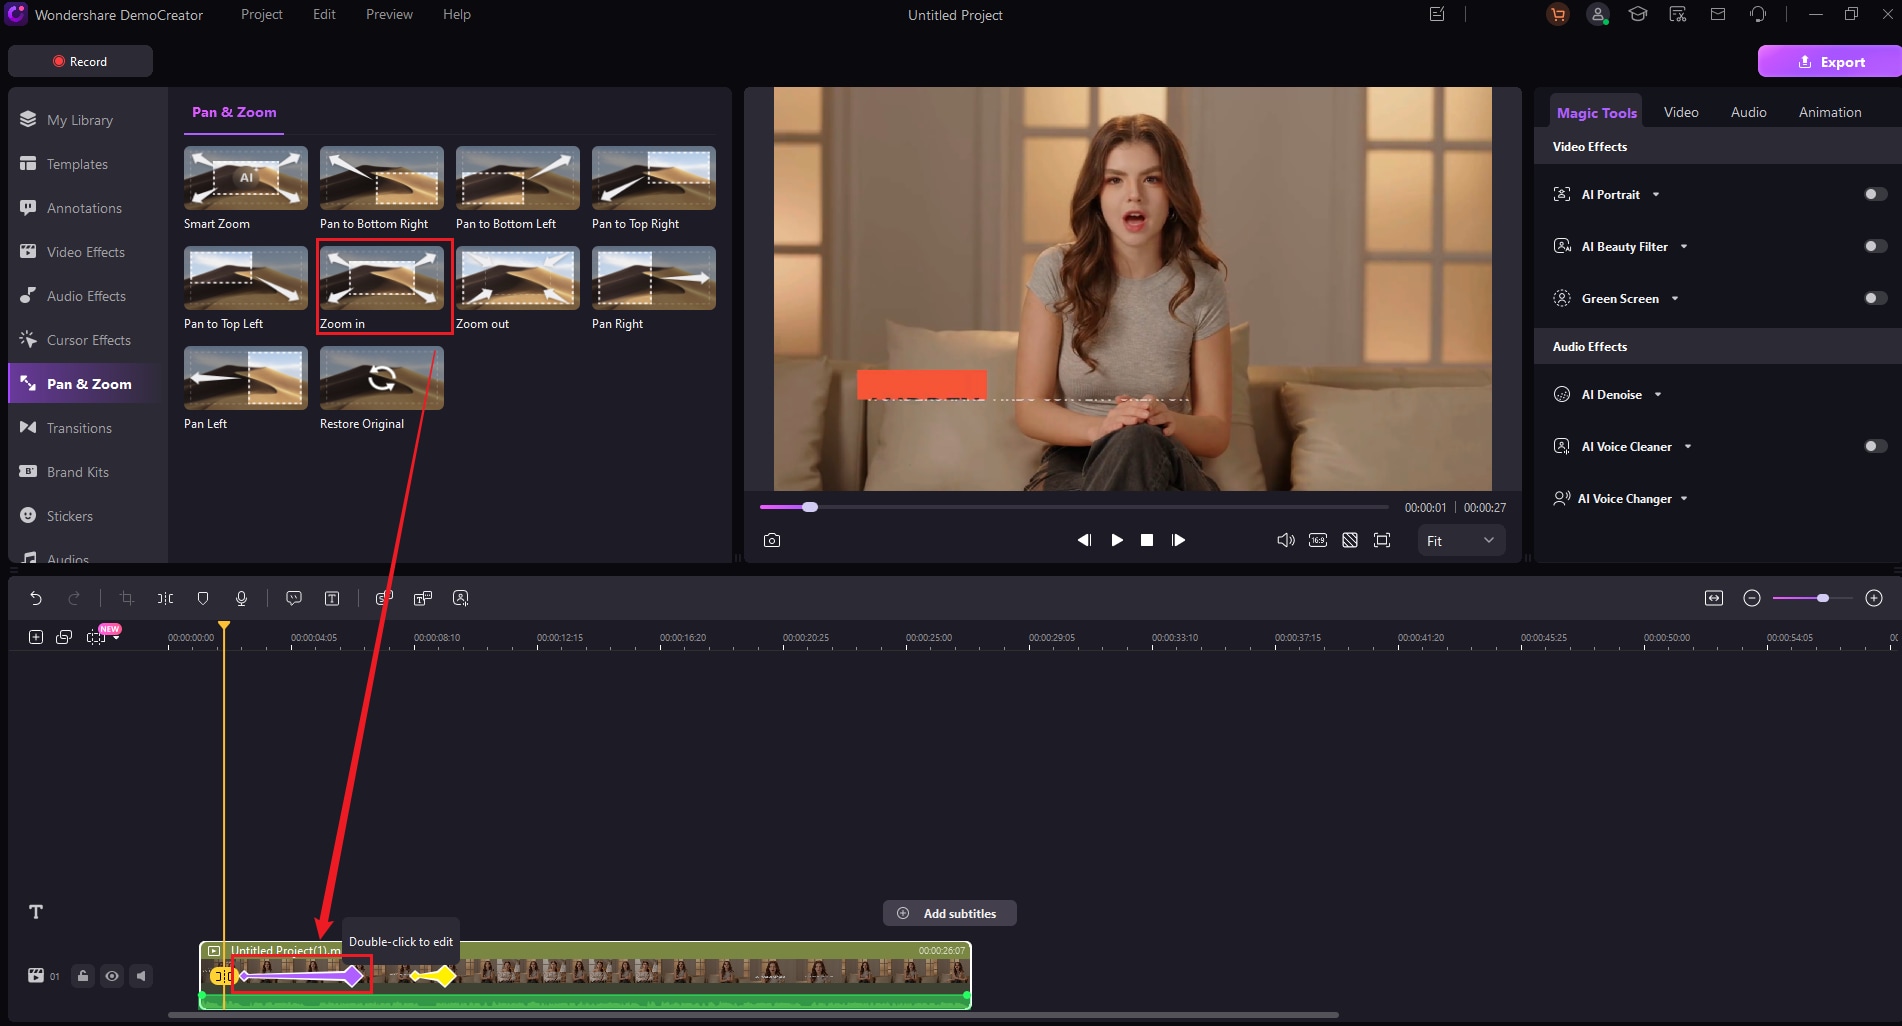
Drag the Pan&Zoom effect to the clip, until there appears an arrow is successfully added.

2. Zoom Editing
- Change Position: To change when the Pan&Zoom occurs, click and drag the green arrow.
- Change Duration: To adjust the length, click and drag either end of the arrow.

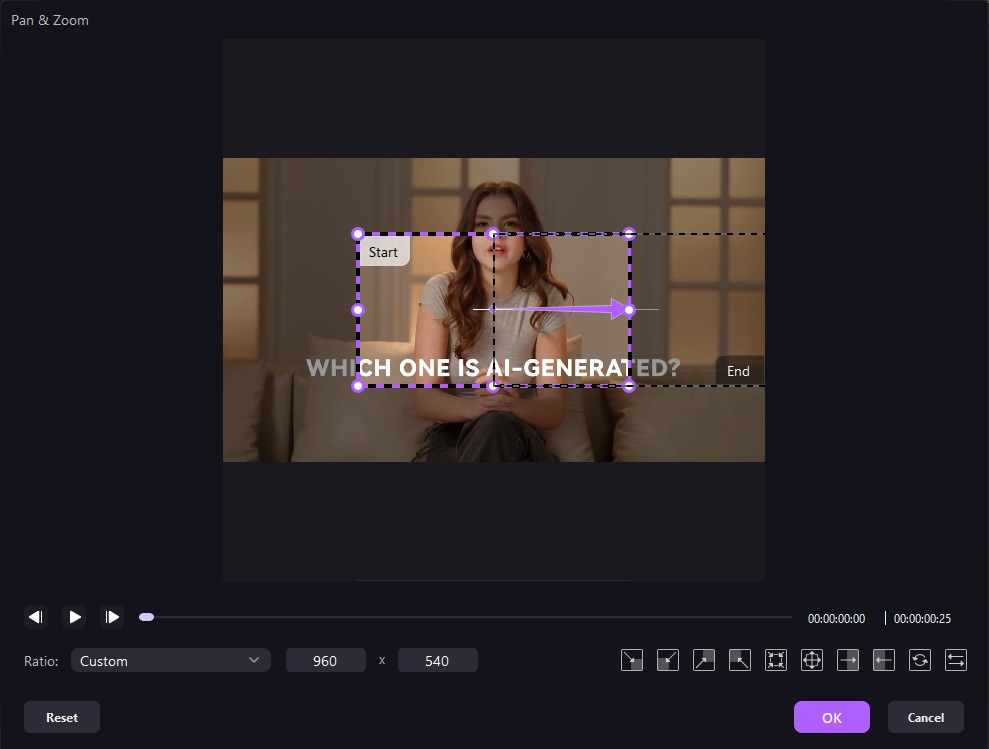
- Edit: Double-click the green arrow to edit. Two frames will appear over your footage: a purple frame marked Start and a green frame marked End.

3.Types of Smart Zoom
There are 7 preset paths provided underneath the preview:
1. You can zoom to 4 different directions: you may do this to emphasize a certain thing.

2. Zoom In Mode: You can zoom in from the larger green frame to the smaller purple frame. Drag and hover your mouse to change the area you want to zoom in. The green arrow indicates the direction of the zoom-in.

3. Zoom Out Mode: Zoom out from the smaller purple frame to the larger green frame. Drag and hover your mouse to change the area you want to zoom out. The green arrow indicates the direction of the zoom-out. You may do this to reveal a larger scene.

4. Pan Right Mode: Move horizontally from the left to the right. Drag and hover your mouse to change the area you want to pan. The green arrow indicates the direction. You may do this to move between characters or follow a moving subject.

5. Pan Left Mode: Move horizontally from the right to the left. Drag and hover your mouse to change the area you want to pan. The green arrow indicates the direction. You may do this to move between characters or follow a moving subject.

6. Zoom Original: The zoom original button cleans all the zoom settings to the original.

7. Swap the start and end areas: The swap button at the right corner enables you to swap the start and end areas instantly.


