DemoCreator User Guide
How to use Wondershare DemoCreator? Learn the step by step guide below
DemoCreator User Guide
-
Drawing Tools
-
Install & Uninstall Extension
-
Record Browser Tab
-
Get Started
-
Video Recorder
-
Video Presentation
-
Video Editing
- Import Media
- Basic Video Editing
- PIP (Picture in Picture) Mode
- Transition Effects
- Annotation
- Caption (New Auto-Caption)
- Stickers
- Filters
- AI Text-to-Speech
- AI Object Remover
- AI Vocal Remover
- AI Voice Changer
- AI Beauty Filter
- DemoCreator Templates
- Brand Kits
- Thumbnail Maker
- AI Text-Based Editing
- AI Clips Generator
-
Audio Edit
-
DemoCreator Effects
-
Export & Share
-
Keyboard Shortcuts - Windows
DemoAir User Guide
-
DemoCreator Cloud Service - Get Started
-
Video Creation Mode
-
Export&Share
FAQs
Templates
If you are looking to create an attractive layout where you can place your screen recordings or captured camera videos, Wondershare DemoCreator is the best choice. All thanks to the AI Layout Template that is tucked into the software. The feature has tons of layout templates for different sectors, from education to business, gaming, and many others.
Using AI Layout Template isn’t tough. If you own a Mac, and need a guide follow the steps given below:
Step 1: Download and Install DemoCreator
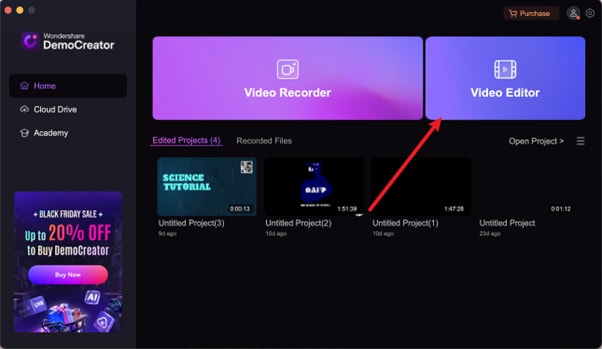
Download and nstall Wondershare DemoCreator on your computer. Ensure that you install the correct one for Mac. After that, launch it and click Video Editor on the main dashboard.
Step 2: Locate and Select Templates
On the subsequent interface, locate the Templates icon on the left sidebar and click on it.
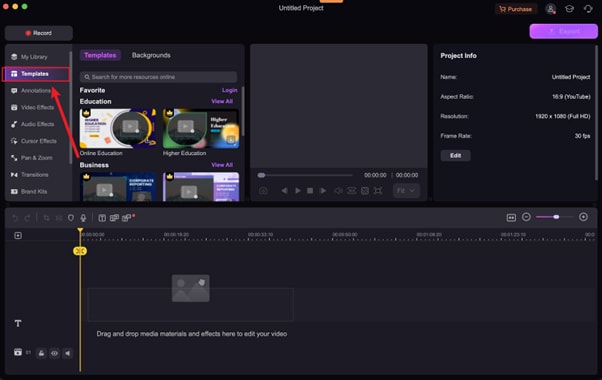
DemoCreator will display a screen with the different AI Layout Templates it supports on the right-hand side of the screen. Click View All to access all the incredible templates it supports.
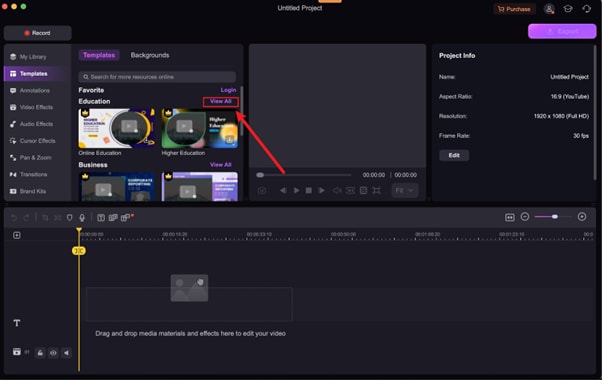
Choose the one that suit your project by clicking on it and the software will quickly download it.

Step 3: Add Template to Timeline
Once the download is finished, drag and drop the template in the editing timeline, just as seen down here.
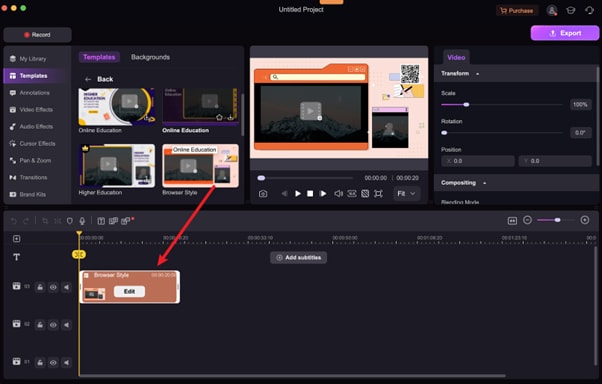
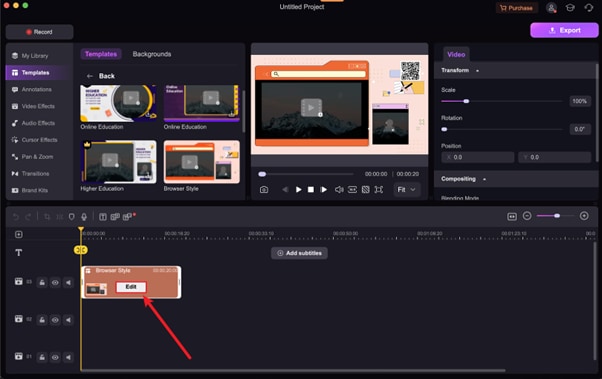
Step 4: Edit the Template
Next, click on Edit in the timeline. Alternatively, you can double-click the template in the timeline to make advanced customization on it.
Step 5: Import and Add Your Video
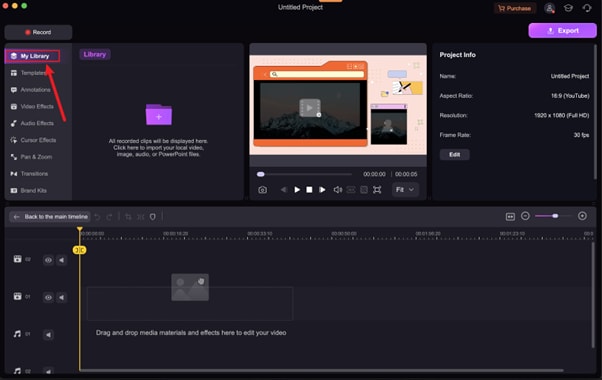
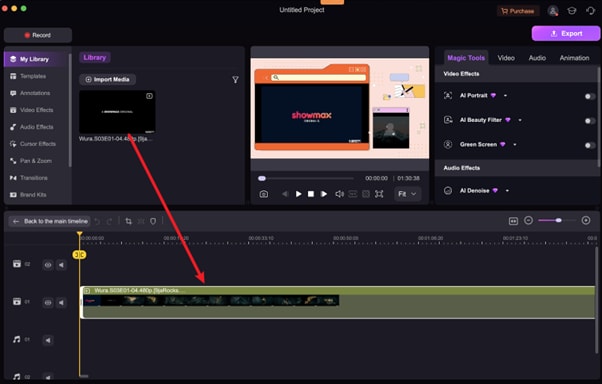
Afterward, import the video you want to work on from your local storage to DemoCreator. To do that, click on Library and select the + icon. Also move the video to timeline where you have the template.

Step 6: Customize Video Size and Position
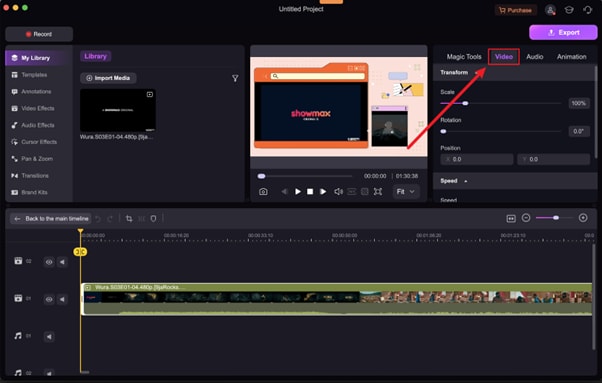
In case you want to make changes to the size, location and positions, proceed to the right hand panel, select Video and go to the Transformation panel to made editings.
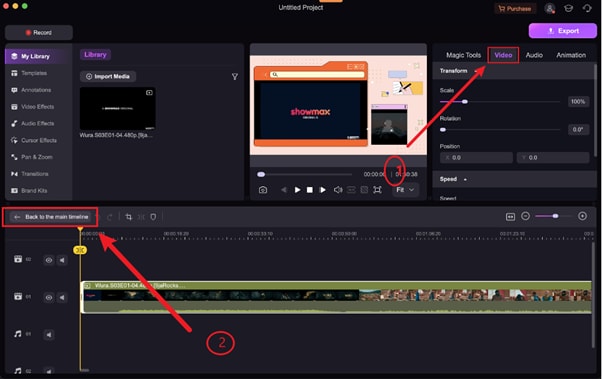
Afterward, head back to the maintimeline. To do that click Back to the main timeline icon.
Step 7: Align and Save Your Work
Ensure the right-edge of the template is well placed in the timeline together with that of the video you imported from your local storage and save your work.
