DemoCreator User Guide
How to use Wondershare DemoCreator? Learn the step by step guide below
DemoCreator User Guide
-
Drawing Tools
-
Install & Uninstall Extension
-
Record Browser Tab
-
Get Started
-
Video Recorder
-
Video Presentation
-
Video Editing
- Import Media
- Basic Video Editing
- PIP (Picture in Picture) Mode
- Transition Effects
- Annotation
- Caption (New Auto-Caption)
- Stickers
- Filters
- AI Text-to-Speech
- AI Object Remover
- AI Vocal Remover
- AI Voice Changer
- AI Beauty Filter
- DemoCreator Templates
- Brand Kits
- Thumbnail Maker
- AI Text-Based Editing
- AI Clips Generator
-
Audio Edit
-
DemoCreator Effects
-
Export & Share
-
Keyboard Shortcuts - Windows
DemoAir User Guide
-
DemoCreator Cloud Service - Get Started
-
Video Creation Mode
-
Export&Share
FAQs
Caption
For those who have no time to customize the text by themselves, caption templates (also called text overlay) are the most popular option. Here are four types of Captions available in DemoCreator -- Opener, EndCredit, Subtitle, Lowerthird. And the DemoCreator supports generating Auto-Caption now.
Opener: A short but professional intro to address your topics
End Credit: Text, displayed at the end of the video, to give credits to all the people who’ve worked on your video content.
Subtitle: Text, displayed at the bottom of the scene, to translate the dialogue or narrative.
Lowerthird: Graphic overlay, displayed at the lower section of the scene, to provide additional info.
Index
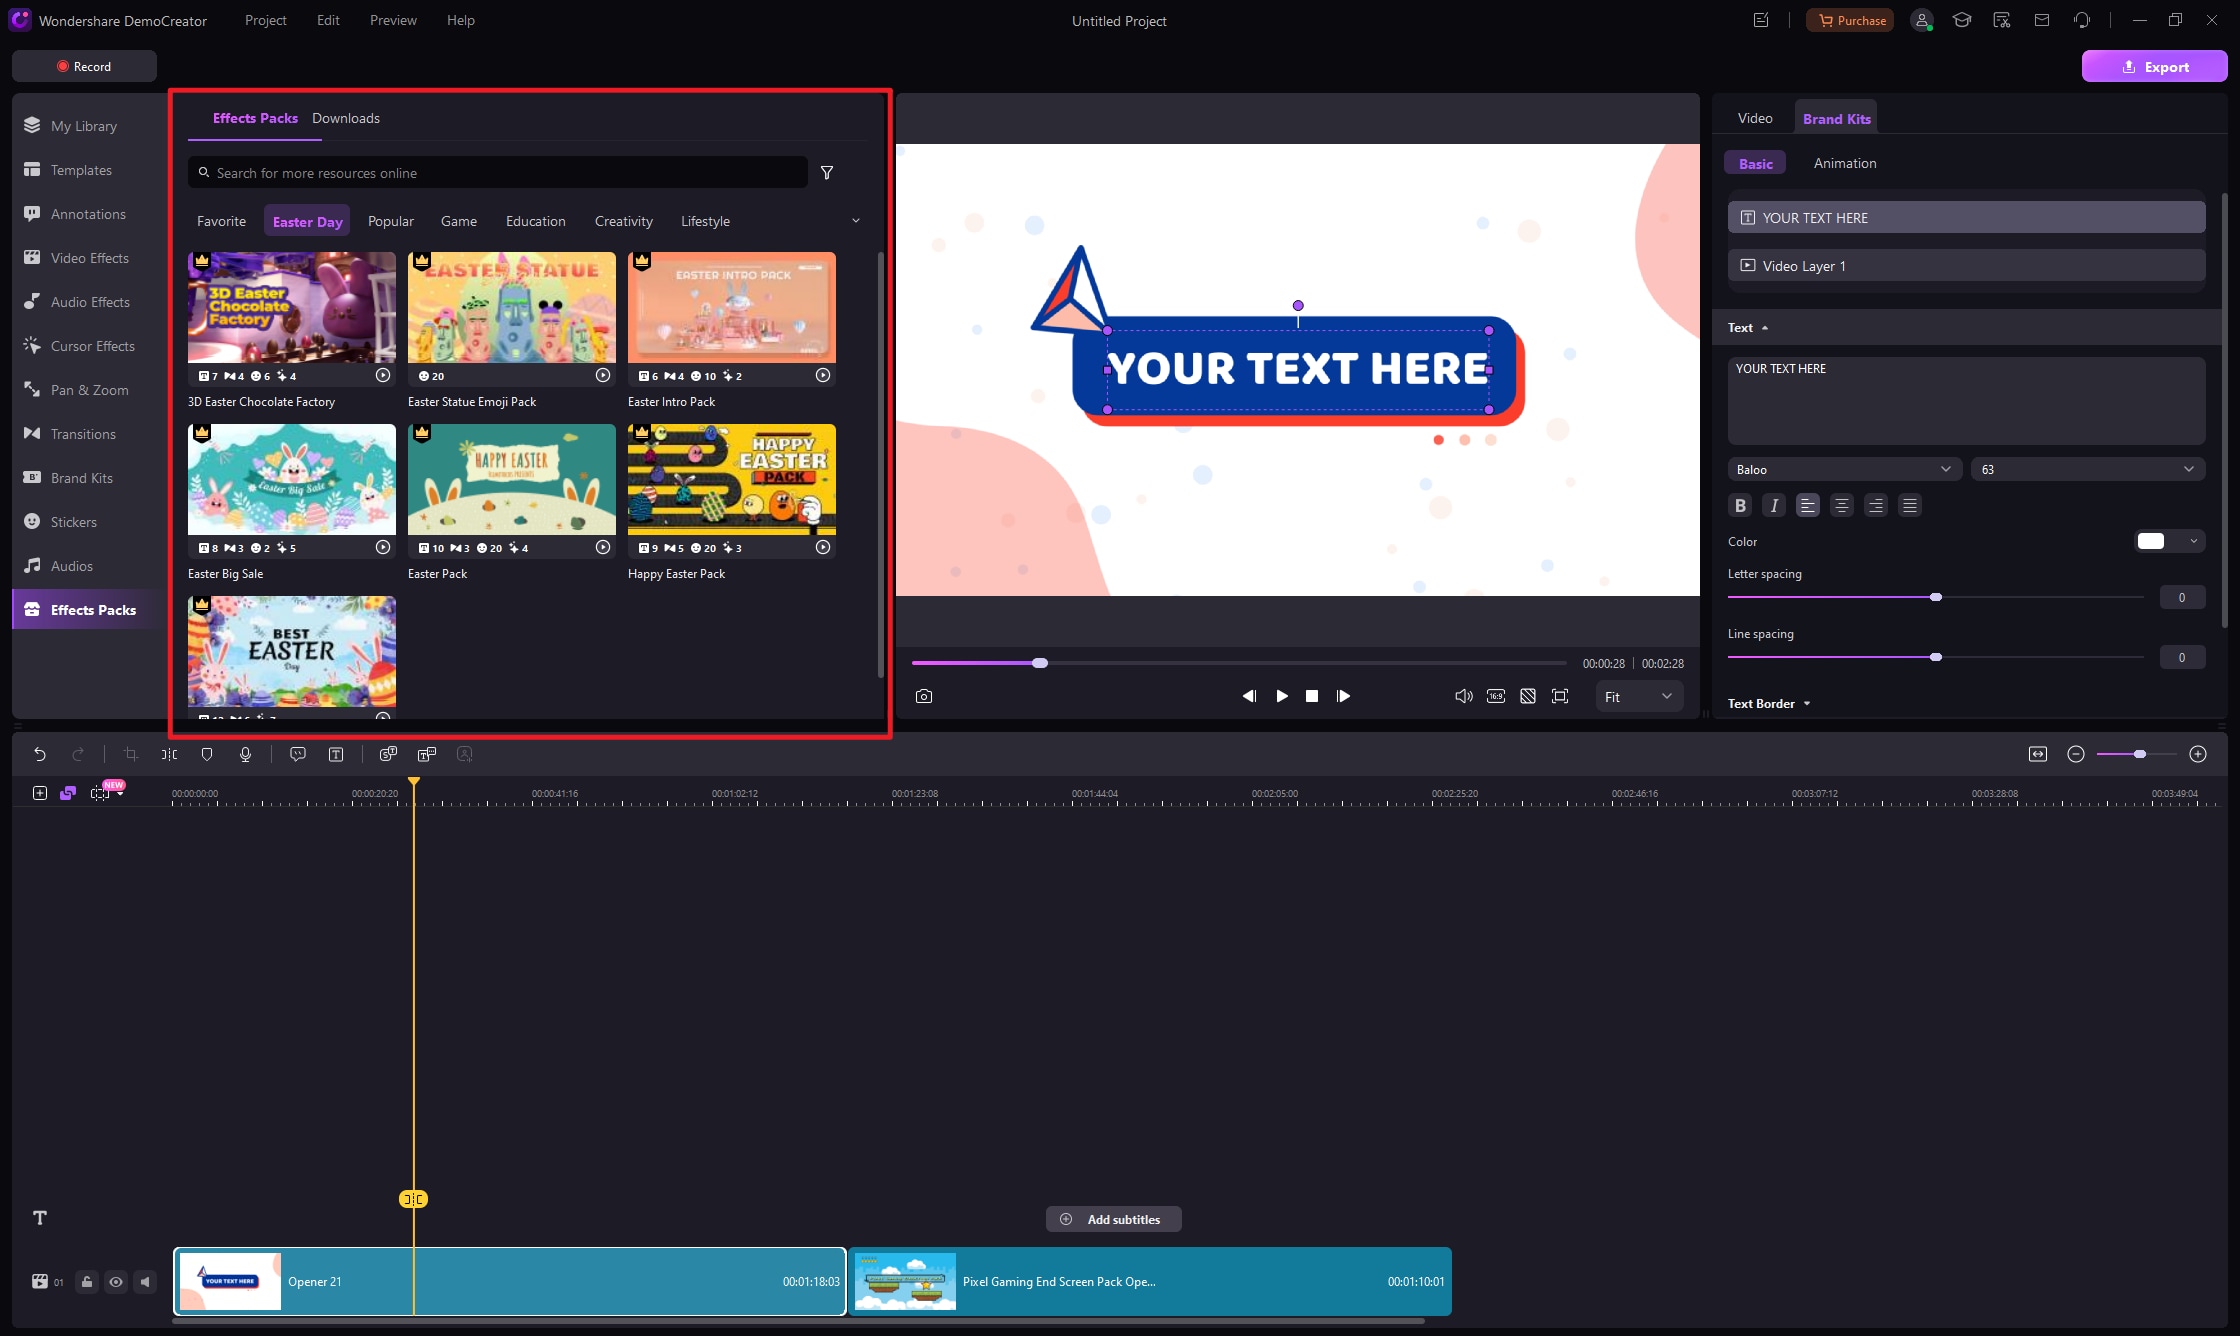
1. Add/Remove the Caption
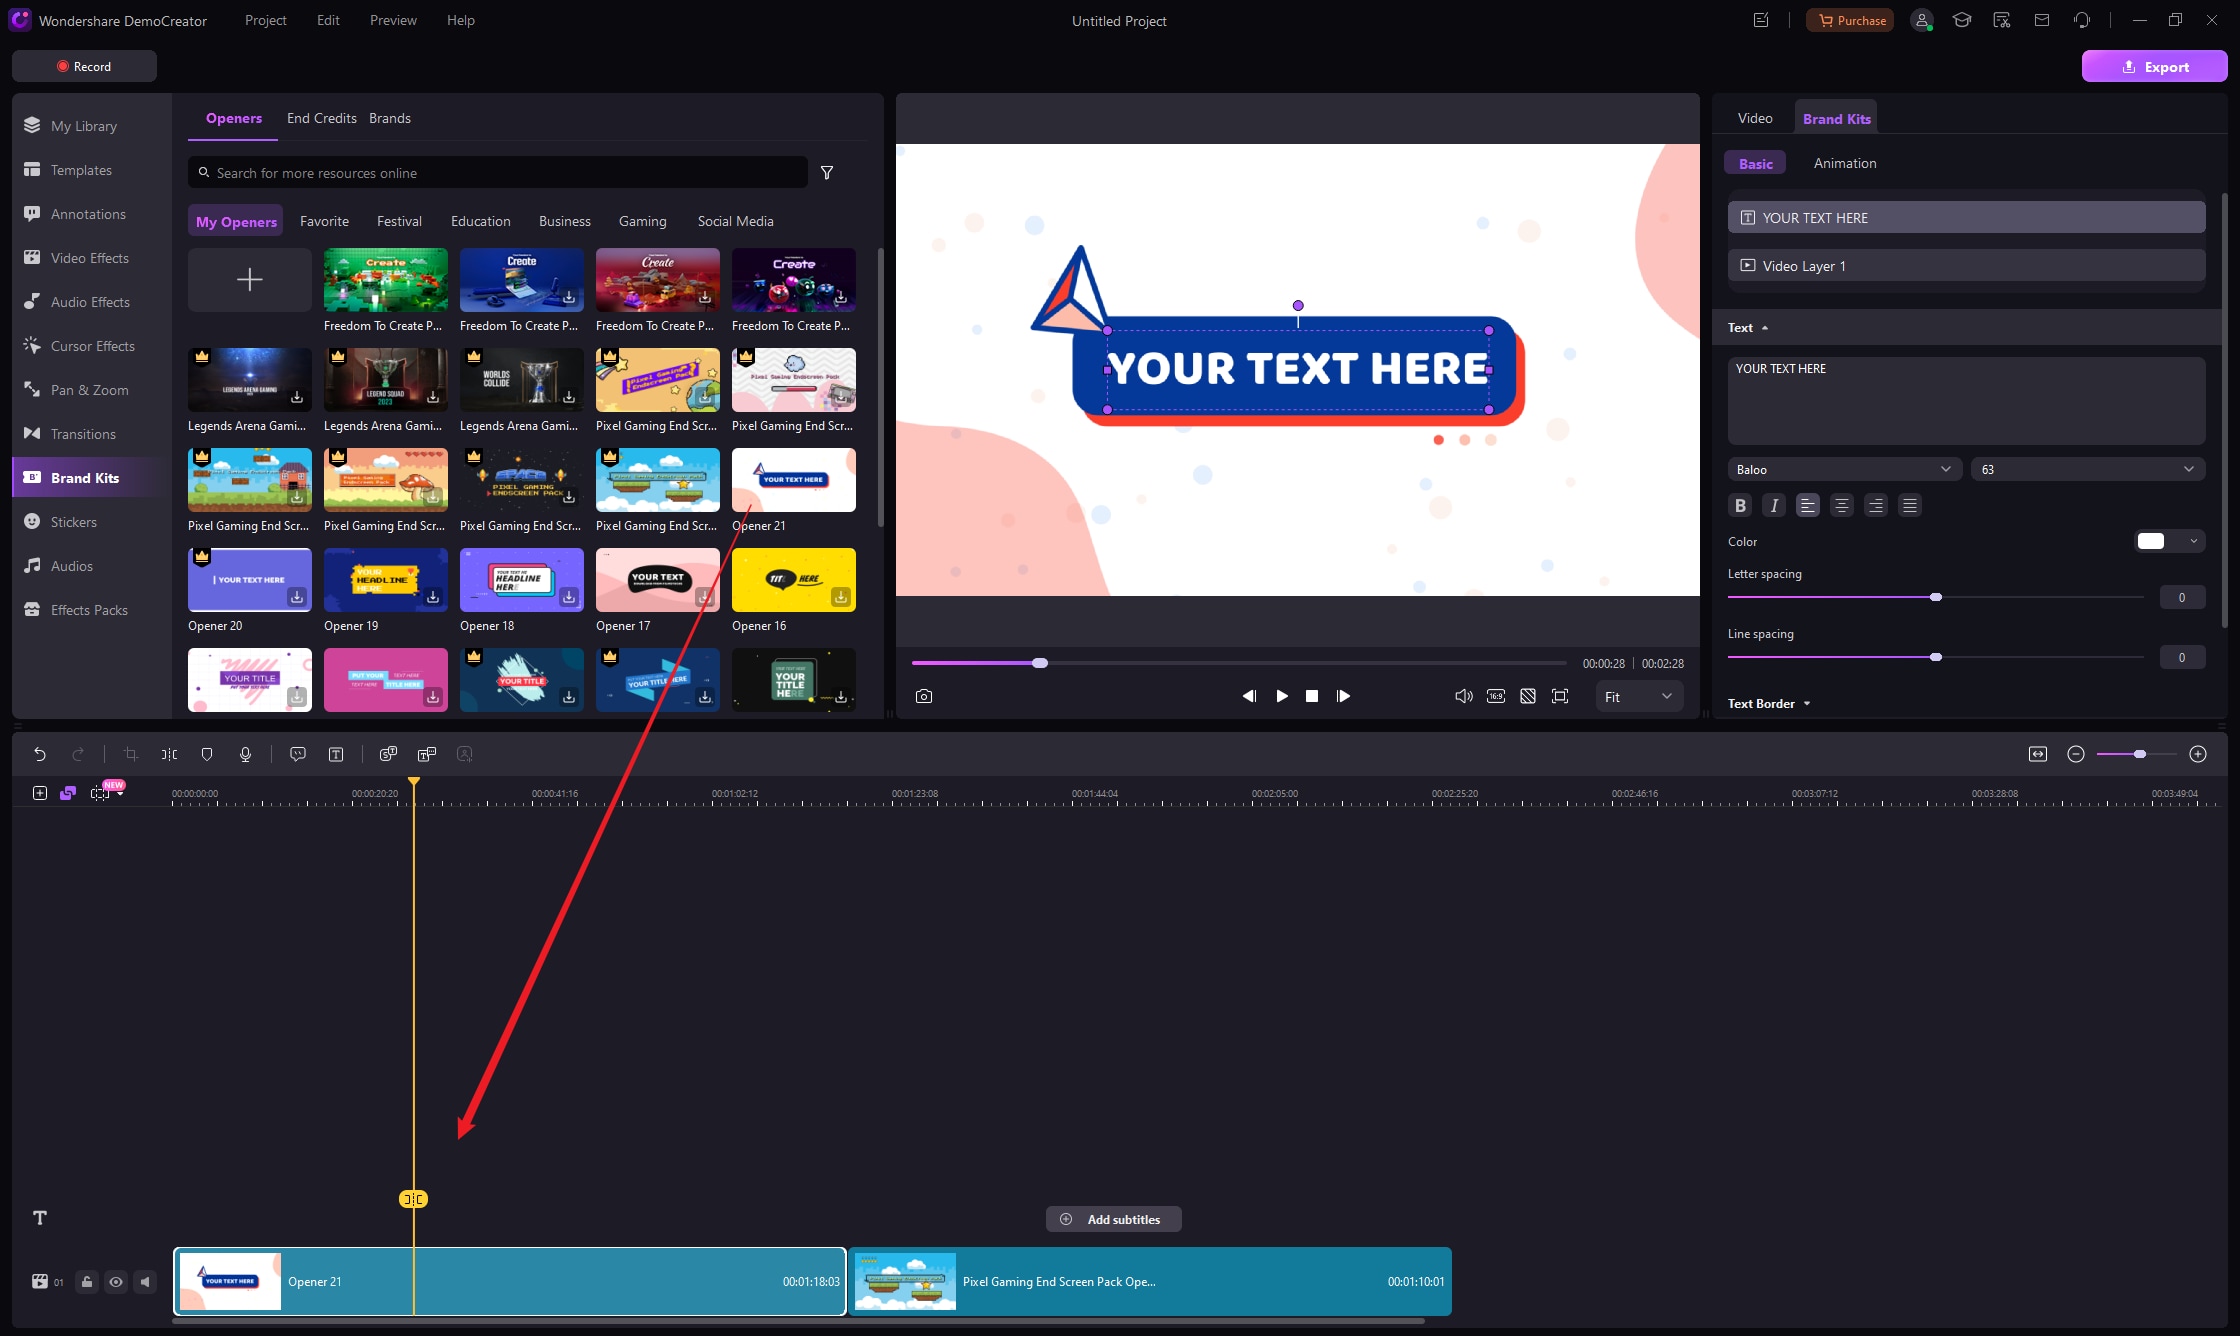
Add the Caption: For example, you want to add an opener to the beginning.
- From the Tools Bar, select the Caption tab and select the category of Opener.
- Hover over the openers to get a preview and choose the one you like. (Note: If you find some opener very useful and want to access it soon, click the Heart icon to mark it as the favorite. It will appear in the first category of “Favorite”.
- Drag it to the timeline where you want to put it in.
Remove the Caption: Select it on your Timeline or in the Preview Panel and press Delete on your keyboard. Alternatively, you can right-click on the caption and choose Delete.
2. Modify the Caption
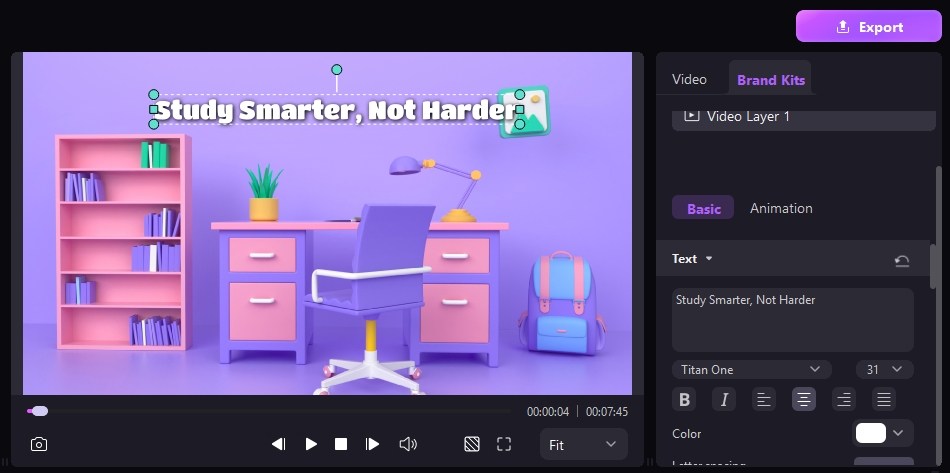
Customize the Text: Double click the text area of the caption in the Preview Panel, in the Annotation tab to enter the text prepared. When the Text of the caption is selected, you can also adjust its appearance in the Properties Channel, such as color, font, or behaviors.
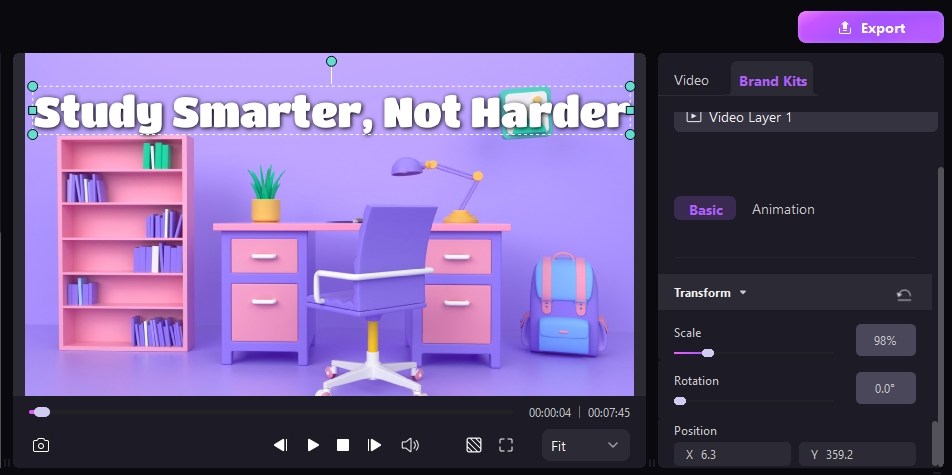
Transform - Resize/Rotate/Re-position: Choose the Caption effect in the Preview Window. Locate Properties Panel > Transform, you can change the size of the caption, rotate it, or position it with parameters. Similarly, all adjustments can be made in the Preview Panel directly. Just select caption and then make changes to the blue bounding box there.
Compositing – Blending Mode/Opacity: For graphics, you can adjust the settings under Transform > Compositing, to change the blending mode or opacity.
Change an Annotation's Duration: To adjust the duration of a caption, drag its left or right edge of it on your timeline.
Change Text Animation: To adjust the speed of text animation.
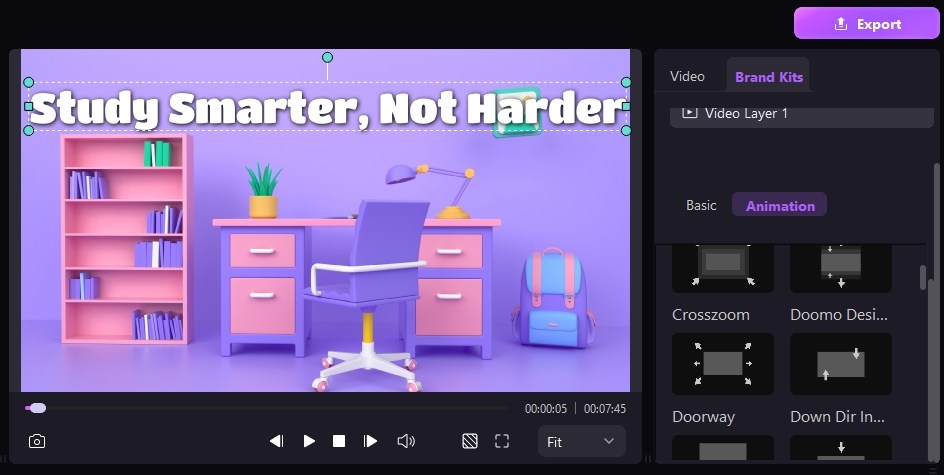
3. Get More Captions
If the default captions cannot meet your requirements for specific contexts, you can download more assets from SFX Store in the Tools Panel. Once the template is downloaded, the included caption will also appear in the caption library.
4. Add Subtitles to Video (3 Methods)
With DemoCreator, adding subtitles to your video is a breeze with three simple methods. You can utilize the Auto Subtitles feature to automatically generate subtitles from speech, import an existing SRT subtitle file, or transcribe the audio into subtitles manually.
Method 1: Auto Subtitle
The DemoCreator supports you to automatically generate subtitles for your videos, which uses artificial intelligence to generate your subtitles with near-perfect accuracy. One-click to generate caption automatically based on speech recognition technology. Below are the detailed steps.
Before starting, you need to sign in with your Wondershare account (WSID). Only you're signed in, the program can identify your account information and get how long transcribe time you have.

There are 2 Different Account Status
- Auto-Caption Free Account
- Auto-Caption Paid Account
 Note:
Note:The Auto Subtitles feature consume AI Credits. Please go to the purchase page to pick up your AI Credits plan.
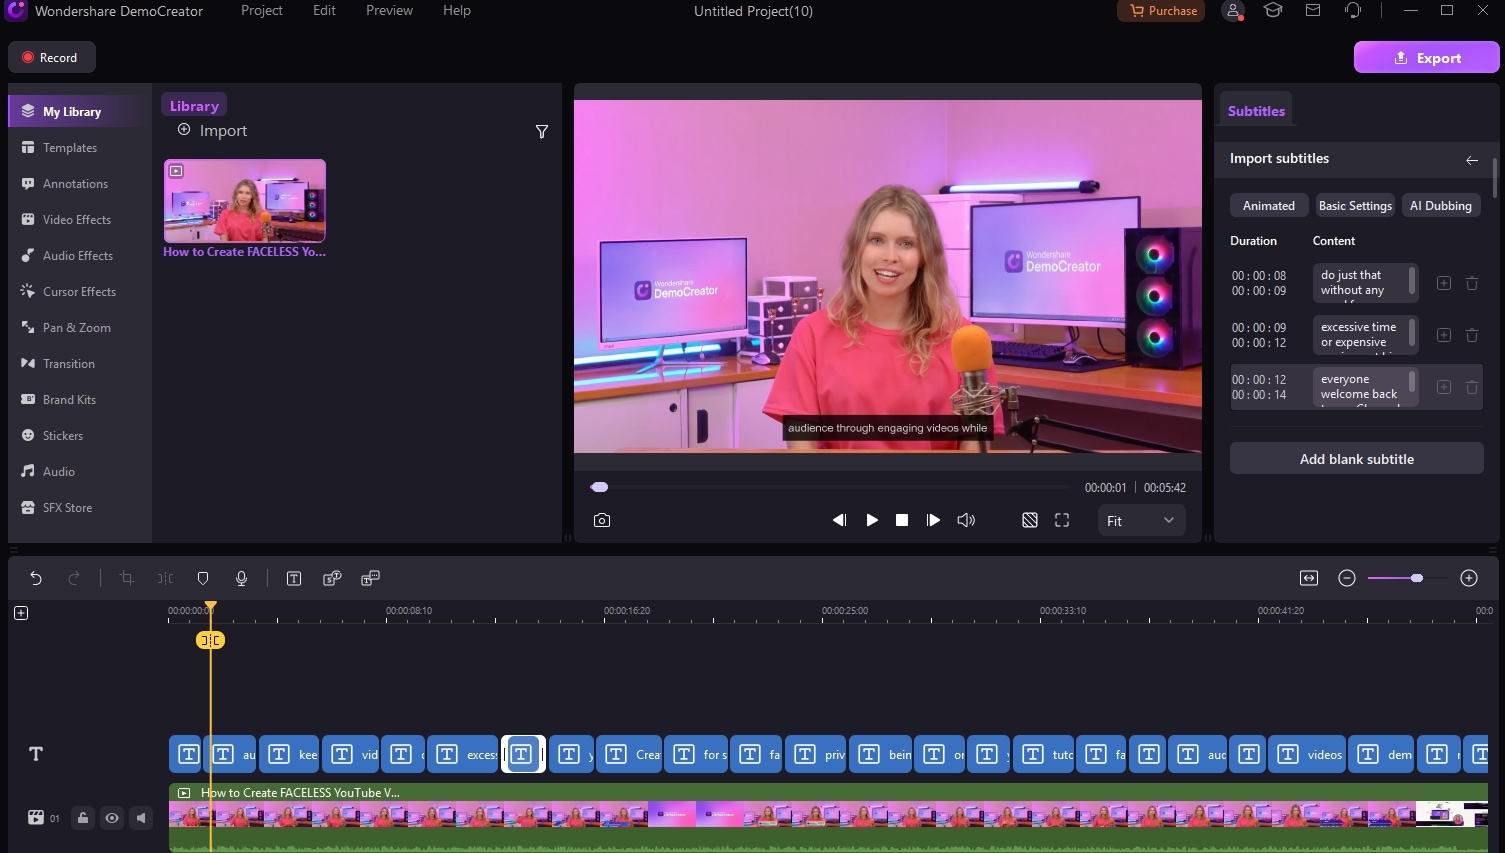
Method 2: Import Subtitle File
In case you have a subtitle file already, you can click the Import subtitles menu to add it to the video automatically. Currently, you can upload subtitle file in SRT format.
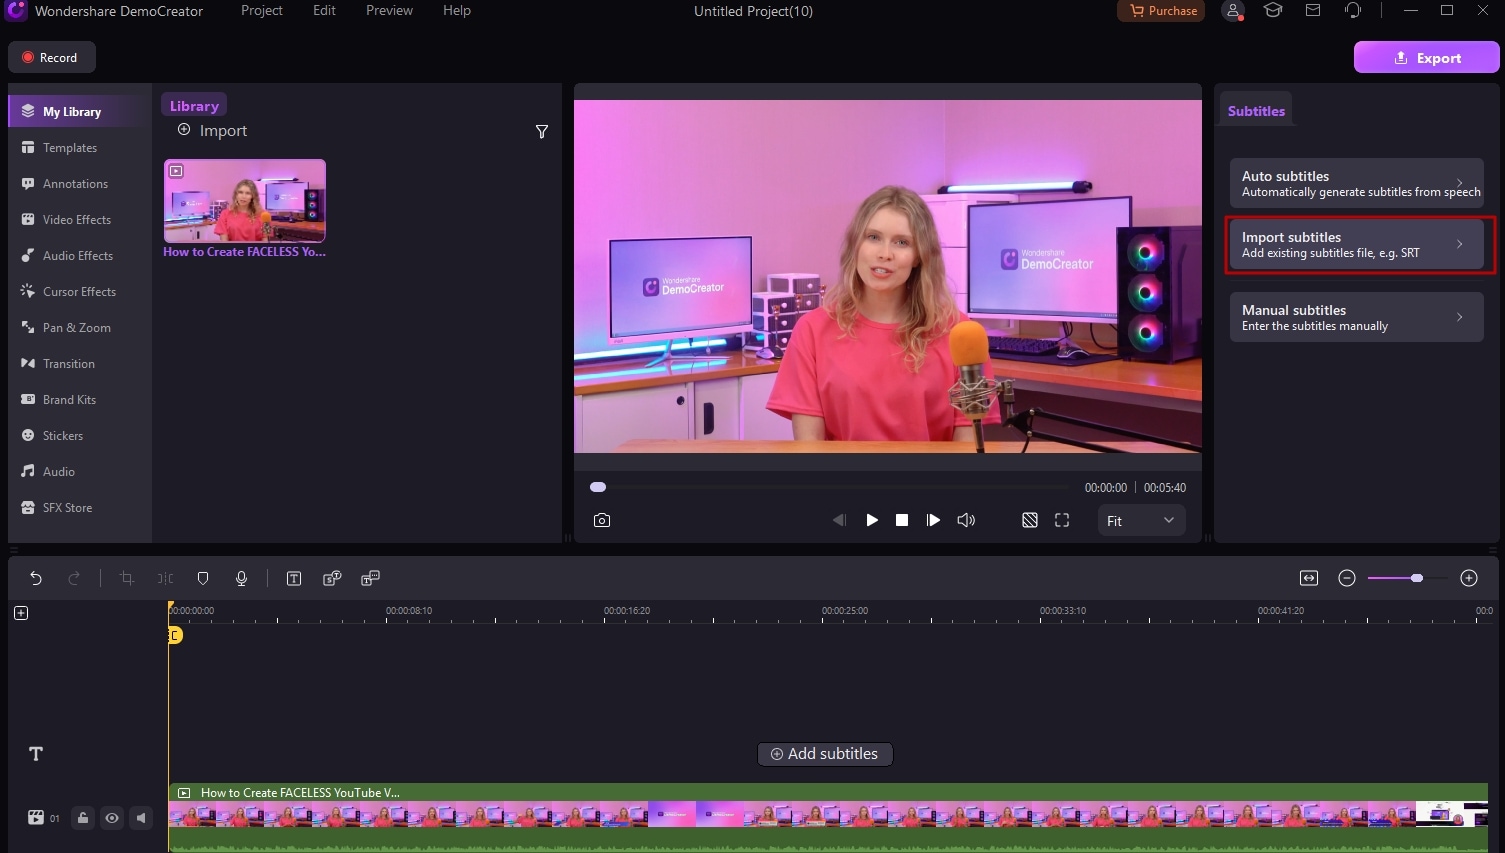
Once the SRT file is loaded, you will see it in the timeline with order. You can then stylize the fonts, size and more of the subtitles just like the auto generated subtitles.
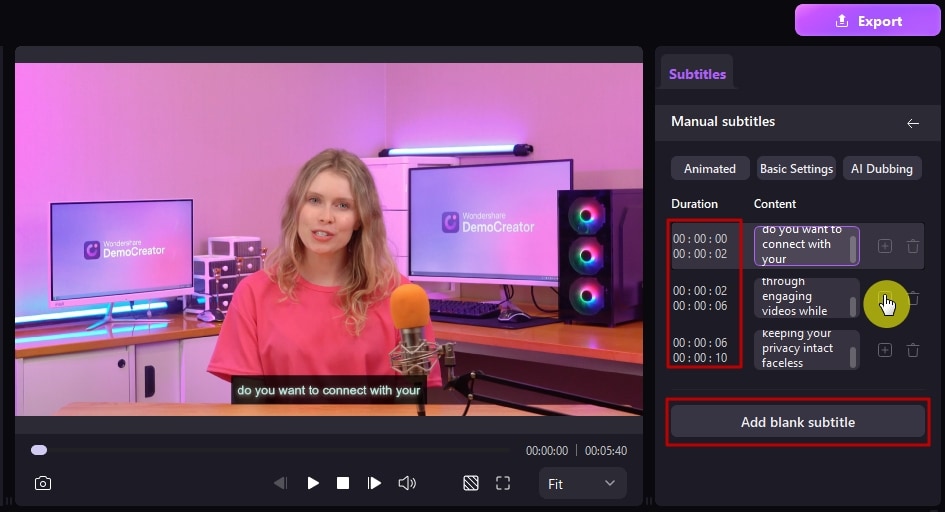
Method 3: Manual Transcribe/Manual Subtitles
In case you didn’t have a subtitle file, you can still transcribe or add subtitles manually. Click the Add Subtitles button in the timeline or click the Subtitles icon in the toolbar and then select Manual subtitles menu.

Click the Plus icon next to the subtitles or the Add blank subtitle button to add subtitle lines quickly. You can also adjust the time stamps to adjust the duration of the subtitles precisely. Like the auto-generated subtitles or uploaded subtitle file, you can also stylize the manually transcribed subtitles in the Basic Settings.
 Note:
Note:These automatic captions are generated by machine learning algorithms, so the quality of the captions may vary. Automatic captions might misrepresent the spoken content due to mispronunciations, accents, dialects, or background noise. You should always review automatic captions and edit any parts that haven't been properly transcribed.
If you have any questions about this feature, please feedback to the support.

