DemoCreator User Guide
How to use Wondershare DemoCreator? Learn the step by step guide below
DemoCreator User Guide
-
Drawing Tools
-
Install & Uninstall Extension
-
Record Browser Tab
-
Get Started
-
Video Recorder
-
Video Presentation
-
Video Editing
- Import Media
- Basic Video Editing
- PIP (Picture in Picture) Mode
- Transition Effects
- Annotation
- Caption (New Auto-Caption)
- Stickers
- Filters
- AI Text-to-Speech
- AI Object Remover
- AI Vocal Remover
- AI Voice Changer
- AI Beauty Filter
- DemoCreator Templates
- Brand Kits
- Thumbnail Maker
- AI Text-Based Editing
- AI Clips Generator
-
Audio Edit
-
DemoCreator Effects
-
Export & Share
-
Keyboard Shortcuts - Windows
DemoAir User Guide
-
DemoCreator Cloud Service - Get Started
-
Video Creation Mode
-
Export&Share
FAQs
Auto Normalization
You can use the Auto Normalization feature to stabilize and balance the audio volume in your videos, achieving a professional sound effect in the following situations:
When the recorded voice volume fluctuates due to varying distances from the microphone during recording.
When the background music and voice volumes in the video you want to edit do not match.
When loud game sound effects overpower the commentary voice.
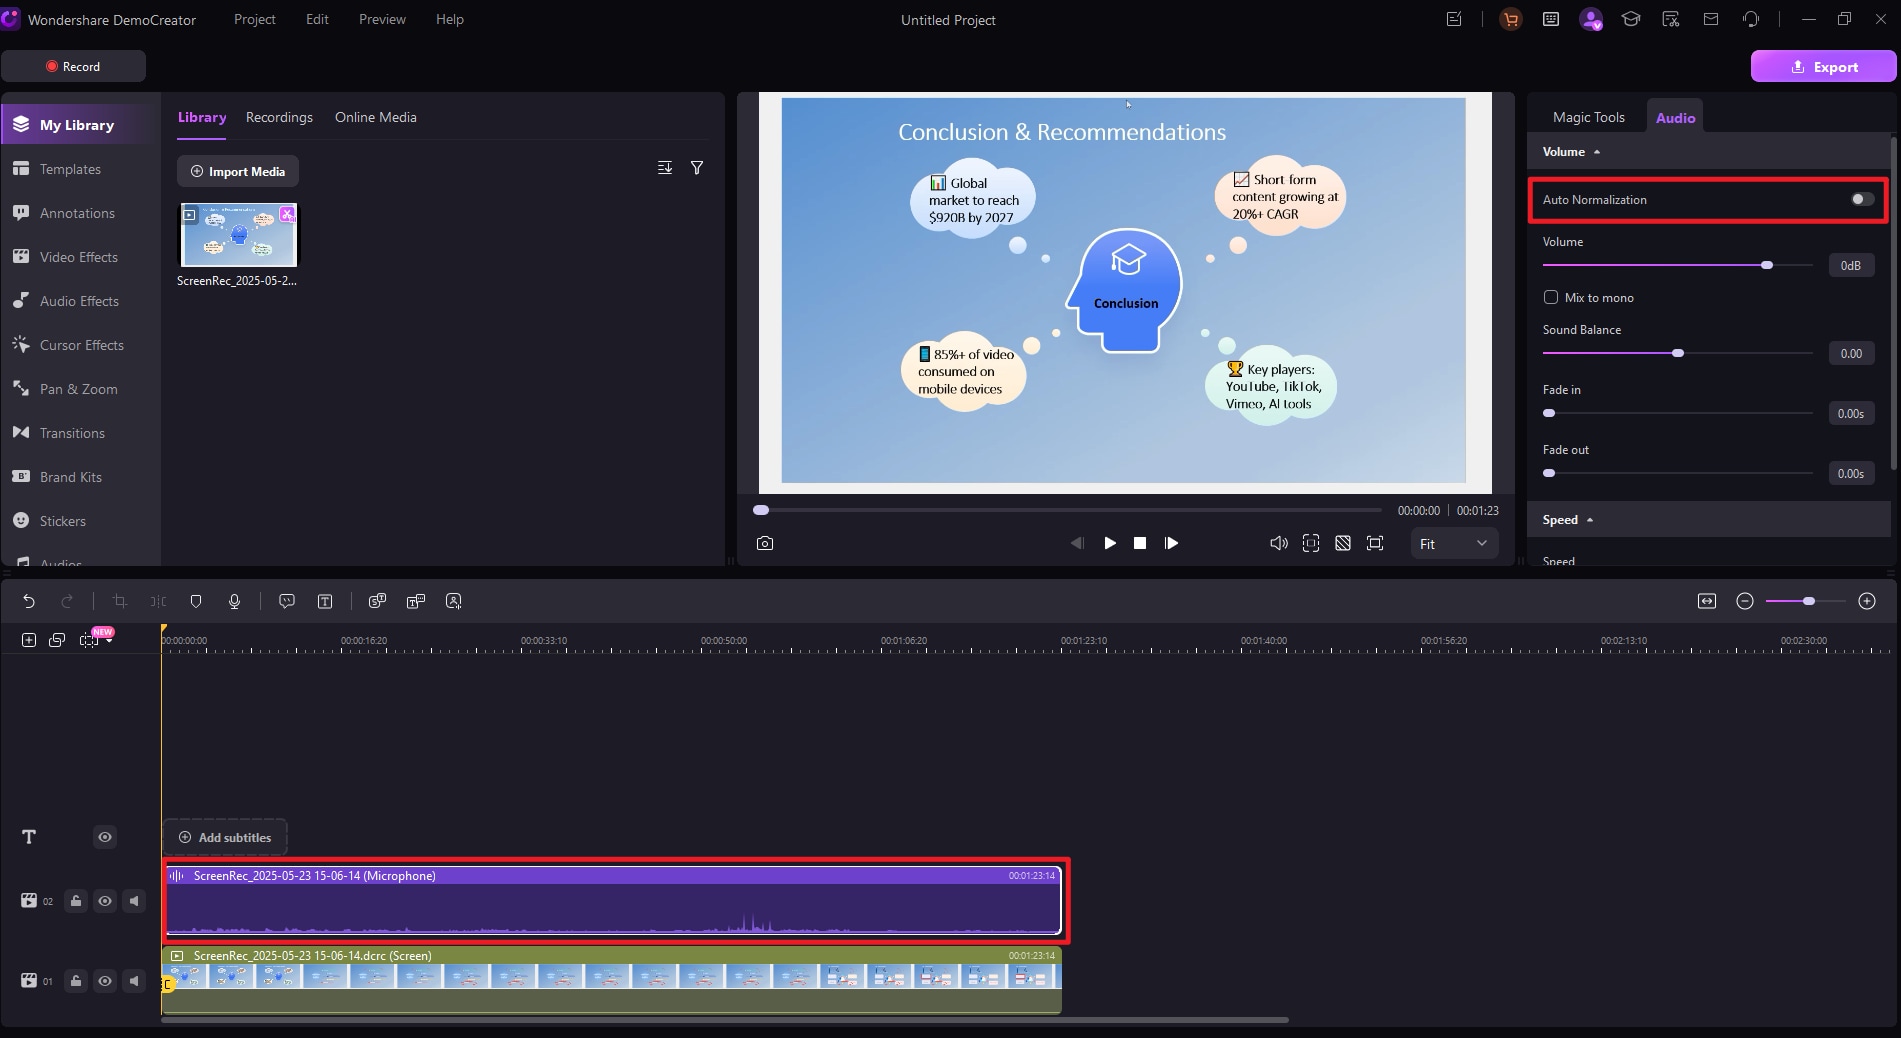
01. Feature Access
Drag an audio file onto the timeline, or import a recorded video into the editor. Select the audio file, then in the Properties panel under Audio -> Volume, you will find the Auto Normalization option.
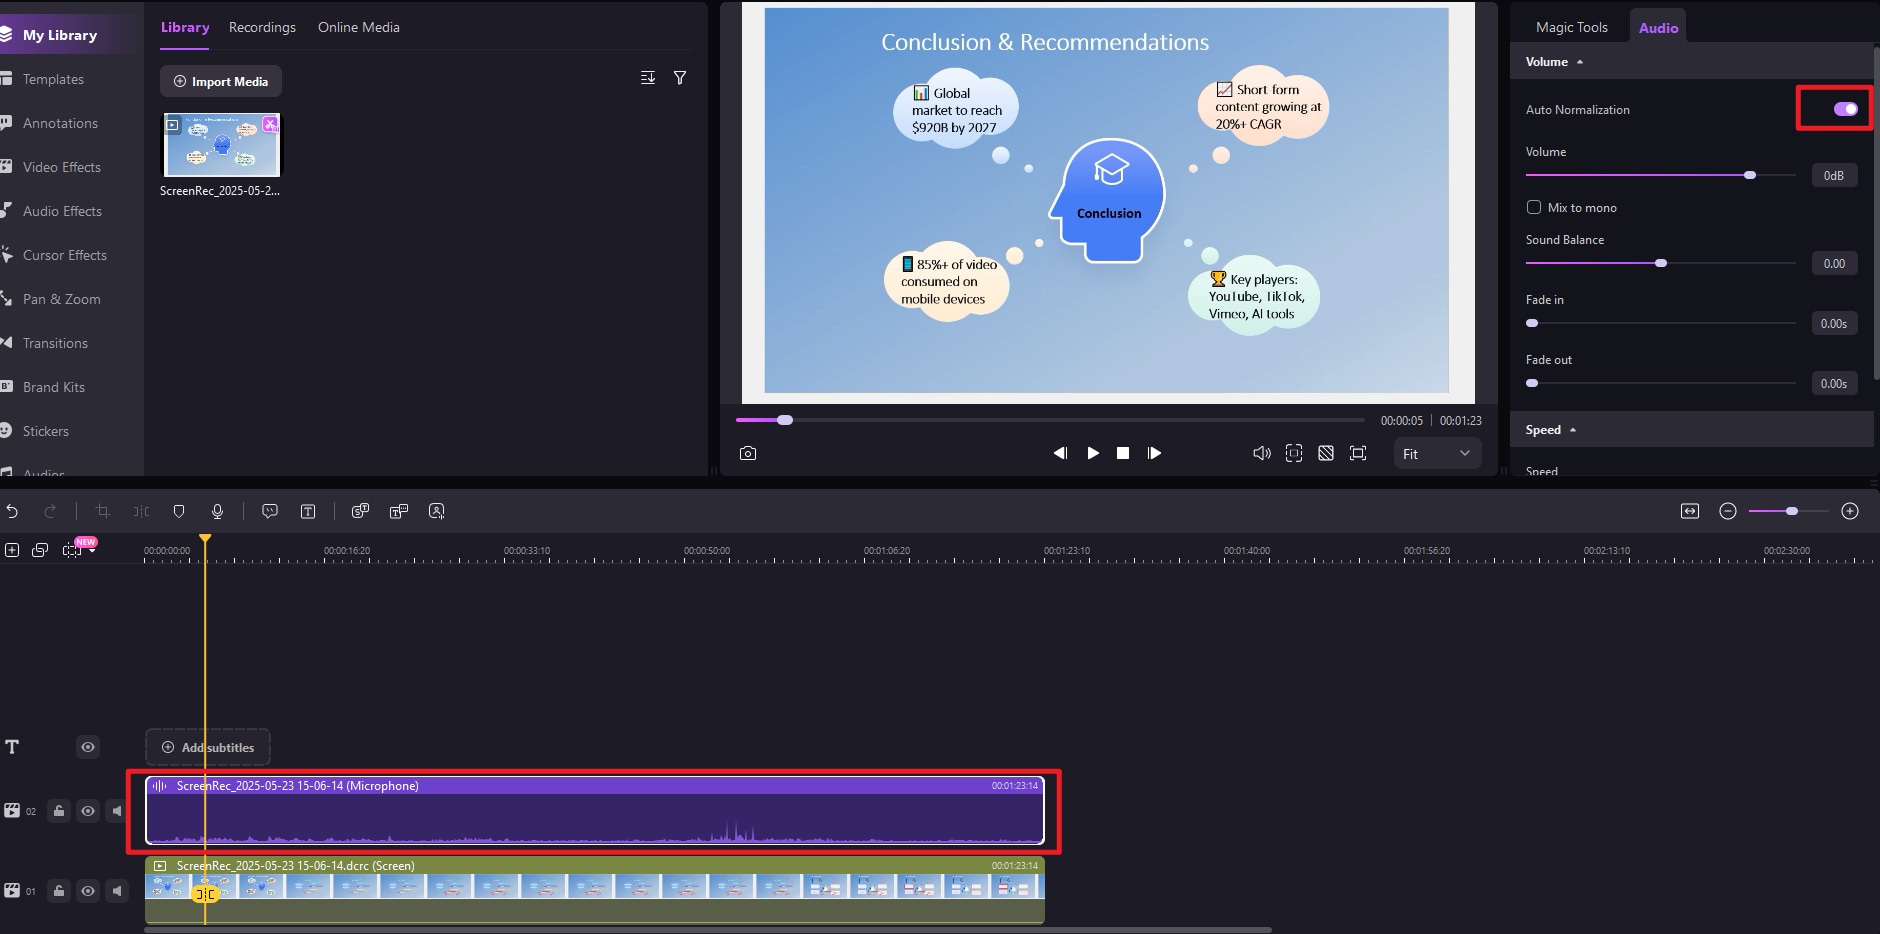
02. How to Use
Turn on Auto Normalization, and the volume stabilization feature will be applied to the selected audio with just one click.
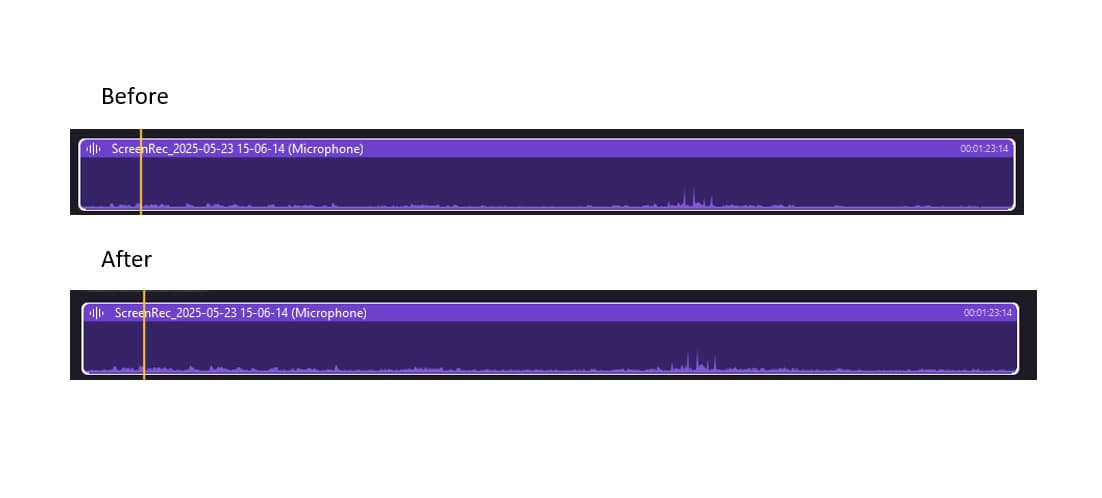
03. Effect Demonstration
-
Improves Creative Efficiency
One-click operation reduces the time spent manually adjusting audio tracks during post-production, boosting overall productivity. -
Enhances Viewer Experience
Lowers the barrier for audio production, enabling non-professional users to achieve “broadcast-level” audio quality, resulting in a better viewing experience for the audience.

