
![How To Record MP4 on Mac [Step-by-Step]](https://images.wondershare.com/democreator/article/record-mp4-on-mac-1.jpg)
If you need to create, share, and publish videos on different platforms, using the MP4 format is usually the most convenient option. Virtually every platform and media player will support this format.
The problem is that Mac prefers its native MOV format, so if you want to record MP4 on Mac, you'll need to go through a couple of hoops and find suitable tools for it.
Table of Content
How To Record MP4 on Mac With Wondershare DemoCreator
Wondershare DemoCreator is one of the most popular tools for capturing videos on Mac. It has a comprehensive video and audio recorder and an all-encompassing built-in editor, giving you access to dozens of unique features and capabilities.
You can use it to capture your screen and webcam with audio and enjoy high-quality videos in up to 4K/8K with 120fps. It supports virtual cameras such as Nvidia, OBS, and SnapCam, allowing you to create professional-looking content immediately.
Some of its stand-out recording features include:
- Separate tracks - capture screen, webcam, system audio, and microphone audio on separate tracks for easier editing;
- Unlimited recording time - as long as you have enough storage space on your Mac, you can record for as long as you want;
- On-screen annotations - add annotations, spotlight effects, cursor effects, and more to make your videos more engaging;
- AI teleprompter - ensure smooth line delivery with an AI teleprompter that keeps your script well-organized.
- Built-in video editor - perfect your recordings quickly and easily with AI tools, templates, and over 50K visual assets.
Once you're done recording and editing with Wondershare DemoCreator, you can export your video in one of many file formats available, including MP4, AVI, WMV, MOV, MKV, and others.
Here's how to record an MP4 video on Mac using this tool:
- Download and launch Wondershare DemoCreator on your Mac;
- Select the All-in-One Recorder;
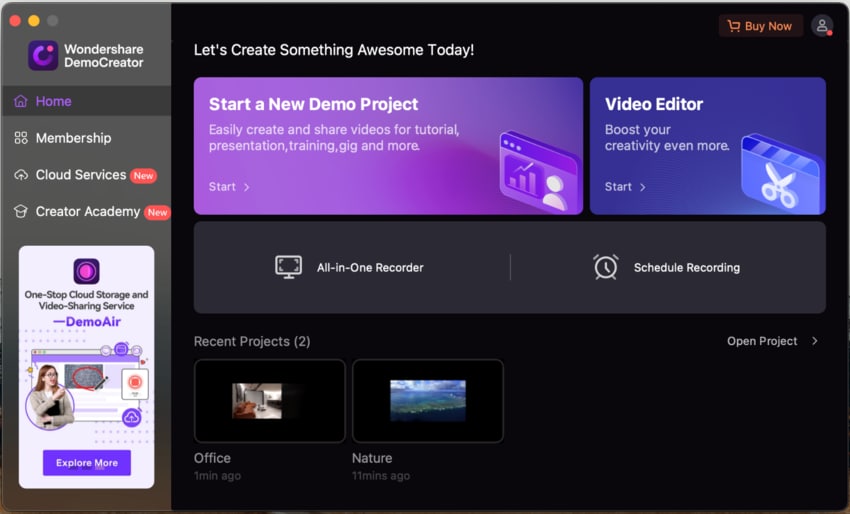
- In the new panel, customize your recording settings - choose your screen recording area and enable/disable system audio, microphone, and webcam;
- Select your recording scheme - Export Express for instant sharing or Edit Recordings for perfecting your video in the built-in editor;

- Click the red REC to start recording;
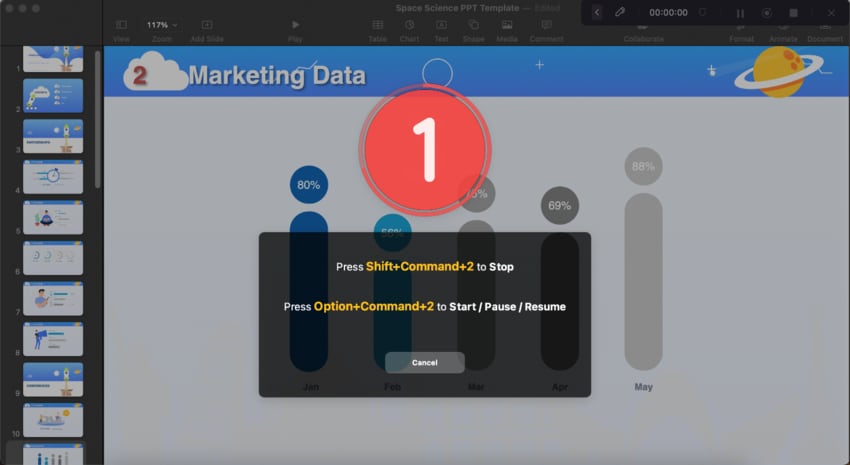
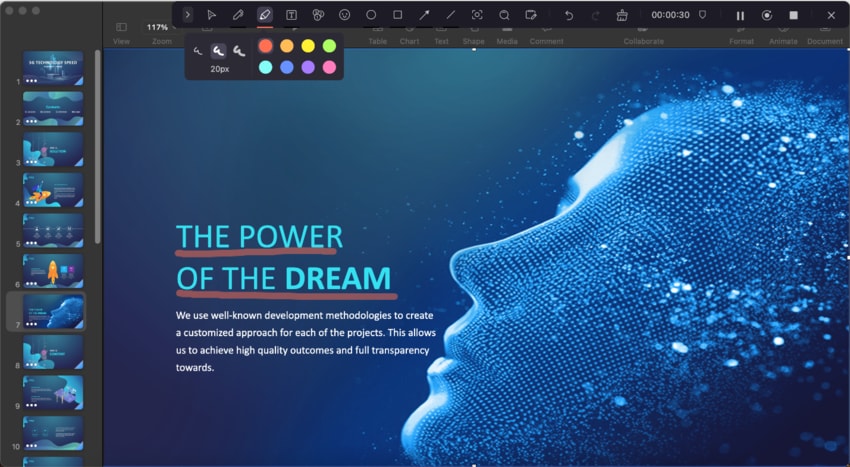
- During the recording, you can utilize the various annotation tools to make your point easier to follow.
- Click the End button or the Shift+Command+2 keys to stop recording.
- Edit the recorded video in DemoCreator's Video Editor (Optional).
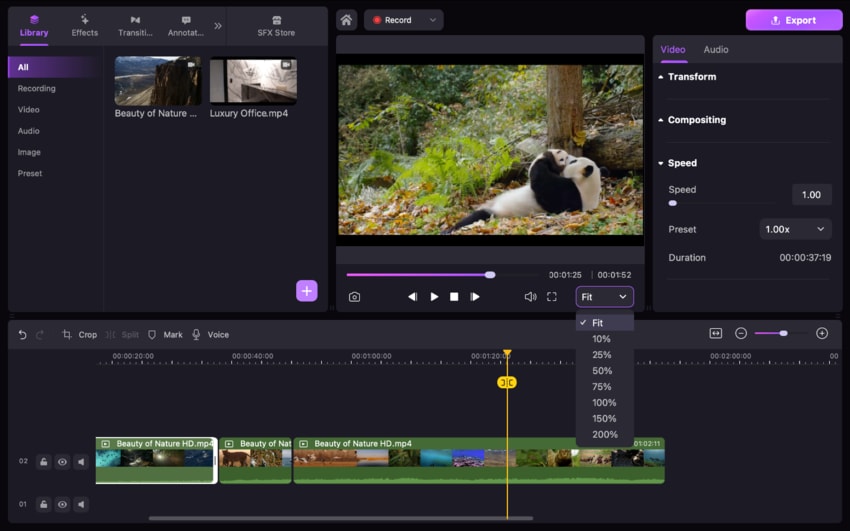
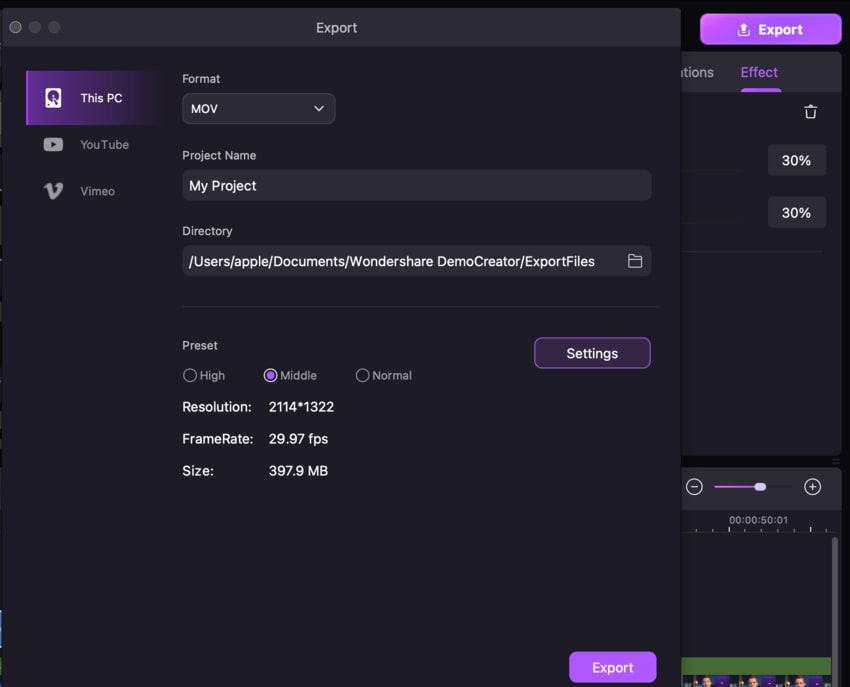
- After recording and editing, you can click the Export button in the upper right-hand corner to export and save your video. Under Format, choose the MP4 option and click Export.
How To Record MP4 on Mac With QuickTime Player
If you prefer, you can use the built-in QuickTime player to capture your screen on Mac. While it's primarily a simple media player, it has limited recording capabilities, enabling you to easily record your screen, webcam, and microphone audio.
Some of its key recording features include:
- Customizable capture area - record the entire screen or select the area to record by dragging your mouse over it;
- Visible mouse clicks - choose whether to make your mouse clicks visible or not;
- Customizable quality - select high or maximum quality (for movie recordings) to adjust quality settings.
The main issue with the QuickTime player is that it's not an MP4 screen recorder for Mac. It will record your videos in the MOV file format. The good news is that you can use tools like CloudConvert, FreeConvert, or Media.io to convert your Mac screen recording to MP4.
Here's how to record an MP4 file on Mac using a combination of QuickTime and Media.io, for instance:
- Open the QuickTime player and go to File > New Screen Recording;

- Click Options to customize your recording settings;

- Adjust your recording area;
- Click the Record button to start recording and the Stop button to stop recording;

- Go to File > Save to save your MOV video;
- Go to Media.io and click Convert your video;

- Click Choose Files to select your recorded MOV video and upload it (if you don't already have one, create your Wondershare account);
- Click Start All to convert your files and save them.

From there, you can share or post your video to any platform supporting the MP4 file format.
How To Record MP4 on Mac With DemoAir Online Screen Recorder
If you don't want to install any additional software and are unsatisfied with Mac's built-in solutions, Wondershare DemoAir (the online version of DemoCreator) will be your best option. A seamless browser-based screen recorder, it enables you to capture browser tabs or desktop apps with the utmost ease.
You can also use it to record your webcam and microphone and share your video messages with a single click.
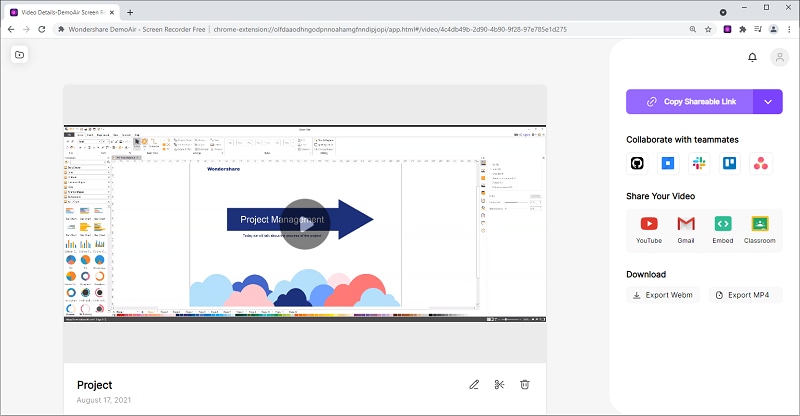
While not as feature-packed as DemoCreator, it enables you to easily record MP4 videos on Mac without requiring conversions.
Some of its key features include:
- Flexible recordings - record browser tab, desktop, and webcam;
- Drawing tools - highlight mouse clicks or use pen drawings to add more interest to your videos;
- Useful integrations - integrate DemoAir with platforms like Slack, Jira, GitHub, Asana, etc.
Here's how to screen record an MP4 on Mac with Wondershare DemoAir:
- Visit the Wondershare DemoAir website and click Online Video Recorder;
- In the new window that opens, choose your recording mode;

- Click Start Recording when you've set up the recording mode.
- Log in to your Wondershare account, if you haven't already.
For easier access to the DemoAir online screen recorder, you can also install the Chrome extension and have it always available through your browser with a single click.
How To Record MP4 on Mac With OBS Studio
Another excellent solution that you can use for Mac screen recording to MP4 is OBS Studio. Free and open-source, it allows you to express your creativity without limits.
While it does have a steeper learning curve than most similar solutions, making it a better choice for video production experts rather than novices, it has everything you need to make your screen captures as engaging as possible.
Some of the key features of OBS include:
- Unlimited scenes - set up as many scenes as needed and add smooth transitions without issues;
- Audio mixer - take advantage of a powerful audio mixer and include per-source filters;
- Modular UI - fully customize the layout to ensure it fits your preferred workflow.
OBS is one of the few solutions to capture system audio alongside your video on Mac. However, that option is only available if you have Ventura or newer macOS. Otherwise, you'd need to install additional software to be able to capture system audio.
Here's how to record an MP4 video on Mac with OBS:
- Download and launch OBS Studio on your Mac;
- Under Scenes, click the + icon to create a new scene;

- Under Sources, click the + icon to select what you want to record (display, webcam, etc.);
- Go to Settings > Output to set up your recording path and select MP4 as the file format;

- In the main window, click Start Recording.
On paper, recording in OBS seems simple enough. However, you must manually adjust all your preferred capture settings, which can be confusing. So, take the time to learn the ropes and familiarize yourself with OBS before using it for important projects.
How To Pick the Right MP4 Recording Method on Mac
Even though Mac doesn't support recording in MP4 natively, you still have plenty of third-party tools to enable you to create videos however you see fit. However, choosing the right option for your needs could be problematic. Here's what you should keep in mind when making your choice:
- Price - free solutions tend to either have a limited feature set or are complicated to use. If you need a user-friendly yet powerful solution, you'll usually need to pay for it;
- Ease of use - capturing videos in MP4 shouldn't feel like rocket science. Go for solutions that are intuitive and that don't require you to overcome a steep learning curve;
- Editing capabilities - a recorder with built-in editing capabilities will always be more useful as you'll be able to perfect your videos with ease.
On top of this, you should also consider what you'll be using an MP4 recorder for. For instance, if you just need a quick video for friends, DemoAir or QuickTime could work fine. If you need more professional-looking videos, solutions like Wondershare DemoCreator and OBS will likely be better suited for you.
Conclusion
Recording in MP4 on Mac could require some workarounds as no built-in solutions support recording in this file format. Even with QuickTime, you'll need to make your recordings in the MOV format and convert your videos later.
That's why it's always in your best interest to use solutions like Wondershare DemoCreator, DemoAir, or OBS. These third-party options give you access to much more powerful features and enable you to record in MP4 with the utmost ease.
FAQ
-
Can I record MP4 on QuickTime?
No, QuickTime doesn't record in MP4. You will need to first record your video in the MOV file format, then use solutions like Adobe Express, CloudConverter, or FreeConvert to convert it to the MP4 format. -
Does Mac support MP4 videos?
Yes, you can play MP4 videos on a Mac, and you can even record them if you have tools like Wondershare DemoCreator, DemoAir, or OBS installed. However, you cannot record in MP4 with Mac's built-in tools. -
How do I record MP4 voice on my Mac?
Using solutions like Wondershare DemoCreator, you can record your desktop, camera, and microphone and save your videos in the MP4 format on Mac. Simply launch DemoCreator and select the All-in-One Recorder, then customize your recording settings. If you want to record your voice, make sure to select your built-in microphone and then click Rec to start recording.


