
Have you ever struggled to record internal Mac audio before? Isn't it frustrating? This issue arises because your Mac's two built-in recorders can't capture internal audio. Luckily, you can use third-party screen recording applications. Explore the seven best tools to record internal audio on a Mac.
The table below shows a quick rundown of these top-notch tools for capturing internal audio on your Mac. Check it out to compare their features, benefits, and drawbacks.
| Tool | Features | Pros and cons |
| Wondershare DemoCreator | Direct internal audio recording, simultaneous recording of computer and microphone audio, exporting audio with no quality loss | Pros:
|
| QuickTime Player | Plugin needed to record internal audio, audio recording with quick edits, support for many file formats | Pros:
|
| Audacity | Plugin needed to record internal audio, unlimited audio tracks, many editing features for sound effects | Pros:
|
| MP3 Audio Recorder | Direct recording of computer audio, customized quality of internal audio recording, capturing audio files without quality loss | Pros:
|
| Simple Recorder | Plugin needed to record internal audio, scheduled recordings, pro features like Shortcuts and Status Icon | Pros:
|
| Recordit | Plugin needed to record internal audio, automatic uploads, no saving of recordings on the user's device | Pros:
|
| Easy Audio Recorder Lite | An additional plugin is needed, supports multiple file formats, adjustable sample and bit rate | Pros:
|
Way 1. Record Internal Audio on a Mac With DemoCreator
If you make online demos, educational videos, and similar content, Wondershare DemoCreator is a must-have for your Mac. Want to know the best part? It offers fantastic features like capturing audio and video from a screen and webcam, a convenient drag-and-drop audio editor, and many more.
Follow these steps to record internal audio on a Mac with DemoCreator:
- Download and launch DemoCreator.
- Click New Recording on the displayed screen.

- Enable Record System Audio. Choose"Don't record screen" in the Capture Area and disable the Microphone and Webcam if you only want to record the system audio of your Mac.
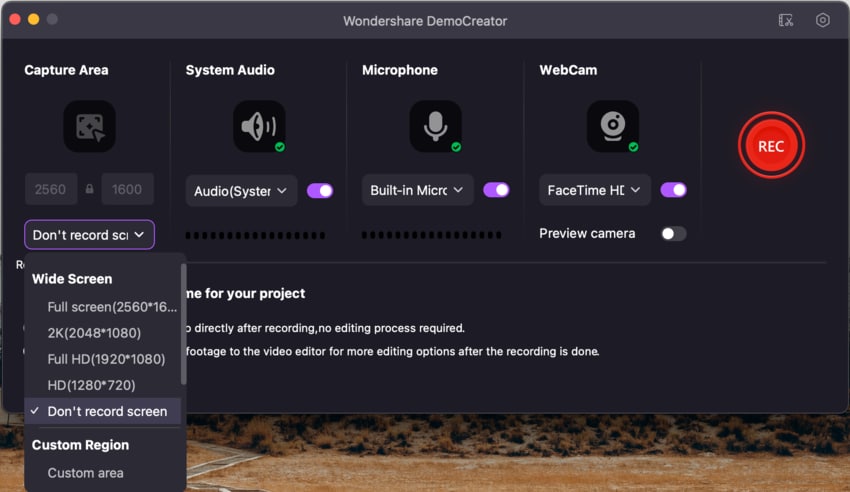
- Click the REC button to start the internal audio recording on your Mac.
- Click the End button or press Shift + Command + 2 to stop recording.
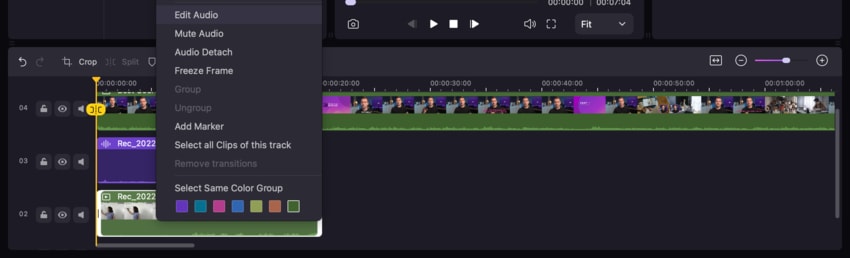
- Edit or Export the recording from your library.
Way 2. Record System Audio on a Mac With QuickTime Player
QuickTime Player is a media player that comes pre-installed on every Mac and can also function as an audio recorder for Mac. It's a free program you are bound to enjoy. However, to record internal audio using QuickTime Player, you must download the Soundflower extension.
Follow these instructions to record system audio on a Mac with QuickTime Player:
- Download and install the Soundflower plugin. You can get it from the MacUpdate;

- Go to Finder > Applications > Utilities > Audio MIDI Setup and click the . icon;

- Select Create Multi-Output Device;
- Click the Output tab and check the Built-in Output and Soundflower (2ch) boxes;
- Click the Settings icon and select Use This for Sound Output.
- Open the QuickTime Player.
- Navigate to the File menu and choose New Audio Recording.

- In the audio recording window tap on the downward pointing triangle.
- Choose Soundflower (2ch).
- Click the Record button to initiate the internal audio capture on your Mac computer.

- Click File > Save As to save your recording.
Way 3. Capture Internal Audio on a Mac With Audacity
Audacity for Mac is a fantastic free tool for audio recording on a Mac. It gives you high-quality sound and excellent recording capabilities with minimal distortion. Despite its robust features, Audacity is easy to use. However, to capture internal audio with Audacity, you must go through the hassle of installing an additional Soundflower plugin.
Follow these instructions to record Mac system audio with Audacity:
- First, download and set up the Soundflower plugin by following the steps outlined in Way 2.
- Download and install Audacity.
- Press Command + Spacebar to open Spotlight and search for Audacity.
- Launch Audacity and go to Audio Setup.
- Click Recording Device and choose Soundflower (2ch).
- Hit the Record button.

- After recording your system audio, click the Stop button to end the process.

Way 4. Record Internal Audio on a Mac With MP3 Audio Recorder
The MP3 Audio Recorder is an excellent choice for those who like to personalize their recordings. With this app, you can quickly create new recordings while having the ability to specify numerous options for your custom recording.
Stick to these simple guidelines, and you'll be on the right track:
- Download, install, and launch the MP3 Audio Recorder.
- Expand the drop-down list next to the Settings icon.
- Once back on the app's main screen, click the red Record button to start recording the internal audio on the macOS.

- Click the Stop button to end the recording.
- Choose where to save the recording.

- Simply double-click on the file to listen to it.
Way 5. Record Mac's Internal Audio With Simple Recorder
Simple Recorder is the ideal option if you're looking for a straightforward voice recorder for your Mac. It's straightforward to operate, with only a few setup steps. However, it only supports M4A and MP3 formats for audio files.
Quickly record internal Mac audio by following these simple instructions:
- Download and set up the Soundflower plugin by following the steps outlined in Way 2.
- Donwload and install the Simple Recorder app.
- Click the small icon that will appear in your menu bar.

- Choose Soundflower (2ch) as the internal audio source.
- Go to Preferences > Select Default Folder to set the preferred location for saving your recordings.

- Click the app icon and hover over Preferences to personalize the recording.
- Click the Record button at the top to start recording.
- When you are done, tap the app icon again and select the Stop option.

Way 6. Record Internal Audio on a Mac With Recordit
Recordit is a user-friendly and versatile screen video and audio recording tool. Furthermore, its free availability makes it an ideal choice for capturing screencasts of various content like presentations, videos, and lectures.
Here are the simple steps to help you record internal audio on your Mac:
- Download and install Recordit.
- Click the Record button on your screen to start the Recordit application.

- Click the Stop button to finish recording.
Way 7. Capture System Audio on a Mac With Easy Audio Recorder Lite
Whether you're a musician, podcaster, or another audio professional, Easy Audio Recorder Lite has got you covered. Its intuitive interface and robust recording capabilities make it a must-have tool for any Mac user.
Follow these simple instructions to capture system audio with Easy Audio Recorder Lite on macOS:
- Download and set up the Soundflower plugin by following the steps outlined in Way 2.
- Install the program and click the Cog icon to open the Settings.
- Expand the Input Device drop-down menu, pick the Soundflower (2ch) for internal audio source, click Format to choose the desired option, and hit OK to save your changes. Then, click the red Record button to start recording.

- Hit the Stop button to finish recording.

- Check your recording by going to the Settings menu and clicking Go to files location.
Conclusion
If you want to record internal audio on your Mac, don't worry—it's pretty straightforward. Even though Macs don't have a built-in feature for recording internal audio, you can address this issue using third-party software.
If you're new to recording internal audio with your screen, try Easy Audio Recorder Lite, as it's free and straightforward.
However, give Wondershare DemoCreator a shot for a premium experience. It's a reliable solution to record internal audio on your Mac with excellent features tailored to your recording and editing needs.
FAQs About Recording System Audio on Mac
-
Can I record system audio on a Mac?
Yes, you can use DemoCreator to record system audio on a Mac easily:- Download and launch DemoCreator on your Mac.
- Click the All-in-One Recorder in the main menu.
- Enable the System Audio option.
- Click the REC button to start recording.
-
How do I record internal audio on my Mac?
You can install a third-party plugin, such as Soundflower, to record internal audio on a Mac using QuickTime Player. Alternatively, you can use a professional third-party recorder like Wondershare DemoCreator to record internal audio from a Mac directly. -
Can you record system audio with QuickTime Player?
QuickTime Player can't record system sounds while screen recording. To capture the screen and system audio simultaneously using QuickTime Player, you must install an extension like Soundflower. -
Is there a built-in voice recorder on Mac?
Apple offers two built-in Mac audio recorders: QuickTime Player and Voice Memos. -
How do I record my Mac screen with system audio?
You can use many tools to record your screen with system sound. For example, you can use Wondershare DemoCreator, an excellent application with fantastic features for capturing audio and video from the screen and webcam. -
How do I record internal audio on a Mac with GarageBand?
Just follow these simple steps:- Open GarageBand.
- Create a new or open an existing project, or choose from the GarageBand template library.
- Click Track > New Track to begin recording external audio.
- Choose the input source, like a microphone or a musical instrument.
- If you prefer to record internal audio, go to Tracks Settings and select your Mac's Built-in Microphone or Built-in Output.
- Hit the red Record button and click it again to stop recording.
- After that, you can edit the recorded audio using GarageBand.
-
How do I record internal audio on my Mac with Soundflower?
- Open QuickTime.
- Navigate to the File tab and click Audio Recording.
- This action will open a new window. Locate the drop-down arrow next to the Record icon and pick Soundflower (2ch) as the audio source.
- Once you do that, you can start recording audio in the background.


