

Do you have a favorite YouTube podcast you’d like to listen to offline? Do you want to download YouTube songs or audiobooks to your computer or smartphone? You can use several tried-and-tested methods.
Before showing you how to take audio from a YouTube video, let us address the elephant in the room: is extracting audio from YouTube legal? Find out below.
In this article
How to Take Audio From YouTube Videos Legally
Only premium subscribers can download videos, podcasts, audiobooks, and songs from YouTube Music to enjoy them offline. YouTube prohibits downloading for other users unless they have permission from content creators.
“How do I take audio from a YouTube video without violating the terms and conditions,” you may ask. Well, you can legally download YouTube content for personal use. Only if you use a downloaded video or audio for commercial purposes would you get into legal trouble due to copyright infringement.
Therefore, respect YouTube’s community guidelines and copyright policies to avoid severe legal penalties.
How to Take Audio From a YouTube Video – Five Methods
The following methods are your best options for extracting audio from a YouTube video. Most don’t require paying a dime, while some have free and paid versions. However, all are fast and straightforward.
1. Use an Online Tool
Online tools provide the fastest way to take audio from YouTube videos. You can access them via your browser instead of downloading software and get the desired content in a few clicks.
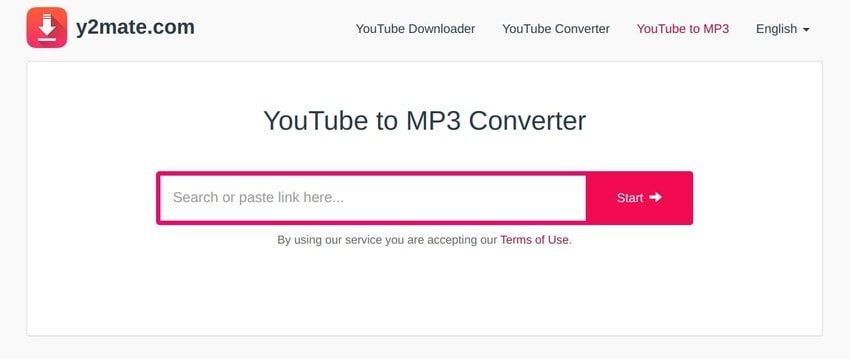
Y2Mate is among the most prominent online tools for downloading and converting YouTube videos to audio files. It’s compatible with all browsers and works seamlessly on any desktop and mobile device. Here’s how to use it:
Step 1: After copying the desired YouTube link, visit Y2Mate, choose the YouTube to MP3 Converter in the navigation bar, and paste the URL into the designated box. You don’t need to click Start because the tool will instantly display the video and conversion options.
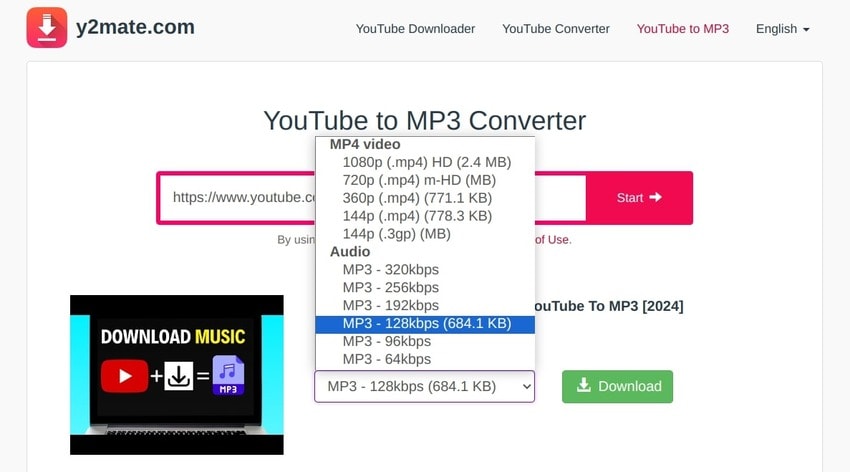
Step 2: Expand the MP3 drop-down list to choose a bitrate and click Download. Your audio will be ready in a few seconds.
2.Use Desktop Software
Why use desktop software when you have convenient online tools? Because desktop solutions often have more options, including more output formats and multiple supported platforms (e.g., TikTok, Vimeo, Twitch, Facebook, SoundCloud, etc.). Some also let you download videos, audiobooks, and podcasts.
4K Download is an excellent example, offering several desktop and mobile solutions. They’re free and available on Windows, macOS, Linux, and Android. There’s a premium version for downloading content, but you don’t need it to extract audio.
Here’s how to take the audio from a YouTube video using the 4K YouTube to MP3 software:
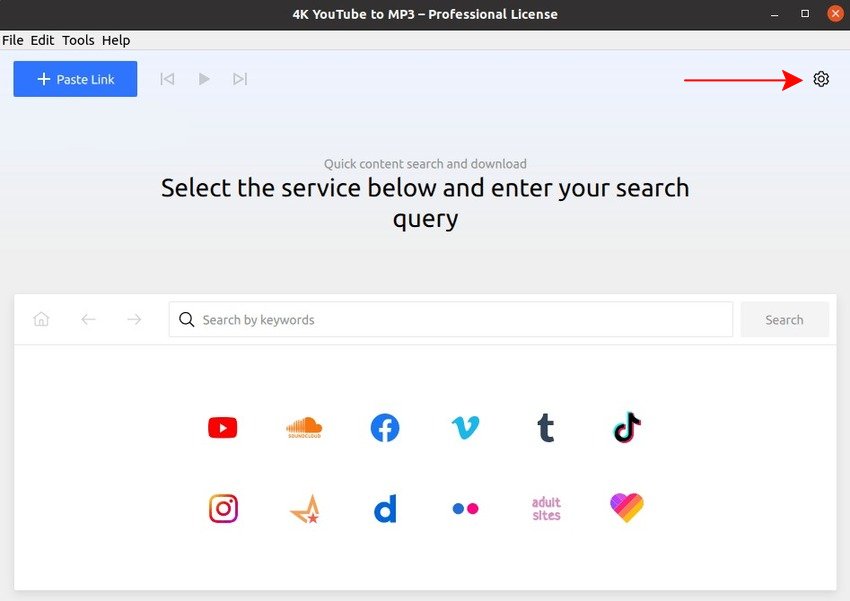
Step 1: Download and install 4K YouTube to MP3 to your computer and go to Settings.
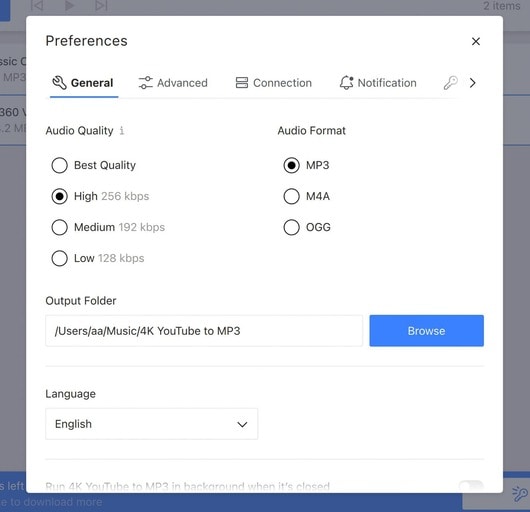
Step 2: Choose the audio quality and format under General Preferences and set the output folder.
Step 3: Visit YouTube and copy the desired video’s URL.
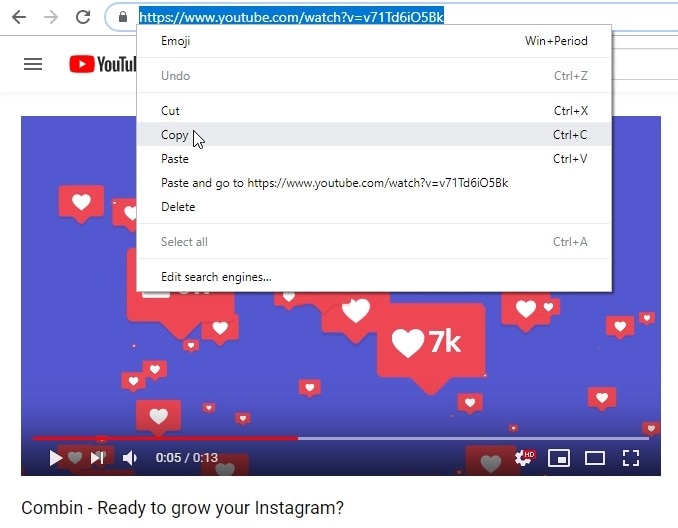
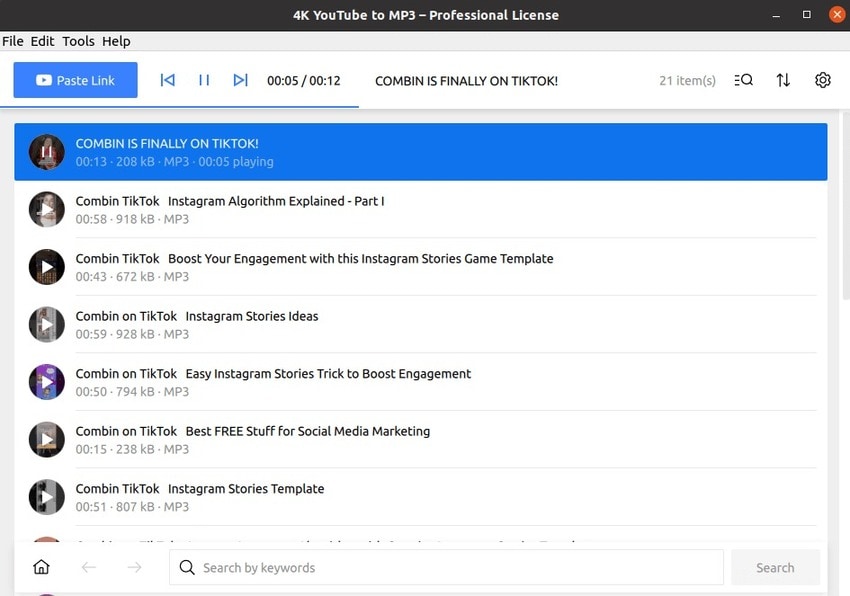
Step 4: Return to the 4K YouTube to MP3 software and click Paste Link.

Step 5: The conversion will start instantly. Once it finishes, you can access the audio in the specified folder or listen to it in the software’s built-in player.
3.Use a Mobile App
Extracting YouTube audio directly to your smartphone eliminates the need to transfer the file from your computer. However, Google and Apple have removed all YouTube downloaders and converters from their app stores. You can still find their APK files across websites, but we don’t recommend them because you might expose yourself to cybersecurity risks.
Therefore, stick to approved apps, but remember that they don’t let you rip audio from YouTube videos directly. They can only extract audio from videos in your internal storage, so download the one you want first. Y2Mate YouTube Video Downloader is your best free option, although the maximum video quality (which affects audio quality) is 1080p.
Here’s how to take audio from YouTube video files on Android and iOS devices.
Android
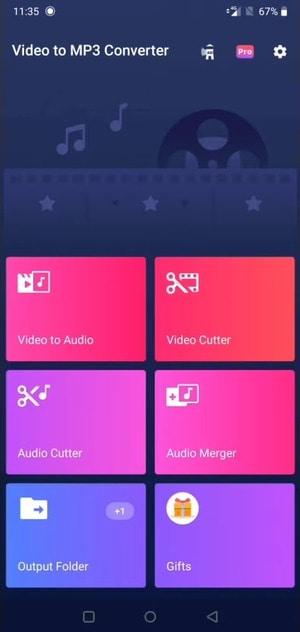
Step 1: Download the desired mobile app from the Play Store and choose an option for converting a video into audio. We’ll use InShot’s free Video to MP3 Converter for illustration. Once you launch it, set your Output Folder and tap Video to Audio.
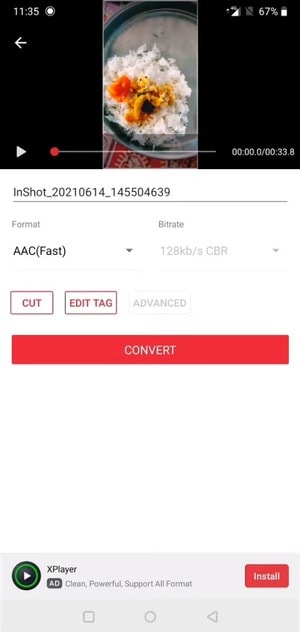
Step 2: Choose your downloaded YouTube video from the Gallery and select a format and bitrate. Tap Convert and access your audio within seconds.
iPhone and iPad
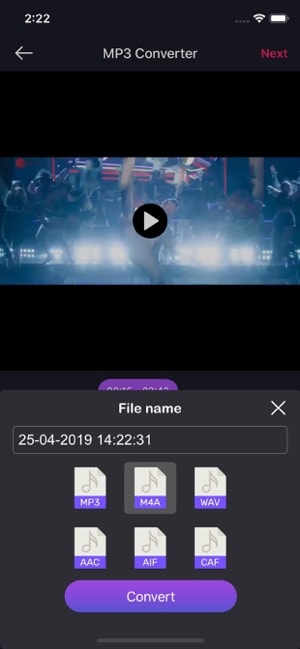
Step 1: Download the free Video to MP3 – MP3 Converter (or another app) from the App Store and tap Video to MP3. Despite the name, you can save audio files in other formats.
Step 2: Choose your downloaded YouTube video from your iPhone’s (or iPad’s) gallery and select the desired audio format. Tap Convert and wait a few seconds.
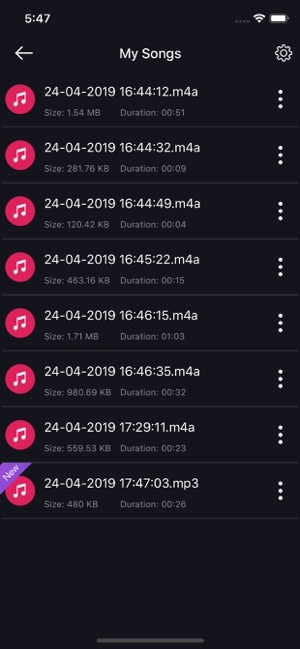
Step 3: Return to the main interface and tap My Songs to find your audio.
4.Use a Video Recorder
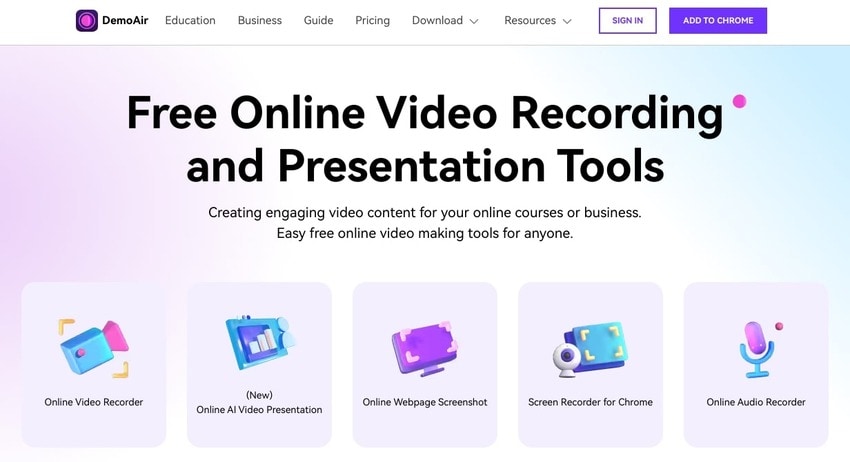
When someone says “video recorder,” you probably think of desktop software. However, you can use an online video recorder like Wondershare DemoAir, which requires no subscription. It lets you record your entire screen, a specific window, or a Chrome tab while capturing system audio (i.e., your desired YouTube video’s audio).
However, using a video recorder requires converting your file to MP3 or another audio format afterward. Still, it’s excellent for having both versions for offline use.
Here’s how to record a YouTube video with Wondershare DemoAir and convert it into audio:
Step 1: Visit Wondershare DemoAir via Google Chrome and choose the Online Video Recorder.
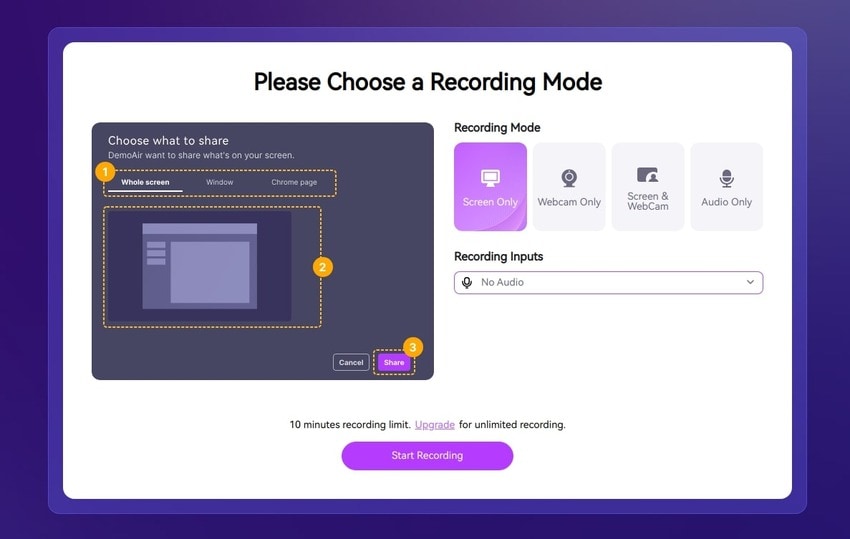
Step 2: Choose the Screen Only recording mode and select No Audio under Recording Input. Click Start Recording.
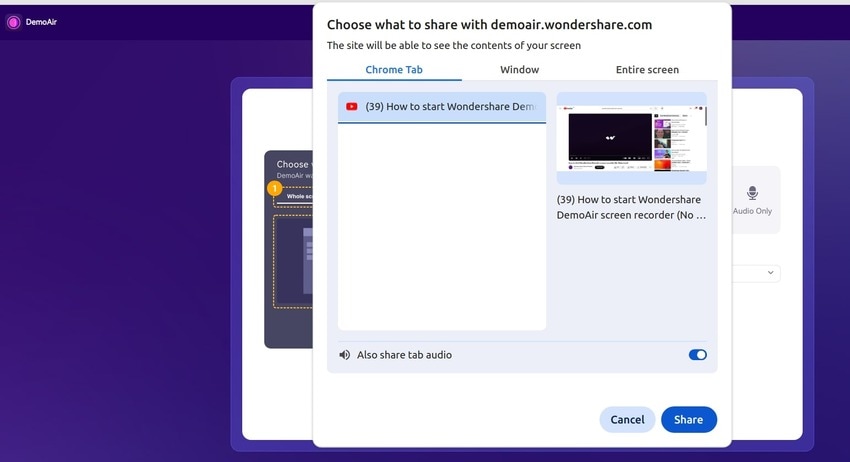
Step 3: Prepare your YouTube video in another tab and select it under the Chrome Tab in DemoAir. Finally, click Share to start recording.
Step 4: DemoAir will switch to the specified YouTube tab, so play the video and click Stop Sharing to finish recording. The Save dialog box will launch instantly, so choose a location on your computer.

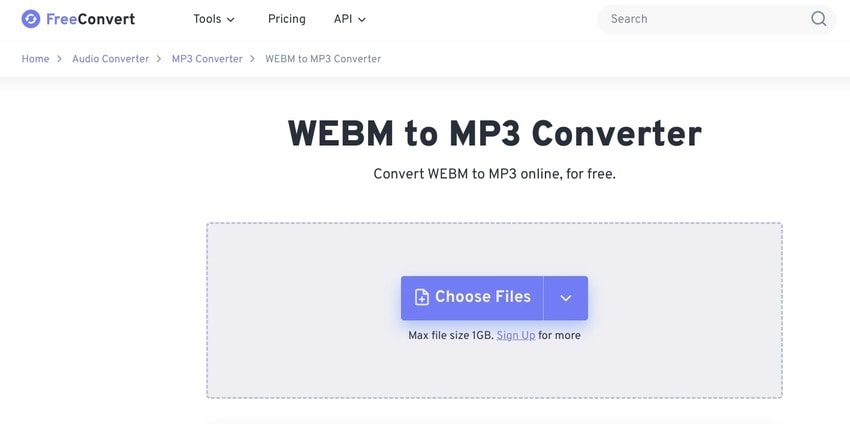
Step 5: Wondershare DemoAir saves screen recordings in the WebM format, so change it with any preferred tool. We’ll use FreeConvert’s Web to MP3 Converter for demonstration. Visit the page and click Choose Files to upload your screen recording.
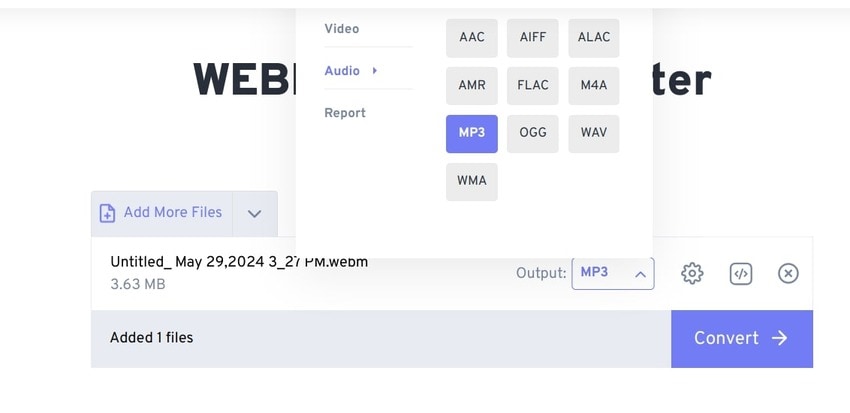
Step 6: Expand the Output options (unless you prefer the default MP3), choose an audio format, and click Convert.
Step 7: Once you see the Done status, click Download to save the audio to your computer. You can also hover over the Chevron icon to reveal other saving options: Google Drive, Dropbox, OneDrive, and a QR code to download the file to your smartphone.

5. Use an Audio Recorder
An audio recorder may be the best way to take audio from a YouTube video. After all, it doesn’t require capturing your screen and converting the file. Why is it better than online tools like Y2Mate? It depends on the recorder, but you can typically access a more extensive output format support and enjoy built-in audio editing capabilities.
Have you tried Wondershare DemoCreator? Its macOS version lets you record system sounds, meaning you can play a YouTube video and capture the audio. The Windows edition may not have that feature, but you can import a downloaded YouTube video and detach its audio.
The best part? You can use it without subscribing. You can record and edit audio and videos for free, although the premium version unlocks more features.
Here’s how to take audio from a YouTube video using Wondershare DemoCreator on your Mac:
Step 1: Download DemoCreator for macOS and run the installation file.
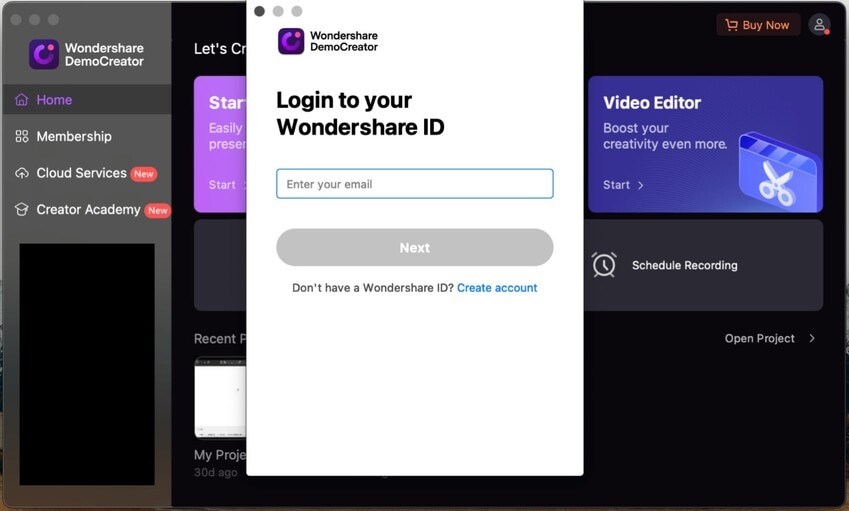
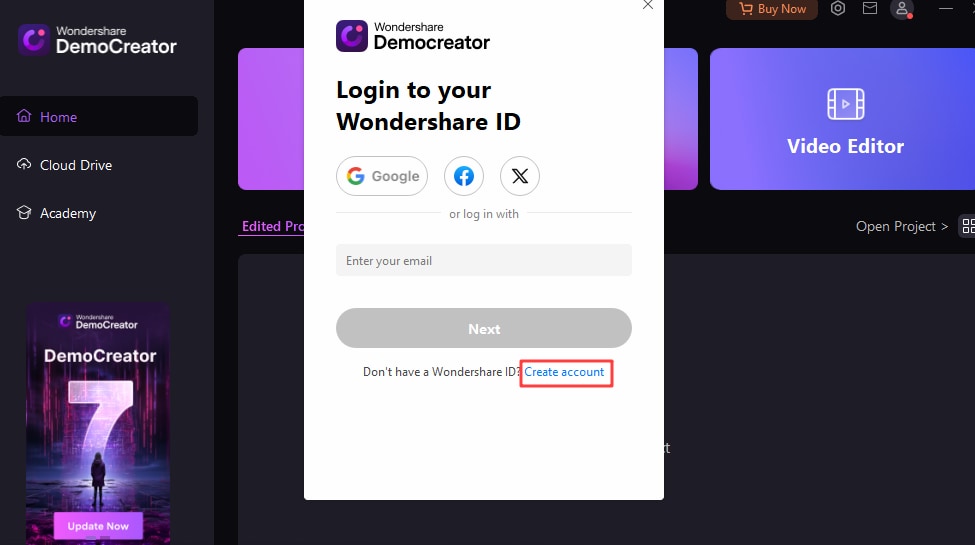
Step 2: Launch the software and create or log into your account.
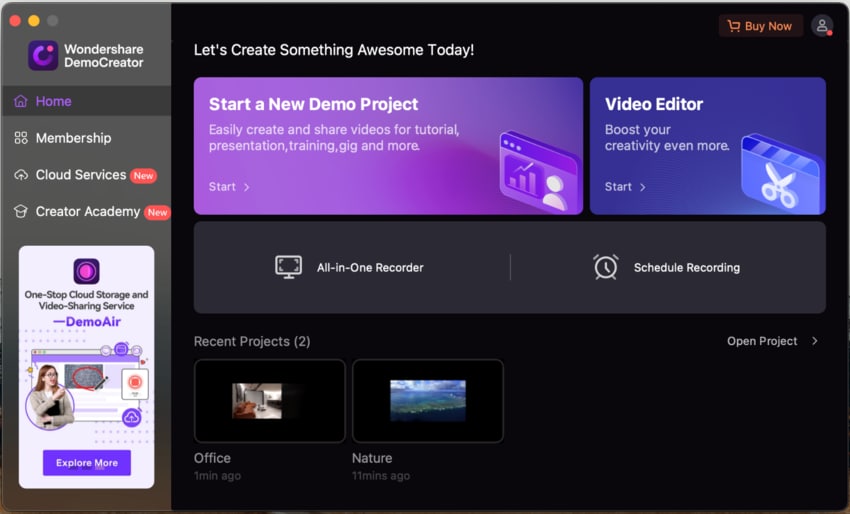
Step 3: Open the All-in-One Recorder.
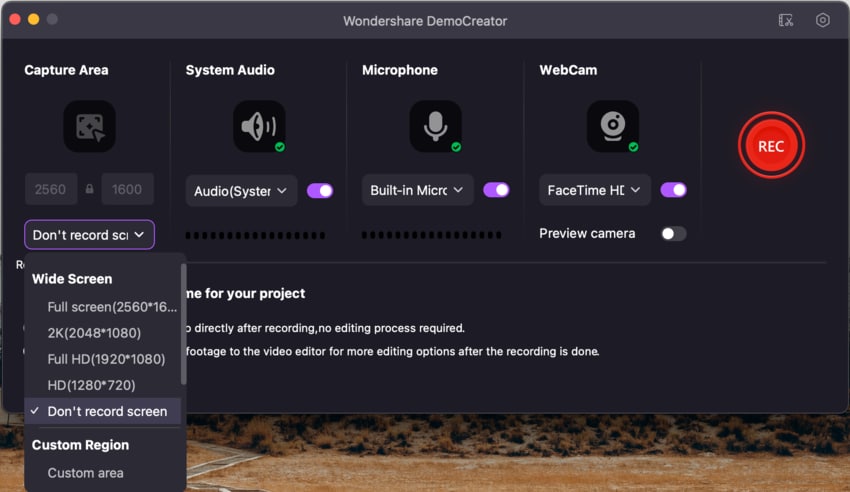
Step 4: Click the Don’t record screen option under Capture Area and turn off your microphone and webcam (if any). Choose your system audio device and click the REC button (or use the Option + Command + 2 shortcut).
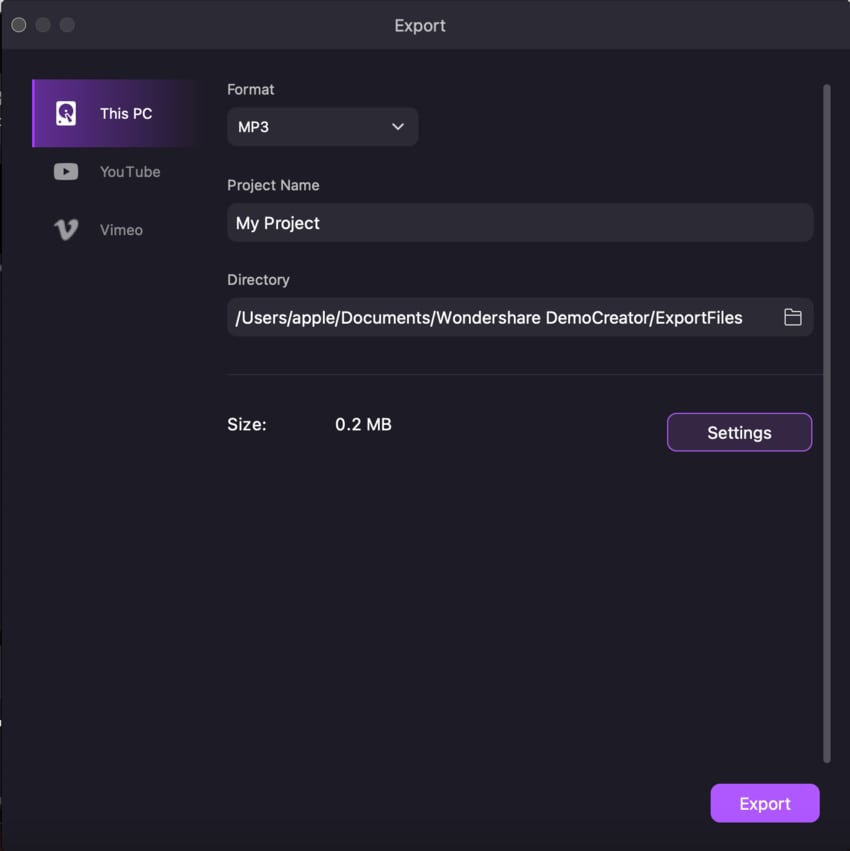
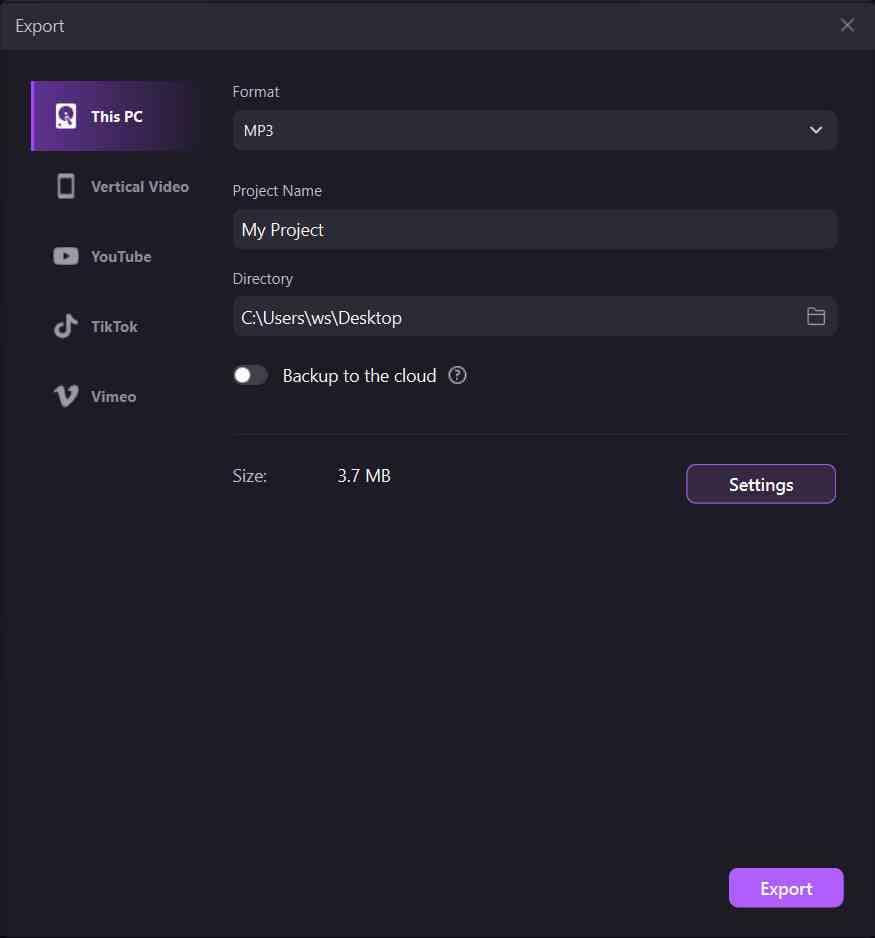
Step 5: Play your YouTube video and click the Stop button to finish recording (or hit Shift + Command + 2). DemoCreator’s Video Editor will launch, so fine-tune your recording (e.g., trim the beginning and end) and click Export. The only supported audio output format on macOS is MP3, so select a directory and hit Export.
You can’t record audio only using DemoCreator if you’re a Windows user. However, you can detach audio from an existing file (the macOS version also has that feature). Therefore, download your YouTube video and follow these steps:
Step 1: Download and install DemoCreator for Windows.
Step 2: Log into your account or create a new one.
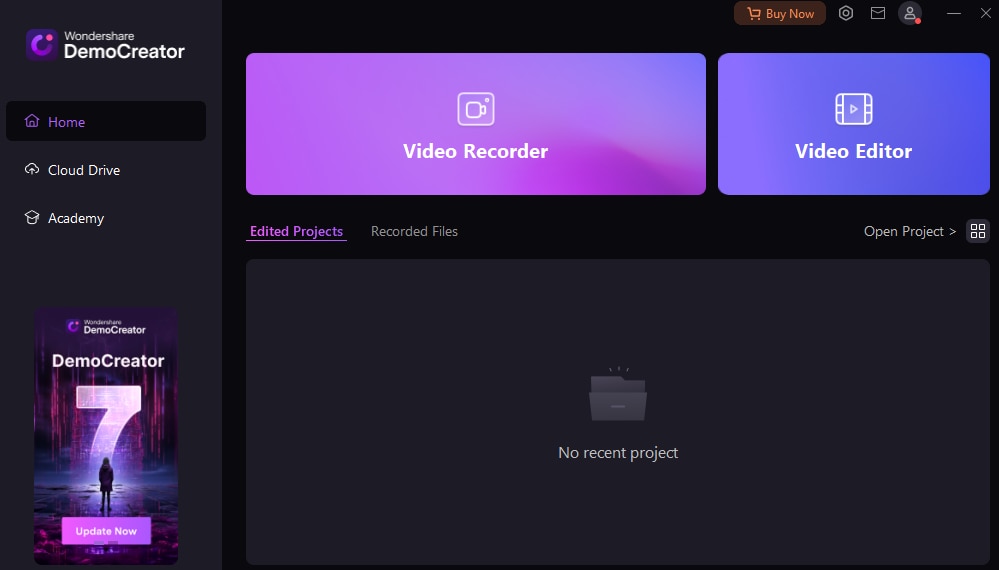
Step 3: Open the Video Editor.
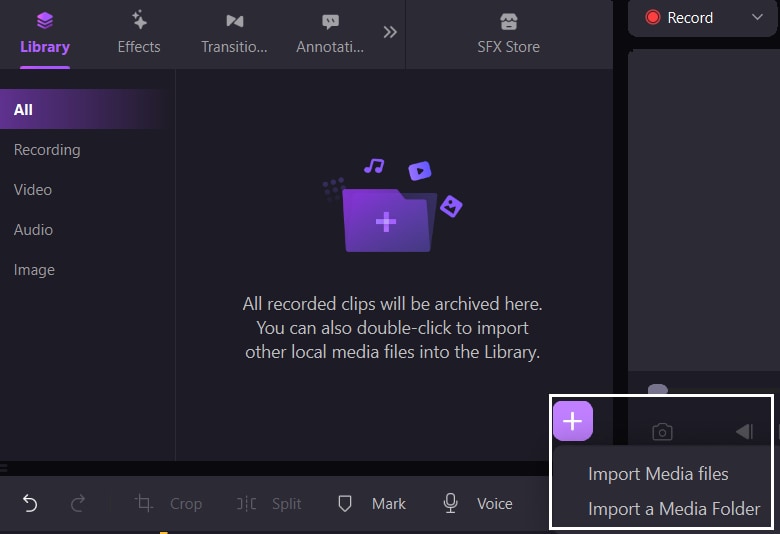
Step 4: Click the Plus button and select Import Media Files to add your YouTube video.
Step 5: Drag and drop it into the timeline below, right-click it, and select Audio Detach.
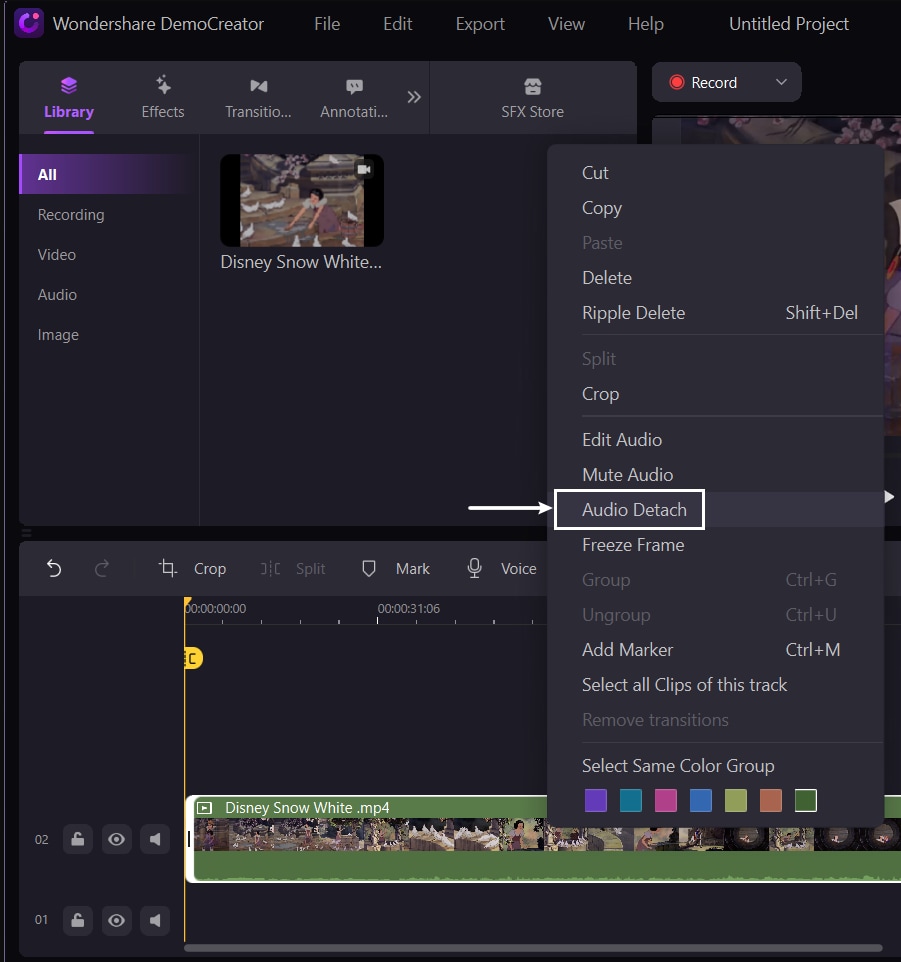
Step 6: Click Export and choose a format (MP3 or M4A) to save the extracted audio to your PC.
- Record customized screens with audio and edit them in different tracks.
- Capture gaming videos, tutorials, and presentations and then edit them in one tool.
- Built-in unlimited editing templates, special effects, and other sources.
- Supported export to MP4, MOV, MKV, GIF, and other formats.

Comparing Different Methods for Extracting YouTube Audio
By now, you probably know which method you’ll choose to take audio from a YouTube video. We’ve briefly explained the benefits of each, but what about the recommended tools? Let’s compare them to help you make an informed decision.
| Tool | Platform | Compatibility | Output Formats | Ease of Use |
| Y2Mate | Online tool | Chrome, Firefox, Microsoft Edge, Opera, Brave, Safari, etc. (mobile-friendly) | MP3 | Ultra easy – no software download |
| 4K YouTube to MP3 | Desktop software | Windows, macOS, Linux, and Android | MP3, M4A, and OGG | Easy – conversion in several steps |
| Video to MP3 Converter | Mobile app | Android | MP3 | Medium – requiring a downloaded YouTube video |
| Video to MP3 – MP3 Converter | Mobile app | iOS and iPad | MP3, M4A, WAV, AAC, AIF, and CAF | Medium – YouTube video download requirement |
| DemoAir | Online video recorder | Google Chrome | WebM | Medium – requiring a video converter like FreeConvert |
| DemoCreator | Offline audio recorder and editor | Windows and macOS | MP3 and M4A (Windows) or only MP3 (macOS) | Easy – recording audio only or detaching it from a video |
Conclusion
Extracting audio from YouTube videos is straightforward. Whether you choose a mobile app or an online or offline tool, you can quickly get the hang of it and enjoy your favorite audio content without an internet connection.
However, if you need more than YouTube video-to-audio conversion, Wondershare DemoCreator and its cloud-based DemoAir are your best options.
DemoCreator’s six recording modes and AI-powered editing features are perfect for high-definition gameplay recordings, presentations, online courses, tutorials, product demos, and other videos. On the other hand, DemoAir’s recording capabilities are ideal for capturing your screen, webcam, and microphone without installing software.


