

Are you a teacher looking to create engaging educational lectures, or a business professional aiming to deliver a powerful presentation with clear voice-over explanations?
Recording voice on PowerPoint slides can significantly enhance the effectiveness of your presentation, making it more accessible and understandable for your audience. It's also the perfect solution if you aren't presenting in person. Stay with us; this guide can teach you how to record audio in PowerPoint on a Mac.
Can PowerPoint Record Audio Voiceovers on Mac?
Yes, PowerPoint on Mac can record narrations. This feature is rarely seen in PowerPoint presentations, as many users are unaware of it. Yet, the Mac version of the app can create voiceovers. Even better, there are two other methods for recording Mac PowerPoint narrations. Let's see what they are.
| Method | Ease of Use | Efficiency |
| PowerPoint | Medium | Medium - You can't record the system audio and might have difficulties with specific export settings |
| DemoCreator | Easy👍 | High - You can create engaging presentations with audio or even add yourself as an overlay through webcam recording👍 |
| QuickTime | Medium | Low - The app can either record system audio or microphone, but not both |
How To Record Audio Voiceovers in PowerPoint on Mac
PowerPoint for Mac has a decent built-in slideshow recording feature. This tool is excellent for recording voiceovers and making your presentations better. It's also effortless to use, and here's how:
- Launch the PowerPoint app on your Mac and import your presentation.
- Head to the Slide Show tab and click the Record Slide Show option. Alternatively, click the Arrow next to it to adjust settings.

- You'll see a recording menu where you can record, pause, or adjust microphone and webcam settings.

- When ready, tap the red Record button.
- Once you're done, stop the recording and close its menu. Then, navigate to File > Export > Create a Video. Select the quality and the location, and click the Create Video button.

- Follow PowerPoint's prompts to edit the file name and choose the desired save location for your video.
- From the File Format options list, select either MP4 or MOV. We recommend saving your file as an MP4, as it is more compatible than MOV.

- Choose either Presentation Quality or Internet Quality for your video export. Note that Presentation Quality may take longer to export.
- Ensure the "Use Slide Timings and Narrations" checkbox is selected for incorporating recorded timings and narrations into your MP4 file.
- Click on Export to finalize the process and save your video.
- PowerPoint for Mac has an elementary screen recorder that can only capture sounds from the microphone. The app's tool can't record system audio or support editing. Making a mistake will likely require redoing the entire recording.
- Avoid adding audio using the Insert and Record Audio option, since this method won't let you save your PowerPoint as a video. This is because it does not synchronize timings, which are necessary for automatically transitioning the slides in accordance with the audio.
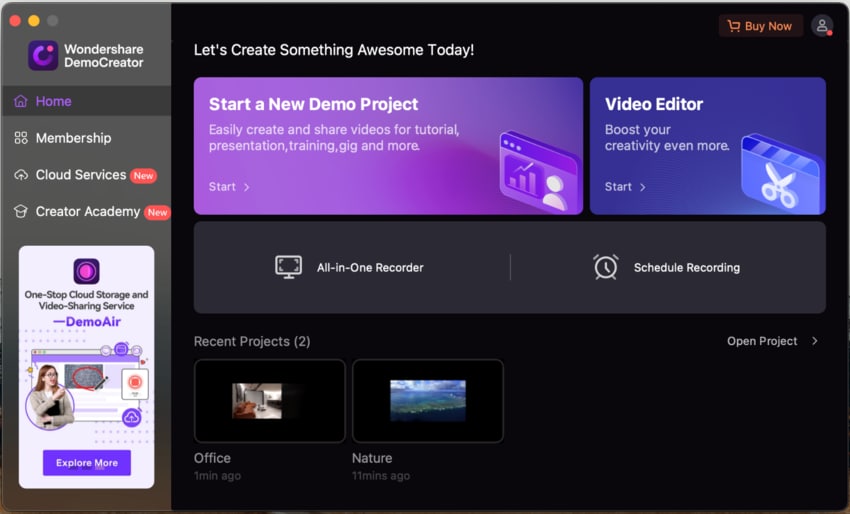
How To Record Audio on PowerPoint on Mac With DemoCreator
Third-party recording applications provide an even better option, and Wondershare DemoCreator is a fantastic example of such a tool. This robust video recording and editing app offers many more customization options in a beginner-friendly interface, making it a great choice.
Unlike PowerPoint for Mac or QuickTime, DemoCreator's powerful recording features aren't limited to system audio or microphone. The PowerPoint and voice are recorded on separate tracks for more efficient post-production. The app's AI-powered features are also a significant advantage. For example:
- AI Teleprompter assists in delivering your presentation smoothly.
- Audio Noise Reducer eliminates unwanted noises, enhancing the audio quality.
- Auto Caption enables automatic subtitle generation for the recorded PowerPoint presentation, making the content more understandable.
Furthermore, the Video Presentation mode enables you to connect to meeting platforms like Zoom and Google Meet, helping to make your online meetings outstanding and significantly boosting their effectiveness.
Recording audio for PowerPoint on Mac via DemoCreator is a breeze. Here's how you can do it:
- Open your PowerPoint on your Mac. Launch the app and select All-in-One Recorder.
- Choose a suitable option under Capture Area to record your presentation.
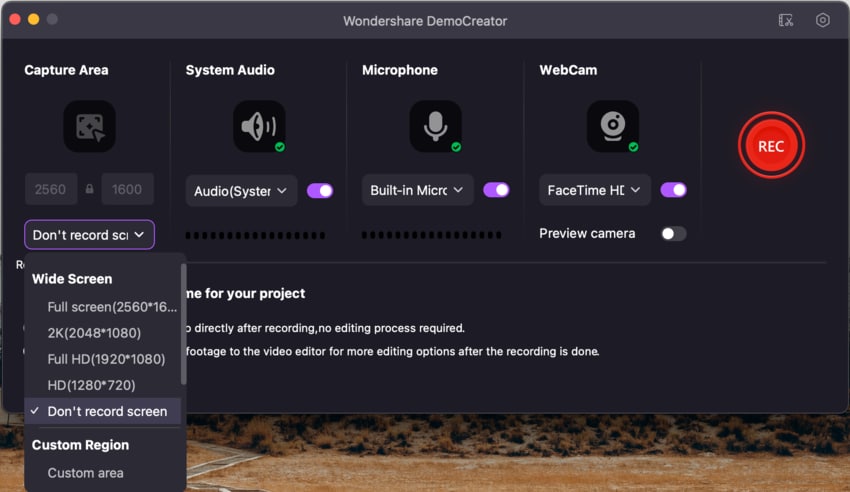
- Ensure System Audio and Microphone settings are correct, then choose whether you want to add WebCam footage.
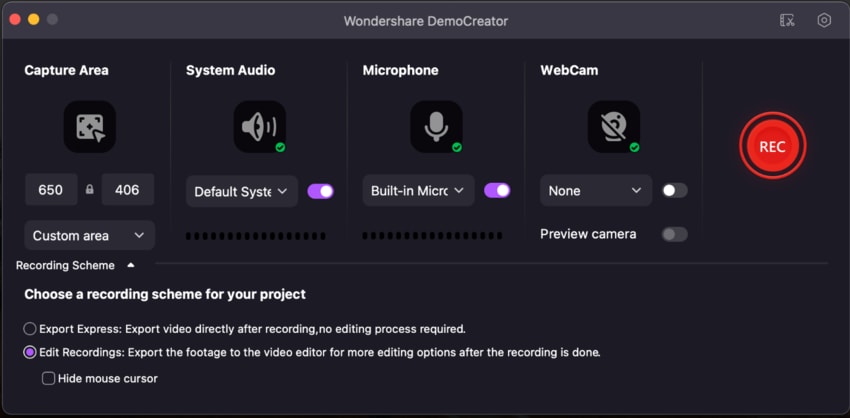
- When ready, click the red REC button and narrate your presentation as you go through it.
- While recording, you can make use of the Screen Drawing Tool to sketch on the screen.
- Once you're done, tap the button again to stop the recording.
You can further improve your recording in the app's robust Video Editor. After all, the app's AI-fueled tools can make post-production easy and significantly enhance your footage.
How To Record Audio and Narration on PowerPoint on Mac With QuickTime
The third and final method of recording a PowerPoint narration on Mac involves using QuickTime. This built-in media player for Mac has decent recording capabilities, making it a viable solution. If you're a Mac user, you're likely familiar with its interface. We've also included detailed steps:
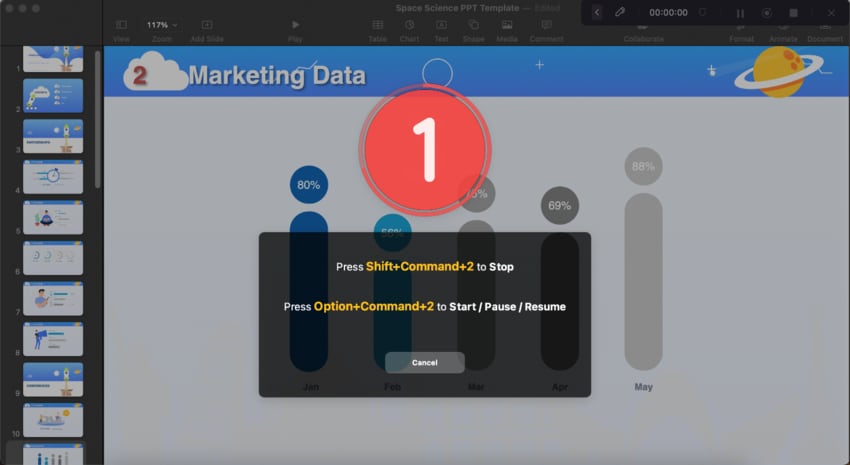
- Launch QuickTime and head to File > New Screen Recording.

- A recording window will pop up. Click the Arrow next to the red Record button and select Internal Microphone.

- Tap the red Record button, open your PowerPoint presentation, and start narrating.
- When you're done, click the squared Stop recording button.
- Head to File > Save and export the video to your Mac.
General Tips for Recording Narration and Voiceovers for PowerPoint Presentations
Creating engaging presentations requires skill and time. You can't just add pictures and stylize your text with different fonts. However, narrations and voiceovers can help, and we've included a few tips to get you started:
- Record with a high-quality microphone to achieve crystal-clear audio;
- Invest in a microphone cover to avoid sudden and loud noises during a voiceover;
- Use a lightweight recording app to avoid stutters when changing slides;
- Add relaxing music to your presentation for a pleasurable hearing/watching experience;
- Include multiple music files to complement your presentation's slide transitions.
With these tips in your arsenal, your PowerPoint presentations can become far more engaging. Your audience is far less likely to doze off after a few slides. They'll listen to you and learn from your presentation instead of getting bored.
Conclusion
Making an audience interested in your presentation will require more than pictures with a few talking points. Instead, you'll need to add the sound element to get that attention. After all, presentations with a voiceover can achieve a much better effect in attracting the audience.
There are three viable solutions for recording narrated PowerPoints on a Mac. First, you can use the app's built-in screen recording feature and add a voiceover through the microphone. Alternatively, you can record your screen with the built-in QuickTime player and manually edit the video later.
The third option is arguably the best one. It involves using a third-party app called Wondershare DemoCreator. Unlike PowerPoint or QuickTime, DemoCreator can record more than just microphone audio. It supports system audio, microphones, screen recording, and webcam layers.
These features allow you to take your presentations to another level and entirely engage your audience.
FAQs
-
Can PowerPoint record audio directly?
Yes, PowerPoint for Mac can access the device's microphone and help you create an exciting voiceover for your presentation. However, it can't record system audio, making its recording capabilities a less viable option. If that's what you're after, you'll prefer Wondershare DemoCreator much more. -
How do you save audio from PowerPoint on a Mac?
Saving a recorded PowerPoint for Mac narration can be complex. You're essentially creating a video out of it, combining your presentation's screen recording with a voiceover. As a result, you'll need to select that in export settings. On another note, free online converters can extract just the audio from this recording. Upload the presentation video, convert it, and download the audio track of your narration. -
How do you screen record a PowerPoint with audio and video on a Mac?
There are three methods for recording narrated PowerPoints on Mac: PowerPoint app, Wondershare DemoCreator, and QuickTime player. However, the app and the media player only allow you to record microphone audio and the presentation. On the other hand, DemoCreator lets you simultaneously record the screen, system audio, microphone, and webcam. -
How do you add audio to a PowerPoint presentation on a Mac?
Voiceovers are one way to enhance your presentation, but you might also want to add music instead. In that case, you can follow these steps:- Create your presentation and customize it to your liking.
- Head to Insert > Audio. Then, choose Audio Browser to add music from iTunes or Audio From File to upload music from the device.
- Choose your audio file, and adjust the options to your will.
- Tap the Audio icon and click Play/Pause to preview the music file.
- Alternatively, select a slide, hit the Audio Format tab, and tap the Start button to set up the audio file to play automatically.
-
What are the best tools for recording audio on PowerPoint on Mac?
While the PowerPoint app or the built-in QuickTime player are great at recording PowerPoint narrations on Mac, they also have a few drawbacks. Therefore, a third-party app like Wondershare DemoCreator is a much better choice. After all, this app doesn't have any of the mentioned disadvantages. -
Why won't my PowerPoint record audio on Mac?
Your Mac's restrictive security settings are most likely causing this issue. You can change these settings by following these steps:- Go into System Preferences > Security and Privacy > Privacy > Microphone.
- Scroll until you find Microsoft PowerPoint.
- Check whether the app has access.
- If there's no access to the microphone, you'll need to enable it here.
- Now that it can access your device's mic, you should be able to record narration in PowerPoint on Mac.


