Watching videos online through streaming has become a huge part of our daily lives. Whether you love catching up on your favorite TV shows, getting lost in movies, or keeping up with live events, streaming sites, and apps have changed how we take in entertainment and information.
But sometimes, you might want to save or capture a stream to watch again later. Maybe it's a live concert you don't want to miss, an educational video you need for school, or a funny moment you want to share with friends. This is where VLC Media Player comes in handy.
In this article
Part 1: Can I Record a Stream with VLC?
Absolutely! VLC is a free program that not only plays many types of video and audio files but also lets you record and save streaming videos right on your computer. It is equipped with robust features that allow you to record a stream directly from various sources, including online streaming platforms, live broadcasts, and even local network streams.
This versatile tool empowers you to capture streaming video using VLC from a multitude of sources, ensuring you never miss a moment of your favorite content.
Part 2: How to Record a Stream With VLC?
After getting the confirmation, let's move on to how to use VLC to record streams from various sources like streaming platforms, live webcasts, and even streams on your local network. We've got you covered whether you use a PC, or Mac, or even want to try a dedicated screen recording tool. Get ready to learn the ins and outs of capturing streaming video with VLC so you can enjoy it anytime!
Method 1: Record a Stream with VLC On a PC (Windows/Linux)
Recording a stream with VLC on a PC (Windows or Linux) is a straightforward process that can be accomplished in a few simple steps.
Step 1: To begin the recording process using VLC, first launch the application on your device. Once VLC is open, navigate to the Media tab > select Open Network Stream.

Step 2: paste the streaming show's URL into the box and then click Play.

Step 3: Under the play button, choose Stream or you can use hotkey "Alt+S" to proceed

Step 4: Now, it will pop up a window, click Next to proceed.

Step 5: Click Add to choose a location to save your output.
Step 6: Wait until the process finishes.
Method 2: Record Stream Using VLC On Mac
Here's how to capture streaming video using VLC on a Mac:
Step 1: Download and install VLC for Mac directly from the official VLC website.
Step 2: Launch the VLC media player application from the Applications folder on your Mac.
Step 3: Open the File menu at the top of the screen. From the dropdown options, select "Open Network".

Step 4: Copy the Video URL and paste it, then click Open.

With these simple steps, you can effortlessly record the stream by VLC on your Mac and enjoy your captured content whenever you need it.
Method 3: Use Wondershare DemoCreator to Record Stream (Recommended)
While VLC Media Player is a powerful and versatile tool for recording streams, it may not always provide the most user-friendly experience, especially for those who are new to the software or prefer a more streamlined approach.
In such cases, we recommend using Wondershare DemoCreator, a dedicated screen recording and video editing software that offers a seamless experience for recording live streams.
Here's how you can use it to record live stream:
Step 1: Download and install Wondershare DemoCreator on your computer.
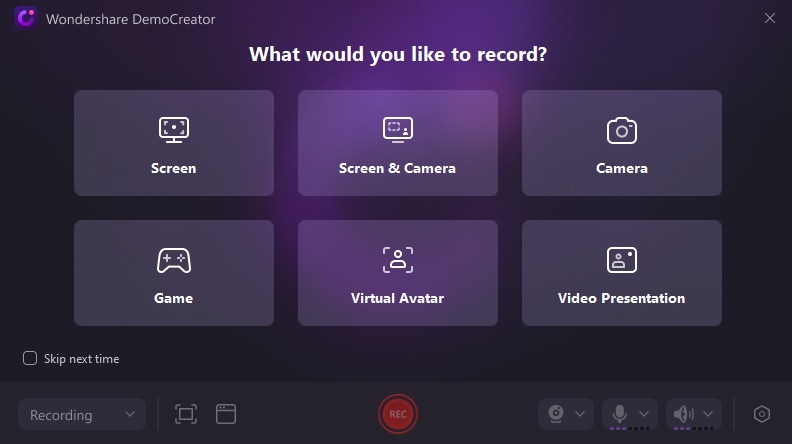
Step 2: Launch the software and select "Video Recording" from the main interface. In the popping-up window, select the “Screen & Camera” option to proceed.

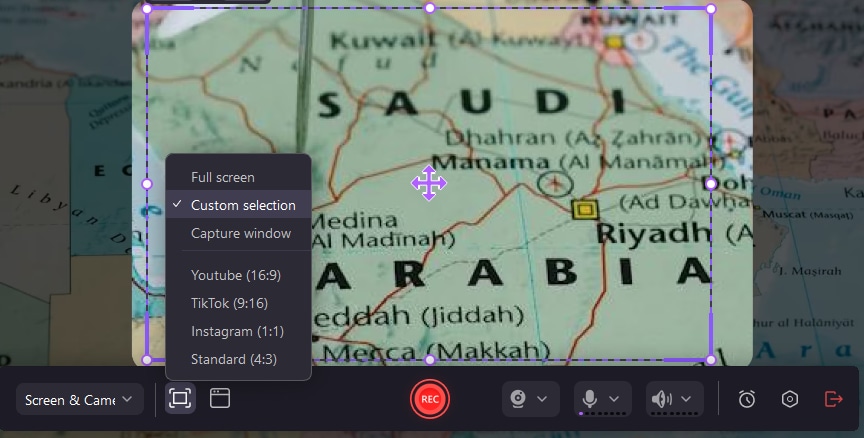
Step 3: Customize the recording area preferences, whether you want to go for Full Screen, Custom Selection, or Capture window.

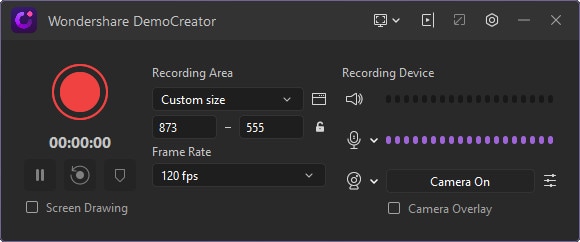
Step 4: Now configure the Webcam settings. [This step is optional.]

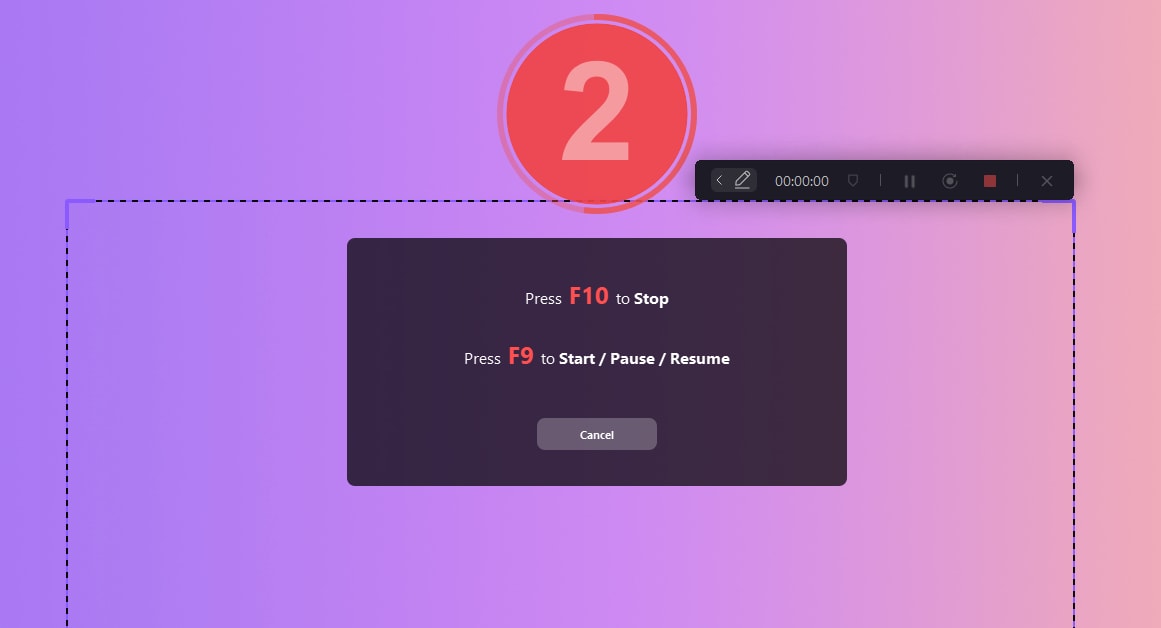
Step 5: When you're ready, click the "Rec" button to start capturing the stream. During the recording process, you can pause, resume, or stop the recording using the respective buttons in the recording panel.
Step 6: After you've finished recording, the video will be automatically saved in the specified location on your computer.

Wondershare DemoCreator has lots of extras like editing tools and notes, and you can adjust recording settings to fit your needs. It's easy to use and has everything you need to make great recordings.
Part 3: 8 Tips to Record a Stream with VLC Effortlessly
Here are some tips that can make your stream recording process with VLC even better, giving you top-notch results:
- Check your internet connection: Before you start recording a stream, ensure that you have a stable and fast internet connection. A poor connection can lead to buffering, stuttering, or interrupted recordings.
- Clear system resources: Close any unnecessary applications or programs running in the background to free up system resources and ensure smooth recording performance.
- Adjust audio settings: If you're recording audio from the stream, make sure to adjust the audio settings in VLC or your screen recording software to ensure optimal sound quality.
- Choose the right file format: VLC supports a wide range of file formats for recording, but some formats may be better suited for specific use cases.
- Remember keyboard shortcuts: VLC and most screen recording software offer keyboard shortcuts for various actions. Mastering how to use them will save time.
- Have a test: It's always a good idea to perform a quick test recording to ensure that everything is working correctly.
- Disable notifications: Temporarily disable any system notifications or pop-ups that may interfere with your recording by launching the stream and recording software in a dedicated workspace or full-screen mode.
- Consider hardware acceleration: If your computer supports hardware acceleration for video decoding and encoding, you can use it to reduce CPU load during recording.
By following these tips and best practices, you can ensure a smooth and efficient recording experience, allowing you to capture high-quality streams with ease.
Conclusion
Recording a stream has never been easier thanks to the versatility of VLC Media Player and dedicated screen recording software like Wondershare DemoCreator. Whether you're using VLC on a PC or Mac, or opting for a more user-friendly solution like Wondershare DemoCreator, capturing streaming video has become a straightforward process accessible to everyone.
You can preserve memorable moments, create educational content, or simply enjoy your favorite content offline at your convenience. By following the step-by-step instructions provided in this guide, you'll be equipped with the knowledge and tools to record a stream with VLC seamlessly.
Remember, incorporating these tips and best practices will ensure a seamless and efficient recording experience, allowing you to capture high-quality streams without any hassle.
FAQs
-
Can I record a stream with VLC on my mobile device?
Unfortunately, VLC Media Player does not currently offer stream recording capabilities on mobile devices like smartphones and tablets. However, there are third-party screen recording apps available for both Android and iOS that can potentially be used to record streams on your mobile device. -
How do I record a stream with VLC that requires authentication or a subscription?
For streams that require authentication or a paid subscription, you'll need to first log in or subscribe to the service before attempting to record the stream with VLC. Some streaming platforms may have measures in place to prevent unauthorized recording, so it's essential to respect the terms of service and copyright laws. -
Can I record a stream with VLC while also capturing my webcam and microphone audio?
Yes, VLC Media Player allows you to record a stream while simultaneously capturing your webcam video and microphone audio. This feature can be particularly useful for creating video tutorials, commentary videos, or live-streaming sessions.


