Who says MP3 is only for listening to audio files? Nobody can question your intentions if you have a reason to record sounds from your computer or microphone in MP3. The world's most popular audio file format offers excellent quality and can be played virtually anywhere.
As an audiophile who is also a Mac user, you have many options. Today, we will show you some of the best ways to record MP3 on Mac, compare different tools, and give you a few tips on MP3 recording.
Table of Content
6 Best Methods for Recording MP3 on a Mac
There are several ways to record MP3 on Mac, ranging from simple tools for straightforward recording to advanced software solutions for content creators and musicians. Some of these tools are built-in apps found in most Macs, while others must be downloaded and installed.
One more thing: MacOS doesn't always let recorders capture internal audio, which is the sound you can hear on your computer. This functionality isn't to be confused with recording external sound from an audio device such as your microphone. Pay attention to this distinction.
Here's how to record MP3 on MacBook, MacBook Air, MacBook Pro, and more:
Way 1. Record MP3 on Mac Using Wondershare DemoCreator
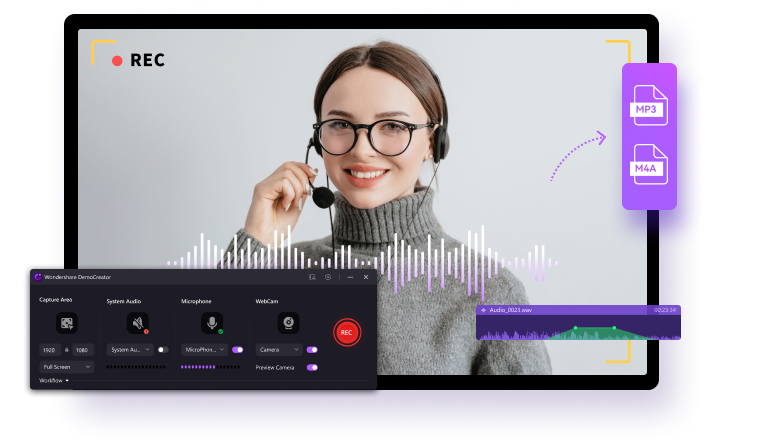
Wondershare DemoCreator is a go-to software for recording just about anything. You can use it to make elaborate multimedia projects, such as online tutorials and gameplay videos. Still, it can also capture sound alone, whether from your computer or microphone.
DemoCreator has an integrated audio and video editor with tools like Denoise and Speech Enhancement. It also lets you control the noise volume and level, eliminate hisses and hums, adjust speed, speak in AI voice with Voice Changer, and add music and sound effects.
Follow these steps to record MP3 on Mac for free using Wondershare DemoCreator:
- Download, install, and launch Wondershare DemoCreator for Mac.
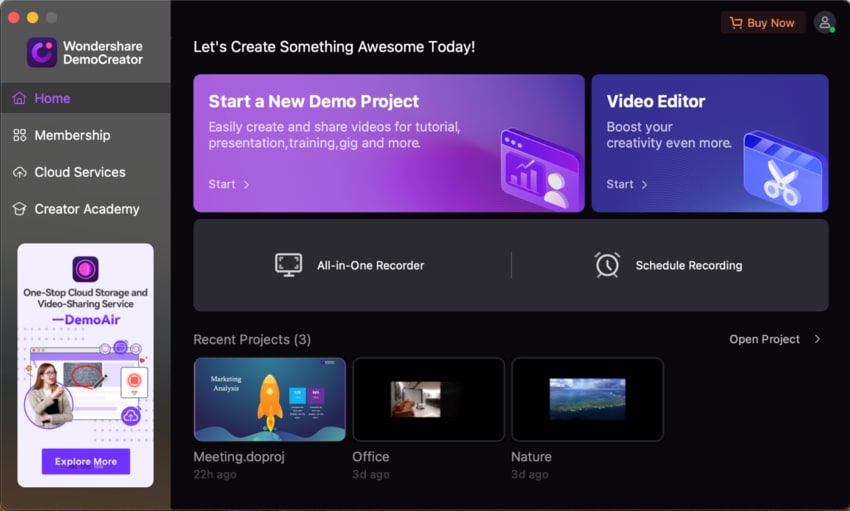
- In the main interface, click on All-in-One Recorder. A new recording window will appear.
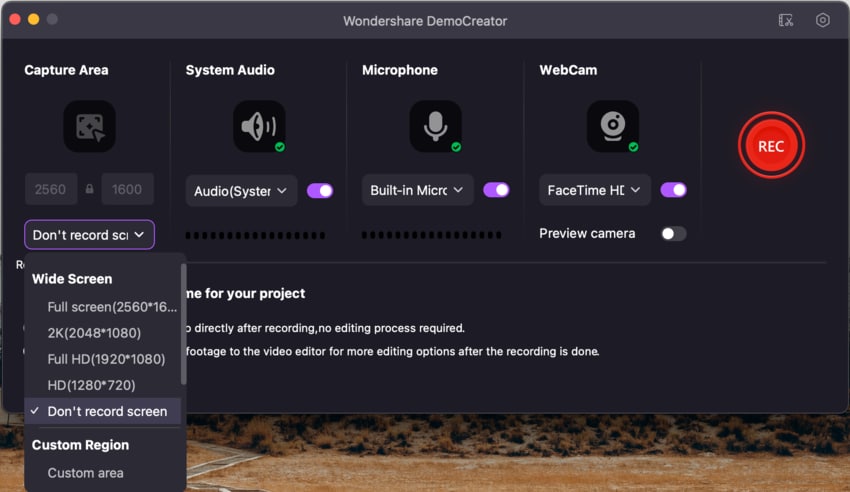
- Customize the audio recording settings. Enable the Microphone and System Audio if you want to record audio from both your microphone and the Mac computer. In the Capture Area, select"Don't record screen".
- Choose a recording scheme according to your needs. Select Export Express if you want to save the MP3 audio directly after recording, and choose Edit Recordings if you wish to enhance the MP3 file after the recording is complete.
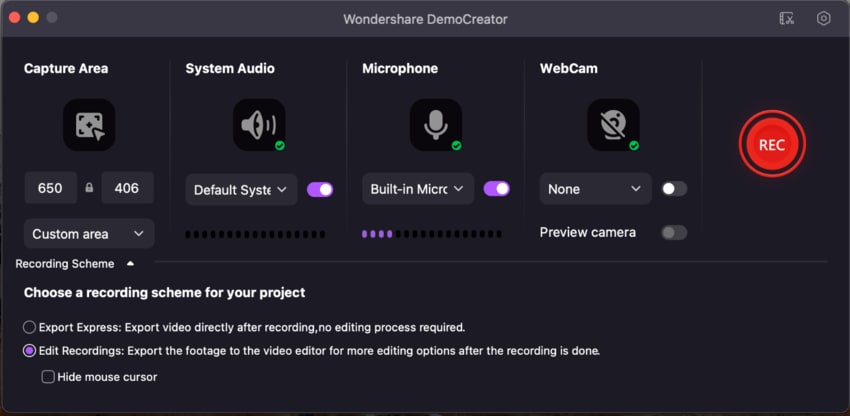
- Click the red REC button to start recording.
- When you're finished recording, click the Stop button in the recording toolbar or press the hotkey combination (by default, it's Command + Shift + 2) to stop the recording.
- The recording will automatically open in the Wondershare DemoCreator Video Editor. You can trim, cut, or apply effects to your audio recording if needed. If you don't need to edit the recording, you can skip this step.
- Click on the Export button in the top right corner of the editor. In the Export window, choose MP3 as the output format and choose a location to save your MP3 file. Click Export again. Your MP3 file will be saved to the specified location.

That's it! You've successfully recorded an MP3 file on your Mac using Wondershare DemoCreator. DemoCreator's intuitive interface makes it easy to explore different options. When exporting MP3 files, it allows you to do more than just save the file to your Mac. You can back it up on the Wondershare cloud or share it directly to YouTube, TikTok, and Vimeo.
Way 2. Record MP3 on Mac Using GarageBand
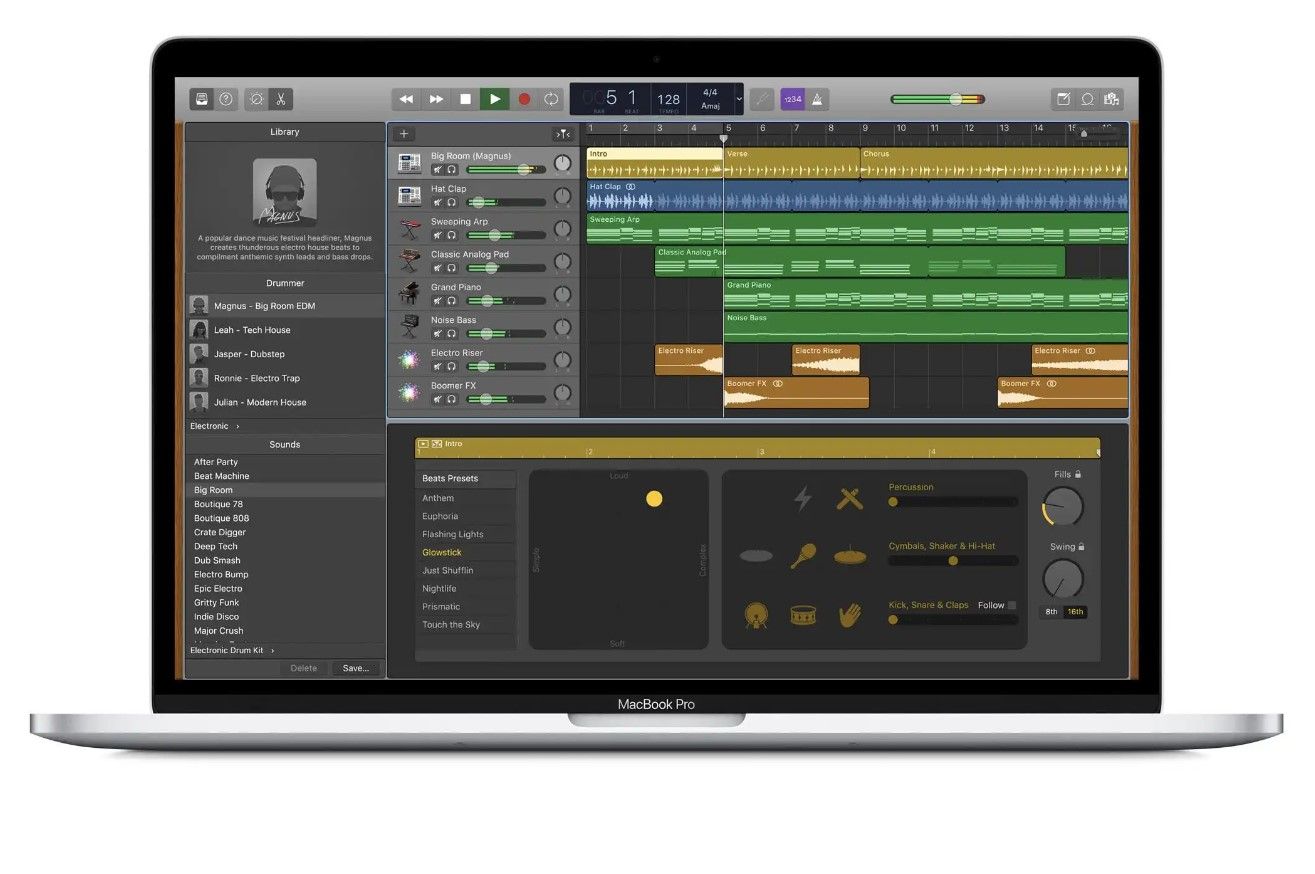
GarageBand Recorder is another good option for recording MP3 on a Mac, presuming you need additional options for sound enhancement, editing, and mixing. It's a well-known software for beginner musicians and music students, so it keeps its functionalities user-friendly.
It's also a built-in Digital Audio Workstation (DAW) that comes with all Mac computers for free, which is a big plus regardless of what you plan to use it for. The only downside is that GarageBand requires a plugin called Screenflow to record system sounds on MacOS.
Here's the simplest way to record MP3 on Mac devices with GarageBand:
- Open GarageBand and click on Project Templates on the left. Choose Voice.

- Next, click on Input Device to set your microphone and hit the Choose button.

- Click the red circle button to start recording an audio with GarageBand.

- Click the Stop button when you want GarageBand to finish recording.
- To save your MP3, click Share in the top menu and pick Export Song to Disk…

- Check MP3, name the file, set the quality, and pick the location before you hit Export.

GarageBand is built with musical collaboration in mind, so it allows users to share songs to iTunes, Media Browser, SoundCloud, and mail or save them on AirDrop.
Way 3. Record MP3 on Mac Using Audacity
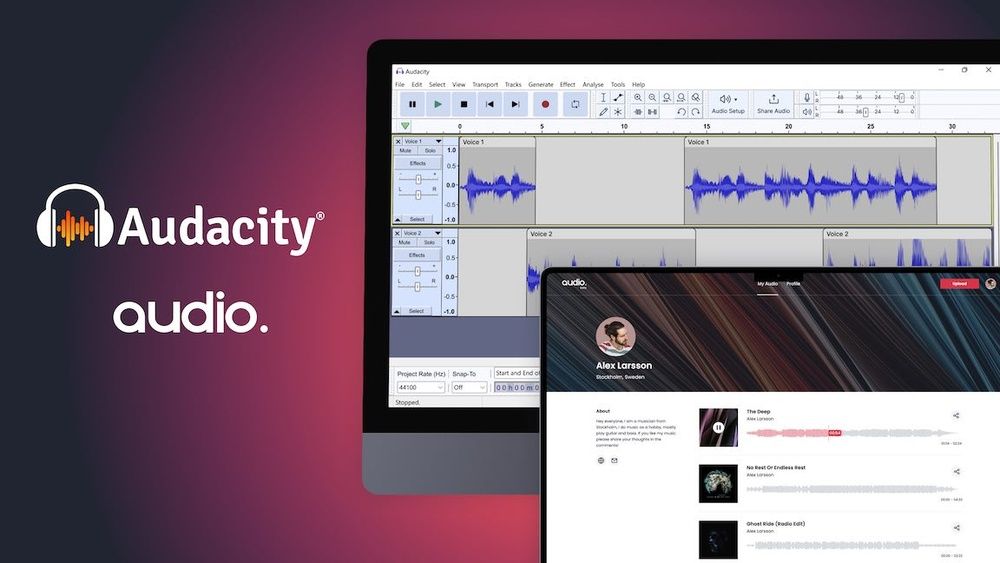
If you are a musician, you know about Audacity, an open-source audio recorder and editor for Mac that packs powerful features for enhancing sound quality and mixing tracks. Audacity is famous for its sound effects, such as echo, phaser, reverb, denoiser, pitch changer, etc.
Although it is designed for musicians and includes advanced capabilities that may feel overwhelming to beginners, Audacity is a fairly simple MP3 recorder. However, you should know that Audacity needs a plug-in called Sunflower to record internal sound on a Mac.
So, how do you record an MP3 file on a Mac with Audacity? Follow these steps:
- Download, install, and launch Audacity on your Mac.
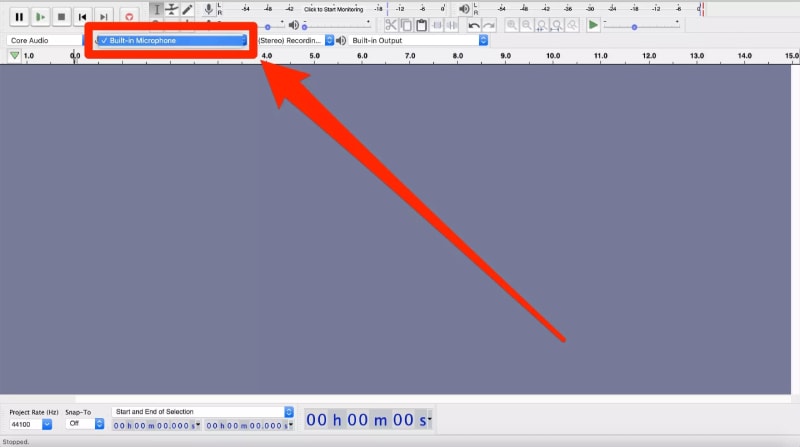
- Click on the Recording Device tab and open the second drop-down menu under the top menu bar to select the audio input device.
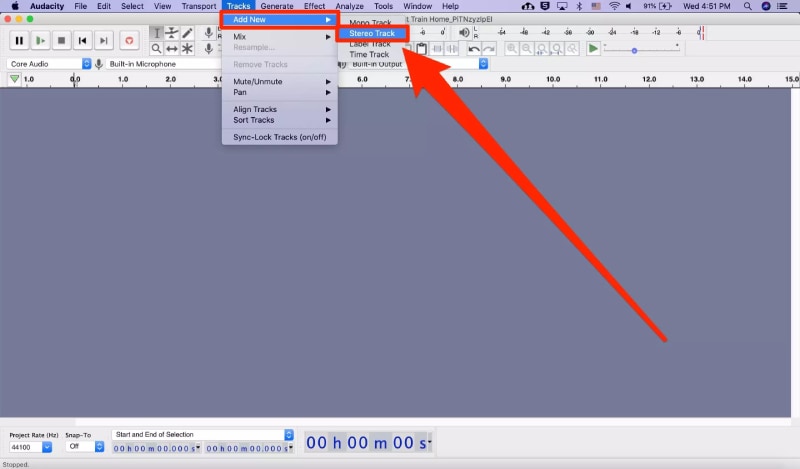
- Select Tracks in the top menu bar and choose Add New.
- Audacity is now ready to start recording. Click on the red circle button to begin.
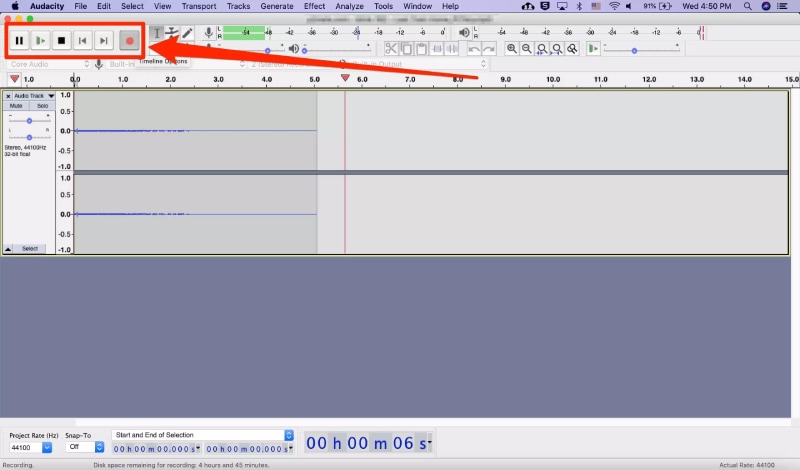
- Click on the red square button to stop recording.
- To save your recording as MP3, go to the File tab in the top menu bar and click Export > Export as MP3.

Before it saves an MP3 recording to your Mac, Audacity lets you configure Format Options like Bit Rate Mode, Quality, and more. Then, you will see a Warning sign that says Your tracks will be mixed down and exported as one stereo file. It's how it's supposed to be, so hit OK.
Way 4. Record MP3 on Mac Using Apowersoft Audio Recorder
Apowersoft's "Multimedia Solutions for Business and Daily Needs" are tried and tested tools that are both capable and easy to use. Along with Apowersoft's screen capture software, the kit also includes an audio recorder for Mac with multi-device capture and rudimentary editing.
Here's how to make an MP3 recording on Mac in Apowersoft's Audio Recorder:
- Download, install, and launch Apowersoft Audio Recorder for Mac.
- Apowersoft lets you record System Sound, Microphone, and Both simultaneously. Click the Audio Source option in the bottom right corner and pick your preferred input.

- Now, click the red circle button to start recording.
- When you've captured everything you need, click the red square button to stop recording.

- Click the Export button to save the recording to your Mac. Apowersoft will let you edit the ID3 information and choose the export mode and format. Pick MP3 and save the file.

Way 5. Record MP3 on Mac Using Voice Memos
Voice Memos is a simple yet powerful recording app developed by Apple. It's popular among students and interviewers because you can use it on any iOS device to record, edit, and save audio clips. As a bonus, it comes pre-installed on Macs and is entirely free.
Unfortunately, there's one small problem with using Voice Memos to record MP3 on Mac: it doesn't let you save audio clips in any other format except M4A. That's not a big problem since you can easily convert M4A to MP3 using online and offline tools like UniConverter, Media.io, or FreeConvert.
Here's how to make an MP3 recording on Mac using the Voice Memos app:
- Open Voice Memos and click the big red button to start recording.

- When you're ready to stop recording, click Done.

- The recording will appear in the list of recorded audio clips on the left. To export it to your Mac, click and hold the file, then drag and drop it to your desktop.

- Remember, Voice Memos saves audio recordings in the M4A format. If you want to convert it to MP3, find a quick online converter tool or a third-party app with this function.
Like DemoCreator, Voice Memos lets you share your recordings directly from the app. But while DemoCreator offers direct posting on YouTube and other popular online platforms, Voice Memos enables you to send recordings via mail and messages or save them to AirDrop and Notes.
Way 6. Record MP3 on Mac Using QuickTime Player
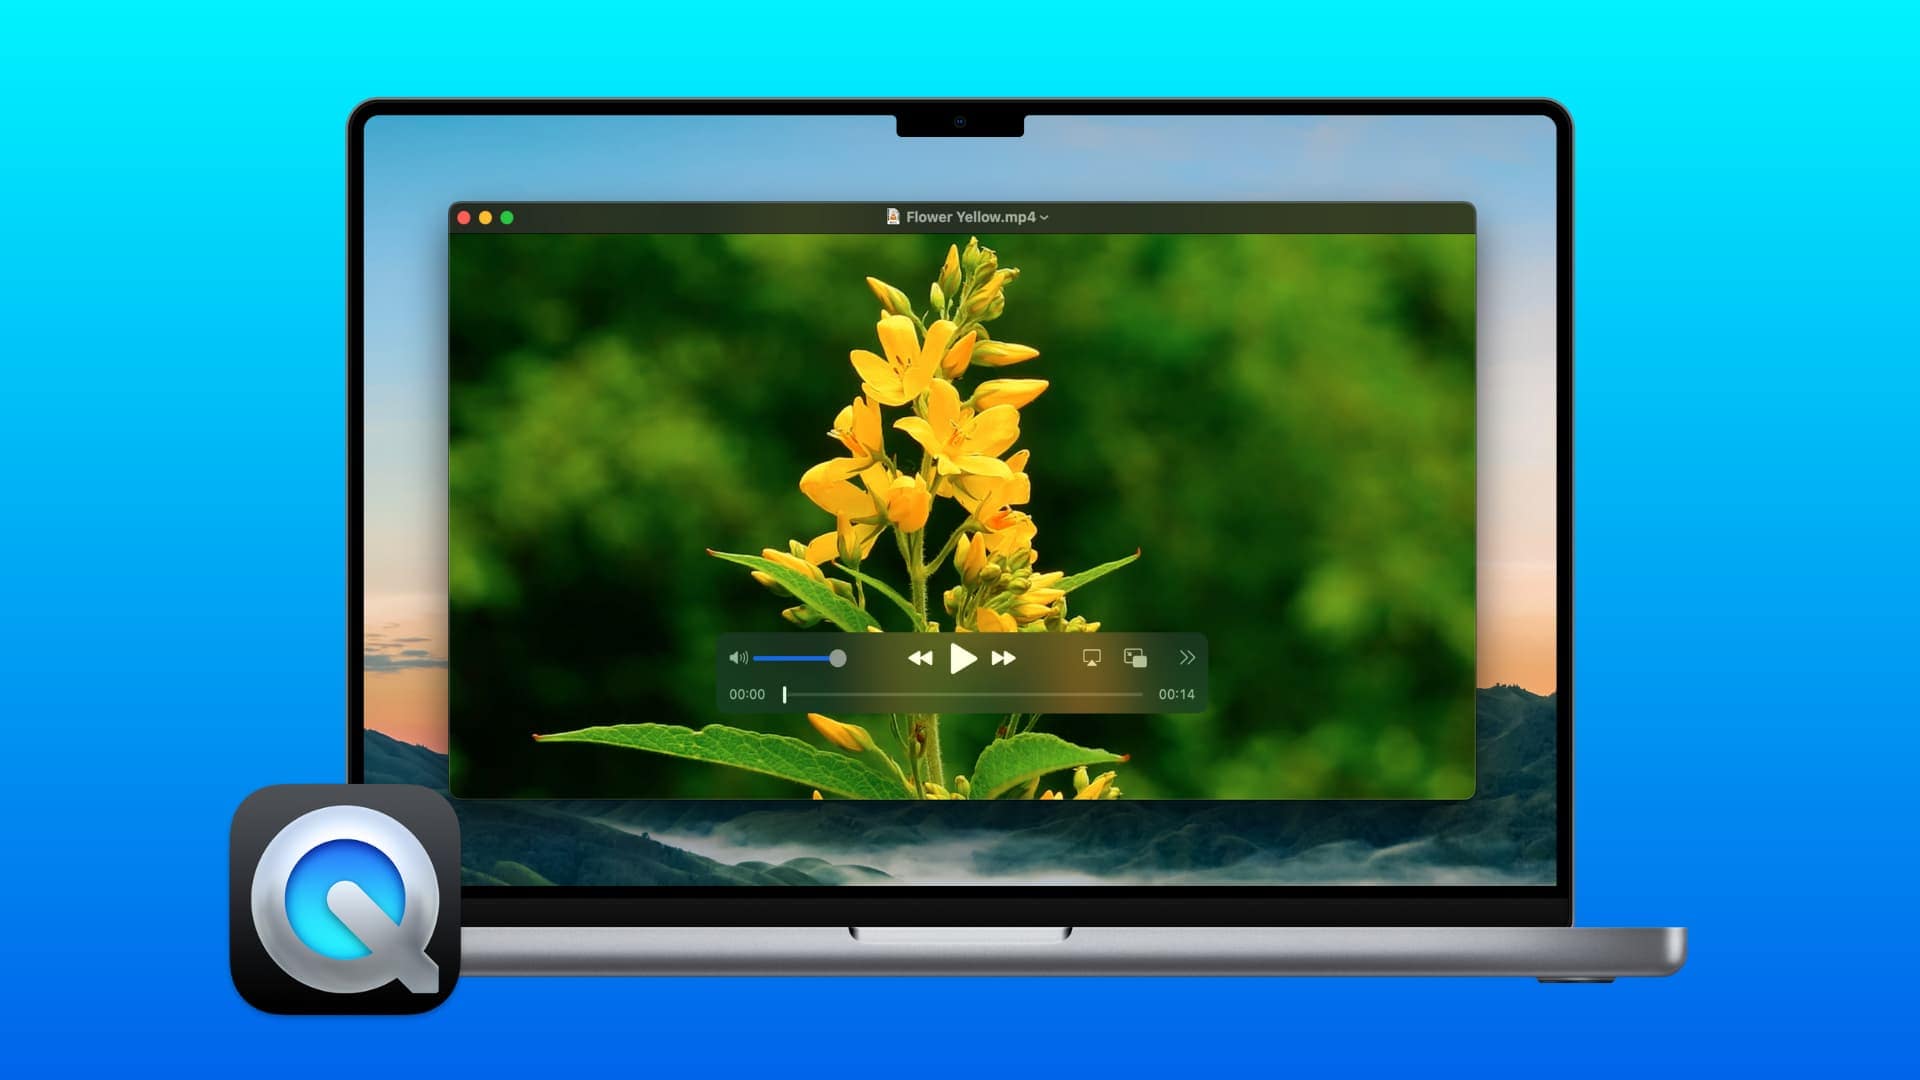
QuickTime Player is one of the most recognizable multimedia players in the world used for watching movies, listening to music, and more. In addition to this primary function, QuickTime Player has a quick recorder and essential editing tools for trimming, splitting, and the work.
The main advantages of recording sound with QuickTime Player are that it is pre-installed on Macs, free to use, and sports a familiar interface. But, like Voice Memos, it can't save audio clips directly in MP3; like Audacity, it needs Soundflower to record internal sound.
Other than that, recording sound with QuickTime Player is straightforward:
- Open QuickTime Player and go to File at the top menu bar. When the drop-down menu is revealed, choose New Audio Recording.

- You will see a widget with recording options. Click on Options and choose the audio input device you want to use for recording.

- If you're all set up, click the red button to start recording.
- After you're done, click on the square button to stop recording.

- While there is an option to customize the output location and save the recording yourself (File > Save…), QuickTime Player will do this automatically as soon as you're done recording.

Remember, QuickTime Player saves sound recordings in M4A file format. Use a trusted third-party tool to safely convert them to MP3 without losing the original audio quality.
Comparing the 6 Methods for Recording MP3 on Mac
Now that you know there isn't a single recording tool for MacOS, but many different solutions for different needs and types of users, you're surely wondering: What is the best way to record MP3 on Mac? Refer to the table below to compare our top-rated options:
| Best for | System Sound Capture |
Microphone Capture |
MP3 Output |
Audio Editor |
|
| Wondershare DemoCreator | Content creators (podcasts, voice-overs, audiobooks, audio lectures, etc.) | ✅ | ✅ | ✅ | Advanced |
| GarageBand | Beginner and amateur musicians | ❌ Requires a plugin (Soundflower) | ✅ | ✅ | Advanced |
| Audacity | Advanced musicians and music producers | ❌ Requires a plugin (Soundflower) | ✅ | ✅ | Advanced |
| Apowersoft | Everyday users (video notes, messages, etc.) | ✅ | ✅ | ✅ | Basic |
| Voice Memos | Everyday users (voice notes and messages), students (audio lectures), and interviewers | ❌ | ✅ | ❌ Requires an audio converter |
Basic |
| QuickTime | Everyday users (video notes, messages, etc.) | ❌ Requires a plugin (Soundflower) | ✅ | ❌ Requires an audio converter | Basic |
Conclusion
If you have been asking yourself, How do I record an MP3 on my Mac, we hope we have helped you find your answer. Let's sum up your options before you leave. Let's say you want to start recording MP3 on your Mac right now for simple tasks like voice notes and messages.
Your Mac already has great tools for this. However, if you choose QuickTime Player or Voice Memos, you'll need an M4A to MP3 converter, as well. Mac users can also access excellent MP3 music recorders, Audacity, and GarageBand, but they can't capture internal audio.
This might come as a surprise, but the best way to record MP3 on a Mac is with a third-party tool like Wondershare DemoCreator. These tools provide comprehensive solutions for multi-device recording and can capture both internal and external sound in all popular file formats.


