

Whether you're a musician, a podcaster, or anything in between, capturing tracks separately and then combining them later makes audio editing simpler, more efficient, and less time-consuming.
The best part? You don't even need to invest in pricey software to do it.
With Mac's free, built-in digital audio workstation (DAW) - GarageBand - you can manage your audio with ease. Learn how to record multitrack in GarageBand and produce astounding audio with minimal effort.
Table of Content
What Is Multitrack Recording?
Before we get into the know-how of GarageBand multitrack recording, it's a good idea to clarify what multitrack recording is.
In a nutshell, it's the process of recording separate tracks for each individual sound source. For instance, if you have a band with a guitarist, drummer, bassist, and keyboardist, you would record separate tracks for the guitar, drums, bass, and keyboard. Then, you would combine them all into a single track later.
Of course, this is just one example of using a multitrack recorder. You can also use it for creating layered audio for podcasts, social media channels, and even movies.
At first glance, this seems unnecessarily complicated, but it makes audio editing much more straightforward. Did the keyboardist make a mistake? There's no need for the entire band to start from scratch - just re-record the keyboard. Are some instruments too loud or too quiet? There's no need to re-record everything - simply adjust the volume of specific tracks.
Multitrack recording with GarageBand or other solutions offers more flexibility and more control over the audio output, making it much easier to create tracks you're proud of.
How To Record a Multitrack in GarageBand
A comprehensive digital audio workstation, GarageBand comes fully equipped with dozens of unique features that make audio management a breeze. It offers an extensive sound library, seamless presets for vocals and guitar, excellent amps, powerful synths, high-quality drum tracks, and so much more.
Its intuitive interface makes multitrack recording in GarageBand perfectly streamlined, though it does take some getting used to.
Here's how to record multitrack in GarageBand on Mac:
- Launch GarageBand on your Mac and go to File > New to start a new project; Alternatively, click on the Empty Project to get started;

- Go to Preferences and select Audio or Audio MIDI;
- Specify your Output and Input devices;

- Click the + icon in the upper left-hand corner, and under Choose a Track Type, select the track to add;
- Repeat this process to add additional tracks;

- Click on a track, select Track, and click on the drop-down menu next to Input to choose your audio input device;
- Right-click on a track you want to work on and check Record Enable;

- Click the red Record button to start recording;
- Click the white End button to stop recording.

Once you're done, you can save your project using the shortcut Cmd + S. If needed, you can continue using GarageBand to continue perfecting your audio.
Tips and Tricks for GarageBand Multitrack Recording
While GarageBand is relatively easy to use, it can still be overwhelming. With such a wide array of features and effects, most beginners are tempted to add as much to their audio as possible.
However, if you want to ensure seamless multitrack recording and high-quality results, there are some things you'll want to keep in mind:
- Keep an eye on input levels - if the input levels are too high, your sound will be distorted. Keep an eye on these levels and adjust them accordingly;
- Don't overdo the effects - adding too many effects to your tracks can make them sound strange and overwhelming, so be careful when selecting which effects to add;
- Be mindful of your setup - recording multiple instruments simultaneously can cause sound distortion if you don't place your equipment far enough away from each other;
- Stay in sync - the easiest way to keep your audio in sync is by closely monitoring the tempo and time signature in GarageBand.
Aside from these tips, it's all a matter of trial and error. Keep playing around in GarageBand to familiarize yourself with the best workflow and determine what features and effects work best for you.
A GarageBand Alternative for Multitrack Recording - DemoCreator
GarageBand can be a great solution for audio recording, but as mentioned, it can be overwhelming, boasting a somewhat steep learning curve for beginners. Unless you're well-versed in audio production, you might have to spend some time learning how to navigate it.
Moreover, it's somewhat specialized for the music production industry.
It's not suitable for creating product demos, for instance, video presentations, online courses, or casual content. If you're looking for a tool that is suitable for these purposes; a tool that's powerful yet lightweight and beginner-friendly, Wondershare DemoCreator can be your best alternative.
This all-encompassing video and audio recorder/editor gives you everything you need to produce high-quality content in record time. It comes with a wide array of audio recording and editing capabilities that can help you clean up your sound with the utmost ease.
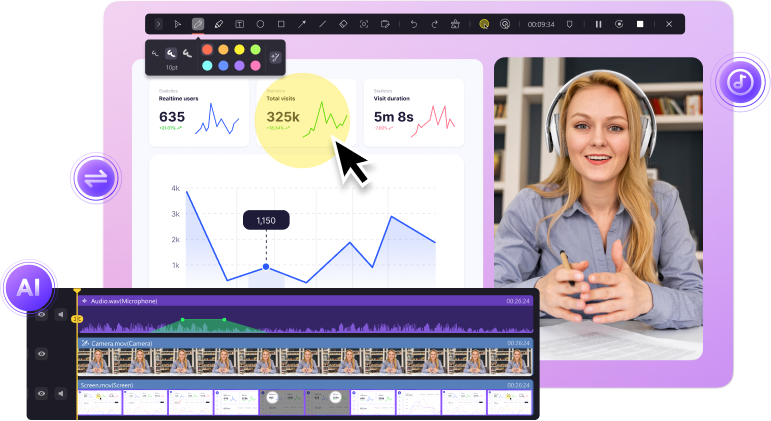
Record multiple tracks simultaneously, add video into the mix, and use AI-powered tools to enhance your audio. Automatically remove background noise, change the sound of your voice, add countless audio effects, and more.
With Wondershare DemoCreator, you'll have access to over 50,000 creative assets that will help you make your content pop.
How To Use Democreator for Multitrack Recording
Although it boasts dozens of powerful features, DemoCreator remains easy to use and beginner-friendly. You can make multitrack recordings in just a few simple steps:
- Download and launch Wondershare DemoCreator on your Mac;
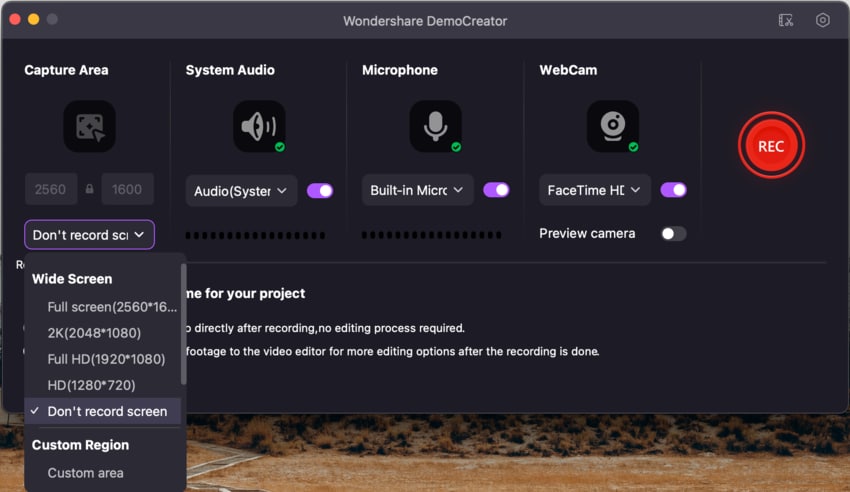
- Select the All-in-One Recorder to get started;

- Under Capture Area, select Don't Record Screen if you want to record audio only;
- Customize your recording settings and select system audio, microphone, and webcam configurations;
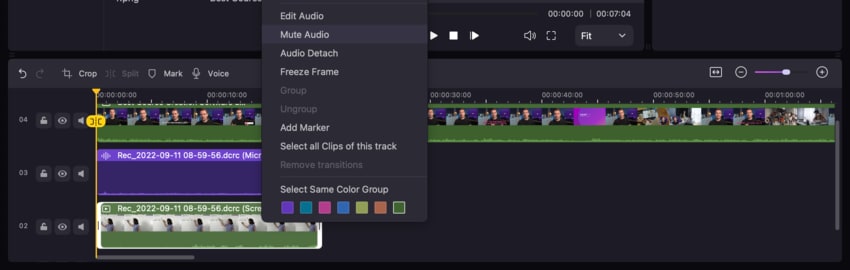
- Select Edit Recordings for the recording scheme if you want a multitrack recording.

- Click the red REC button to start/stop recording;
- After finishing the recording, you can edit the recording with multitrack in DemoCreator's Video Editor.
With DemoCreator's extensive recording and editing capabilities, you can make multitrack recordings like a pro, even if you're new to it all.
Conclusion
Though they can take some extra work, multitrack recordings can make your life easier. Simplifying both recording and editing, they give you complete flexibility to create flawless audio that can't but astound your audience.
Whether you're using GarageBand or solutions like Wondershare DemoCreator, start playing around with multitrack recording and see for yourself just what a difference it can make for your content production.
Garageband Multitrack Recording FAQs
-
Does GarageBand allow multitrack recording?
Yes, you can make multitrack recordings with GarageBand. While you can make multitrack recordings on all Mac and iOS devices, it's in your best interest to stick to your Mac. GarageBand can be resource-intensive, so making multitrack recordings on iPhone or iPad could cause significant lagging and latency issues. -
How many channels can GarageBand record simultaneously?
You can record up to 32 tracks simultaneously in GarageBand on iOS and up to 255 tracks on Mac. However, the precise number depends entirely on your specific device and its overall capabilities. -
Can I record two different microphones on different tracks simultaneously in GarageBand?
Yes, you can technically use two different microphones for different tracks. However, you must first create an aggregate device with them in GarageBand. Open the Audio Midi Setup on your Mac, click the + icon, select Create aggregate device, and check the boxes by the USB microphones you want to use. Then, in GarageBand, open Preferences > Audio, and under Input Device, choose your aggregated device (aka your combined microphones). -
How to enable multitrack recording in GarageBand Mac?
The process is relatively straightforward. Start a new project in GarageBand and specify your output and input devices. Click the + icon in the upper left-hand corner, and under Choose a Track Type, select the track to add. Repeat this process to add additional tracks. -
Can GarageBand separate audio tracks?
Unfortunately, you cannot separate audio tracks in GarageBand if you already have one comprehensive track. This tool cannot separate vocals, for instance, from the instrumentals if they've already been combined into a single track.If you want to separate vocals from instrumentals (for karaoke, for instance), you'll need an AI-powered tool like Wondershare DemoCreator. -
Can GarageBand make professional recordings?
Yes, GarageBand can easily make professional recordings. However, it does take some getting used to. It will take some trial and error before you can use this tool to produce studio-quality tracks.


