

While taking a screen recording is relatively easy on a Mac, audio recording is a bit different. For one reason or another, some macOS versions don't allow you to capture desktop audio. So, when you need to record video presentations, tutorials, or other forms of content, you won't be able to capture all the alerts, browser sounds, or program audio whatsoever. Better said, you won't be able to do it without some help.
OBS (Open Broadcaster Software) is a popular free and open-source recording solution compatible with Mac, most commonly used for live streaming. And it might just be able to lend you a helping hand when capturing system audio.
Stick with this guide to learn all about using OBS to record desktop audio on Mac.
Table of Content
Can OBS for Mac Record Desktop Audio?
First things first - can you capture desktop audio on Mac with OBS? The answer depends entirely on the macOS and OBS versions you have.
If you have Ventura (macOS 13) or newer, you can use OBS Studio 30 to capture desktop or application audio. It takes just a few clicks to set things up and get started.
If, however, you have an older macOS version and an older OBS version, things are a bit more complicated.
OBS 28 and 29, for instance, require you to add your screen capture source to capture app audio on Ventura.
If you have an older macOS version, on the other hand, no version of OBS will be able to capture desktop audio by itself. You'll need an additional third-party tool for audio routing like SoundFlower or Loopback. Both are designed to transfer audio between applications, making screen recording with sound easier.
How To Configure OBS for Desktop Audio Recording on Mac
To take full advantage of OBS and capture high-quality content, you first need to install and configure it. If you're using Venture or newer macOS, the process is relatively straightforward:
- Head to the official OBS website and download and install the macOS version;
- Launch OBS, and in the lower part of the screen, click the + icon;
- Enable Audio Output Capture.

As mentioned, if you have a macOS version older than Ventura, you'll need to install and configure additional software. If you're using SoundFlower, for instance, the steps are as follows:
- Download and install SoundFlower from its official website;
- Head to ;

- Go to Audio MIDI Setup, click on the + icon, and select Create Multi-Output Device;
- Check the Built-in Output and Soundflower (2ch) boxes;

- Click the Settings icon and select Use This for Sound Output;
- Launch OBS and go to Settings > Audio;

- Change the Desktop Audio device to Soundflower.
The process is similar for any third-party software you might need to use for capturing audio on your Mac.
How To Record Desktop Audio on Mac in OBS
Once you've configured everything, you can start recording videos with desktop audio with the utmost ease on your Mac:
- Launch OBS and click on the + icon under Sources;
- Select Display Capture;

- In the Create/Select Source window, click OK;
- Under Display, select the display to capture and click OK;

- Adjust the audio and click Start Recording.

While it can take some getting used to, especially with older Mac versions, OBS is an excellent choice for recording your screen and audio. What's more, considering that it's completely free and open-source, it enables you to seamlessly empower it with more features and capabilities - as long as you have the know-how to do it.
Is OBS Too Complicated for You? A Simple Alternative is Available
While it's admittedly a great tool, OBS can be pretty overwhelming for beginners - especially if you need to download and configure additional software just to be able to capture desktop audio. So, if you're looking for an alternative that's much easier to use, you'll want to give Wondershare DemoCreator a try.
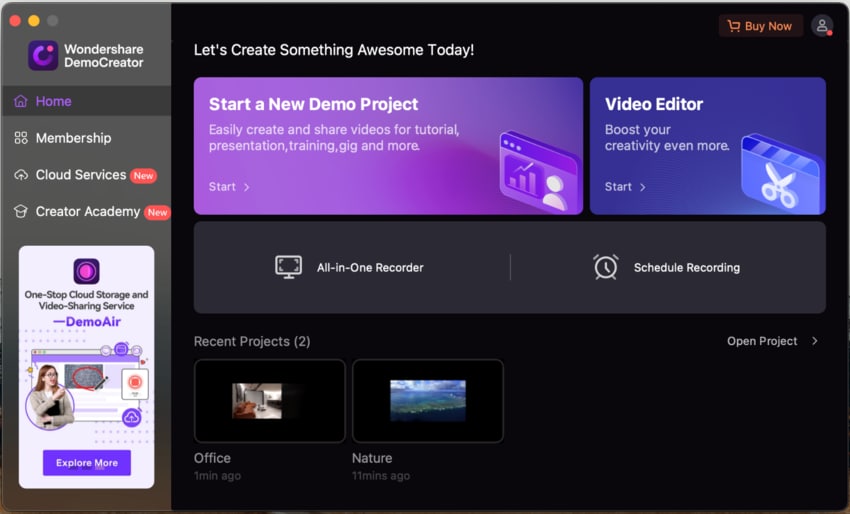
Fully compatible with all macOS v10.15 devices and above, it has a powerful all-in-one recorder that can capture desktop audio without much fuss.
In just a few clicks, you can start capturing any custom area of your screen, webcam, system, and microphone audio and keep them separate tracks for smoother editing.
It comes packed with dozens of valuable features that can simplify your recordings and make them more engaging for your audience. Add audio and video effects, use AI teleprompters for easier line delivery, remove or change your camera background, and more.
To top it all off, Wondershare DemoCreator also has a comprehensive built-in video editor that will make your recordings truly captivating for your audience.
How To Record Desktop Audio on Mac With the OBS Alternative
DemoCreator was designed with simplicity in mind. Even though it's packed with dozens of recording and editing features, it's easy to navigate and perfectly beginner-friendly. Even if it's your first time using such software, you'll get professional-looking (and sounding) recordings you'll be proud to share.
- Download and install Wondershare DemoCreator on your Mac;
- Select All-in-One Recorder;

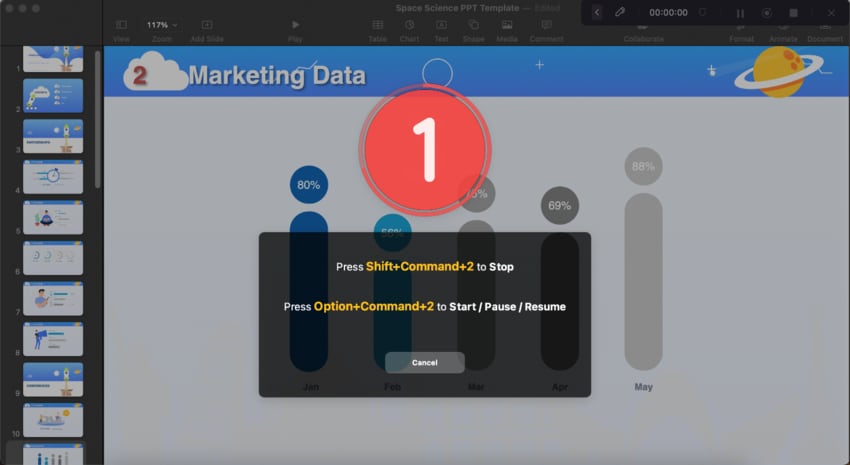
- Set up your recording settings (enable/disable screen, webcam, system audio, and microphone); If you solely want to record audio, under Capture Area, select Don't record screen)
- Choose Export Express or Edit Recordings recording scheme;

- Click the red REC button to start recording;
- Click the square End button to stop recording.
If you've chosen the Export Express recording scheme, your recording will be immediately ready for sharing. If you've chosen the Edit Recording scheme, you'll be taken to the built-in editor, where you can make all the necessary adjustments to make your recordings pop.
Conclusion
OBS is an excellent open-source solution for capturing audio and video on your Mac devices. However, it can be complicated to use, especially if you don't have macOS Ventura or newer. With older operating systems, you'll have to go through hoops and install additional tools to capture desktop audio.
If you want to simplify processes and get high-quality audio recordings without any obstacles, rely on Wondershare DemoCreator instead.


