

Want to record what’s happening on your Mac screen, including your voice? You might be making a tutorial, attending webinars, or capturing gameplay. If you have a Mac, you can do this using QuickTime screen recording with audio.
However, many people get frustrated because QuickTime recordings don’t capture sound by default. This article will show you how to record your Mac screen with audio in QuickTime Player. Keep reading to learn the step-by-step guide to screen recording with internal or external audio and do both.
In this article
Part 1. QuickTime Screen Recording With Audio
QuickTime allows you to record your screen and microphone audio simultaneously on a Mac device. If your recordings lack sound, it might be because you haven’t selected an audio source or your microphone is disabled in the settings. Here’s how to screen record in Mac with sound:
Step 1: Access QuickTime Player in the Applications folder.
Step 2: Go to the menu bar in the upper navigation pane and choose File > New Screen Recording.

Step 3: The QuickTime Screen Recording pop-up window will show on the screen. Click the down arrow next to the Record button (red circle) to access the settings.
Step 4: Select Internal Microphone to enable recording voice or audio in screen recordings.

Step 5: Click the Record button to start capturing the screen. Decide on the recording area:
- Click anywhere on your screen to record your entire screen with QuickTime. Or,
- Drag your cursor to select a specific portion of the screen you want to record.
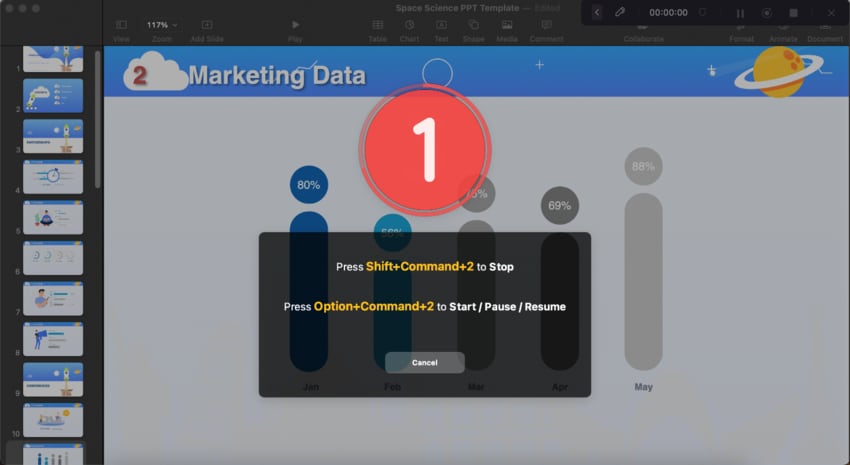
Step 6: Click the Stop button or press Command + Control + Esc once finished recording.
Step 7: QuickTime Player will automatically open the recording, allowing you to play it back or edit it.
While convenient, using QuickTime player for screen recording with audio has limitations. It won’t record internal sounds from your computer, like videos you play. QuickTime can only capture your voice from the microphone once enabled. But you can use a free third-party app called Background Music. This is different from solutions like Soundflower, which require more configuration. Background Music is simpler.
Part 2. QuickTime Player Screen Recording With Internal Audio
While not its core function, you can use Background Music as a recording input in apps like QuickTime Player. It allows you to record the system audio alongside your screen recording.
To use Background Music with QuickTime for screen recording with sound or internal audio:
Step 1: Download Background Music from the GitHub repository and install the .pkg file on a Mac computer.

Step 2: Open QuickTime from the Applications folder. Then, under Microphone, choose Background Music. This sets QuickTime screen recording to capture internal audio.

Step 3: Open the audio you want to record alongside your screen activity, such as a music player or web browser, with a video.
Step 4: Click the Record button to begin capturing your screen. Background Music will record the internal audio playing on your Mac along with your screen actions.
Step 5: Once finished, click the Stop button in the menu bar. QuickTime Player will automatically open your screen recording with the internal audio included.
While the Background Music app lets you manage music and indirectly record it via QuickTime Player audio and screen recording, it might have limitations. On GitHub, users report bugs like uninstall issues. QuickTime itself is basic for editing. You can trim recordings, but advanced editing requires exporting to another program. Consider the best alternative for features like direct recording and multi-track video editing.
Part 3. QuickTime Alternative: Mac Screen Recording With Audio
QuickTime screen recording with audio is great for basic needs, but Wondershare DemoCreator offers more. This all-in-one app lets you record your screen, webcam, microphone, and computer audio at the same time. It’s a screen recorder, voice recorder, webcam recorder, and video editor – all in one! DemoCreator makes capturing your Mac screen with sound much simpler.
Key Features
- Advanced Recording and Editing
Choose what to record: the whole screen, a specific application window, or a designated part of your display. Capture system audio or internal sounds alongside your microphone. For incredibly smooth visuals, you can even record gameplay in stunning 4K/8K resolution at up to 120 FPS.
- Multi-track Recording and Editing
DemoCreator lets you capture video, webcam footage, and audio on separate tracks. It allows you to edit each track independently in the built-in video editor. The editor offers a rich set of tools for adding annotations, intros, outros, or effects. You can also trim, cut, adjust playback speed, and more.
- AI-powered Tools
DemoCreator utilizes innovative AI features to refine your work further. Reduce background noise for high-quality audio, disguise your voice with fun voice changer effects, or use speech enhancement for improved clarity.
Screen Recording With Audio Using DemoCreator
DemoCreator has an intuitive interface for Mac users of all skill levels. Capture high-quality screen recordings with sound and edit them effortlessly on your desktop or online. Here’s how to use this app as an alternative to QuickTime screen recording with audio:
Step 1: Download and install DemoCreator on a Mac computer. Then, launch the app to create a new account or log in to an existing one.
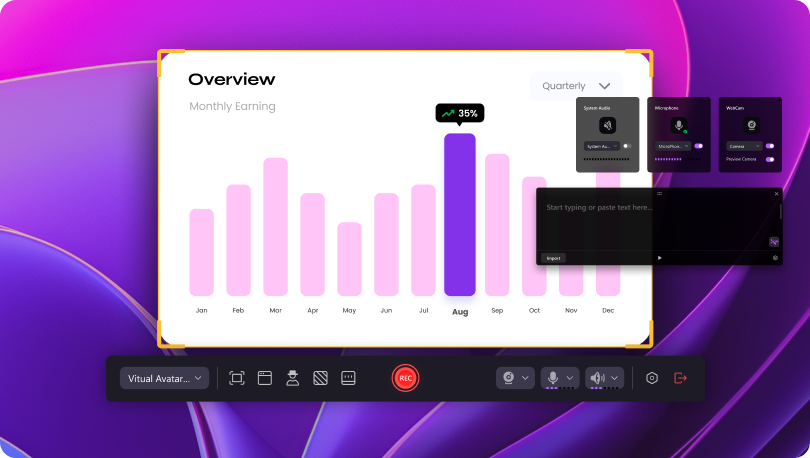
Step 2: Select All-in-One-Recorder from the Home page.

Step 3: Turn on the System Audio, Microphone, and WebCam toggle button in the settings.

Step 4: Click REC to begin recording your screen, including audio. Click Stop to finalize the recording.
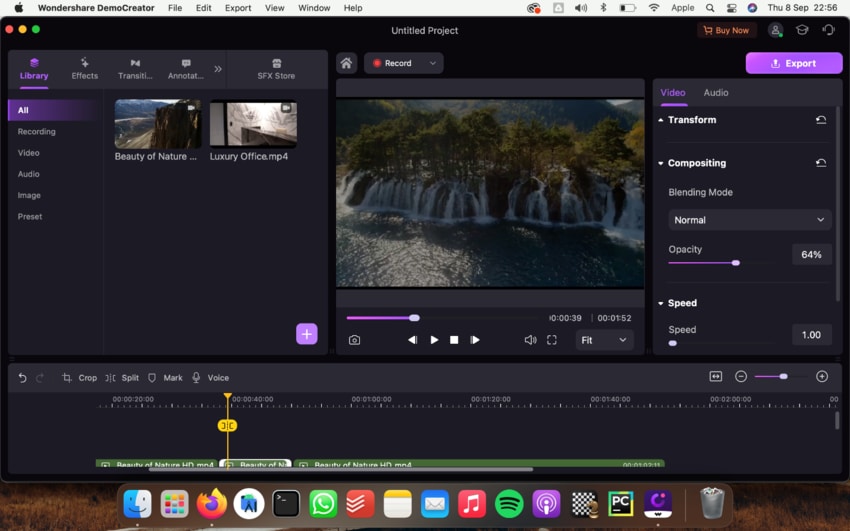
Step 5: Edit the screen recording video on the editor and export the file once done.
Part 4. Comparing QuickTime and DemoCreator as the Best Alternative
QuickTime is a basic screen recording tool that comes with macOS. However, it does not have some of the advanced features of DemoCreator. For example, DemoCreator can record both system and microphone audio, while QuickTime cannot.
Here is a table summarizing the features of these screen recorders:
| Feature | QuickTime | DemoCreator |
| Screen recording | Yes | Yes |
| Microphone audio recording | Yes | Yes |
| System audio recording | No | Yes |
| Simultaneous screen recording with sound/audio | No | Yes |
| Picture-in-picture during recording | No | Yes |
| Video editing | Trim, split, rearrange, add, rotate, and flip movies or clips | Cut/merge, resize, change video speed, batch processing, video, animations, creative assets, and more. |
| Webcam recording | Yes | Yes |

Conclusion
QuickTime screen recording with audio is a convenient way to capture your Mac screen with sound. It’s perfect for creating presentations, tutorials, or any video that needs audio. This built-in tool is simple to use and readily available on all Mac devices. You’ll just have to install other apps to record the internal audio or edit the recorded video using advanced tools.
However, if you want the less hassle method, consider DemoCreator. It offers powerful recording and editing tools in one app. It will help you create more engaging and professional-looking videos anytime.
FAQ
-
Why Is There No Sound on My QuickTime Screen Recording?
Check if QuickTime has microphone access in System Preferences > Security & Privacy > Privacy. You might also need to select the correct microphone under the recording options in QuickTime. -
Can You Add Audio to QuickTime Screen Recording?
QuickTime can capture microphone audio along with your screen recording. Just select the microphone option in the recording settings before you start. But QuickTime can’t record computer audio directly. You’ll need a third-party tool or workaround like a virtual audio cable to capture sound from your computer applications. -
How To Record Screen on Mac Without External Sound?
Choose None under the recording options when setting up your screen capture in QuickTime. This will only record the visual elements on your screen.


