
Have you ever wished you could record important phone conversations for future reference? Maybe you need to document a business call or capture a memorable chat with a loved one. Whatever the reason, automatic call recording can be an incredibly useful tool. And thanks to the Google Dialer app, it's easier than ever to record calls on your Android smartphone.
In this comprehensive guide, we'll explore the world of automatic call recording in the Google Dialer app.
We'll cover various methods to enable the Google Dialer auto call recording feature, edit and share your recordings, and troubleshoot any issues you might encounter along the way.
So, let's dive in and unlock the power of call recording!
In this article
Part 1: How to Use Automatic Call Recording in Google Dialer
In this section, we have covered three simple methods that you can use to record your phone calls automatically.
Method 1: Use the Phone App to Record Calls
If you're running the latest version of the Google Dialer app (also known as the Phone app) on your Android device, you may already have built-in call recording functionality. Also, before you begin recording, here are a few things to consider before you use the auto call record Google Dialer feature:
- Device Compatibility: Your Android device must be running Android 9 (Pie) or a later version. The automatic call recording feature is only available on devices with these more recent Android operating system versions.
- Latest Phone App Version: You must have the latest version of the Google Phone app installed on your device. This app is typically pre-installed on many Android devices, but you can also download the latest version from the Google Play Store.
- Regional Availability: Call recording is widely available in many countries and regions, but it's essential to note that it may not be supported everywhere due to legal and regulatory restrictions. The availability of this feature varies based on your specific location, as it needs to comply with local laws regarding call recording and privacy.
Everything’s in place? Here’s how to use automatic call recording in Google Dialer app.
Step 1: Open the Google Dialer app on your Android smartphone. Tap on the three-dot menu icon in the top-right corner of the app. Select "Settings" from the drop-down menu.
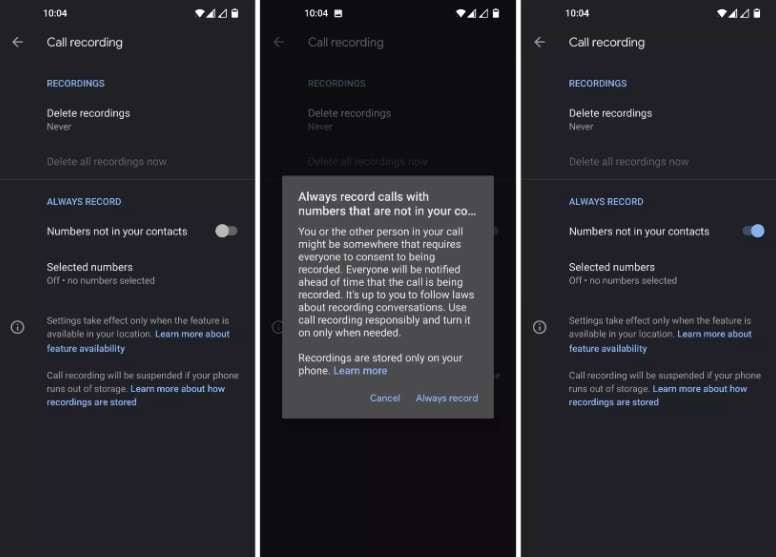
Step 2: Scroll down and look for the "Call Recording" option. In "Always record" section, select the "Selected numbers" option. Activate the "Always record selected numbers" toggle switch.
Step 3: In the top-right corner, tap the "Add" button. From your contacts list, choose the individual you want to enable automatic recording for. Confirm your selection by tapping "Always record" for that particular contact. (Repeat these steps if you wish to add more contacts to the automatic recording list.)
Step 4: Once enabled, the Google Dialer app will automatically record all incoming and outgoing calls.
Locating Your Recorded Calls
To protect your privacy, your call recordings are stored locally on your device. They are not saved or backed up on any external servers or cloud services.
Follow these straightforward steps to find your recorded calls:
Step 1: In the Phone App, tap on the "Recents" section to view your recent call history.
Step 2: Locate the contact or caller you recorded a conversation with and tap on their entry. If you recorded the most recent call with this person, the recording player will be visible on the "Recent" screen.
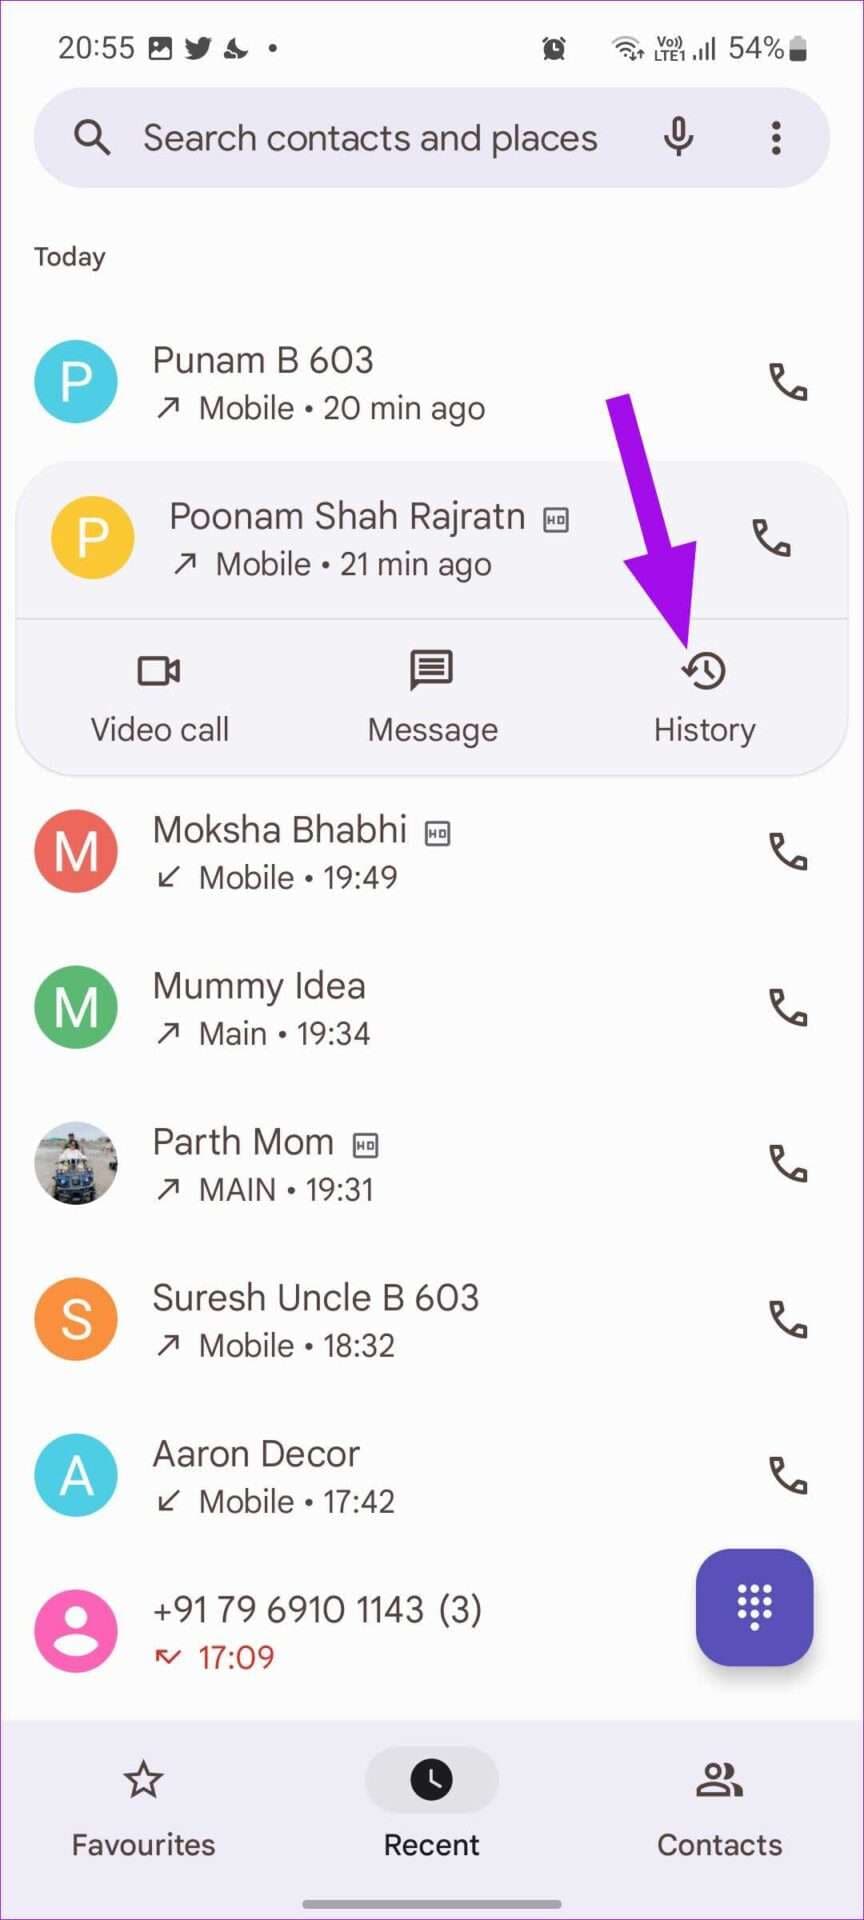
Step 3: If you recorded a previous call, tap on the "History" option. Then, select the specific recording from the list of past calls. Once you've found the recording, tap the "Play" button to listen to it.
Remember, by keeping your recordings stored locally on your device, you can rest assured that your private conversations remain secure and accessible only to you.
It's important to note that the availability of the call recording feature in the Google Dialer app may vary depending on your device manufacturer and Android version. If you don't see the option, don't worry – we've got alternative methods for you.
Method 2: Use the Google Voice App
If the built-in call recording feature isn't available on your device, you can try using a third-party app like "Google Voice" This app is specifically designed to enable automatic call recording for the Google Dialer app.
Here's how to set it up:
Step 1: Download and install the Google Voice app app from the Google Play Store. Open the app and follow the on-screen instructions to grant the necessary permissions.
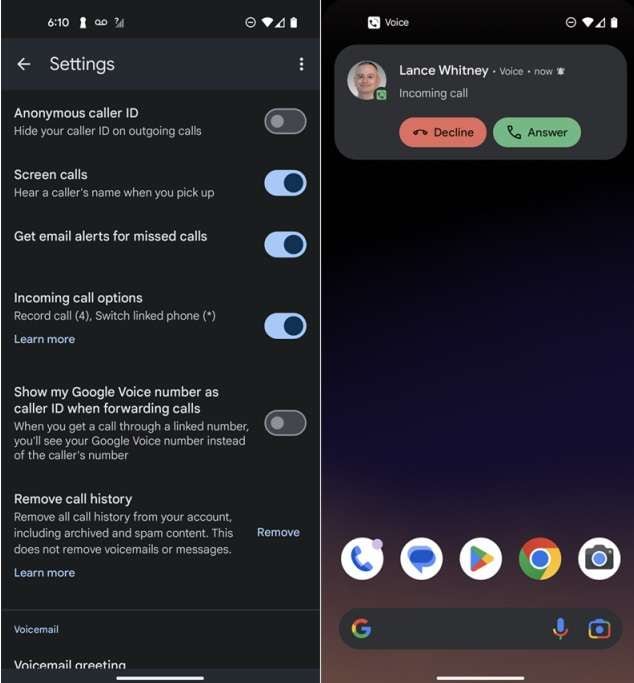
Step 2: Tap the three-horizontal lines icon, and select “Settings”. In the Settings window, enable the “Incoming Call Options” option. Once you turn ON this setting, your calls will be automatically recorded on the Google Voice app.
The Google Voice App app offers additional features like the ability to customize recording settings, organize your recordings, and even share them with others.
Method 3: Use the Automatic Call Recorder
Another popular option for automatic call recording in the Google Dialer is the Automatic Call Recorder app.
Here's how to get started:
Step 1: Open the Google Play Store to install the Automatic Call Recorder Pro app on your Android phone.
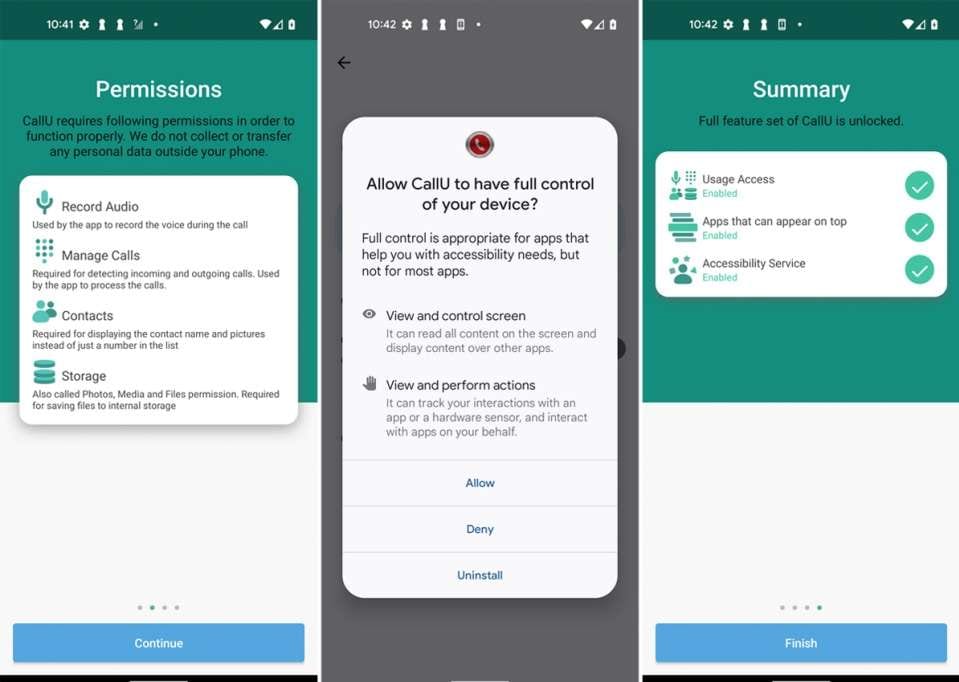
Step 2: Configure the call recording settings. You can also adjust sound levels, audio source, and format, based on your needs and requirements. And that’s it!
Once set up, the app lets you customize how you want to record calls. You can choose to record calls automatically or manually start recording each time. The app also allows you to change the audio source, like using your phone's speaker or microphone. You can pick different audio formats for the recordings.
Part 2: Edit and Share Your Call Recordings: Use DemoCreator
Once you've recorded your calls using any of the methods mentioned above, you may want to edit or share them. That's where DemoCreator comes in handy. This powerful app allows you to trim, split, and even merge your call recordings, making it easier to share only the relevant portions.
Here's how to use DemoCreator to edit and share your call recordings:
Step 1: Hit the “Free Download” button. Follow the on-screen instructions to complete the process. Launch DemoCreator on your Windows or Mac device. Choose the “Video Editor” option.

Step 2: Head to File > Import Media Files. Select the call recording you want to edit.
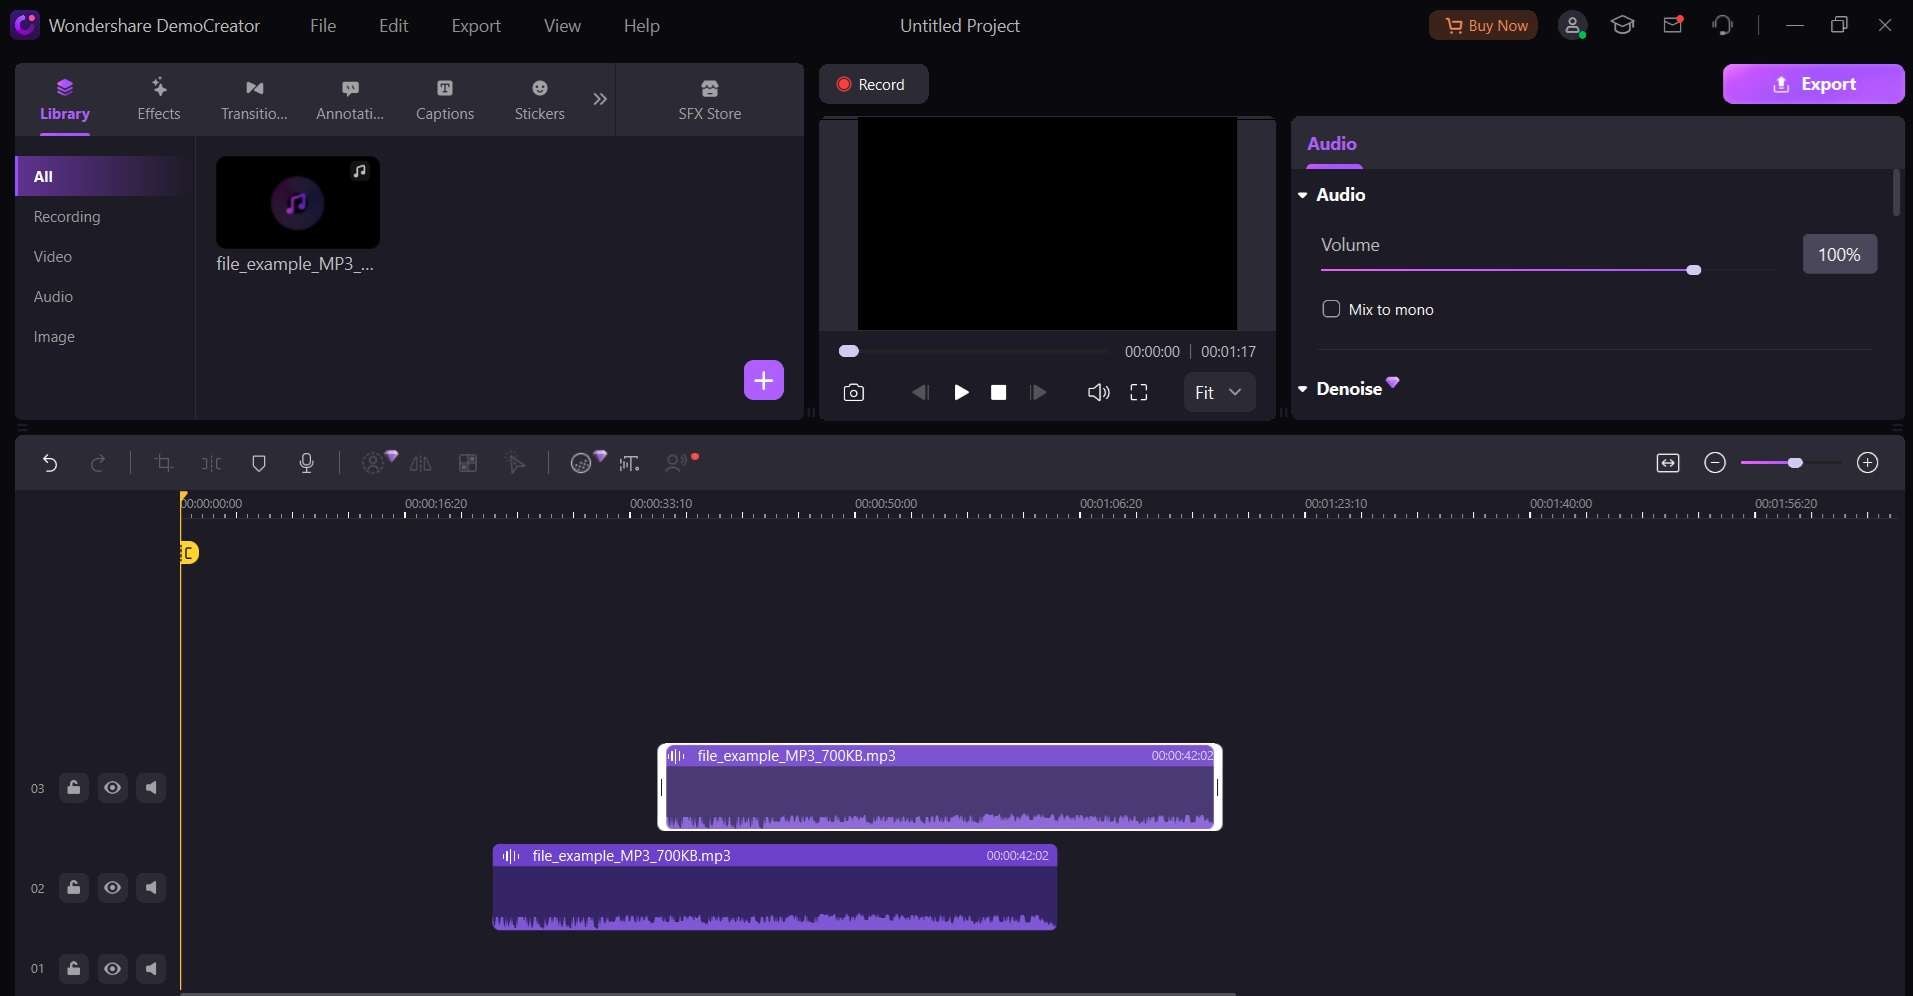
Step 3: Drag and drop the recording to the Timeline placed at the bottom of DemoCreator’s interface. Use the trimming and splitting tools to remove any unwanted portions or divide the recording into multiple files. If needed, you can also merge multiple recordings into a single file.
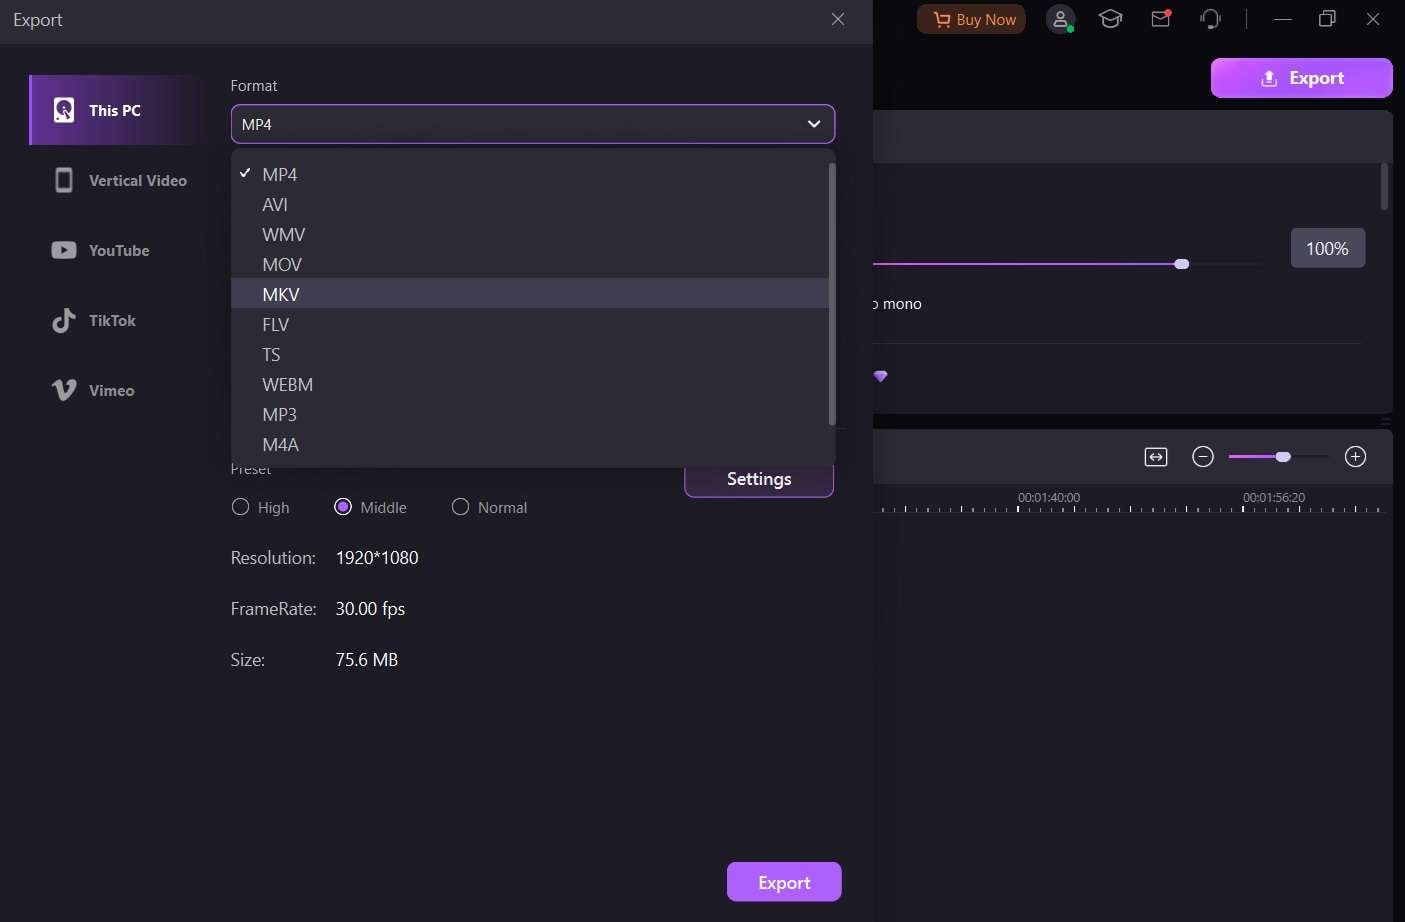
Step 4: Once you're satisfied with your edits, tap the "Export" option. DemoCreator allows you to export your edited recording in various formats including MP4, AVI, MOV, MKV, etc.
DemoCreator offers a range of additional features, such as adding annotations, applying filters, and even converting recordings to different file formats. With its intuitive interface and powerful editing tools, DemoCreator is a must-have companion for anyone serious about call recording.
Part 3: Automatic Call Recording Not Working: Try These Troubleshooting Tips
The methods outlined above should work for most users, you may encounter situations where automatic call recording in the Google Dialer isn't functioning as expected. If that's the case, don't worry – we've got some troubleshooting tips to help you get back on track.
- Check Permissions: Ensure that you've granted the necessary permissions to the call recording app you're using. Without proper permissions, the app won't be able to access the microphone or record calls.
- Update Apps: Make sure you're running the latest versions of the Google Dialer app and any third-party call recording apps you're using. Outdated apps may have bugs or compatibility issues that prevent call recording from working correctly.
- Clear App Data: Sometimes, clearing the app data and cache can resolve issues with call recording. To do this, go to your device's Settings > Apps > Select the app > Storage > Clear Data and Clear Cache.
- Check Device Compatibility: Not all Android devices support automatic call recording due to manufacturer restrictions or hardware limitations. If you're having persistent issues, check with your device manufacturer to ensure your device is compatible with call recording.
- Try a Different Call Recording App: If one call recording app isn't working for you, try switching to a different app. Some apps may be better optimized for your device or Android version.
- Check for Third-Party App Conflicts: In some cases, other third-party apps running on your device may interfere with call recording functionality. Try disabling or uninstalling any unnecessary apps to see if that resolves the issue.
If you've tried all these troubleshooting steps and automatic call recording still isn't working, you may need to seek further assistance from the app developer or your device manufacturer.
Conclusion
The Google Dialer auto call recording is a powerful tool that can save you time and effort in documenting important conversations. Whether you're using the built-in Phone app, a third-party call recording app like "Google Voice" or "Automatic Call Recorder Pro” or editing your recordings with DemoCreator, this guide has provided you with the necessary steps to unlock the full potential of call recording on your Android device.
Always ensure you're following local laws and regulations regarding call recording, and respect the privacy of others when recording conversations.
With the right tools and techniques, automatic call recording can be a valuable asset for both personal and professional use.
FAQ
-
Is automatic call recording legal in my area?
The legality of call recording varies by country and region. In some areas, you may need to obtain consent from all parties before recording a call. It's essential to research and comply with the relevant laws and regulations in your jurisdiction. -
How do I ensure high-quality call recordings?
Several factors can affect the quality of your call recordings, such as background noise, microphone sensitivity, and device hardware. To improve recording quality, use a noise-canceling headset or microphone, reduce background noise, and consider using a higher-end device with better audio capabilities. -
Can I record calls on my iPhone using the Google Dialer app?
No, the Google Dialer app is designed for Android devices only. If you're an iPhone user looking to record calls, you'll need to explore alternative solutions, such as third-party call-recording apps or services specific to iOS devices.


