Recording your voice on an Android device has numerous benefits, whether you're a student capturing lectures, a professional taking notes during meetings, or a creative individual recording ideas or podcasts.
With the abundance of voice recording apps available, it's easier than ever to harness the power of your Android device's built-in microphone. In this comprehensive guide, we'll explore various methods to record your voice on Android, ensuring you can capture high-quality audio effortlessly.
The ability to record voice on Android is an invaluable tool that empowers you to preserve important moments, conversations, and insights. By following the simple steps outlined in this article, you'll learn all about how to record your voice on Android using various methods.
In this article
Part 1: How to Record Voice in Android
Let’s explore a few methods for how to use voice recorder on Android. We will also discuss steps for using other Android apps to record your voice using simple steps.
Method 1: Use the Built-in Voice Recorder
One of the most straightforward ways to record your voice on Android is to utilize the built-in voice recorder app. This app, often called "Voice Recorder" or "Recorder," comes pre-installed on many Android devices and provides a user-friendly interface for recording audio.
Here’s how to use voice recorder on Android:
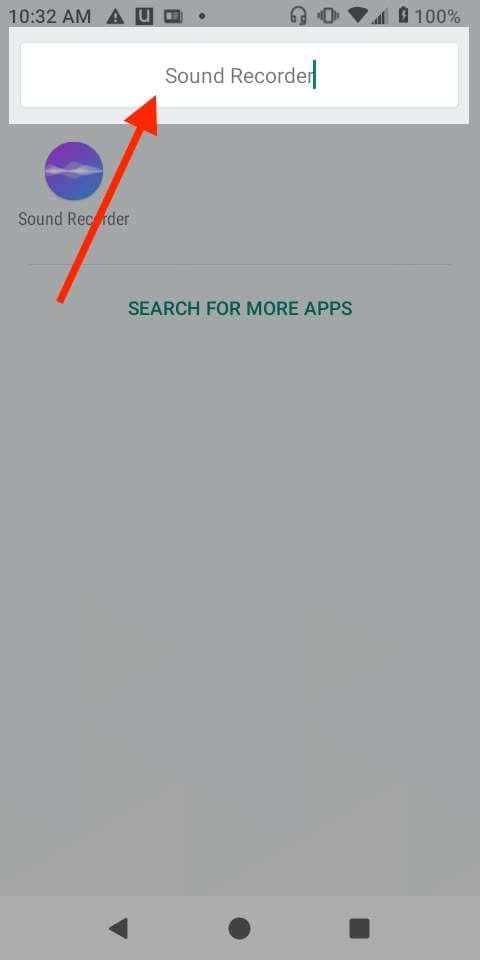
Step 1: Locate the Sound Recorder app on your Android device. It might be in the app drawer or on the home screen. Open the app on your Android phone and grant the necessary permissions, such as access to the microphone and storage, if prompted.
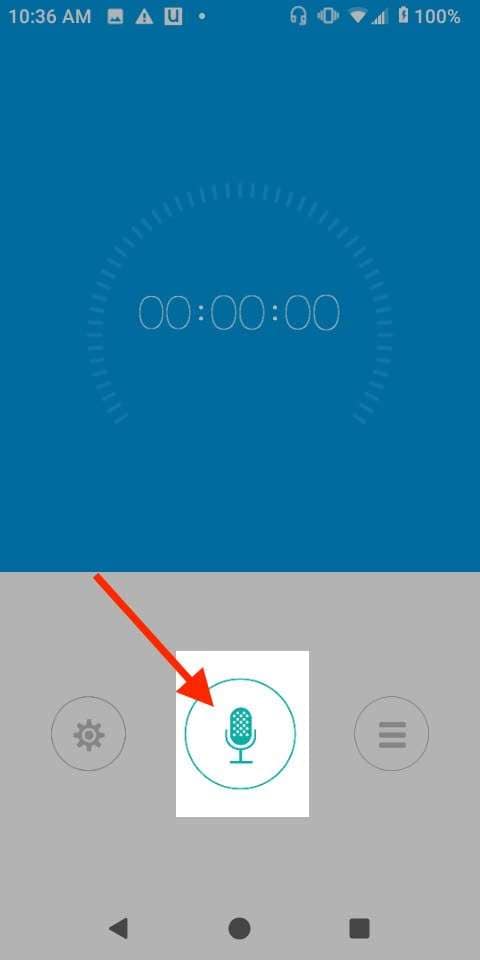
Step 2: Tap the record button (microphone icon) to start recording your voice.
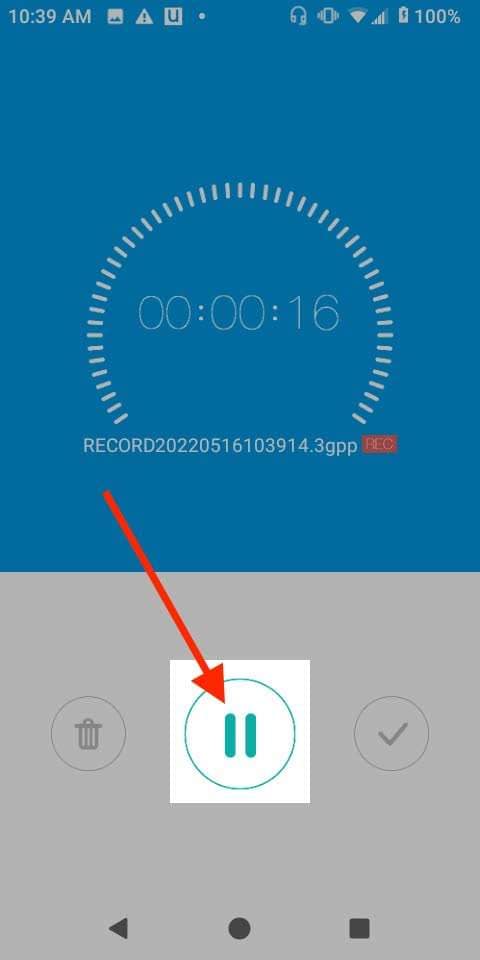
Step 3: Hit the Pause icon to pause the recording. Tap the stop button to save the audio file.
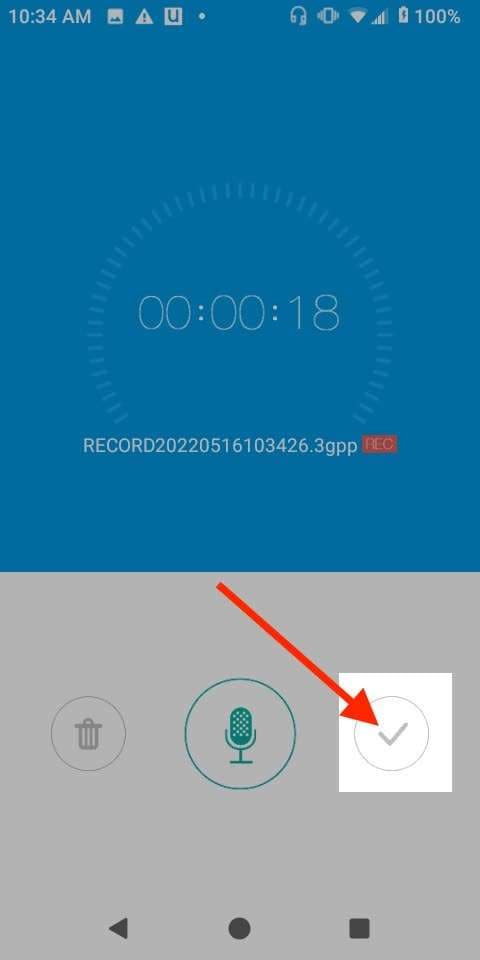
Step 4: To save your voice recording, hit the “checkmark” icon.
Step 5: You can find your recorded audio files in the app's library or in the default storage location for audio files on your device.
Method 2: How to Record Your Voice on Android with Notta
Notta is a popular and feature-rich voice recording app for Android that offers a range of tools for capturing and managing audio recordings.
Here's how to record your voice on Android using Notta:
Step 1: Download and install the Notta app from the Google Play Store. Launch the app on your Android device. Grant the necessary permissions for accessing the microphone and storage.

Step 2: Tap the “+” button to start recording your voice.
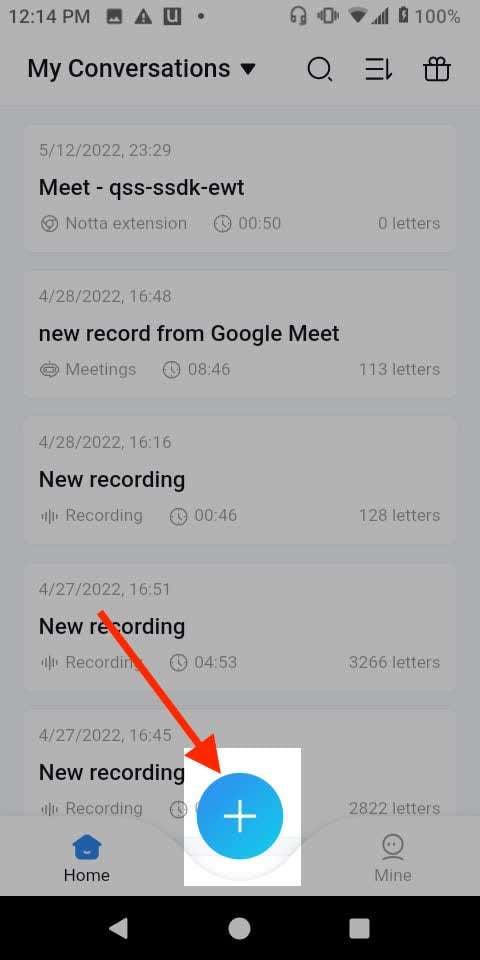
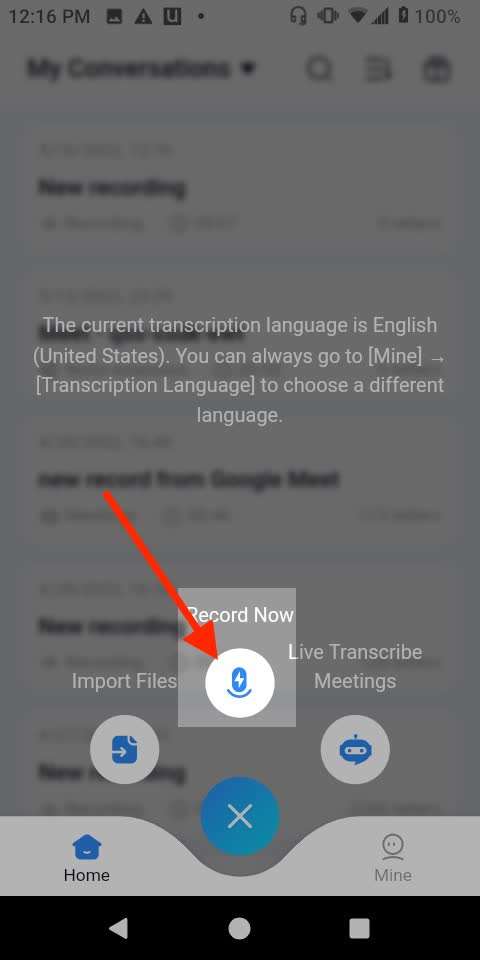
Step 3: To begin recording, hit the “Record Now” button.
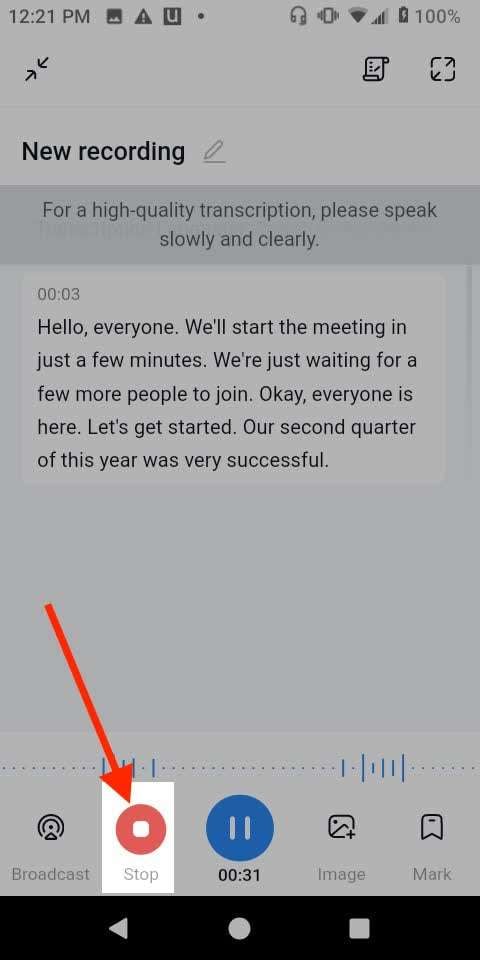
Step 4: When you're done, tap the stop button to save the audio file.
Step 5: Notta allows you to name and organize your recordings for easy access.
Method 3: Use the Easy Voice Recorder App
Easy Voice Recorder is another popular voice recording app for Android that offers a clean and user-friendly interface. Here's how to use it to record your voice:
Step 1: Head to the Google Play Store and install the “Easy Voice Recorder” app on your Android phone. Open the app to begin recording.
Step 2: Tap the microphone button to start recording your voice.
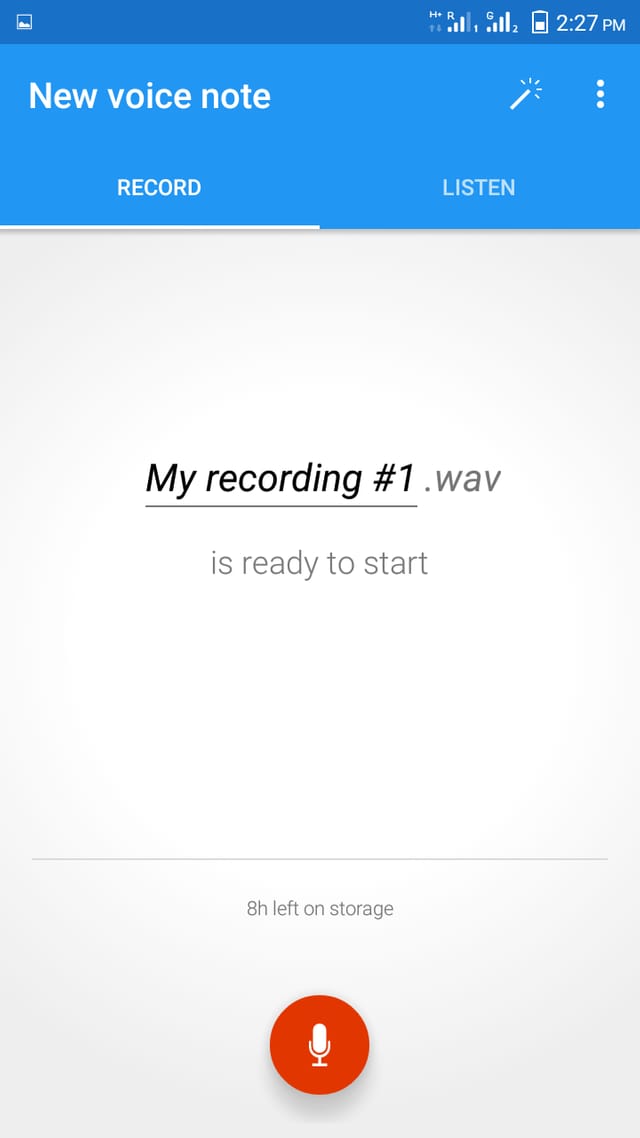
Step 3: Tap the stop button to save the audio file.
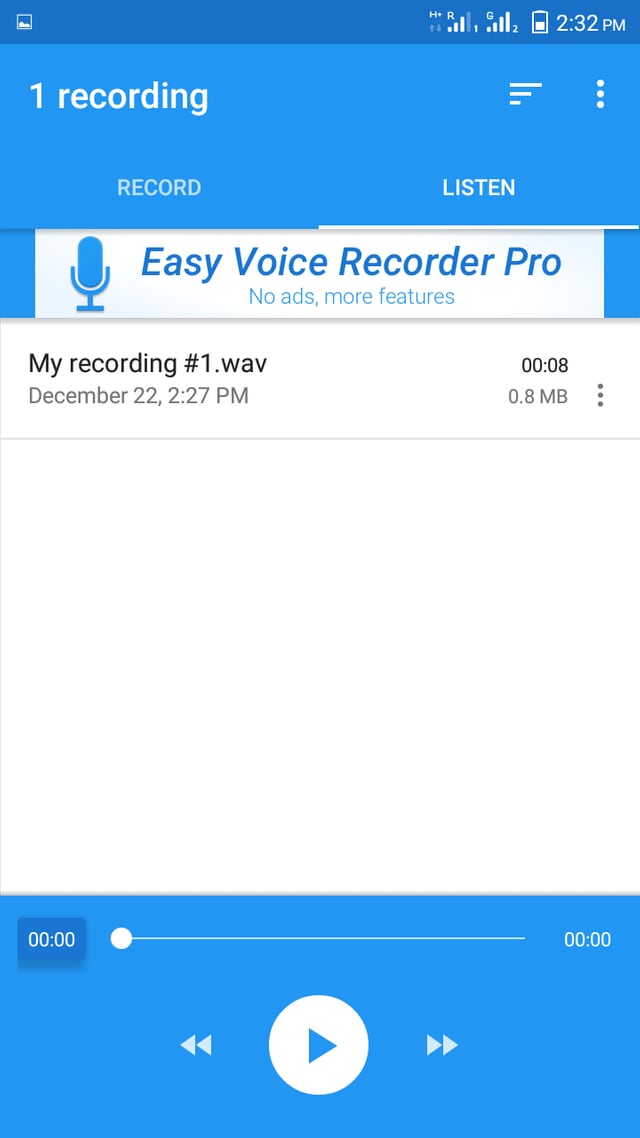
Step 4: Easy Voice Recorder automatically organizes your recordings by date and time, making it easy to find and manage your audio files.
Method 4: How to Record Voice in Android with an External Microphone
While most Android devices come equipped with built-in microphones, you may want to use an external microphone for superior audio quality or to capture audio from a distance.
Here's how to record your voice on Android using an external microphone:
Step 1: Connect your external microphone to your Android device via the appropriate port (e.g., USB, 3.5mm audio jack, or Bluetooth).
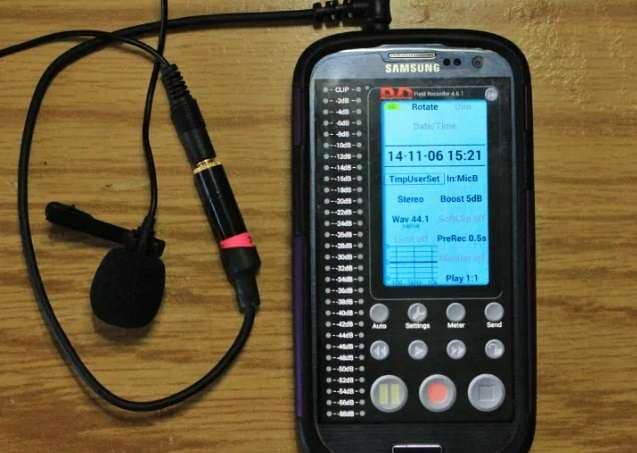
Step 2: Open your preferred voice recording app and grant the necessary permissions for accessing the microphone and storage.
Step 3: Position the external microphone as desired and tap the record button to start recording your voice. When you're done, tap the stop button to save the audio file.
Using an external microphone can significantly enhance the quality of your voice recordings, especially in scenarios where ambient noise or distance is a concern.
Part 2: Edit and Trim Your Voice Recordings Easily with DemoCreator
Recording your voice is the crucial first step, post-production editing can take your audio files to new heights. Wondershare DemoCreator is a powerful desktop application for Windows and Mac. It offers a comprehensive suite of tools to refine, enhance, and transform your voice recordings into polished masterpieces.
DemoCreator's audio editor is packed with features that cater to both casual users and professionals. From trimming and splitting to mixing and mastering, you have complete control over every aspect of your audio files.
With DemoCreator's multitrack editing capabilities, you can combine multiple voice recordings, add background music or sound effects, and create professional-quality audio projects with ease.
Here are the simple steps to use DemoCreator to enhance your audio recordings:
Step 1: Go to the official Wondershare DemoCreator website. Hit the “Free Download” button and install DemoCreator on your Windows or Mac computer from the official website. Launch the application and navigate to the Video Editor section.
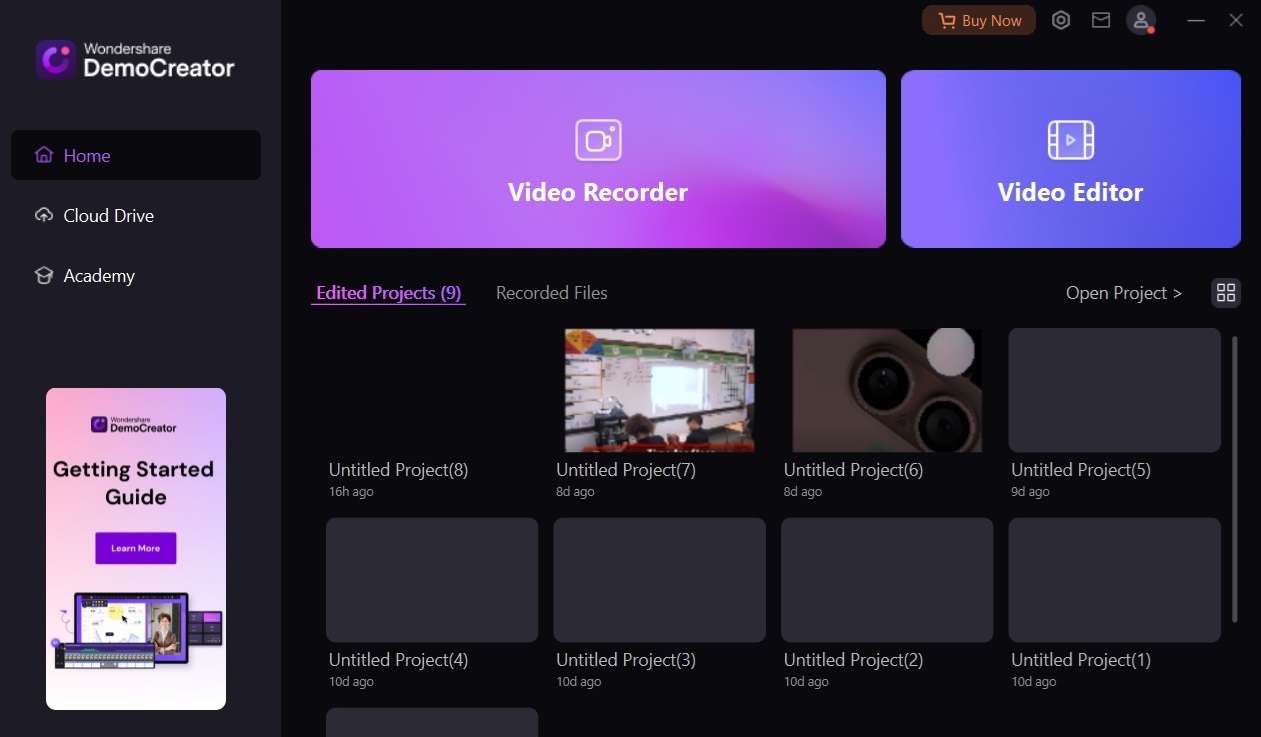
Step 2: Import your voice recording by dragging and dropping the audio file into the timeline or using the "Import Media Files" option.
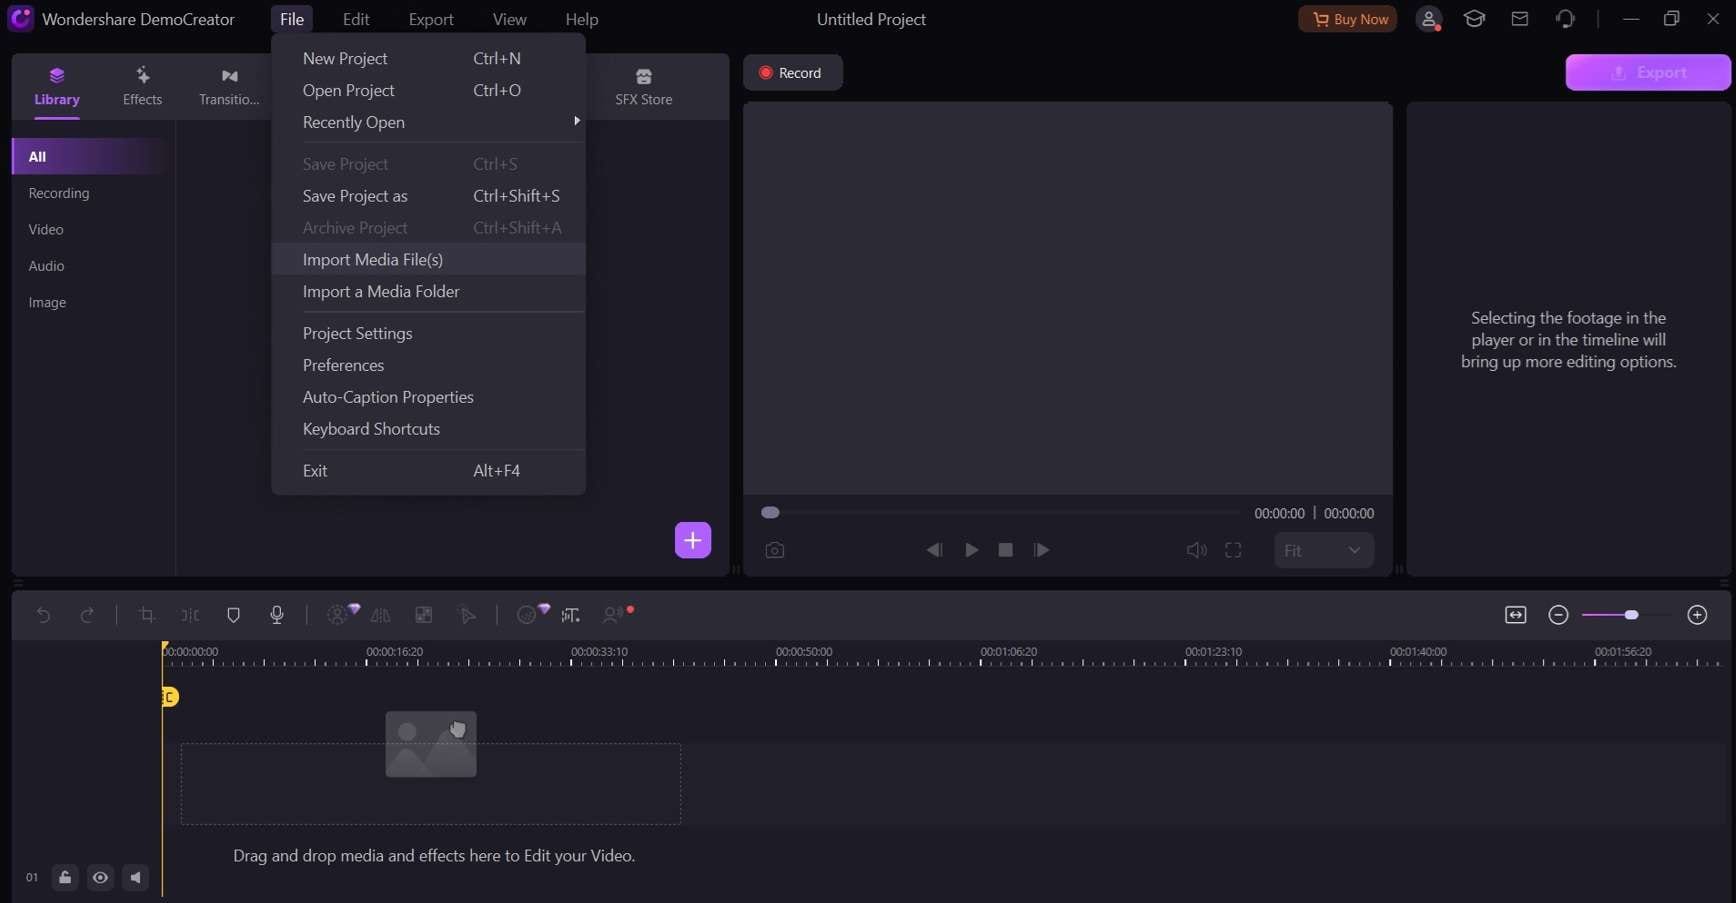
Step 3: Drag and drop the recording to the Timeline. Now make the best the trimming tools to remove any unwanted sections from the beginning or end of the recording. Apply noise reduction and audio enhancement filters to improve the overall sound quality.
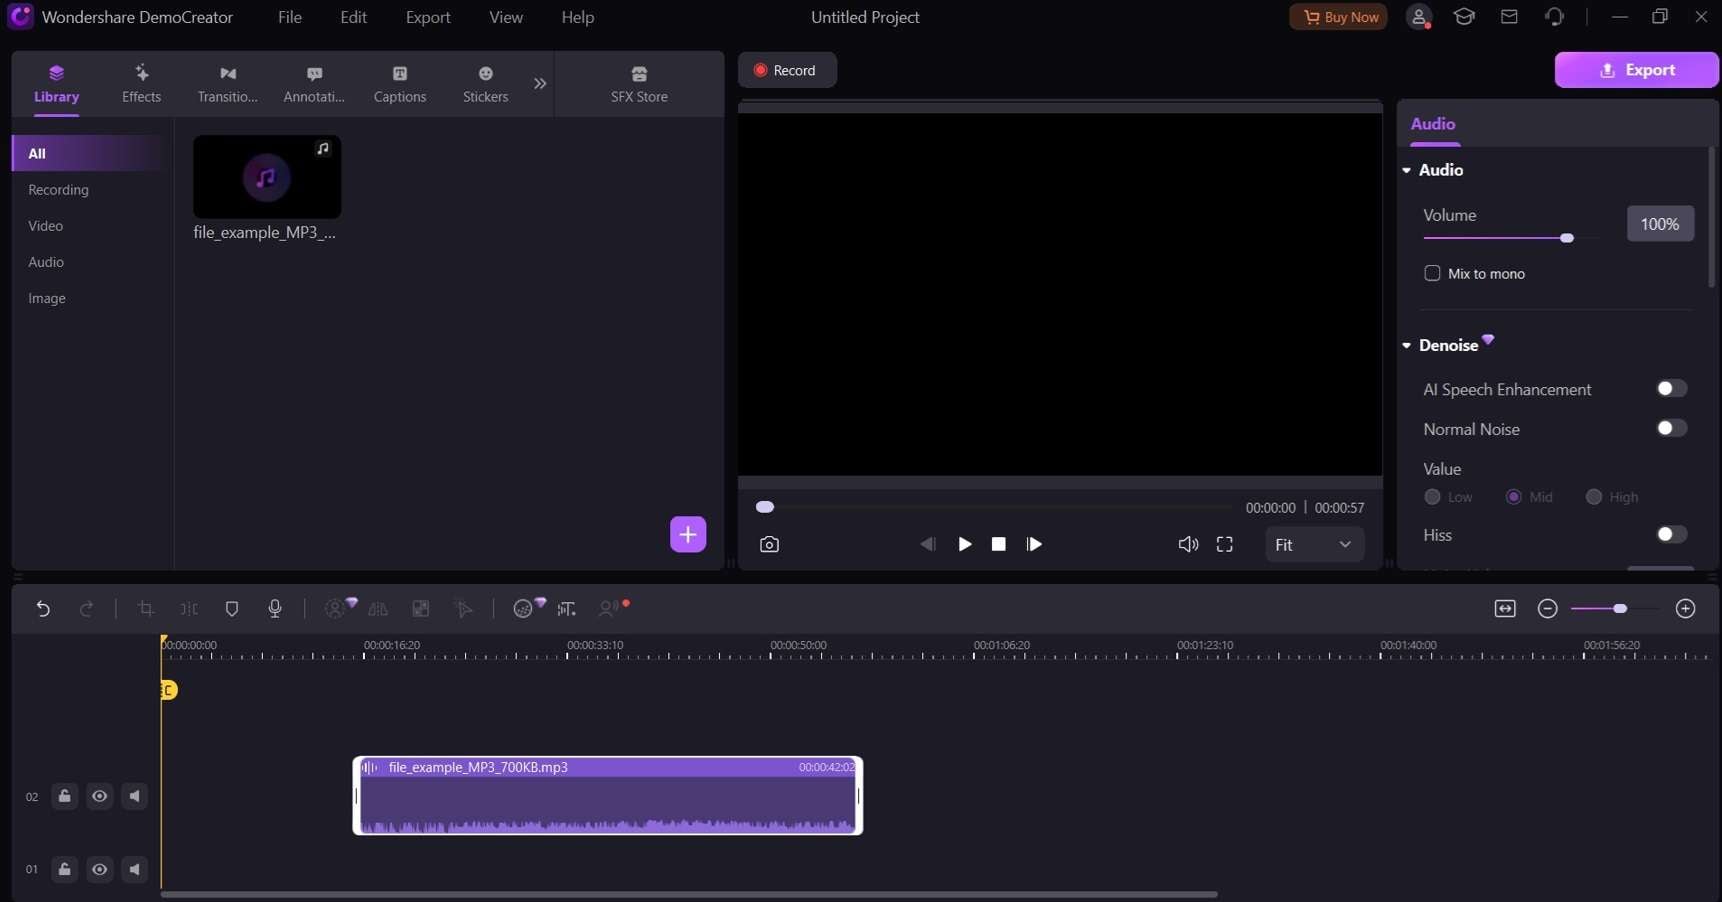
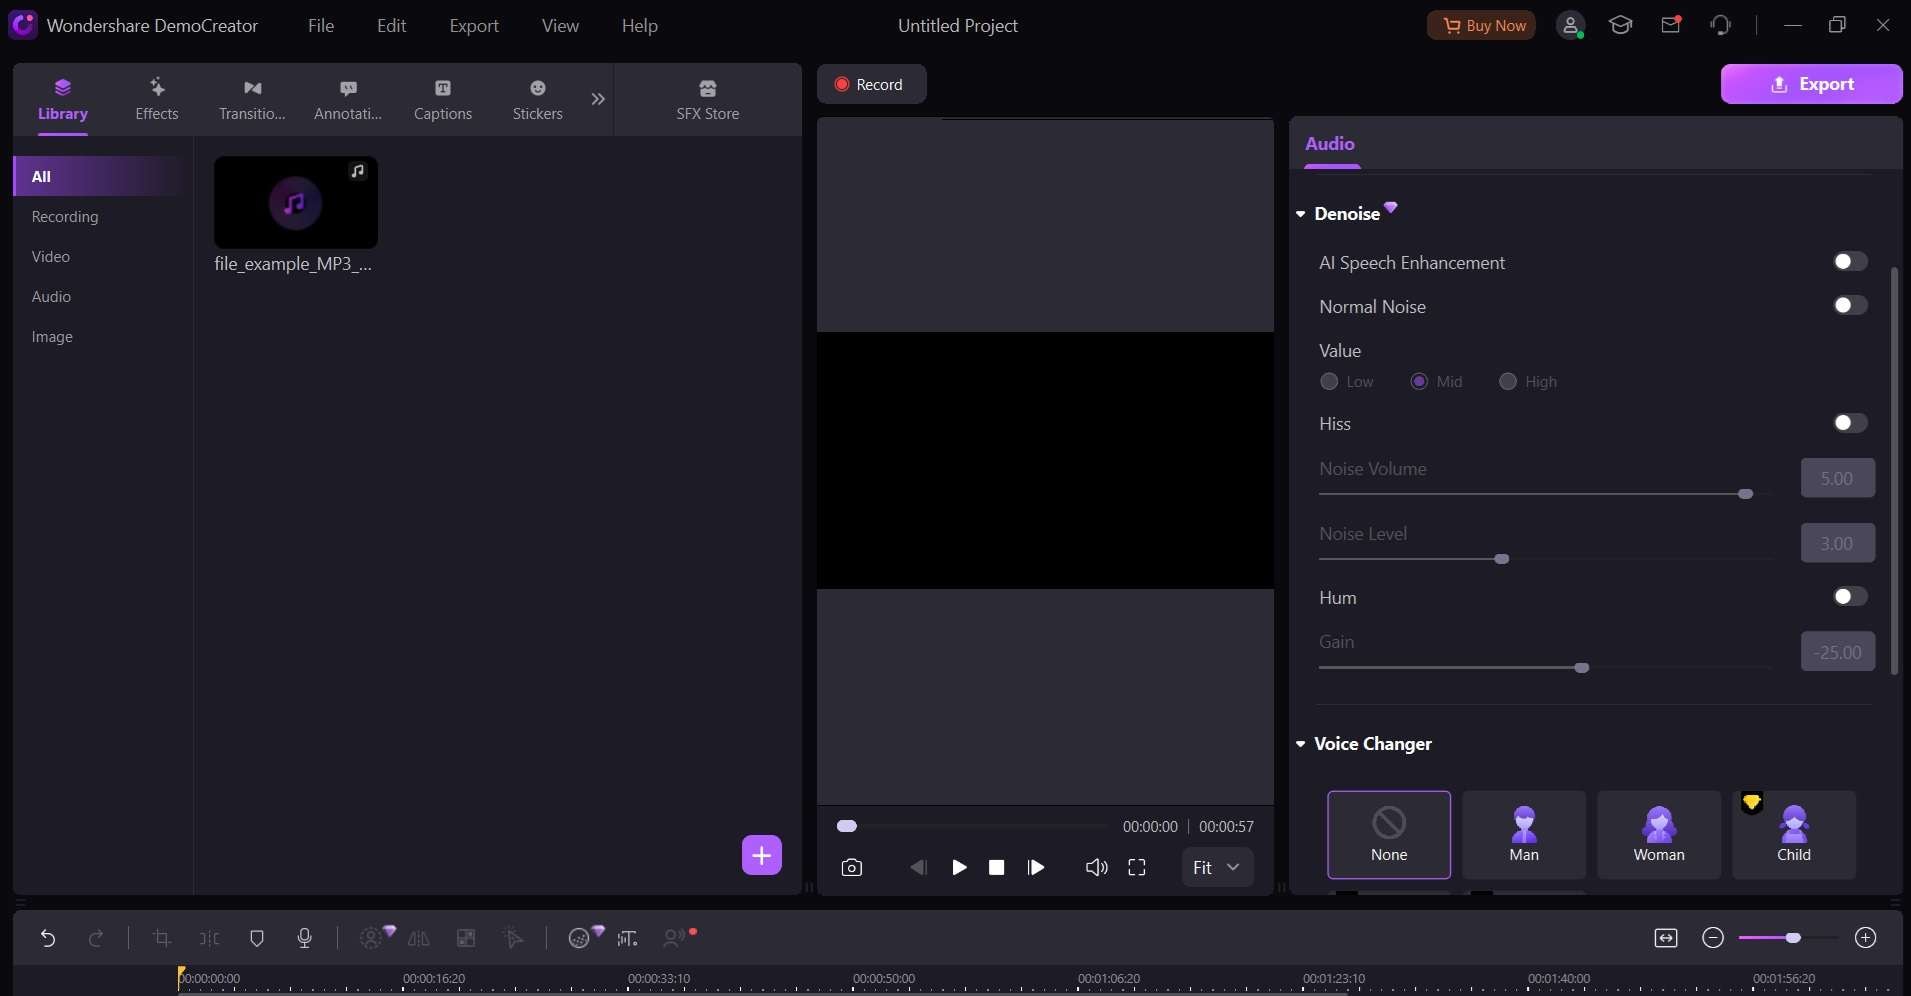
Step 4: Experiment with the various editing tools, such as AI Speech Enhancement, normalization, and adding effects like reverb or compression.
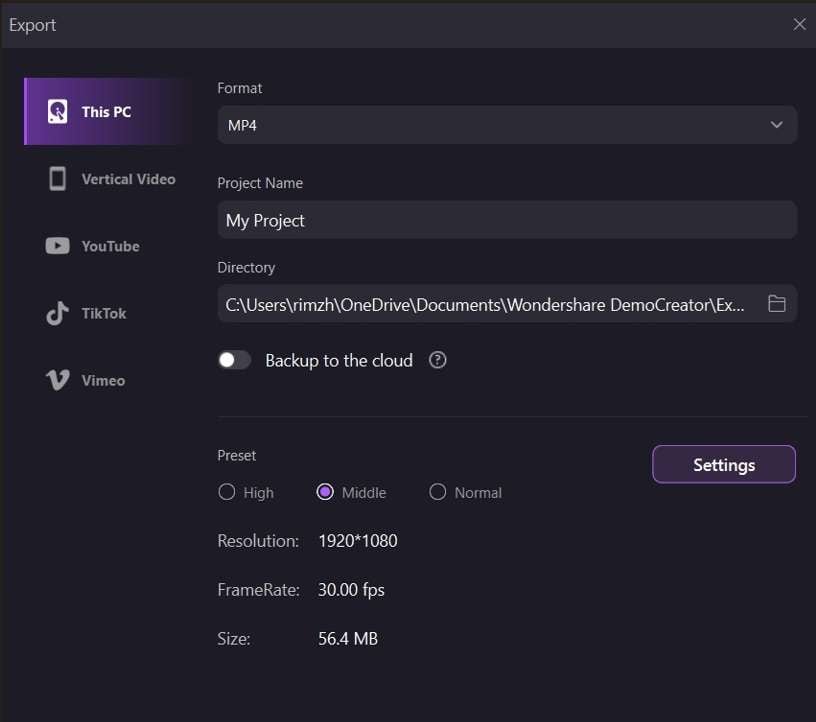
Step 5: All set? Hit the “Export” button placed on the top menu bar to export your edited audio file in your desired format, ready for sharing or further use.
DemoCreator offers a user-friendly interface and a range of editing tools, making it a valuable companion for enhancing and refining your voice recordings.
Part 3: Additional Tips to Enhance Voice Recordings
While the methods outlined above provide a solid foundation for recording your voice on Android, there are several additional tips and best practices to consider for optimal results:
- Choose a quiet environment: Background noise can significantly impact the quality of your voice recordings. Whenever possible, choose a quiet room or space with minimal ambient noise to ensure clear and crisp audio.
- Experiment with microphone positioning: The positioning of your device's microphone or an external microphone can greatly affect the audio quality. Try different positions and angles to find the sweet spot that captures your voice with the best clarity and volume.
- Use a pop filter or windscreen: If you plan to record your voice frequently, consider investing in a pop filter or windscreen. These accessories help reduce plosive sounds (hard "p" and "b" sounds) and minimize background noise caused by wind or breath.
- Optimize microphone settings: Many voice recording apps offer advanced microphone settings that allow you to adjust gain, sensitivity, and noise reduction. Experiment with these settings to find the optimal configuration for your recording environment and voice.
- Monitor audio levels: Pay attention to the audio levels while recording to ensure your voice is being captured at an appropriate volume. Most recording apps provide visual indicators or meters to help you monitor and adjust the levels accordingly.
- Use a tripod or stand: If you're recording your voice while holding your device, consider using a tripod or stand to keep the device steady and minimize unwanted movements or vibrations that could impact audio quality.
Conclusion
This wraps up our guide on how to record your voice on Android. Recording your voice on an Android device has never been easier or more accessible.
With a range of built-in and third-party voice recording apps, as well as the option to use external microphones, you have the tools to capture high-quality audio for various purposes. Whether you're a student, professional, or creative individual, the ability to record your voice on Android empowers you to preserve important information, ideas, and moments with ease.
By following the simple steps outlined in this guide, you can harness the power of voice recording on your Android device and unlock a world of possibilities.
From capturing lectures and meetings to recording podcasts and creative projects, the possibilities are endless.
FAQ
-
Can I record phone calls on my Android device?
Recording phone calls on Android devices is possible, but the process and legality vary depending on your location and the specific app or method used. In many regions, recording phone calls without the consent of all parties involved may be illegal. It's essential to check your local laws and regulations before attempting to record phone calls. -
Can I share or transfer my voice recordings to other devices or platforms?
Yes, you can easily share or transfer your voice recordings from your Android device to other devices or platforms. Most voice recording apps offer sharing options that allow you to send audio files via email, messaging apps, cloud storage services, or transfer them directly to a computer via USB cable. Additionally, you can upload your recordings to online platforms like SoundCloud or YouTube for broader sharing and distribution. -
How can I improve the audio quality of my voice recordings?
There are several ways to improve the audio quality of your voice recordings on Android:- Use an external microphone, which typically offers better sound quality than built-in microphones.
- Record in a quiet environment with minimal background noise.
- Experiment with microphone positioning and distance to find the optimal setup.
- Adjust microphone settings, such as gain and noise reduction, to suit your recording conditions.
- Use audio editing apps like DemoCreator to enhance and refine your recordings after capturing them.


