While it’s certainly convenient, keeping important files like voice memos and other audio recordings stored directly on your iPhone isn’t always in your best interest. Many things could go wrong and result in you losing them all in an instant.
So, the best thing you can do is transfer your recordings to your computer, where you can easily make backups and manage your files with ease. You just have to first find the best method for making the transfer.
Below, you’ll find the easiest and safest ways to get audio recordings off your iPhone in just a few simple steps.
In this article
Why Move Audio Recordings to Your Computer?
First things first – you’re probably wondering why you would even want to learn how to get audio recordings off your iPhone. It’s convenient, keeps your files easily accessible, and you can easily just share them whenever you need to.
While there are some benefits to keeping your recordings solely on your iPhone, there are some drawbacks as well. Here are the main reasons why you sho uld consider transferring your files to your computer:
- Prevent data loss – you’re much more likely to lose, damage, or even break your iPhone than your computer. If you want to minimize the damage and avoid unnecessary data loss, you’ll want to keep backups of your recordings on your computer;
- Free up storage – audio files like voice memos, recordings, music, and more can easily clog up your storage. Transferring them to your computer will free up the space you need for new data;
- Easier audio editing – if you need your recordings for social media content, podcasts, YouTube, and more, you’ll find it much easier to edit and manage your files with powerful desktop solutions rather than iPhone apps.
All things considered, it’s always a good idea to keep your most essential files on your computer rather than on your phone.
How to Get Audio Recordings off iPhone With iTunes
Although iTunes has been discontinued more or less since the introduction of MacOS Catalina, it’s still widely used on older Macs and PCs. So, if you happen to still use iTunes, you could rely on it for getting your audio recordings off your iPhone.
However, keep in mind that it could potentially be risky if your phone and iTunes library aren’t already synced. If you have some music on your iPhone that’s not in your iTunes library, you could lose it after syncing the two for audio recording transfers.
Keeping this in mind, here’s how to get audio recordings off your iPhone and on your computer using iTunes:
Step 1: Use a USB cable to connect your iPhone to your computer;
Step 2: Launch iTunes on your computer and select your iPhone;
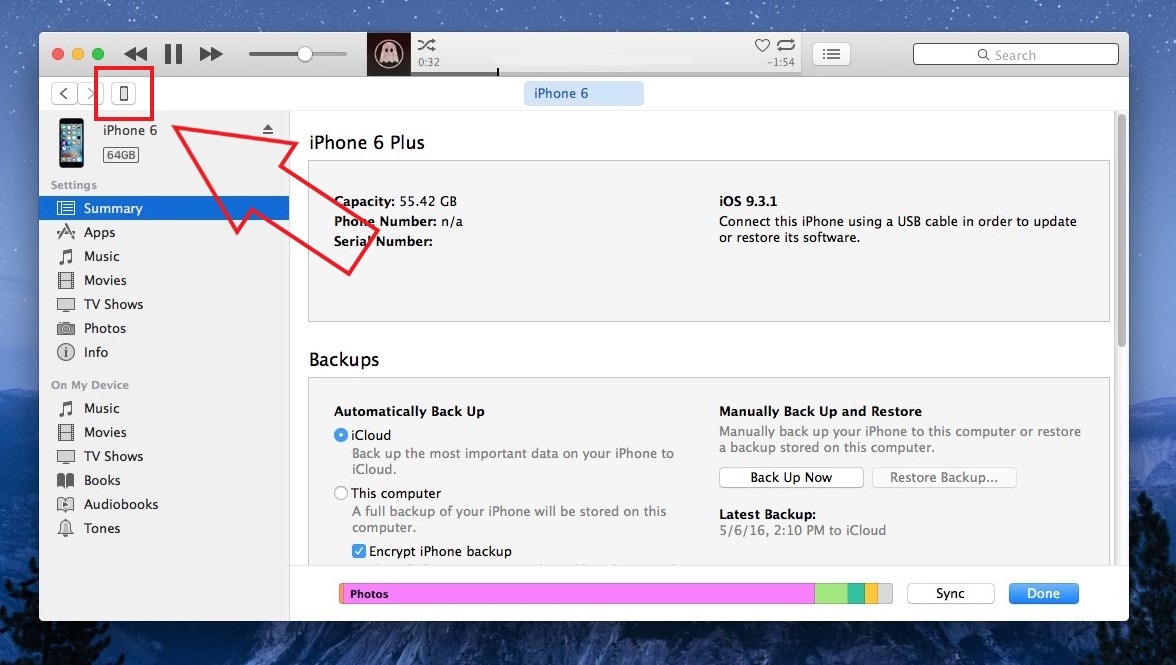
Step 3: Go to Music and check the box by Sync Music;
Step 4: Check the box by Include voice memos;
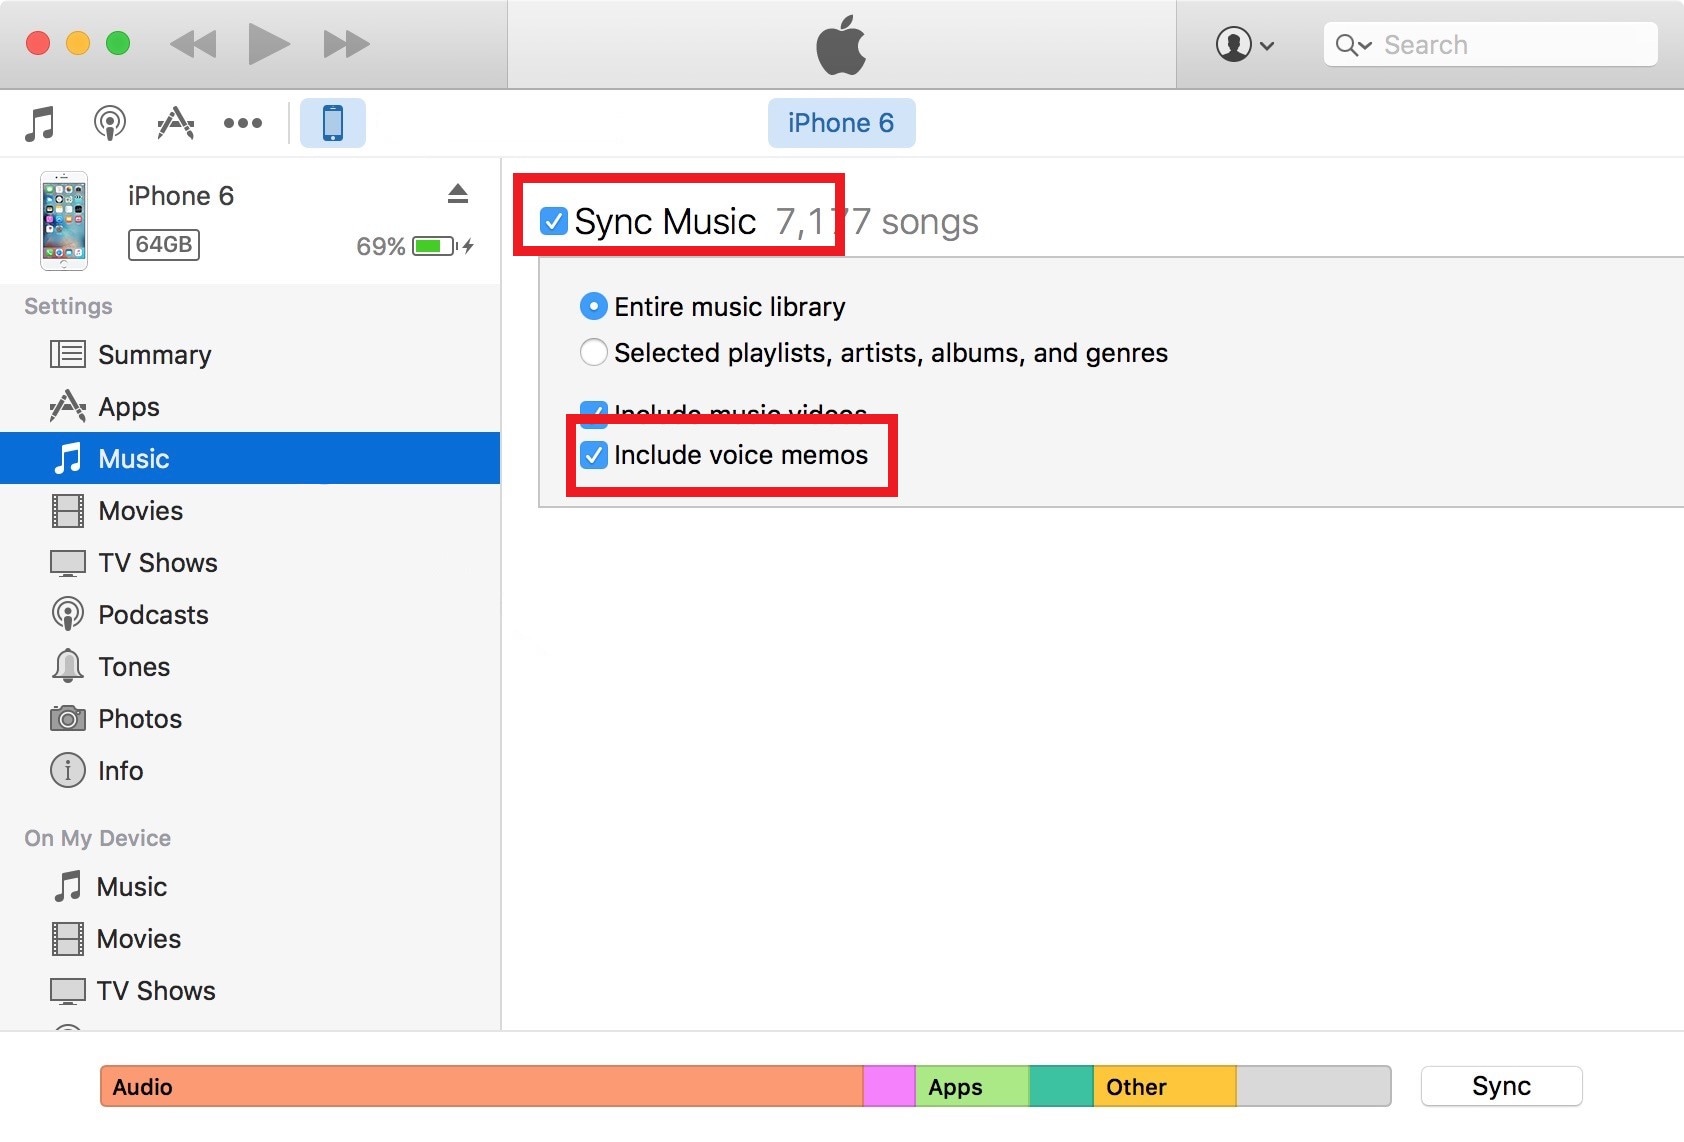
Step 5: Click Apply.
Your voice memos and audio recordings will automatically be saved to your computer. You’ll then be able to find them by clicking the Music icon in the iTunes navigation bar and going to Playlists > Voice Memos.
How to Get Audio Recordings off iPhone With Share Sheet
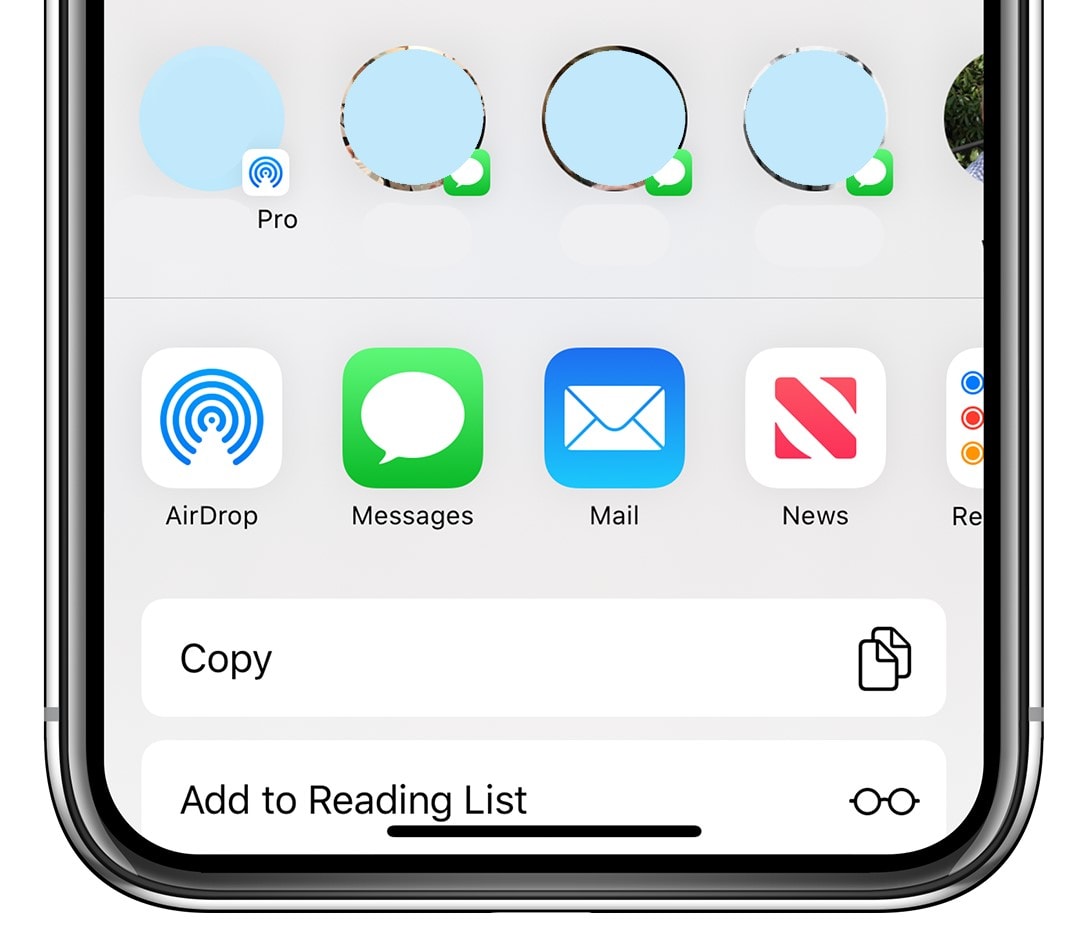
If you don’t want to risk overwriting some of the data on your phone by syncing it with iTunes, another solution is using the Share Sheet.
All iPhones come with a built-in Share feature that allows you to send content like voice memos, photos, videos, and more to other devices using one of many different options such as AirDrop, Gmail, Instagram, etc.
It’s easy to use and convenient, but there’s a catch. Using the Share Sheet, you can only send one voice memo at a time. If you need to transfer more than a couple of audio recordings to your computer, this is probably not the most efficient way to do it.
Step 1: Open the Voice Memo app on your phone and tap on the audio recording you want to transfer;
Step 2: Under your audio recording, tap on the More icon > Share;
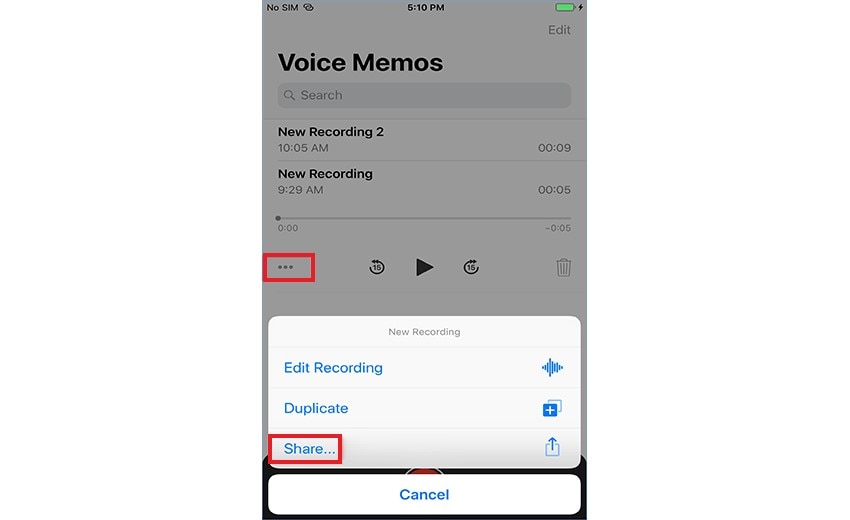
Step 3: Select the option you want to use to share your voice memo to your computer.
Depending on which option you’ve chosen, you might have to accept the incoming voice memo on your target computer.
How to Get Audio Recordings off iPhone With iCloud
Of course, if you prefer, you could always go the simple route and get audio recordings off your iPhone using your iCloud. After all, it’s the go-to tool for backing up your data and syncing it across devices.
Since iCloud comes built-in with your iPhone, all you have to do is sign into it with your Apple ID and do the same on your computer. Then, you can seamlessly transfer files between the two devices.
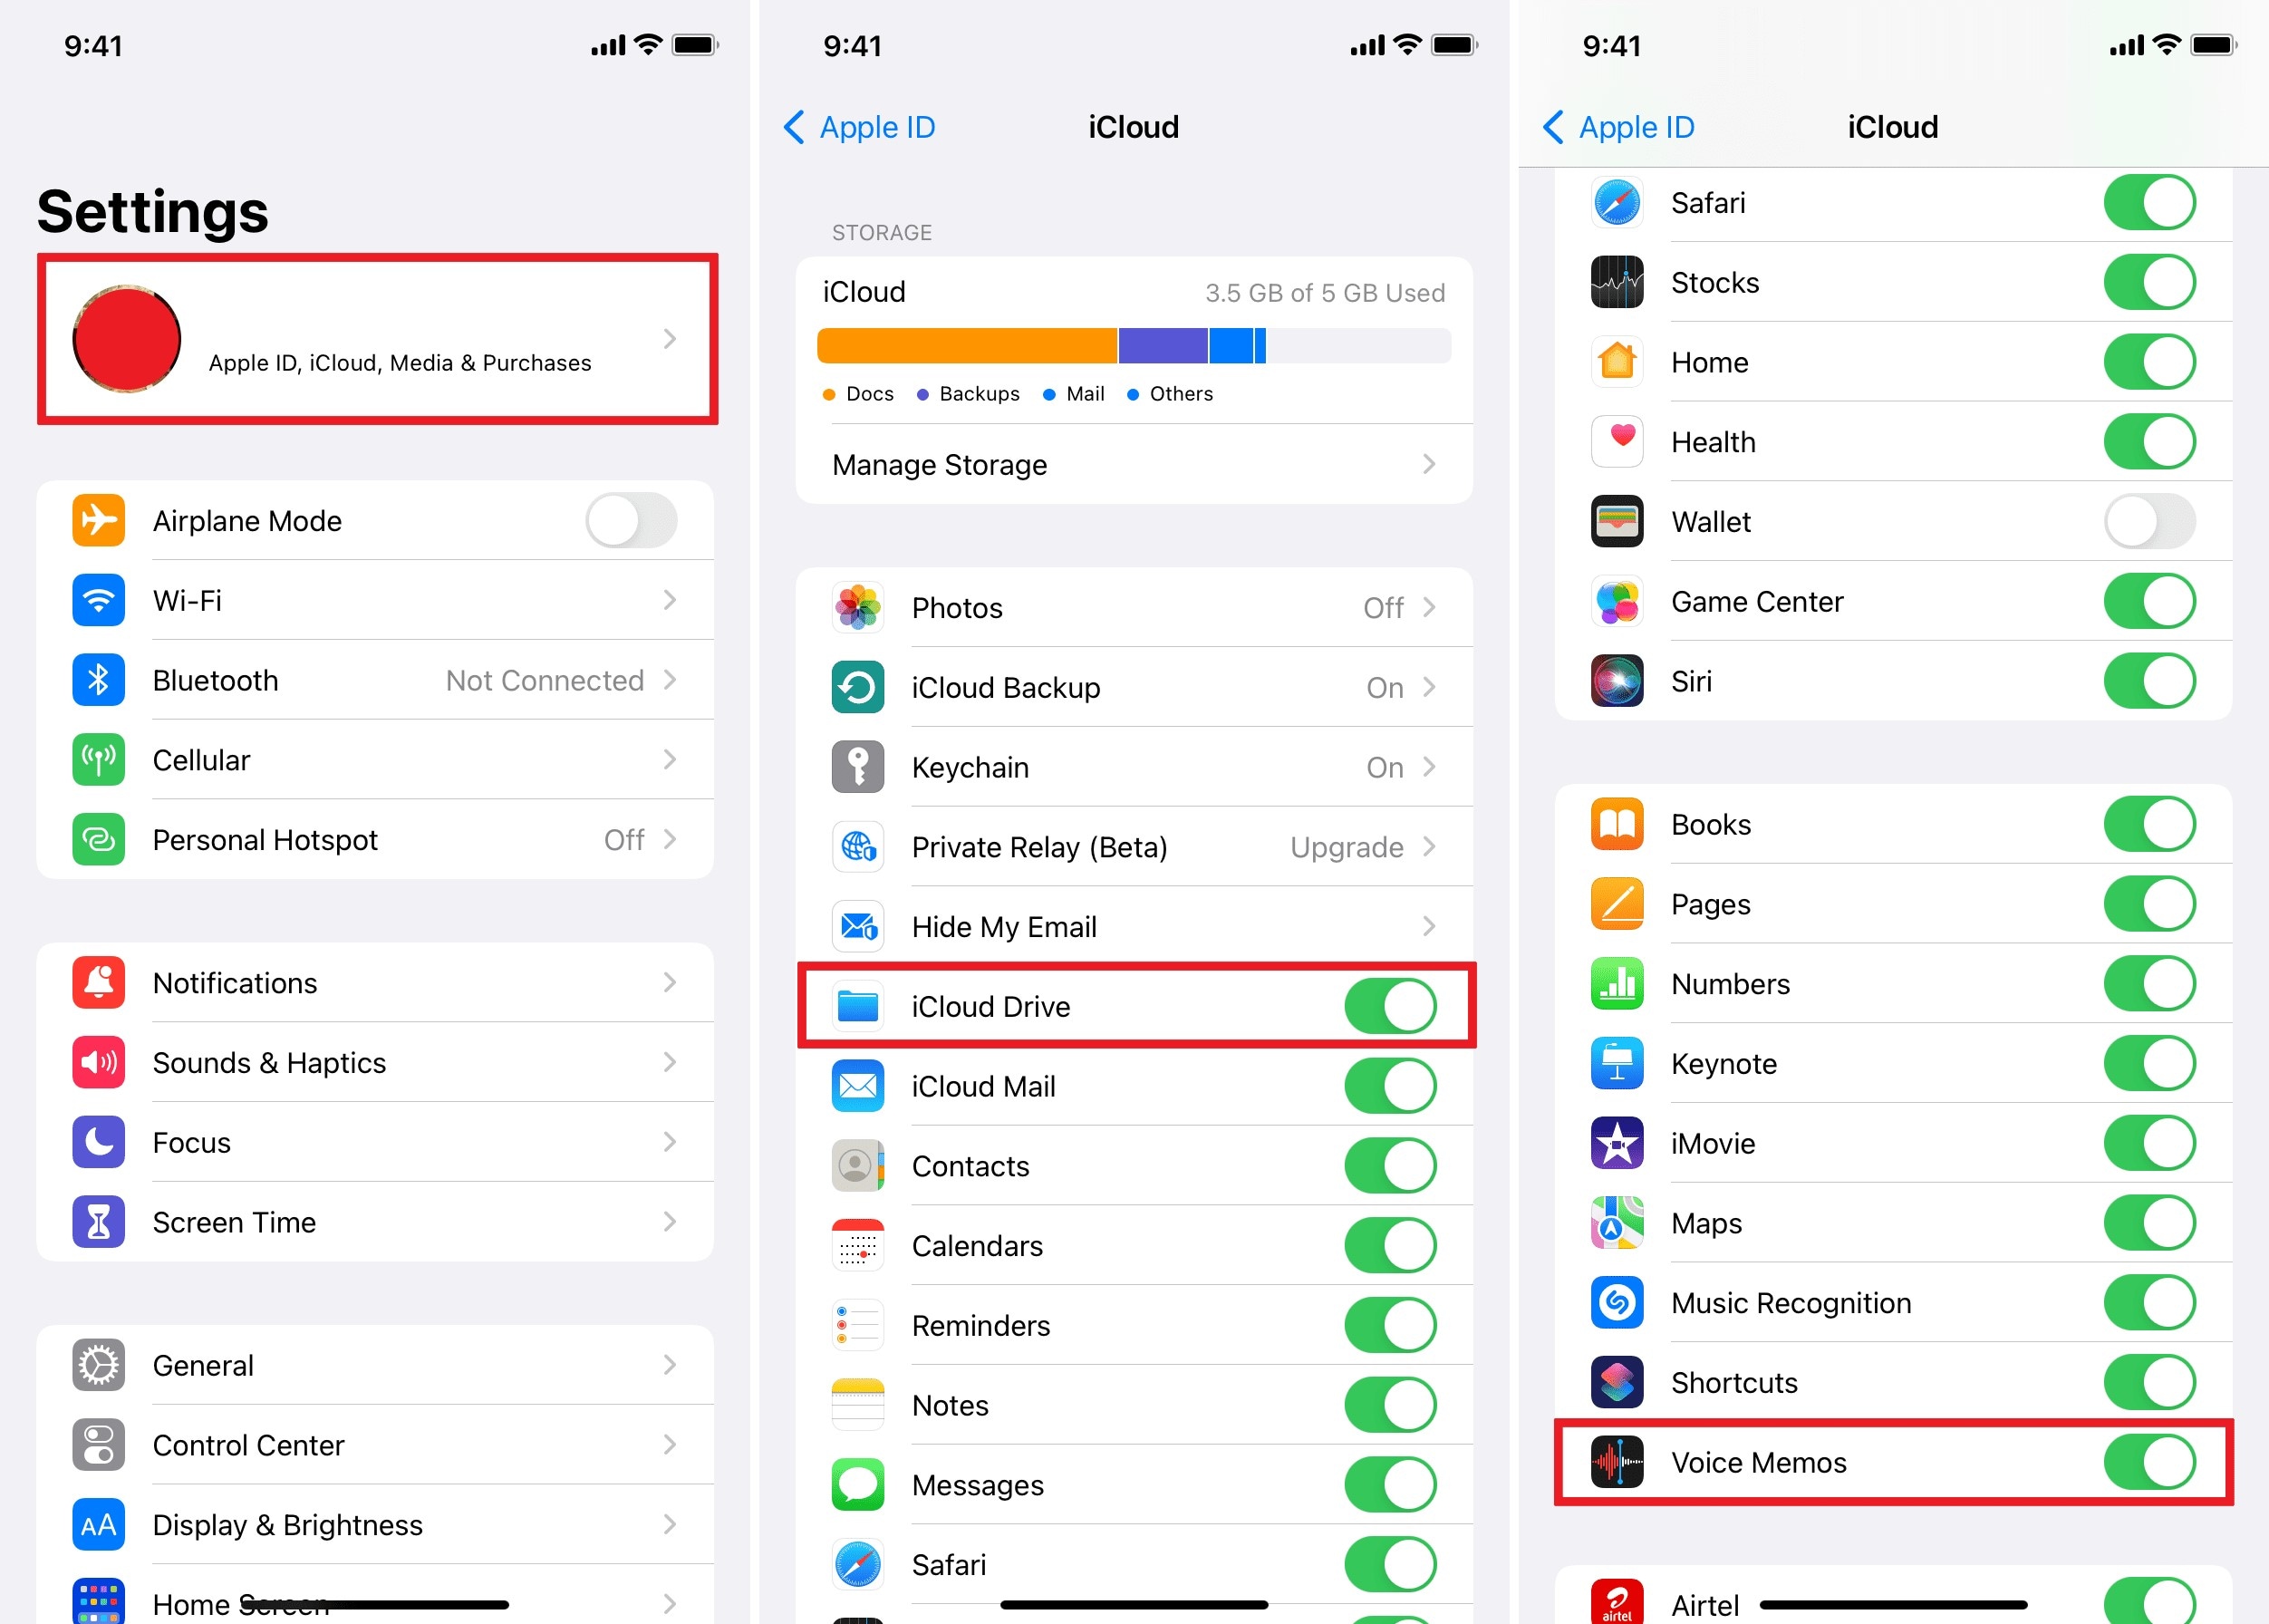
Step 1: On your iPhone, go to Settings > [Your Account Name] > iCloud;
Step 2: Toggle the slider by Voice Memos on;
Step 3: Log into your iCloud account using your PC;
Step 4: Go to Voice Memos, select the ones you want, and download them to your computer.
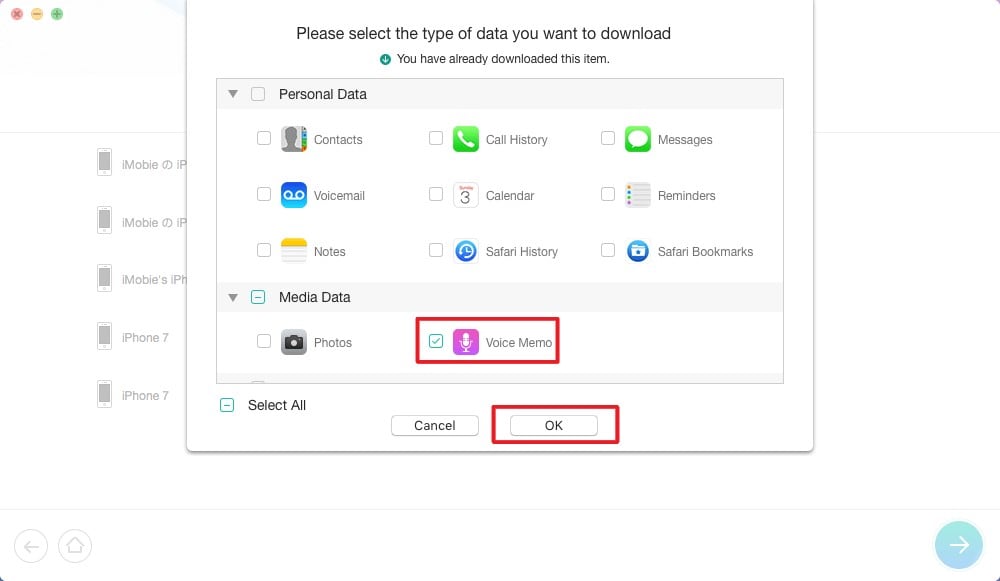
All you need is a stable internet connection to ensure your downloads aren’t interrupted. Otherwise, this is a great way to transfer audio recordings from your iPhone to your computer.
How to Get Audio Recordings off iPhone With Dr.Fone
If you frequently find yourself having to transfer data between your phone and your computer and are having difficulties efficiently managing your devices, you’ll need a dedicated tool for it. Wondershare Dr.Fone is your best option.
It’s a one-stop solution for all your phone management needs. It comes packed with comprehensive toolkits that can do everything from transferring files between devices to retrieving data from broken/damaged phones, recovering corrupted files, and so much more.
To get audio recordings off your iPhone with Dr.Fone, you’ll need to follow a few steps:
Step 1: Download and install Wondershare Dr.Fone on your computer;
Step 2: Log in to your Wondershare account;
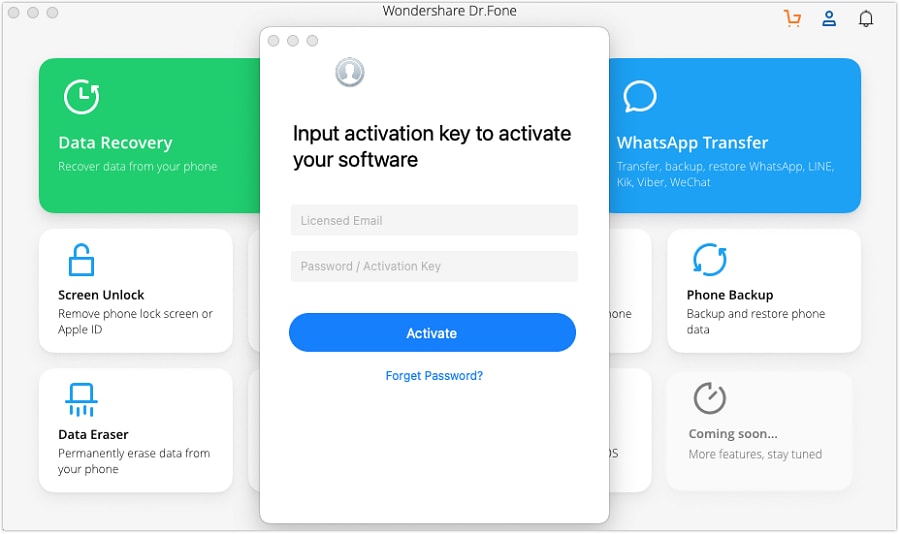
Step 3: Use a USB cable to connect your iPhone to your computer;
Step 4: In Dr.Fone, go to My Device > USB;
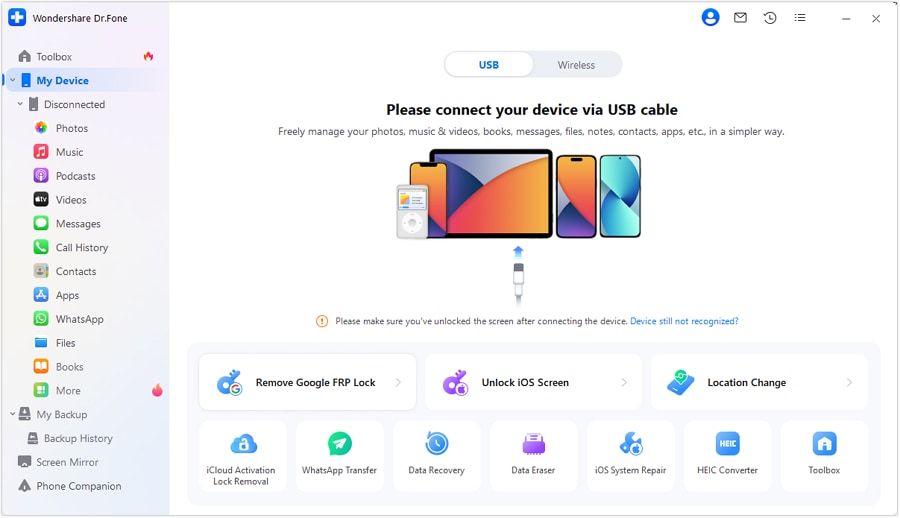
Step 5: Unlock your phone and tap Trust;
Step 6: After your iPhone is connected, click Export all data;

Step 7: Under the file types to export, select Voice Memos and click Export;
Step 7: Set a password to protect your files and click Verify;
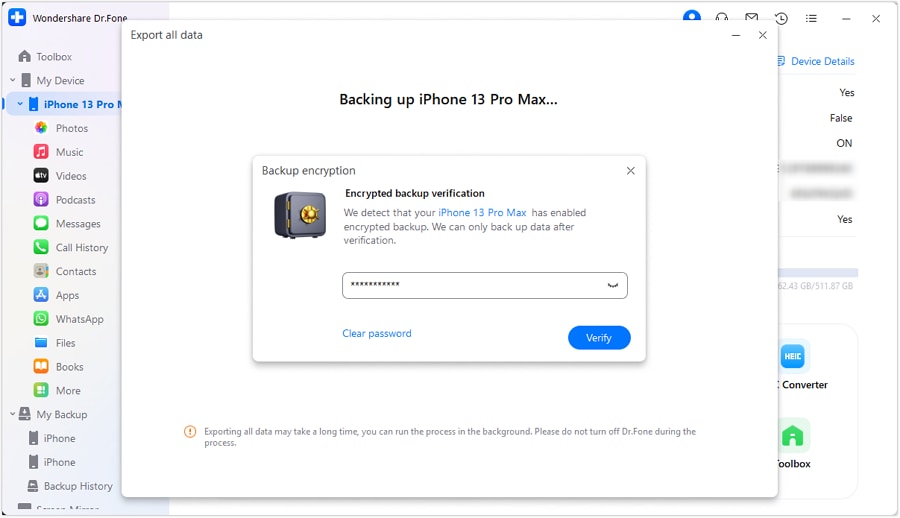
Once your audio recordings have been transferred to your PC, you’ll get a notification. Depending on the size of the files, the process shouldn’t take long. You can click Open in folder to get immediate access to your voice memos.
How to Get Audio Recording off iPhone With Google Drive

If you have a Google account, you also have 15GB of free storage on Google Drive, making this a great option for transferring files like audio recordings between devices. You can also use it for safe cloud backup of all your phone data, including contacts, photos, videos, and so much more.
It works similarly to iCloud, meaning you would first have to log into your device on your iPhone, upload the data you need, and then download it to your preferred computer. The process is as follows:
Step 1: Sign in to your Google Drive account, then find your recording in the Voice Memo app;
Step 2: Tap on the More icon > Share and select Google Drive;
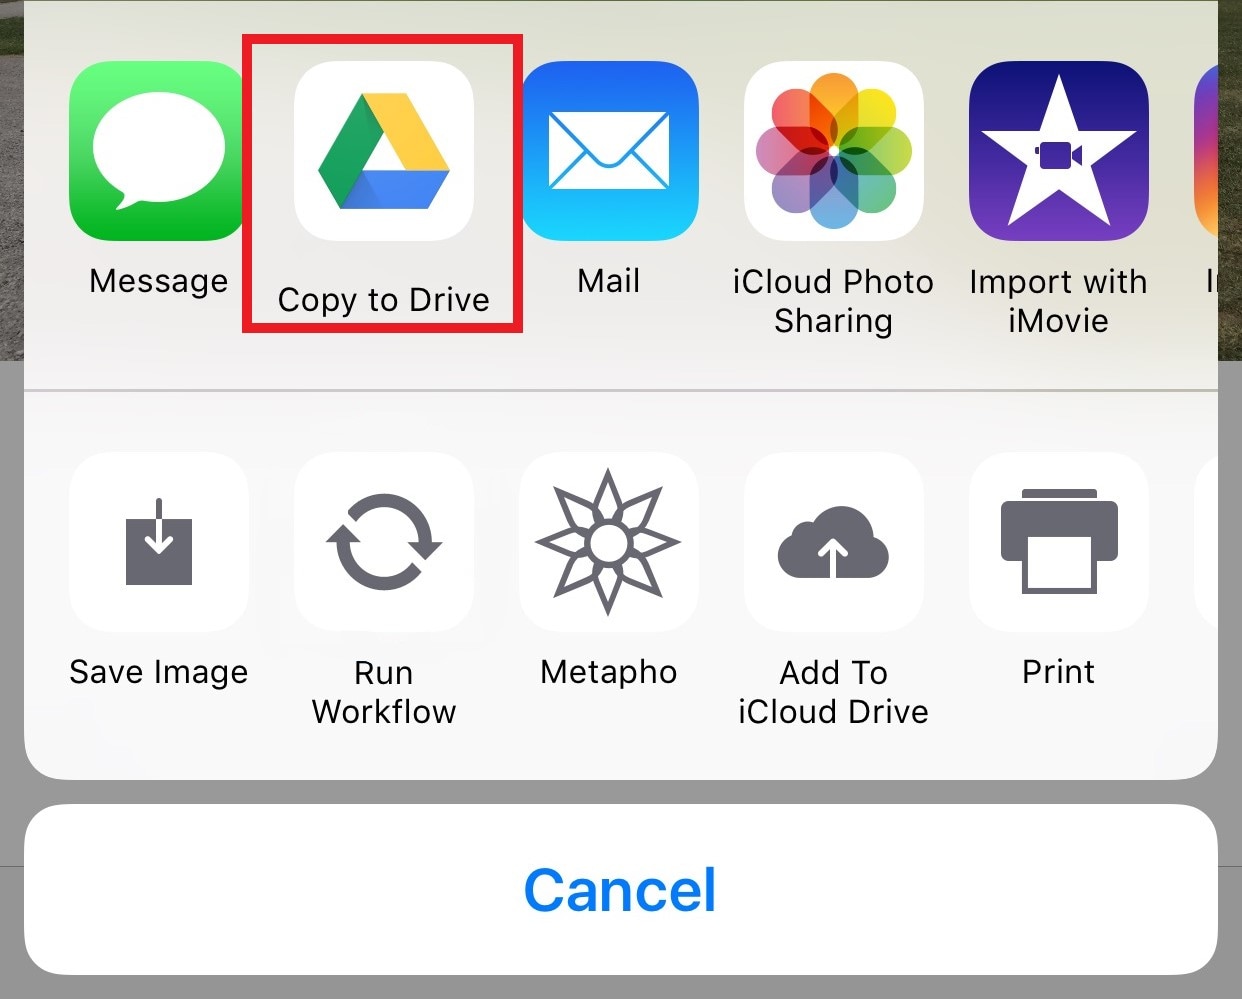
Step 3: Select the folder in Google Drive to upload to, then tap Upload;
Step 4: Sign in to Google Drive on your computer, find the recording, then right-click on it and select Download.
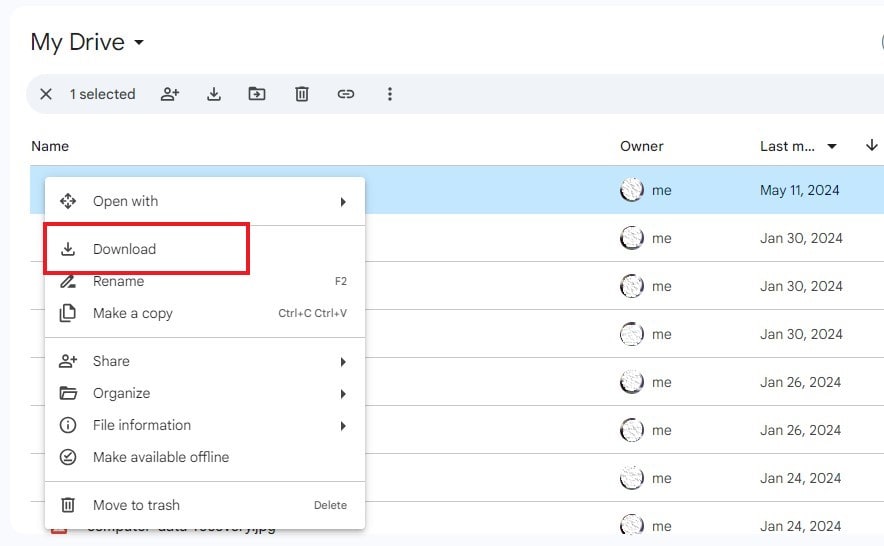
As needed, instead of downloading, you can directly share the file to virtually any platform you’d like directly from your Google Drive account.
How to Get Audio Recordings off iPhone With Email

Lastly, you could also choose to transfer your audio recordings from your iPhone to your computer via email. While not the most efficient option out there, it’s free and simple. Moreover, you can do it using any email client you like – Gmail, Outlook, Mailbird, or anything in between.
Step 1: Step 1: Access the audio recording in Voice Memo, then tap on the More icon > Share;
Step 2: Select Mail;
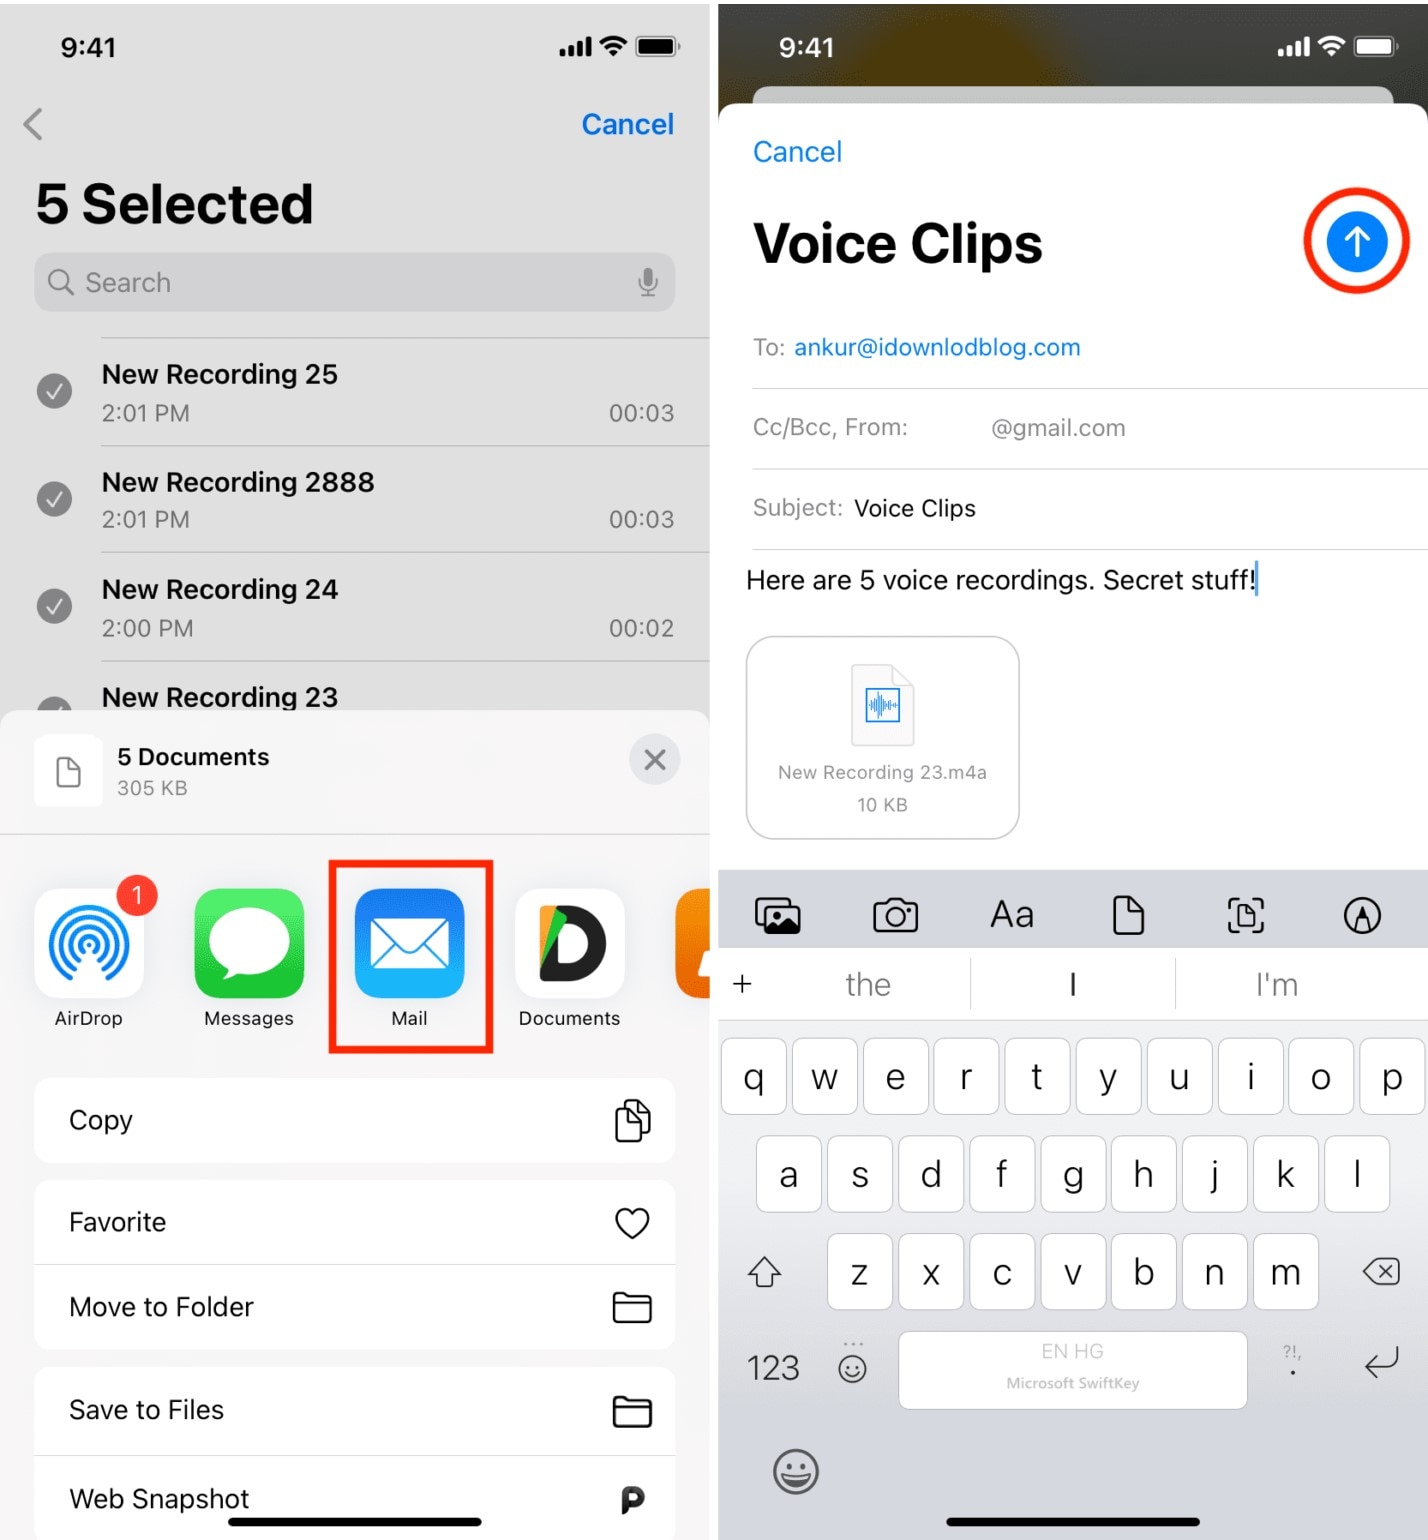
Step 3: Tap the Upload button;
Step 4: Sign in to your email on your computer and download the attachment.
If you want to transfer more than one recording, you might want to consider compressing them all into a single zip file and then sending them via email. Uploading and downloading will take less time and minimize the chances of data corruption during transfer.
Bonus: How to Edit iPhone Recordings on Your Computer
In most instances, the main reason why you’d want to transfer audio recordings from your iPhone to your computer is for easier editing. For that, you’ll need reliable audio editing software, and that’s where Wondershare DemoCreator comes in handy.
A feature-packed video/audio recorder and editor, it allows you to perfect your recordings with the utmost ease. You can use it to denoise your audio, change your voice using AI, add fade-in/fade-out effects, and so much more.
In just a few simple steps, you can enhance your audio and make it ready for publishing on any platform:
Step 1: Download and install Wondershare DemoCreator on your computer;
Step 2: Sign in to your Wondershare account and navigate to the Video editor;
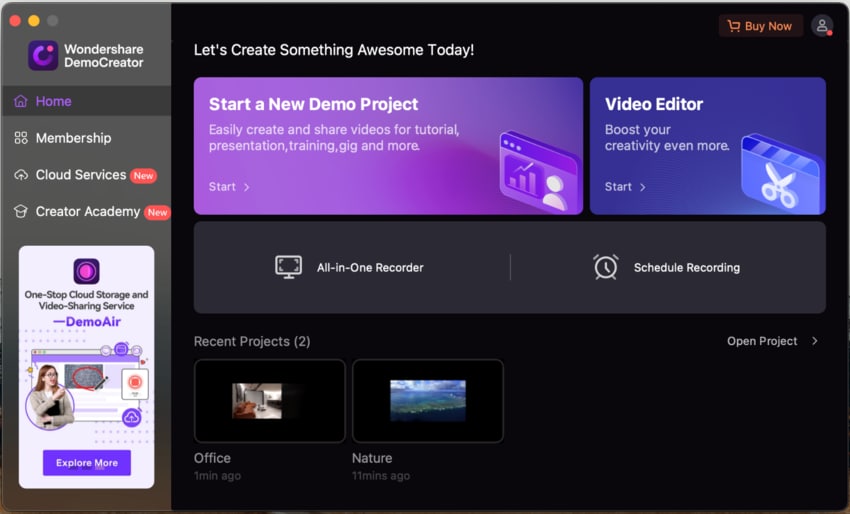
Step 3: Double-click the Media library board to upload your audio recording;
Step 4: Drag your recording to the timeline, then right-click on it;

Step 5: Select Edit audio to add sound effects, fade-in/fade-out, and more;
Step 6: If needed, click on the Audio icon in the upper right-hand corner to denoise your audio or change your voice.
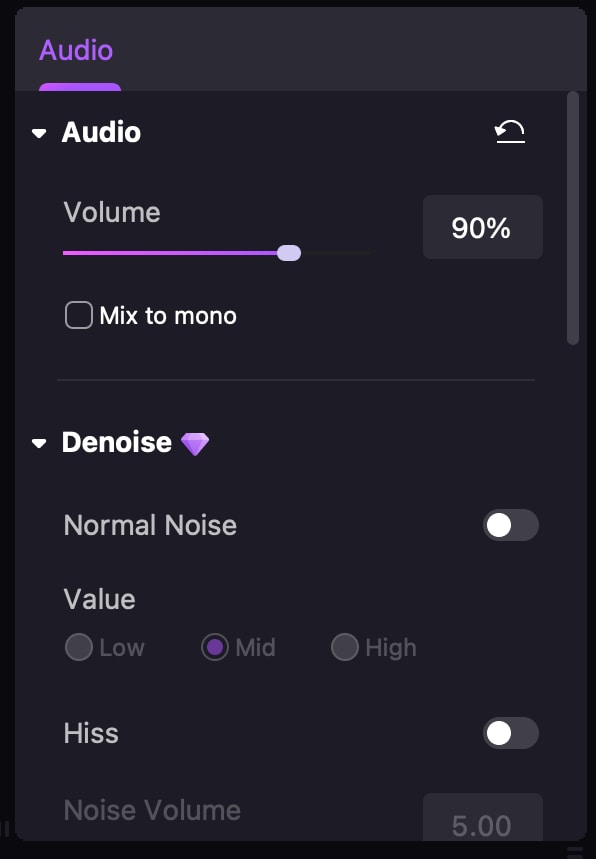
Wondershare DemoCreator lets you play around with your audio and video content and perfect every last element with ease. It comes with dozens of AI-powered features, over 50K creative assets, and countless useful tools that will make your content flawless and ready for sharing.
Conclusion
Getting audio recordings off your iPhone and on your computer is relatively easy. For transferring a voice memo or two, using things like your email client or Share Sheet could work well enough. However, if you want to transfer multiple files and simplify phone management as a whole, you’ll need a more comprehensive tool like Wondershare Dr.Fone to help you out.


