
Are you a content creator, a student, or a parent looking to preserve your favorite video moments as high-quality images? Whether you're capturing gameplay highlights, presentation slides, or family memories, knowing how to extract still images from videos on your iPhone can be incredibly useful. While extracting stills is a convenient way to get the perfect shot, it's important to note that the quality might not always match a dedicated photograph. However, by using the right methods—including built-in iPhone tools, third-party apps, and advanced software like Wondershare DemoCreator—you can capture and enhance images with precision and clarity. In this guide, we’ll explore multiple ways to capture a picture from an iPhone video, including frame-by-frame extraction, screenshot techniques, and AI-powered enhancement tools for the best results.
In this article
- Part 1: Built-In iPhone Methods to Capture a Picture from a Video
- Part 2: Using Third-Party Apps to Extract High-Quality Stills
- Part 3: Capturing High-Quality Images Using Wondershare DemoCreator
- Part 4: Benefits of Using Wondershare DemoCreator for Image Capture
- Part 5: Troubleshooting Common Issues When Capturing Photos from Videos
- Conclusion
- FAQs
Part 1: Built-In iPhone Methods to Capture a Picture from a Video
If you want to quickly extract a still image from a video without using third-party apps, iPhones provide built-in methods to capture pictures. These methods are easy and convenient, allowing you to grab important frames directly from your video. However, they might not always provide the highest quality, especially if the frame is in motion. Below are the best native iOS methods to capture pictures from a video.
Method 1: Taking a Screenshot While Playing the Video
The easiest way to capture a picture from an iPhone video is by taking a screenshot while the video is playing. This method is quick and requires no additional apps, making it a convenient solution for extracting still images.

Step 1Open the Video in Photos
To start, open the Photos app and locate the video from which you want to extract an image. Play the video and carefully watch until you reach the exact frame you want to capture. Once you find the perfect moment, pause the video to ensure you get a clear and stable shot.
Step 2Pause the Video at the Right Frame
Next, take a screenshot of the paused video. If you're using an iPhone with Face ID (iPhone X and later), press the Power + Volume Up buttons simultaneously. If you're using an iPhone with Touch ID (iPhone 8 and earlier), press the Power + Home buttons at the same time.
Step 3Take a Screenshot
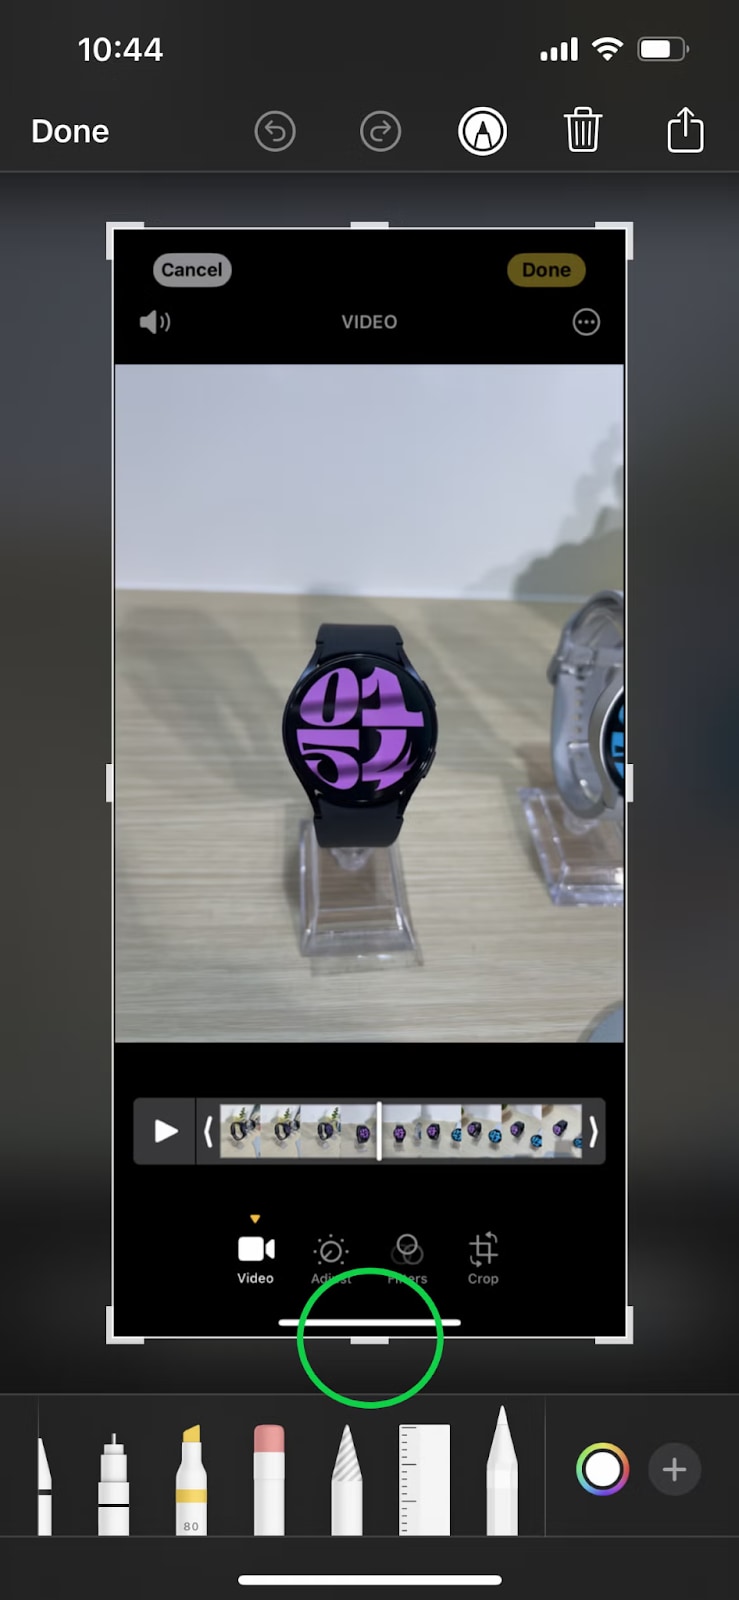
After taking the screenshot, navigate to Photos > Edit and crop out any unwanted parts, such as video controls. If necessary, adjust the brightness and sharpness to improve image quality. While this method is simple, it may not offer the highest resolution, and motion blur can sometimes affect the image quality if the video wasn’t paused properly.
Limitations of Taking a Screenshot from a Video
❌ Lower resolution – Screenshots are saved at screen resolution, often lower than the original video.
❌ Motion blur risk – Pausing at the wrong moment can result in blurry or distorted images.
❌ File format constraints – Screenshots are saved as PNG, which may take up more space than
Method 2: Using iOS Live Photos Feature (For Slo-Mo & Burst Mode Videos)
Live Photos allow you to select the best frame from a short video clip, making it an effective way to capture high-quality still images. This method is especially useful if you’ve recorded using the Live Photos mode or taken burst shots.
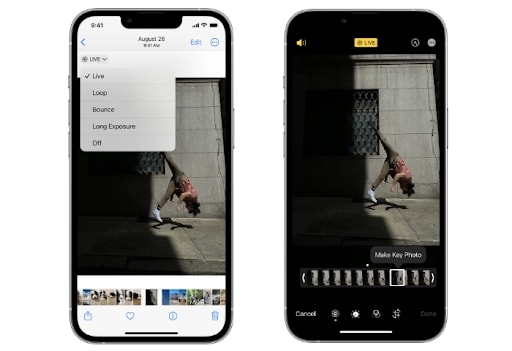
Step 1Open the Live Photo in the Photos App
Launch the Photos app and locate the Live Photo you want to extract an image from. If you recorded a Slo-Mo or Burst Mode video, find it in the Albums section under Live Photos.
Step 2Swipe Up to Access the Key Photo Option
Tap on the Live Photo to open it, then swipe up or tap Edit in the top-right corner. You will see a slider showing all available frames from the Live Photo.
Step 3Select the Best Frame
Drag the slider to browse through the frames and stop at the sharpest or most visually appealing moment.
Step 4Save the Frame as a Still Image
Tap Make Key Photo, then hit Done to save the selected frame as the main image. This new still image will replace the default Live Photo thumbnail while keeping the original Live Photo intact.
Limitations:
❌ Only works if the video was recorded as a Live Photo (not regular videos). ❌ The resolution may be lower compared to the original video recording. ❌ Limited to short clips, as Live Photos only capture a few seconds before and after the shot.
Method 3: Using iPhone’s Frame-by-Frame Playback for More Precision
For more accuracy, the iPhone allows you to manually scrub through a video frame by frame. This method helps you capture a clearer and sharper image by selecting the exact frame without motion blur. Follow these steps to extract the best-quality still from your video.
Step 1Open the Video in the Photos App
Launch the Photos app and locate the video you want to capture a still image from. Tap to open it in full-screen mode.
Step 2Use the Frame-by-Frame Scrubber
Slowly drag your finger across the video timeline at the bottom of the screen. Moving your finger gently allows you to scrub through frames precisely.
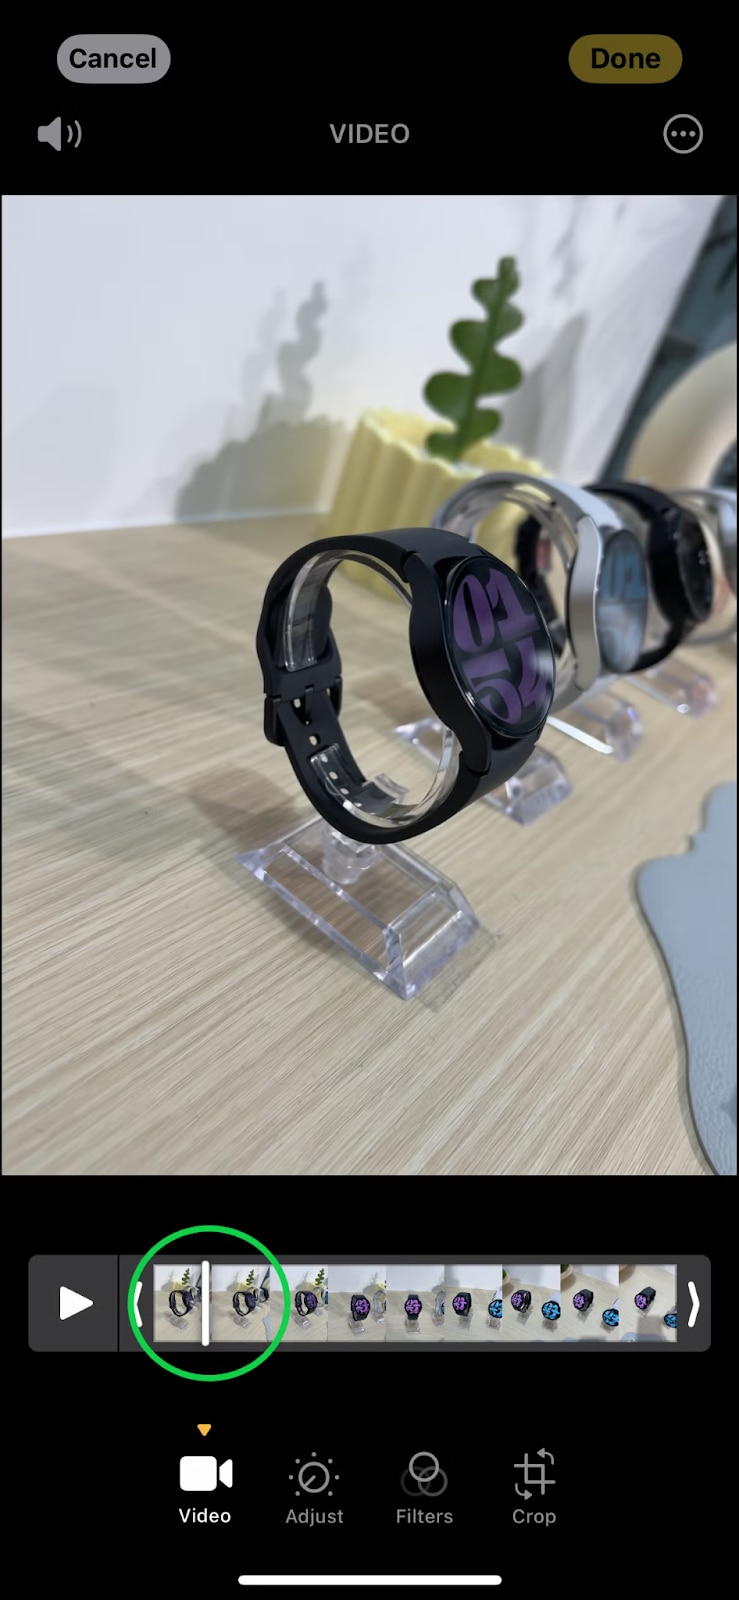
Step 3Pause at the Perfect Frame
Once you find the sharpest frame, pause the video. If needed, fine-tune your selection by slightly adjusting the scrubber.
Step 4Capture the Image
Take a screenshot by pressing Power + Volume Up (Face ID models) or Power + Home (Touch ID models). Crop the image in the Photos app to remove video controls for a cleaner look.
Part 2: Using Third-Party Apps to Extract High-Quality Stills
While built-in iPhone methods work well, they may not provide the highest quality image extraction. Third-party apps offer frame-by-frame precision, higher resolution, and automated cropping for cleaner, professional-looking stills. These apps are perfect for users who want better clarity without manually cropping or dealing with motion blur.
Method 1: Using Screenshot Editing Apps
Apps like SnapStill and Frame Grabber allow you to extract individual frames from videos with better quality than standard screenshots. Follow these steps to capture high-resolution stills easily.
Step 1Open the App and Upload Your Video
Download and install a frame-grabbing app Frame Grabber from the App Store. Open the app and import the video you want to extract a frame from.
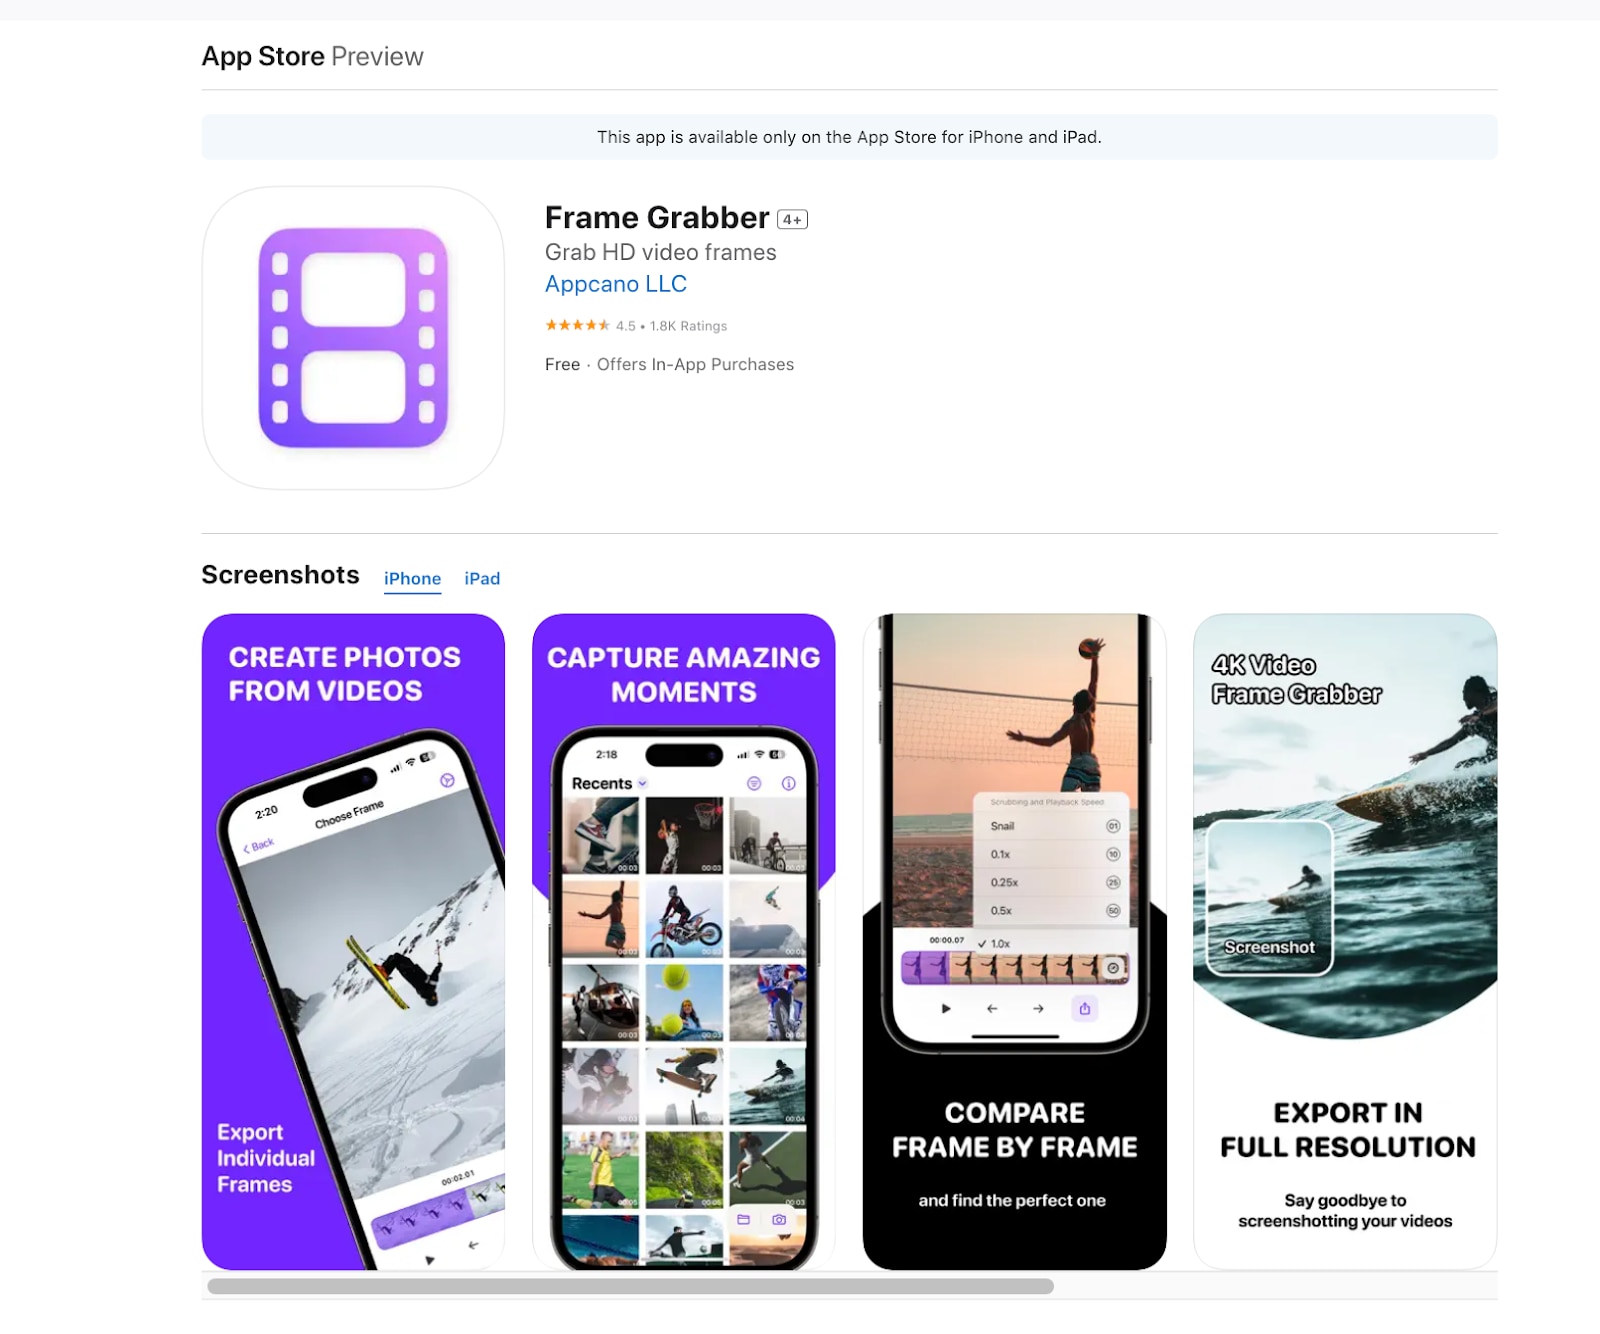
Step 2Select the Exact Frame
Use the frame-by-frame navigation within the app to scroll through the video. Stop at the perfect moment to capture the sharpest image.
Step 3Save the Image in High Resolution
Tap the Save or Export button to extract the selected frame. The app will automatically save the image in high quality, ensuring better clarity than a standard screenshot.
Method 2: Using Video-to-Image Converter Apps
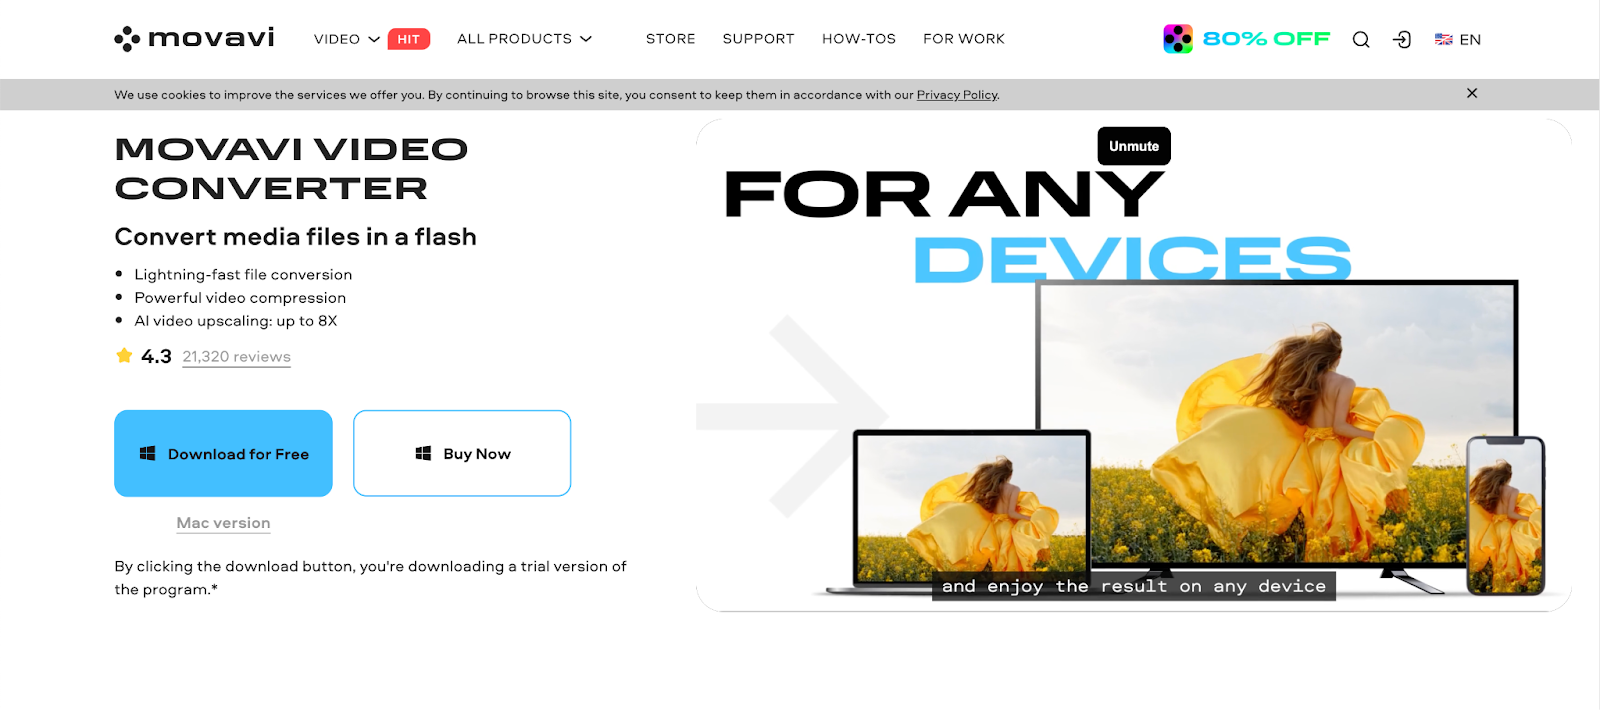
If you need to extract multiple frames from a video instead of just one, video-to-image converter apps offer a more efficient solution. Apps like Movavi Video Converter let you extract still images in high resolution while maintaining original video quality. This method is ideal for capturing action shots, motion sequences, or multiple moments from a single clip.
Step 1Import Your Video into the App
Download and install a video-to-image converter app like Movavi Video Converter from the App Store. Open the app and upload the video from which you want to extract images.
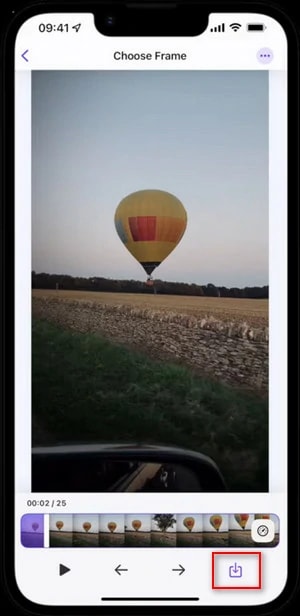
Step 2Select the “Extract Frames” Option
Look for the Extract Frames feature within the app. Set a time interval (e.g., every second or specific moments) to capture frames automatically.
Step 3Save the Frames as JPEG or PNG
Once the frames are extracted, choose JPEG or PNG as the file format and save the images to your Photos app or a preferred folder for easy access.
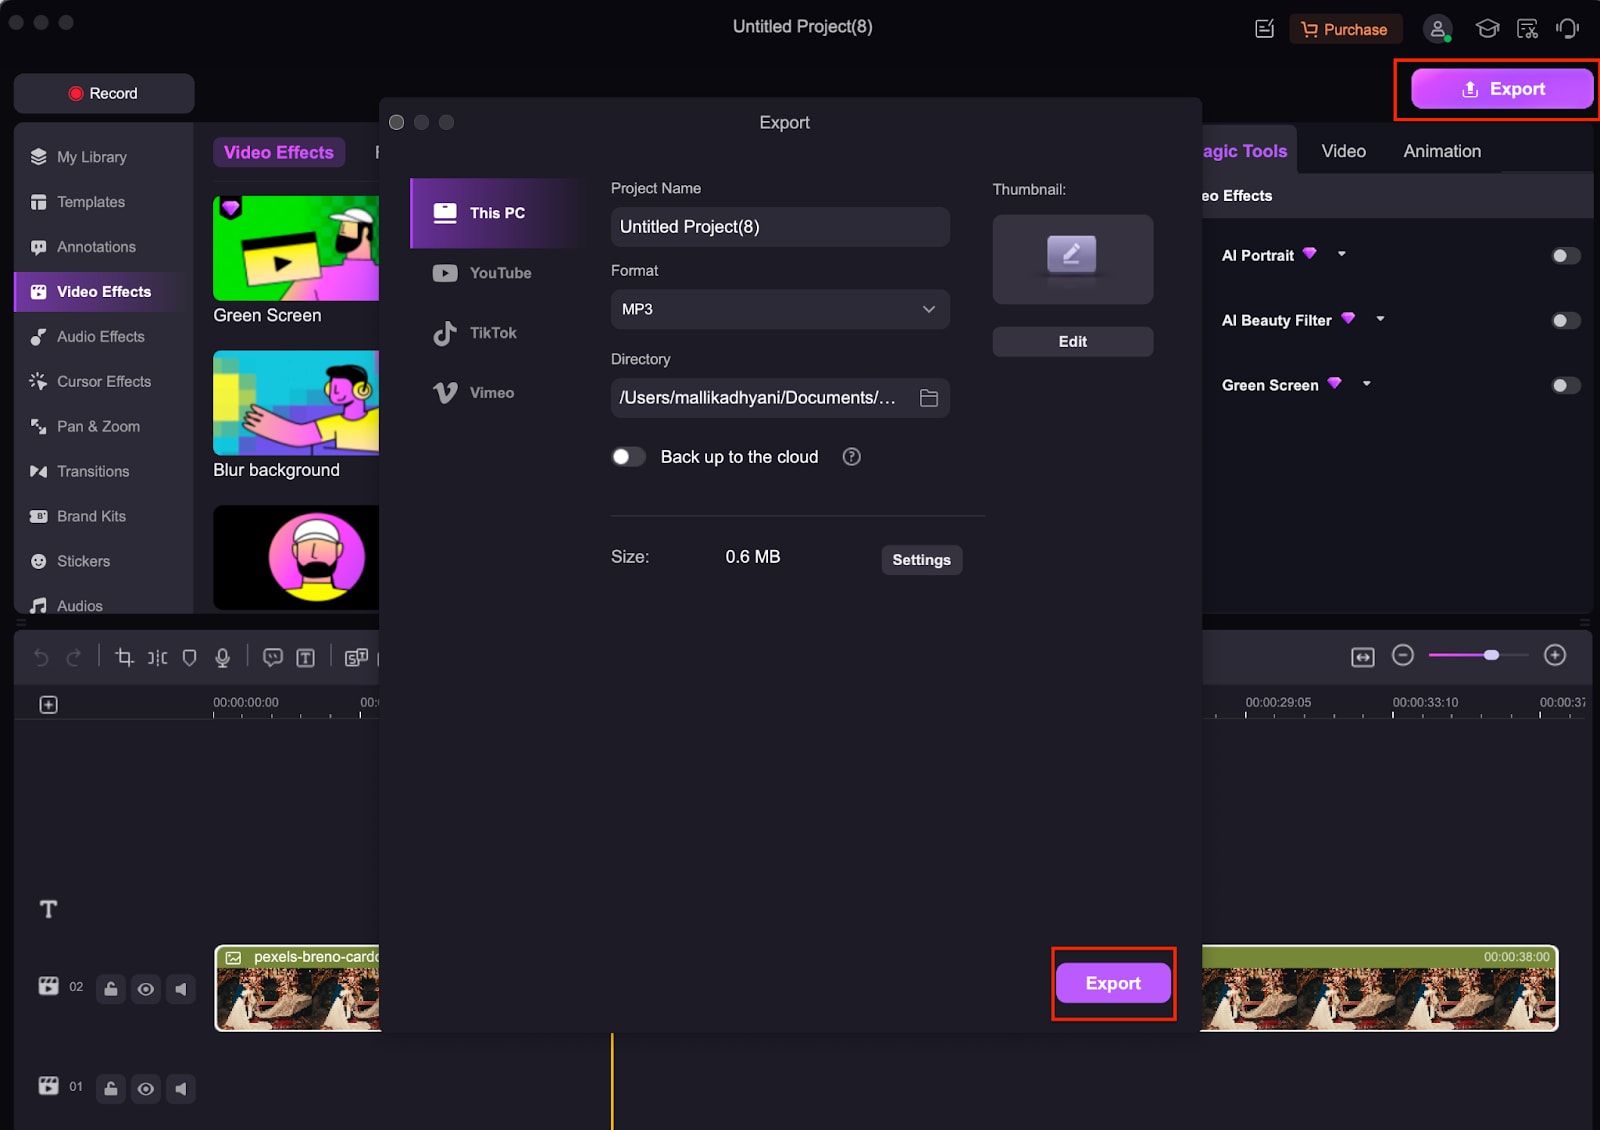
Part 3: Capturing High-Quality Images Using Wondershare DemoCreator
Wondershare DemoCreator is a powerful all-in-one video recording and editing tool designed for content creators, educators, and professionals. It allows users to extract ultra-HD images from videos with frame-by-frame accuracy, ensuring the highest quality. Unlike basic screenshot methods, DemoCreator provides advanced editing features like brightness, contrast, and sharpness adjustments to enhance images effortlessly. The batch capture feature makes it easy to extract multiple stills at once, perfect for users who need multiple frames from a single video. Its seamless iOS-to-desktop workflow ensures a quick and efficient image extraction process.
Why Use Wondershare DemoCreator for Video Screenshots?
- Ultra-HD Image Capture – If you're a content creator or photographer needing high-resolution images from videos, DemoCreator ensures 4K clarity, making it perfect for social media posts, professional portfolios, or print materials.
- Accurate Frame Selection – For sports analysts, video editors, or educators, DemoCreator lets you step through each frame to extract the sharpest moment, avoiding motion blur for precise action shots or tutorial visuals.
- Advanced Editing Tools – If your captured image looks too dark or washed out, DemoCreator’s built-in brightness, contrast, and sharpness adjustments allow instant enhancement, ensuring high-quality visuals for presentations or thumbnails.
- Seamless iOS-to-Desktop Workflow – Ideal for influencers and professionals, DemoCreator eliminates the need for multiple apps by directly transferring videos from iPhone to desktop, streamlining image extraction and editing in one place.
- Batch Capture Feature – For animators, researchers, or video editors, DemoCreator allows you to extract multiple frames at once, making it efficient for creating GIFs, time-lapse sequences, or frame-by-frame analysis.
How to Capture a Picture from an iPhone Video Using DemoCreator
Step 1Install Wondershare DemoCreator on Your Mac
Download and install Wondershare DemoCreator from the official website. Launch the software on your Mac and connect your iPhone via USB to enable seamless video capture and frame extraction.
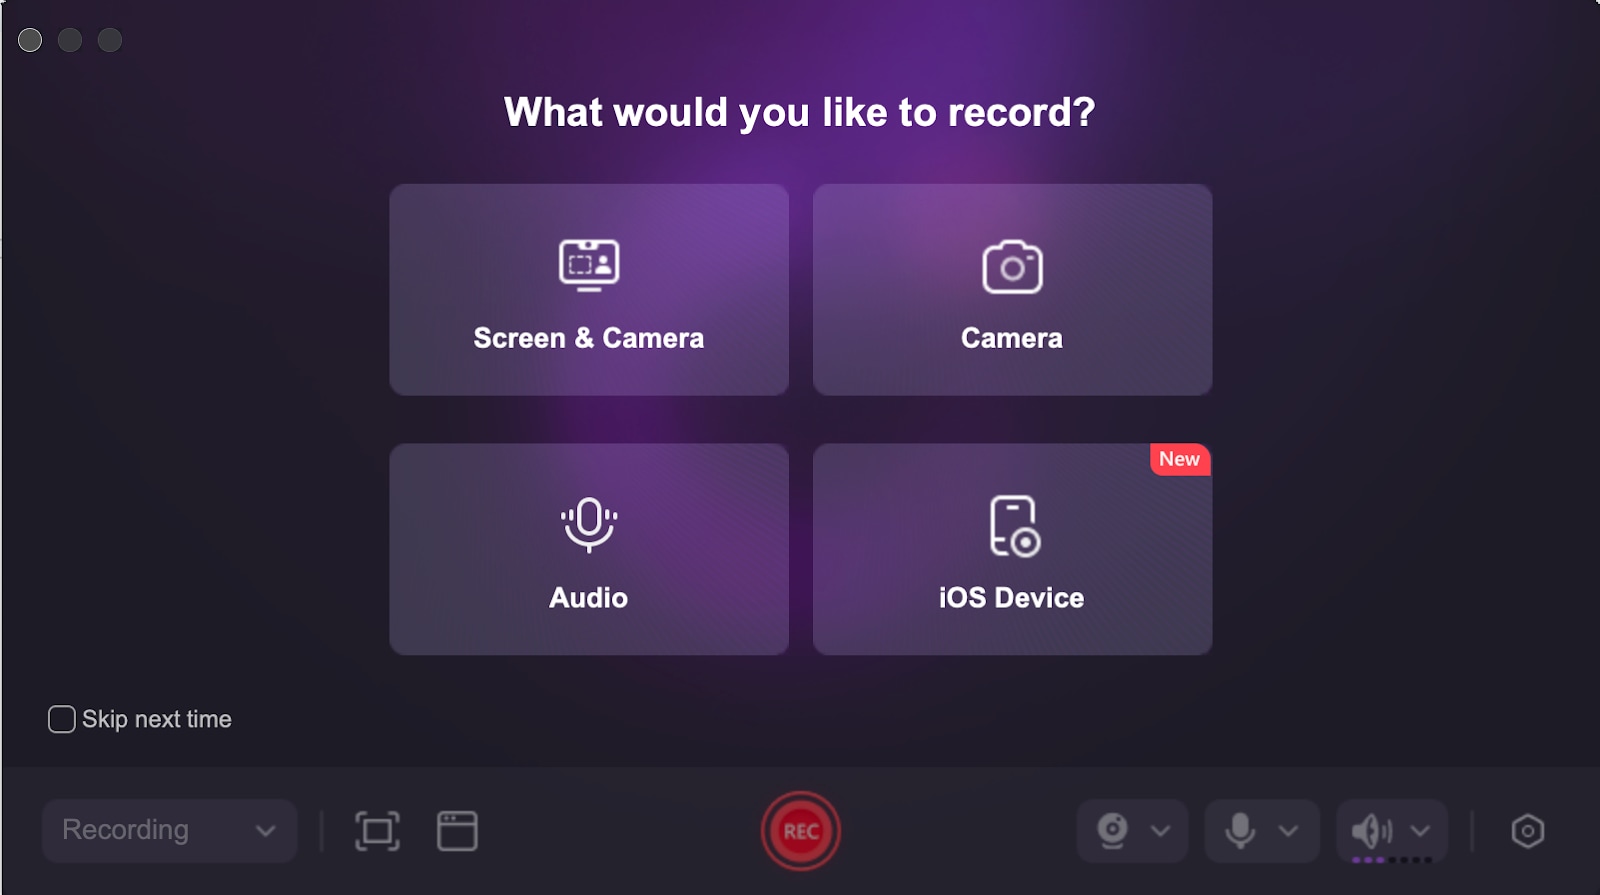
Step 2Record Your iPhone Video
Open the Camera app on your iPhone and start recording your video. In Wondershare DemoCreator, select the "Record iOS Device" option to capture high-quality footage directly from your iPhone. This ensures smooth video recording with no frame drops or compression issues.

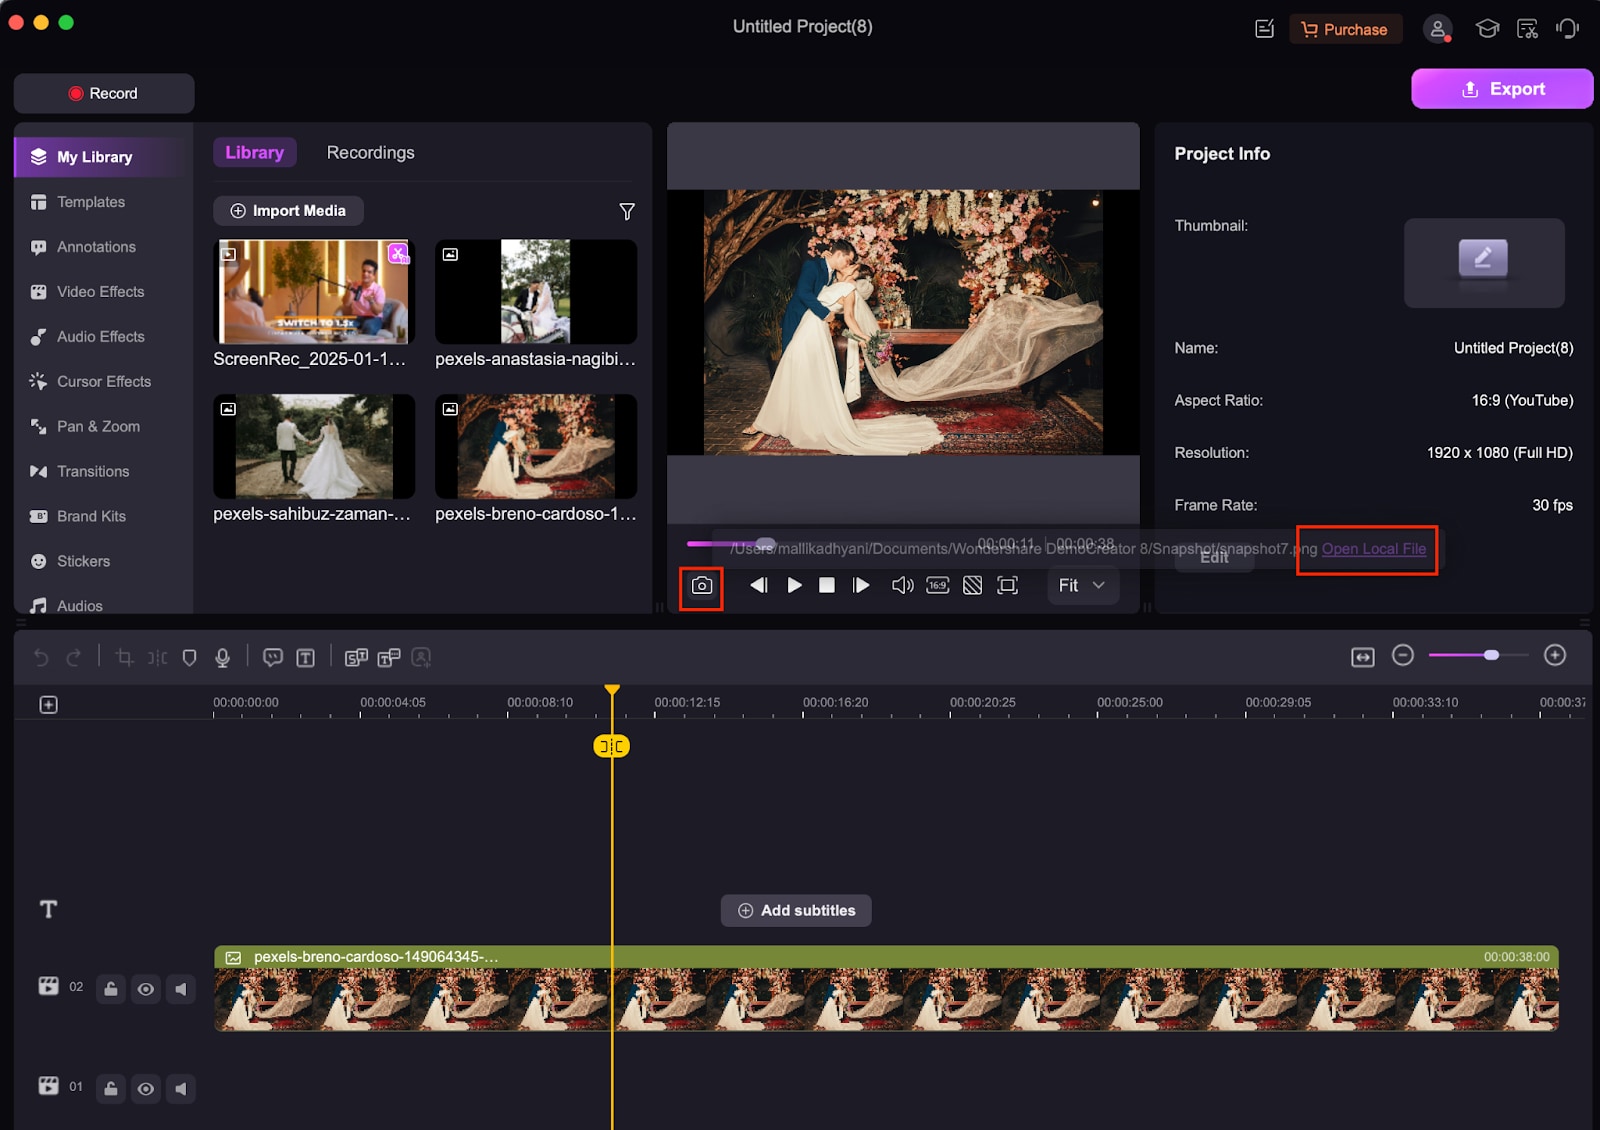
Step 2Navigate to the Exact Frame for the Best Quality
After recording, switch to the "Advanced Editing" tab in Wondershare DemoCreator. Use DemoCreator’s frame-by-frame navigation tool to scroll through the video and find the sharpest, most detailed moment. Pause the video at the ideal frame for a high-quality still image. Click the Camera button to extract the image. DemoCreator saves the still in PNG or JPEG format, ensuring it retains its original clarity and resolution without motion blur or compression artifacts.
Step 3Enhance & Export the Image
For better clarity, use DemoCreator’s built-in editing tools to adjust brightness, contrast, and sharpness. Once satisfied, export the image in your preferred format and save or share it for use in presentations, social media, or personal collections.
Part 4: Benefits of Using Wondershare DemoCreator for Image Capture
Using Wondershare DemoCreator to capture images from iPhone videos offers a superior alternative to traditional screenshot methods. With high-resolution extraction, precise frame selection, and built-in enhancement tools, DemoCreator ensures sharp and professional-quality images. Here’s why it’s the best tool for capturing high-quality stills from videos.
- Higher Quality Than iPhone Screenshots: Unlike standard screenshots, which may result in pixelation or motion blur, DemoCreator captures ultra-HD images directly from the video source. This ensures maximum clarity and sharpness without loss of detail.
- Precise Frame Selection: Instead of pausing a video and struggling to capture the perfect moment, DemoCreator allows precise frame-by-frame navigation. This feature lets users select the sharpest and most detailed frame effortlessly.
- Built-in Enhancements: DemoCreator includes AI-powered editing tools that allow users to adjust brightness, contrast, sharpness, and remove noise. This ensures that every extracted image looks polished and professional.
- Multiple Format Options: Users can save extracted images in PNG, JPEG, or BMP formats, providing flexibility for printing, digital use, or social media uploads. PNG is ideal for high-quality storage, while JPEG offers space-saving compression.
- Easy Integration with Presentations & Social Media: Captured images can be seamlessly inserted into PowerPoint presentations, online reports, or social media posts. This makes DemoCreator perfect for content creators, educators, and professionals looking to enhance their visual content.
Part 5: Troubleshooting Common Issues When Capturing Photos from Videos
Even with the right tools, you might face quality issues when extracting images from iPhone videos. Blurry screenshots, low resolution, or dark images can reduce the overall clarity of your captured frames. Below are common problems and their solutions to help you achieve high-quality stills effortlessly.
✔ Why is my screenshot blurry? – If your screenshot appears blurry, it’s likely due to motion blur in the video. Use frame-by-frame navigation to carefully select the sharpest frame before capturing it. For better precision, try using a tool like Wondershare DemoCreator, which allows frame-by-frame extraction.
✔ Why does my extracted image have low resolution? – The quality of your extracted image depends on the original video resolution. Ensure that your video is at least 1080p or higher before capturing frames. If the resolution is too low, consider enhancing the image using built-in editing tools in DemoCreator.
✔ How can I remove video controls from screenshots? – When taking screenshots directly from your iPhone, video controls may appear in the image. To avoid this, use a third-party app like DemoCreator, which extracts clean frames without overlays, giving you a professional-quality image.
✔ Why are my saved images too dark? – If your extracted frames appear too dark or unclear, it may be due to poor lighting in the original video. Use DemoCreator’s brightness and contrast settings to adjust exposure, enhance clarity, and refine the details for a better final result.
Conclusion
Capturing high-quality pictures from iPhone videos is simple with the right tools. While iPhone’s built-in screenshot and frame selection methods work well, Wondershare DemoCreator offers superior quality, advanced editing, and accurate frame selection. Whether you need images for social media, presentations, or personal use, DemoCreator ensures the best results with professional-level clarity and customization.
FAQs
-
1. Can I extract high-resolution images from iPhone videos?
Yes! For the best results, use Wondershare DemoCreator, which captures frames in 4K resolution with no motion blur or quality loss. -
2. Is there a way to capture multiple frames at once?
Yes, batch capture tools like DemoCreator allow you to extract multiple still images from a video at specific time intervals. -
3. Why does my screenshot look blurry when paused?
iPhone’s built-in video player may reduce quality when paused. Using a video-to-image tool like DemoCreator ensures crisper, clearer captures. -
4. How do I save my extracted images in the best format?
For the highest quality, save images as PNG for lossless clarity. JPEG is also good for sharing but may slightly compress the image. -
5. Can I edit and enhance the captured images?
Yes, Wondershare DemoCreator includes brightness, contrast, and sharpening tools to enhance and refine your captured images.


