Having a reliable and user-friendly audio recorder can be a game-changer. Google Pixel smartphones come equipped with a built-in audio recorder that offers a seamless and convenient way to record high-quality audio. This comprehensive guide will walk you through the process of using the Google pixel audio recorder, unlocking its full potential, and exploring advanced editing options.
The Google pixel sound recorder is a powerful tool that not only allows you to capture clear and crisp audio but also provides various editing and sharing capabilities. With its intuitive interface and seamless integration with other Google services, voice recording on the Google Pixel has never been easier.
Whether you're a student, professional, or simply someone who values capturing memories, this guide will empower you to make the most of your device's audio recording capabilities.
In this article
Part 1: How to Use Google Pixel Audio Recorder
Recording audio on your Google Pixel is a straightforward process that can be accomplished with just a few taps. Here's how to voice record on Google Pixel:
Section 1: Record audio on the Google Pixel
Step 1: Open the "Recorder" app on your Google Pixel. It's typically pre-installed, but if you can't find it, simply search for it in the app drawer or use the Google Play Store to download and install it.
Open the Recorder app, and you'll be greeted with a simple interface. The main screen will display a large "Record" button, along with options to browse your previously recorded files.
Step 3: When you're ready to start recording, simply tap the "Record" button. The app will display a recording meter, indicating that it's capturing audio. During the recording, you can pause or resume by tapping the respective buttons.
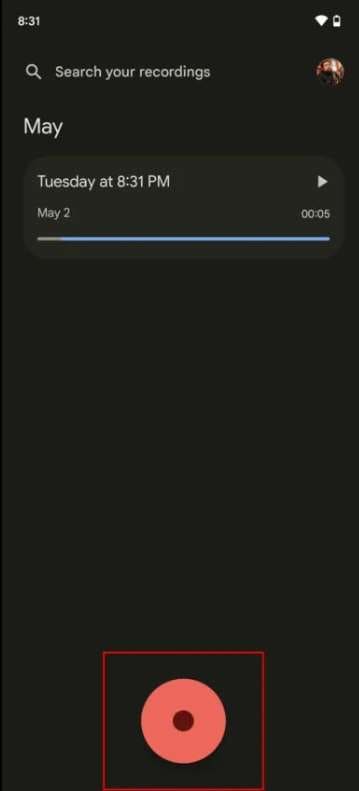
Step 3: As soon as you are done recording, tap the "Stop" button to save your audio file. After stopping the recording, you'll be prompted to name the file and add any relevant notes or tags for easy organization.
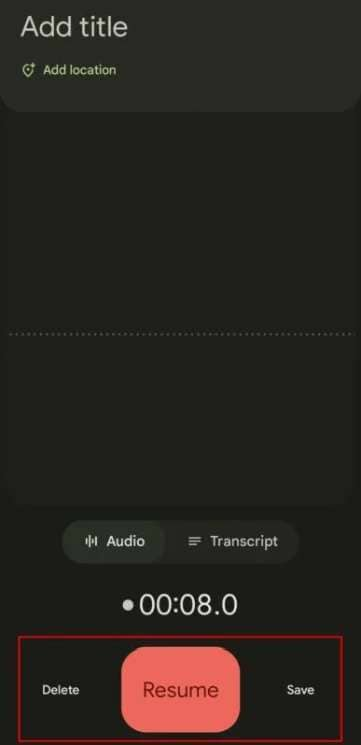
Step 4: Hit the “Save” button to save your recording.
Section 2: Edit your audio recording
The Google Pixel audio recorder offers basic editing capabilities, allowing you to trim, split, and rename your recordings.
Here's how to access these features:
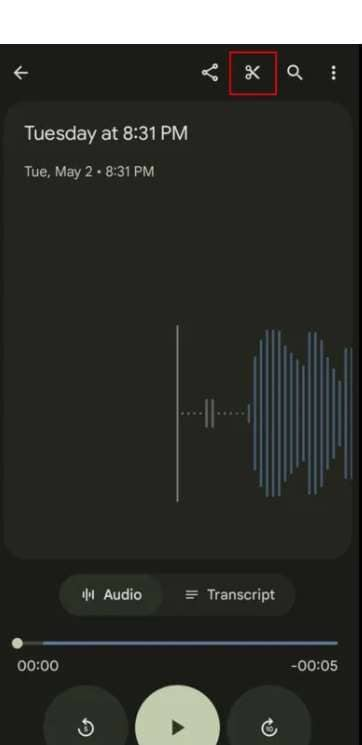
Step 1: From the main screen of the Recorder app, locate and tap on the audio file you want to edit. Tap the "Scissors" icon to edit a recording.
Step 2: Within the audio waveform, use your finger to drag the yellow recording bar and sliders, precisely selecting the section you want to keep or remove. You have two options: Either keep the selected portion by choosing the "Crop" option or discard it by tapping "Remove."
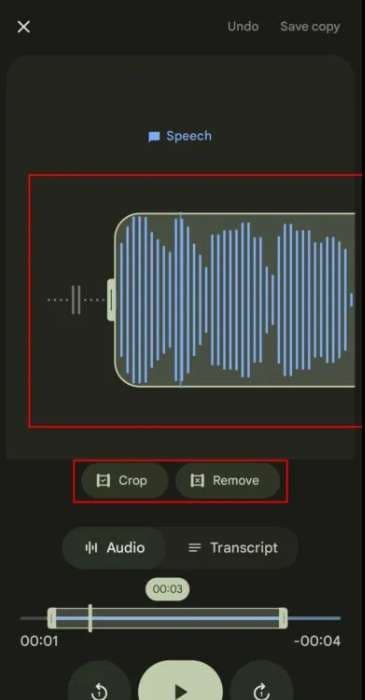
Step 3: Once you've made your desired edits, tap on "Save copy" to create a new version of the recording with your changes applied. Provide a descriptive name for the edited copy and tap "OK" to finalize the process.
By following these steps, you can effortlessly trim and customize your audio recordings, ensuring you retain only the necessary segments while discarding any unwanted portions.
Section 3: Get the Transcript of your Audio Recording
One of the standout features of the Google Pixel audio recorder is its ability to generate transcripts for your recordings automatically. This can be incredibly useful for taking notes, creating subtitles, or simply reviewing the content of a recording quickly.
Here's how to access the transcription feature:
Step 1: Open the Recorder app and locate the audio file you want to transcribe. Tap on the file to open it, then tap the "Transcript" button.
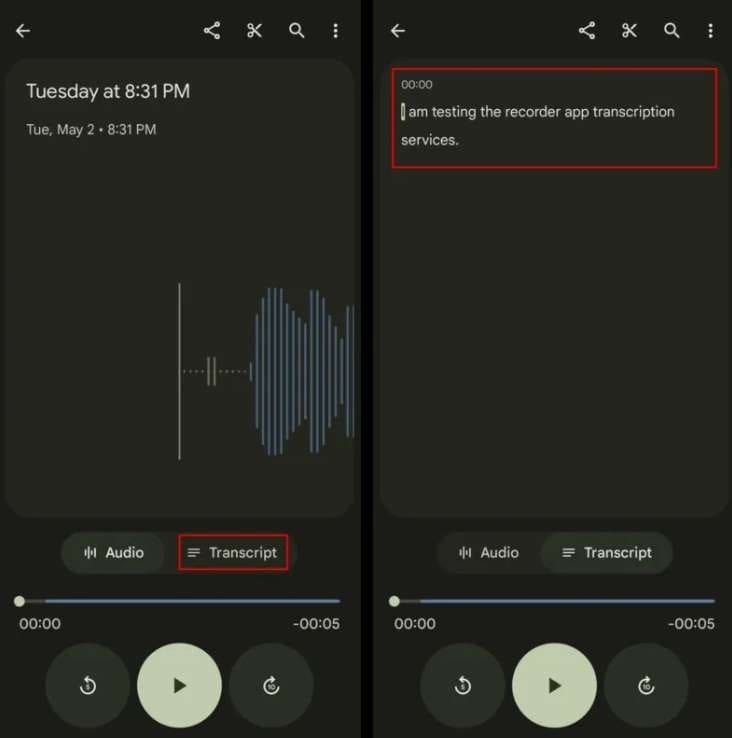
Step 2: The app will begin processing the audio and generating a text transcript. Once the transcription is complete, you'll be able to view and edit the text, making corrections or annotations as needed.
Step 3: You can copy the transcript text and paste it into other applications, such as a word processor or note-taking app, for further editing or sharing.
Section 4: Share your Voice Record on Google Pixel
After capturing and editing your audio recordings, you may want to share them with others. The Google Pixel audio recorder makes it easy to share your files via various channels:
Step 1: Open the Recorder app on your Google Pixel phone and locate the audio file you want to share. Tap the “Share” icon placed on the top.
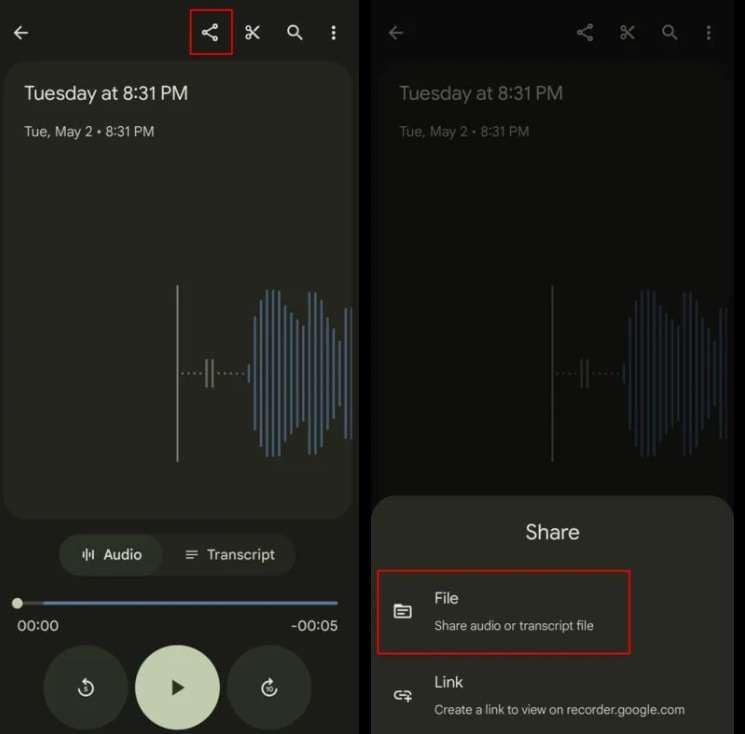
Step 2: A list of sharing options will appear, including messaging apps, email, cloud storage services, and more. Select the desired sharing method and follow the prompts to send the audio file to your intended recipient(s).
Step 3: Alternatively, you can share directly to compatible apps by tapping the respective app icon from the sharing menu.
Section 5: Backup and Sync your Audio Recordings on Google Pixel
To ensure you never lose your precious audio recordings, it's essential to back them up and sync them across your devices. The Google Pixel audio recorder integrates seamlessly with Google Drive, allowing you to store and access your recordings from anywhere:
Step 1: Open the Recorder app and tap on your profile icon placed on the top. Head to “Recording Settings”.
Step 2: Select “Backup and Sync”. Toggle ON this option. Select your respective Google account and then hit the “Backup Recordings” option.
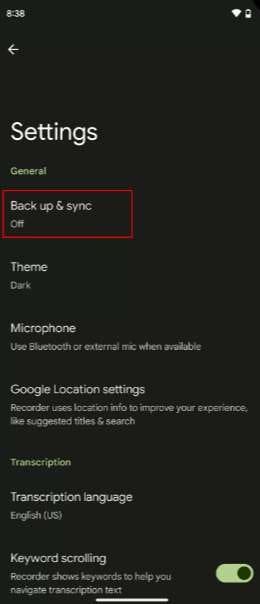
Once enabled, your audio recordings will automatically be backed up to your Google Drive account, ensuring they're safe and accessible from any device.
Part 2: Require Advance Audio Editing Tools? Try DemoCreator Today
The built-in Google Pixel audio recorder is a powerful tool, some users may require more advanced editing capabilities. For those seeking a comprehensive audio editing solution, DemoCreator is an excellent option to consider.
Wondershare DemoCreator is a feature-rich audio and video editing software that offers a wide range of tools for professionals, educators, and content creators alike. With its intuitive interface and extensive editing capabilities, DemoCreator empowers users to take their audio recordings to the next level.
Some of the key features of DemoCreator include:
- Advanced audio editing: Trim, cut, split, and merge audio clips with precision, adjust levels, remove background noise, and apply various effects and filters.
- Multitrack recording: Record multiple audio sources simultaneously, allowing you to layer and mix different tracks for richer and more complex recordings.
- Voiceover and narration: Add professional-quality voiceovers and narrations to your recordings, perfect for creating instructional videos, podcasts, or presentations.
- Video integration: Combine your audio recordings with video footage, images, and screen recordings to create comprehensive multimedia projects.
- Export and sharing options: Export your projects in various formats, including MP3, WAV, and video formats, and share them directly to popular platforms like YouTube, Vimeo, and more.
Here are the simple steps to use Wondershare DemoCreator for editing your audio recording:
Step 1: Go to the official website of DemoCreator. Follow the on-screen instructions to complete the installation process. Launch DemoCreator on your PC and hit the “Video Editor” option to get started.
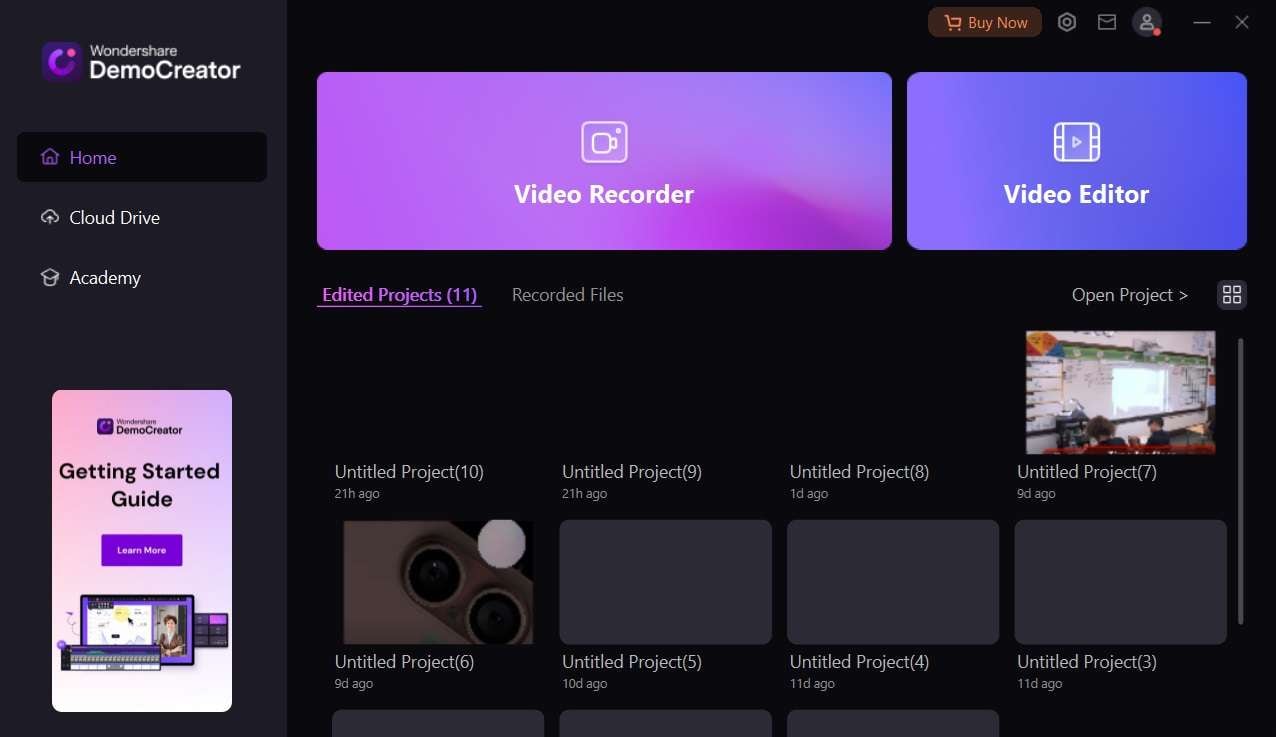
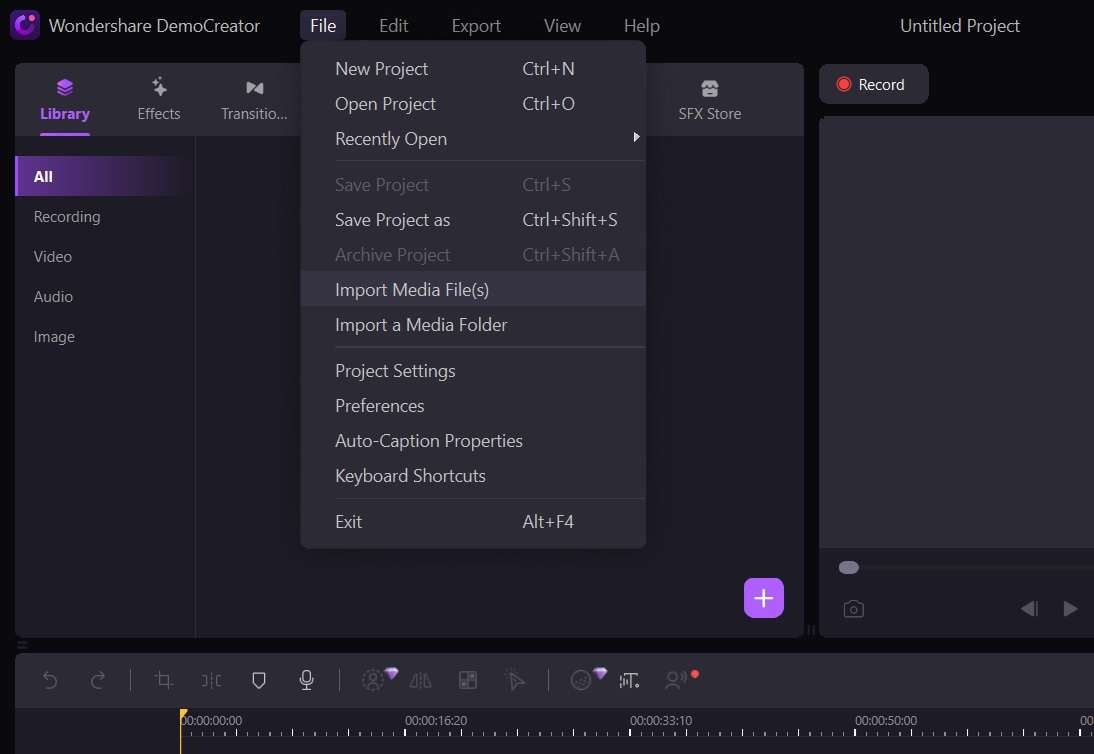
Step 2: Tap the File menu and then select the “Import Media Files” option to import your audio recording for editing.
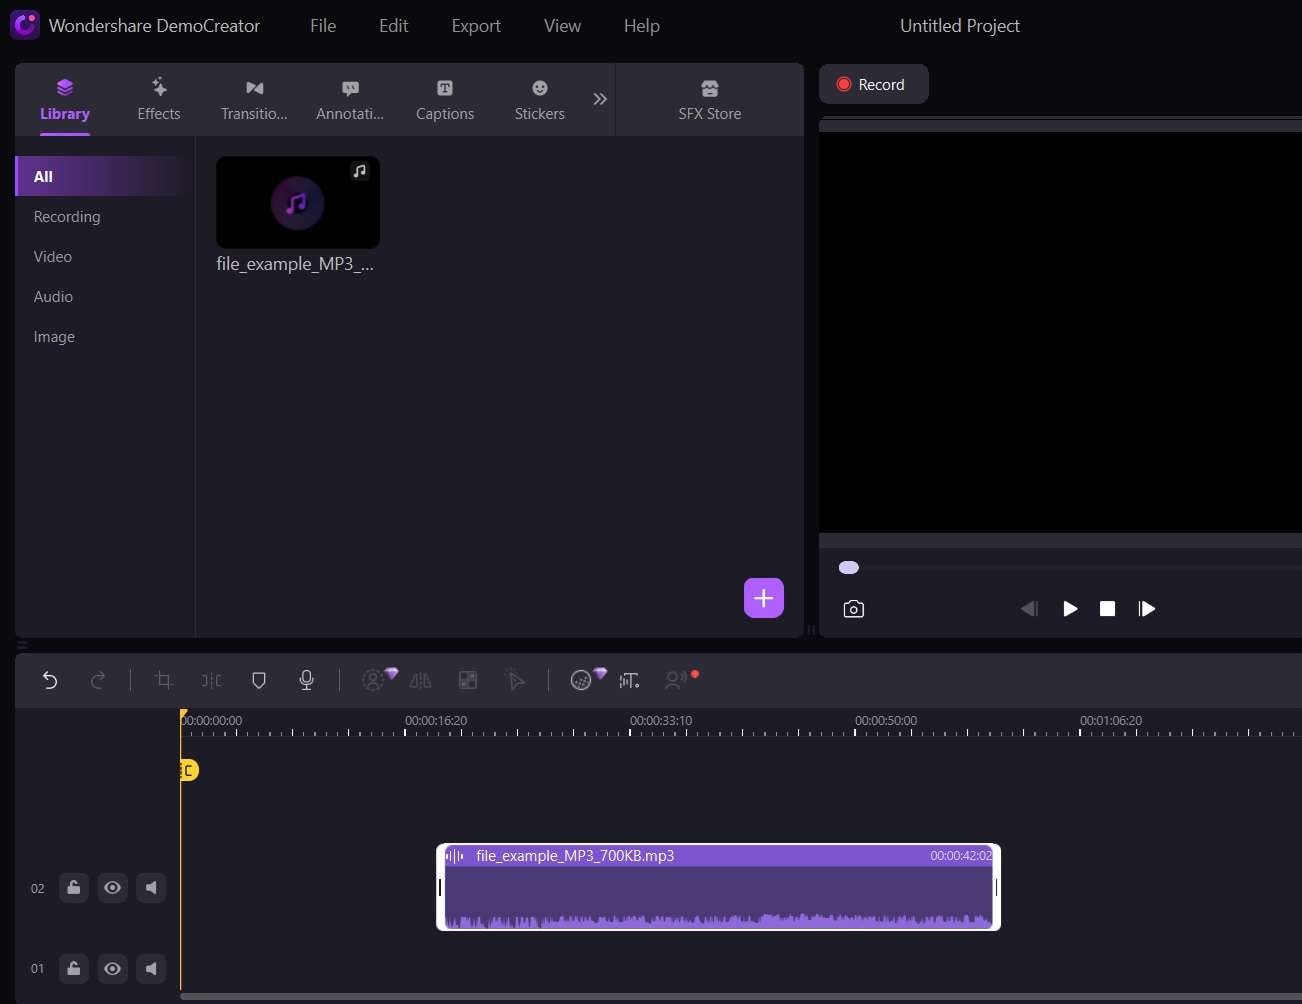
Step 3: Now, simply drag and drop the recording to the timeline. In the timeline, you can perform basic editing functions like trim, and crop.
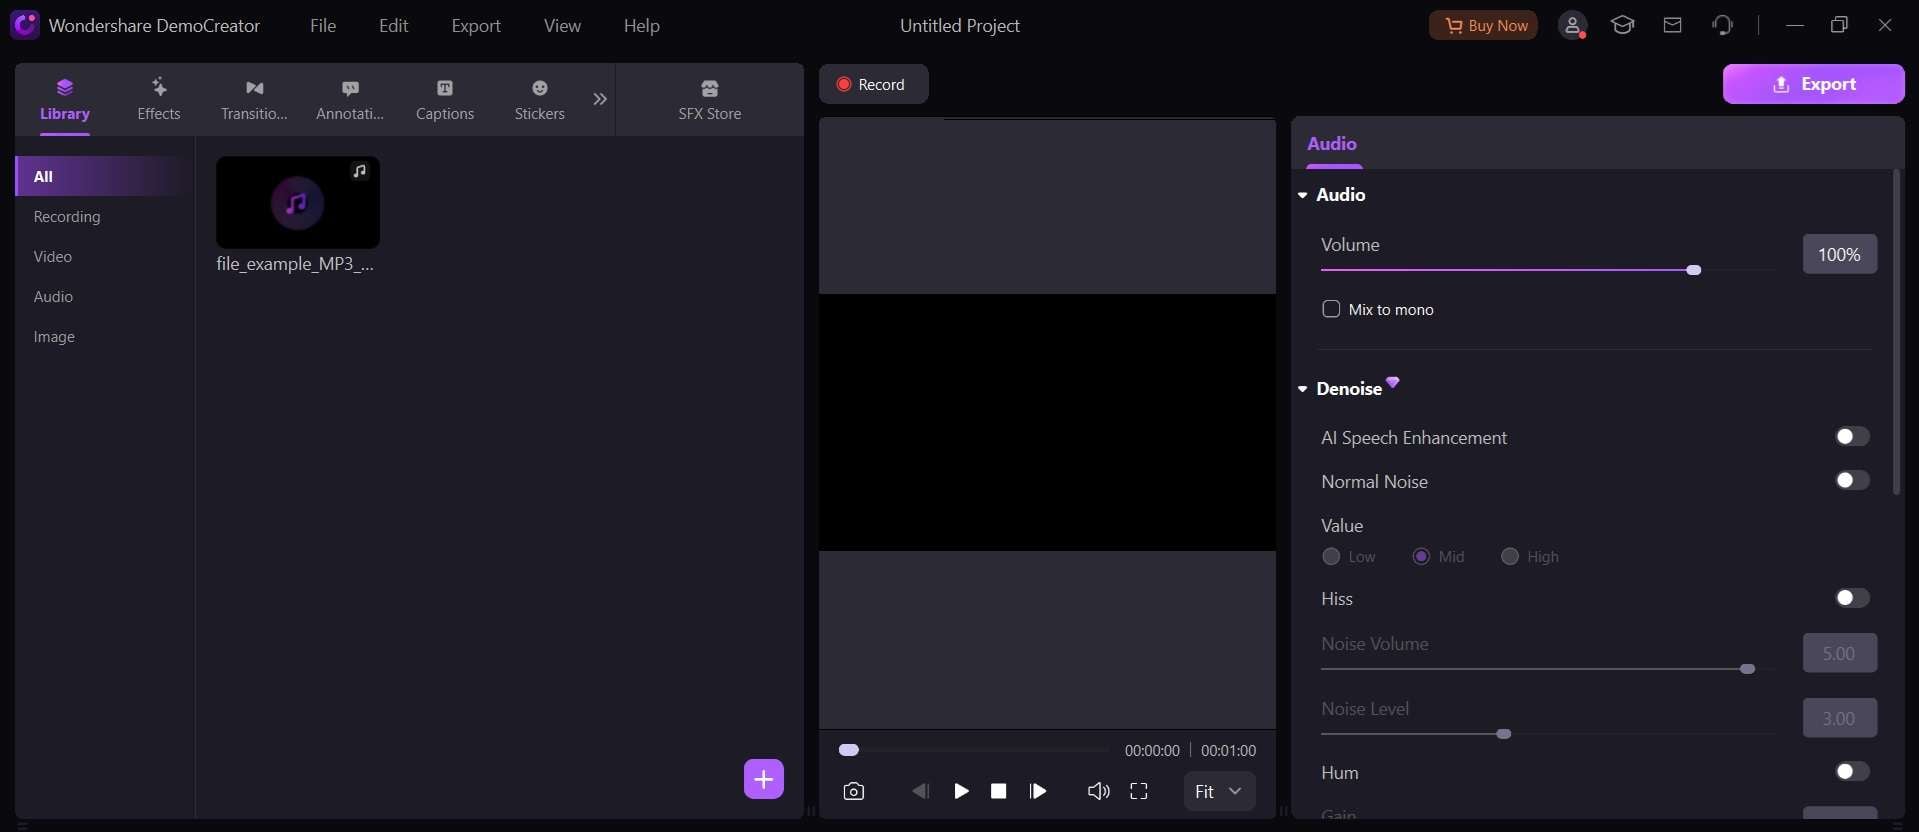
Step 4: Make the most of the sound editing features like AI speech enhancement, voice changer, and so on to enhance your recording.
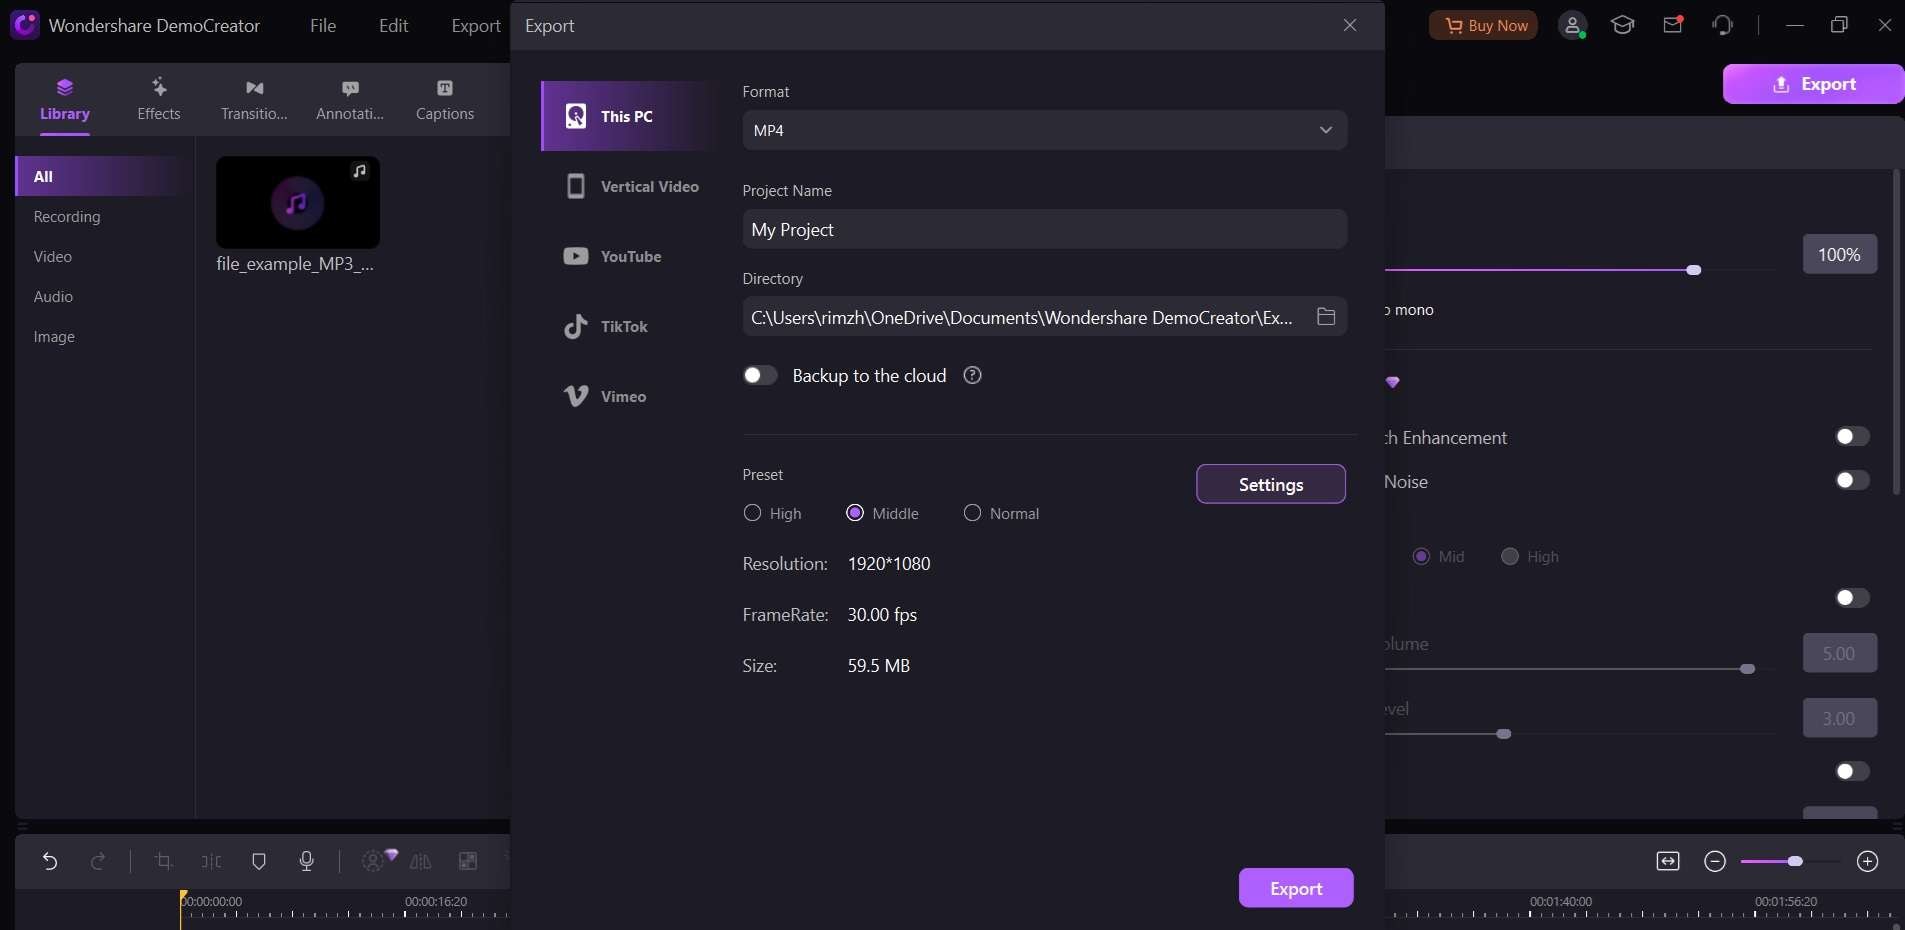
Step 5: Hit the “Export” button when done. You can export your audio recording in various formats, including MP4, WAV, etc.
Whether you're a podcaster, musician, educator, or simply someone who enjoys creating high-quality audio content, DemoCreator is a powerful tool that can take your projects to the next level.
Part 3: Tips and Techniques to Use a Voice Recorder
While the Google Pixel audio recorder is designed to be user-friendly, there are several tips and techniques you can employ to ensure you capture high-quality audio recordings every time:
- Take advantage of tags and notes: The Google Pixel audio recorder allows you to add tags and notes to your recordings. Use these features to categorize your files, add context, or include any relevant information that can help you quickly locate and identify specific recordings in the future.
- Invest in a portable microphone: While the built-in microphone on the Google Pixel is suitable for basic recordings, consider investing in a portable external microphone for improved audio quality, especially when recording in challenging environments or for professional purposes.
- Learn audio editing basics: While the built-in editing tools in the Google Pixel audio recorder are basic, familiarizing yourself with concepts like trimming, splitting, and normalizing audio can help you produce better-quality recordings.
- Explore advanced audio editing software: If you require more advanced editing capabilities, consider exploring dedicated audio editing software like Audacity or Adobe Audition. These tools offer a wide range of features for more complex editing tasks, such as noise reduction, equalization, and multi-track editing.
- Optimize battery and storage: Audio recording can be resource-intensive, so it's important to monitor your device's battery life and available storage space. Consider clearing cache and unnecessary files regularly, and carry a portable power bank for longer recording sessions.
- Utilize cloud storage for backups: In addition to backing up your recordings to Google Drive, consider using other cloud storage services like Dropbox or iCloud for redundant backups, ensuring your precious audio files are safe and easily accessible from multiple locations.
By incorporating these additional tips and techniques, you'll be able to take your audio recording skills to the next level and capture high-quality, organized, and easily manageable audio recordings on your Google Pixel device.
Conclusion
Mastering the art of audio recording on your Google Pixel can open up a world of possibilities, whether you're a student, professional, or simply someone who enjoys capturing life's precious moments. By following the steps outlined in this guide, you'll be able to harness the full potential of the built-in audio recorder, from recording high-quality audio to editing, transcribing, and sharing your recordings with ease.
Experiment with different settings, microphone placements, and editing tools to find the perfect balance that works for you.
With the Google Pixel's seamless integration with other Google services, such as Google Drive, you can rest assured that your precious audio recordings are always backed up and accessible from any device. For those seeking more advanced editing capabilities, the DemoCreator software offers a comprehensive solution to take your audio projects to new heights.
FAQ
-
Q: Can I record audio while using other apps on my Google Pixel?
A: Yes, the Google Pixel audio recorder allows you to record audio in the background while using other apps. However, be mindful that some apps may pause or interrupt the recording process if they require significant system resources. -
Q: How long can I record audio on my Google Pixel?
A: The recording duration is primarily limited by the available storage space on your device. However, it's generally recommended to split longer recordings into multiple files for easier management and editing. -
Q: Can I use voice commands to start and stop recording?
A: Unfortunately, the Google Pixel audio recorder does not currently support voice commands for controlling the recording process. You'll need to use the on-screen buttons or gestures to start, pause, and stop recordings. -
Q: How do I recover deleted audio recordings on my Google Pixel?
A: If you've accidentally deleted an audio recording, you may be able to recover it from the trash or recently deleted folder within the Recorder app. Additionally, if you've enabled backup and sync to Google Drive, you can restore deleted files from your Google Drive account.


