

Many new operating systems have been launched over the years. Yet, many users still favor the familiarity and reliability of Windows 7. Fear not if you’re among them and looking to capture your screen activities! The article will walk you through two effective methods. It will show you how to record screens on Windows 7 using built-in and third-party tools.
These methods will have you covered if you’re showcasing tutorials or streaming your favorite games. Let’s dive in and learn how to screen record on Windows 7, with or without extra software.
In this article
Part 1. How To Screen Record on Windows 7?
Windows 7 doesn’t have its successors’ advanced built-in screen recording features. However, there are several methods you can use to capture your screen activities. Let’s explore three of them:
Method 1: Using a Dedicated Screen Recorder
Wondershare DemoCreator is a powerful tool that Windows 7 users can use to record. Here are the features of the software to help you get started:

- Record screen with sound. DemoCreator allows you to capture not only the visuals but also the accompanying audio. The platform ensures a comprehensive recording experience.
- Record screen with webcam. DemoCreator can integrate webcam footage into screen recordings. It enables you to add a personal touch to your videos.
- Easy screen area selection. You can choose the desired capture area of your screen recordings. Record videos on the full screen, in a specific application window, or in a custom region.
- Smooth and clear recording. DemoCreator supports high-quality recordings up to 4K or 8K resolution. It can also record at 120 frames per second, ensuring crystal-clear playback.
- Multi-track recording. You can record many audio and video tracks simultaneously. The feature allows for seamless editing and customization.
- Free on-screen annotation. DemoCreator offers built-in annotation tools. The options include text, shapes, arrows, and highlights. The tools enable you to add informative overlays to your recordings.
- Plan recordings with Scheduled Mode. You can schedule screen recordings in advance. DemoCreator ensures timely capture of important events or activities.
- Cloud storage and security Image name sharing. DemoCreator provides cloud storage options and secure Image name sharing. It provides easy access to recorded content and collaboration with others.
Here’s how to record screen on Windows 7 using the platform:
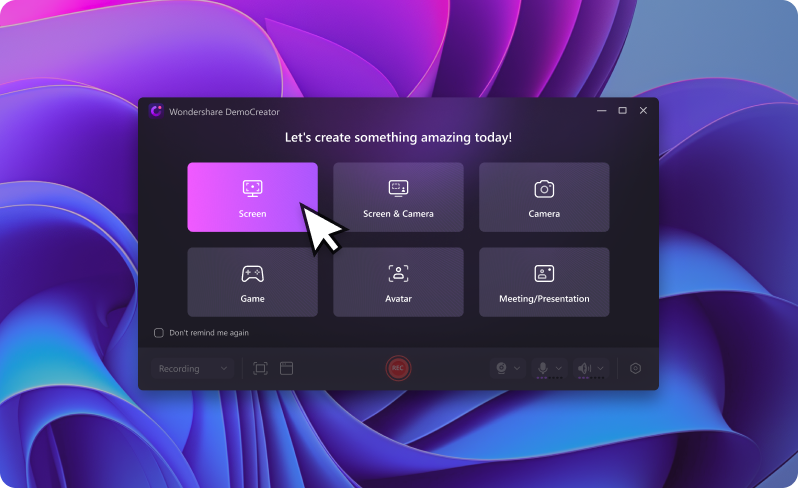
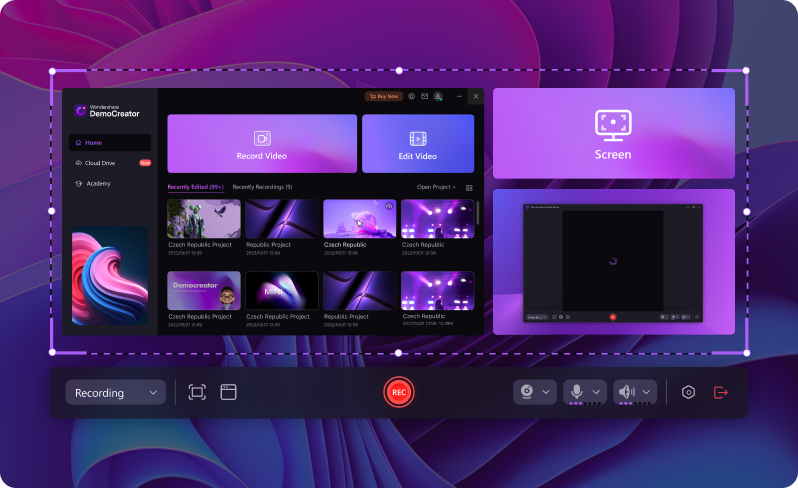
Step 1: Download and install DemoCreator on your Windows 7 PC. Next, launch the software. Log in or register an account. Choose from the recording options available.
Step 2: Choose the camera recording mode to capture both your screen and webcam. Alternatively, you can opt for screen-only recording.
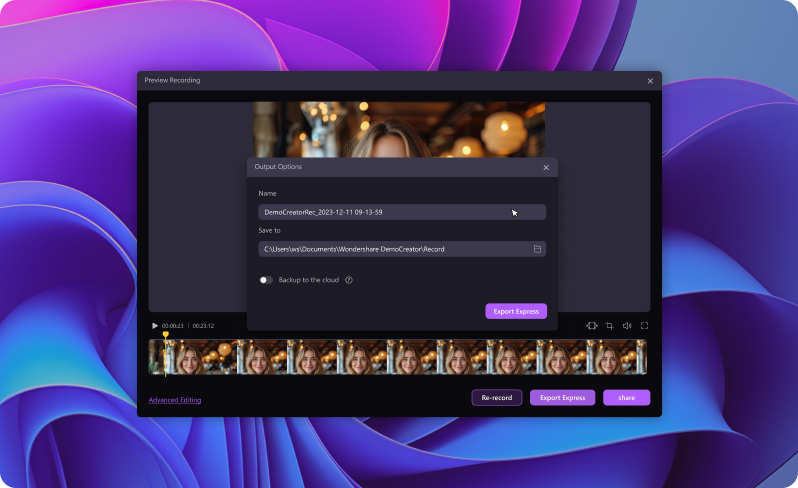
Step 3: Customize the frame rate, audio input, and capture area. Hit the Record button to start capturing your screen. When done, refine the recording and save or share it with your audience.
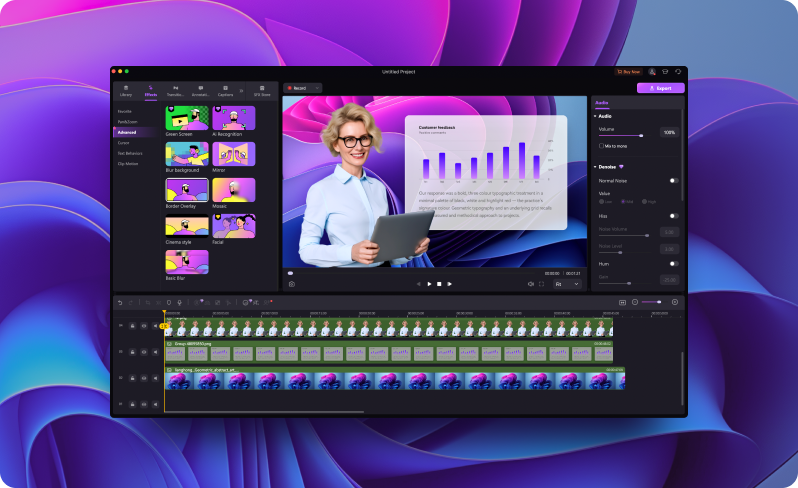
Step 4: After recording, edit your footage with DemoCreator’s built-in editing tools. Use tools such as trim, add annotations, or apply effects. Once you’re satisfied, save or share your work.
Method 2: Using an Online Screen Recorder
DemoAir is DemoCreator’s online counterpart. It has nifty features such as:
- Screen recording online
- Screen drawing tool
- Seamless sharing capabilities
- Integration with other tools
With all these in mind, here’s how to record screen on Windows 7 using DemoAir:
Step 1: Visit the DemoAir website. Log in or register an account.
Step 2: Adjust recording settings such as capture area and audio input. Click the Start Recording button to launch the online screen recorder.

Step 3: Once you’re done recording, you can annotate your footage using the screen drawing tool, then save or share it with others.

Method 3: Record Screen Using Office Tools
Believe it or not, Microsoft Office tools can do screen recording on Windows 7. It’s an underrated feature many creatives don’t know. Here’s how to use PowerPoint for screen recording:
Step 1: Open PowerPoint and create a new presentation. Go to the Insert tab and click on Screen Recording in the Media group.

Step 3: Select the area of your screen you wish to record. Then, click Record to start capturing. Once finished, click Stop, and your recording will be inserted into your presentation.
Part 2. Why Use a Dedicated Tool like DemoCreator for Windows 7 Users
Using an older Windows version doesn’t mean you can’t make content fun and engaging. Having a dedicated tool like Wondershare DemoCreator can enhance the screen recording experience for Windows 7 users. If you’re interested to start your content creation journey with DemoCreator, the tool offers a free trial version. The free software allows you to experience DemoCreator’s features before getting a subscription. Here are the available pricing plans:
- Cross-Platform Quarterly Plan: $29.99 per quarter
- Cross-Platform Yearly Plan: $59.99 per year
- Perpetual Plan: $75 (one-time purchase)
Use Cases
DemoCreator offers a feature-rich and user-friendly solution for screen recording on Windows 7. It’s a must-have for Windows 7 users looking to create high-quality screen recordings. Here are the many use cases of DemoCreator and what you can do with the tool:
- Educational tutorials
Teachers and educators can create engaging instructional videos for online classes or e-learning platforms. The screen capture, webcam integration, and annotation tools can cater to diverse learning styles and enhance student engagement.
- Software demos
Software developers and IT professionals can demonstrate software functionalities and features for training or promotional purposes. Using DemoCreator is ideal for showcasing software functionalities and features.
- Gameplay recording
Gamers can capture their gaming sessions to create walkthroughs, reviews, or highlights to share with their audience. With features like multi-track recording and free on-screen annotation, gamers can create walkthroughs, reviews, or highlights to engage viewers.
- Business presentations
Professionals can record presentations, meetings, or product demonstrations to communicate with clients or colleagues. The tool ensures that important discussions and information are captured for future reference. Additionally, DemoCreator’s cloud storage and secure Image name-sharing features enable seamless collaboration.
- Remote collaboration
With remote work becoming increasingly common, DemoCreator enables teams to collaborate effectively. It helps you record and share screen-based discussions, brainstorming sessions, or project updates.
Bonus: How To Use Windows 7 Built-in Screen Recorder
Windows 7 comes with a built-in tool called Problem Steps Recorder. The tool can be used as a basic screen recorder. Here’s how to use it:
Step 1: Go to the Start menu, and type “psr” in the search bar. Hit Enter to launch the Problem Steps Recorder. Click the Start Record button to begin capturing your screen activities.

Step 2: Carry out the actions you want to record. The tool will continue to capture screenshots and will also log mouse clicks. Once done, click the Stop Record button to end the recording session.
Note
It’s worth noting that Problem Steps Recorder lacks advanced features and customization options. The tool doesn’t have the in-depth features found in dedicated screen recording tools. Therefore, it’s not an ideal choice for high-quality recordings. This can be an issue, especially for creatives recording professionally.
Conclusion
Mastering how to record screens on Windows 7 is vital for many creatives. While the platform offers native recording options, it often falls short in delivering professional-grade results. That’s where dedicated tools like DemoCreator shine. The platform is backed with an intuitive interface and powerful features. It empowers you to learn how to screen record on Windows 7 easily.
You can unlock a world of possibilities by taking advantage of DemoCreator’s capabilities. Say goodbye to Windows 7 limitations and hello to seamless screen recording. Feel free to experiment with DemoCreator to get your screen recording journey started.


