

Listening to audio is a new and popular way to consume content. If you’re creating content, knowing how to voice record on the computer is a valuable skill. The guide will walk you through several quick and easy methods.
From built-in tools to third-party software, there are many options for audio recording on a laptop. The articles will showcase many methods to get the job done. Get ready to capture high-quality sound with ease! Read on to learn more.
In this article
-
- Method 1: Use the Built-In Voice Recorder App
- Method 2: Use a Dedicated Software for Audio Recording on Laptop
- Method 3: Use an Online Tool for Voice Recording
- Method 4: Record Audio From Laptop With Audacity
- Method 5: Record Audio Using QuickTime for Mac Users
- Method 6: Record Audio on a Laptop Using OBS Studio
Part 1. How To Voice Record on Computer [6 Methods]
Recording audio on your computer is essential for creating podcasts, lectures, or personal notes. The section discusses 6 different methods to voice record on your computer. Read on for detailed instructions and learn the key features of each method.
Method 1: Use the Built-In Voice Recorder App
The built-in Voice Recorder app on Windows is a simple tool for recording audio. It’s easy to use, making it perfect for quick recording. Here’s a breakdown of its features:
- Basic editing tools. Trim and cut audio clips within the app.
- Automatic save. Recordings are saved automatically, preventing data loss.
Here’s how to use Voice Recorder:
Step 1: Search for Voice Recorder in the Windows search bar and open it. Click the microphone icon to begin recording. Click the pause button to pause and the stop button to finish the recording.
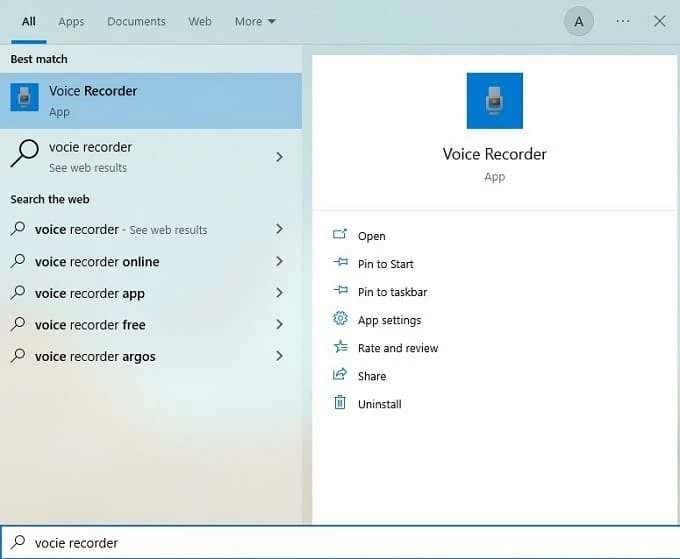
Step 2: The recording will be saved automatically. You can edit the clip by selecting it and using the trimming tool.
Method 2: Use a Dedicated Software for Audio Recording on Laptop
Wondershare DemoCreator is a comprehensive tool for recording and editing both audio and video. It’s designed for creatives who need advanced features and customization options. The platform is ideal for creating professional-quality recordings. Whether you’re producing a podcast, recording a tutorial, or working on a multimedia project, DemoCreator can help you. Let’s explore its key features:
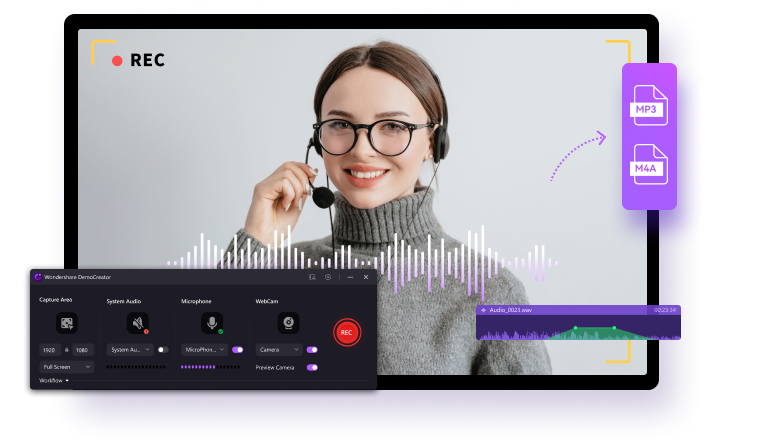
- Advanced editing tools. DemoCreator Includes voice effects and background noise removal.
- Screen recording. The software can capture both screen and audio simultaneously.
- Multiple formats. It supports various audio and video formats for easy export.
Follow the steps to start using DemoCreator for audio recording:
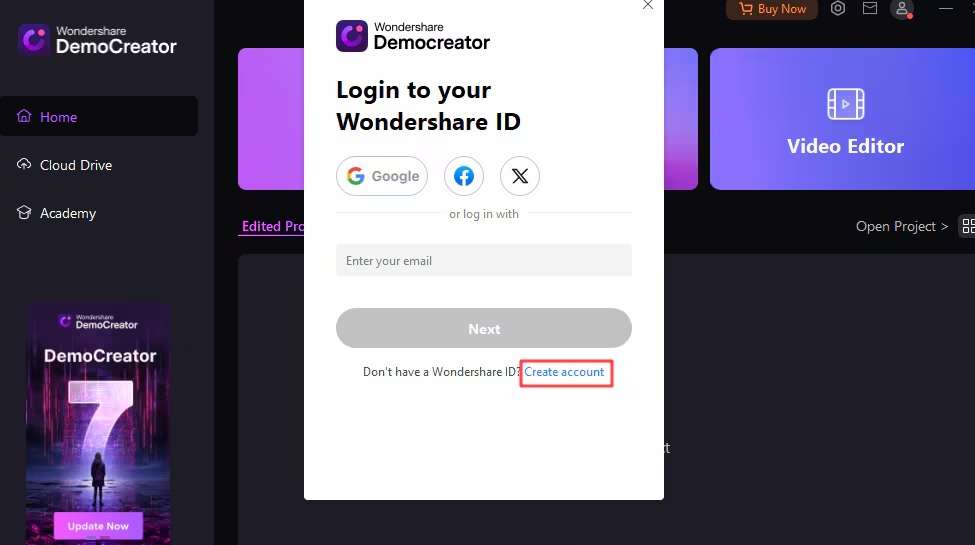
Step 1: Visit the DemoCreator website to download and install the software. Launch the software and log in or register for an account. Once done, click New Recording.
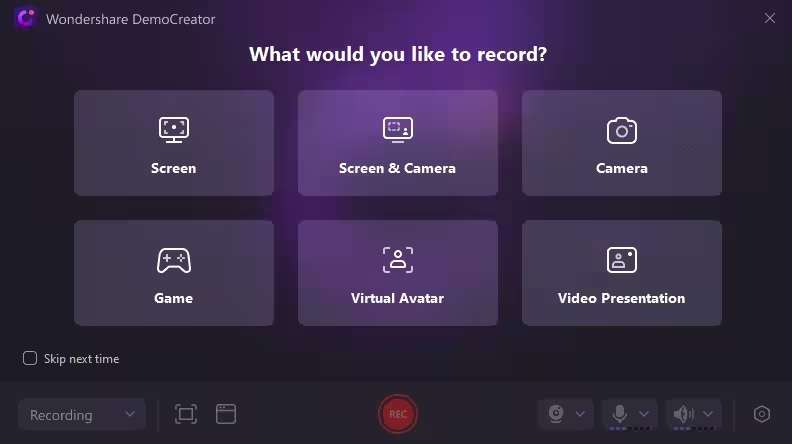
Step 2: Choose the audio input source and any other recording settings. Once done, click the red Record button to begin.
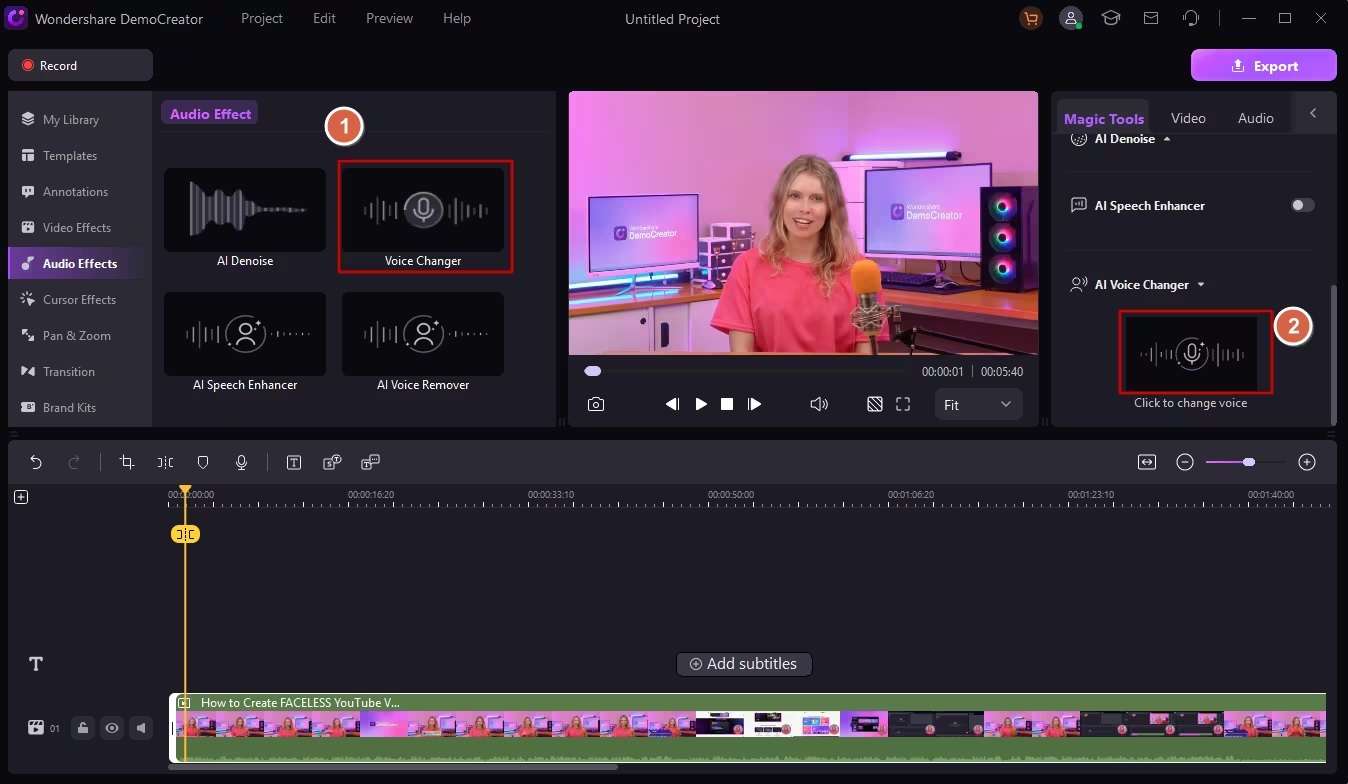
Step 3: After recording, click the Audio tab to use the editing tools to refine your content. Use the Audio, Denoise, Speed, and Voice Changer tools to improve your recording.
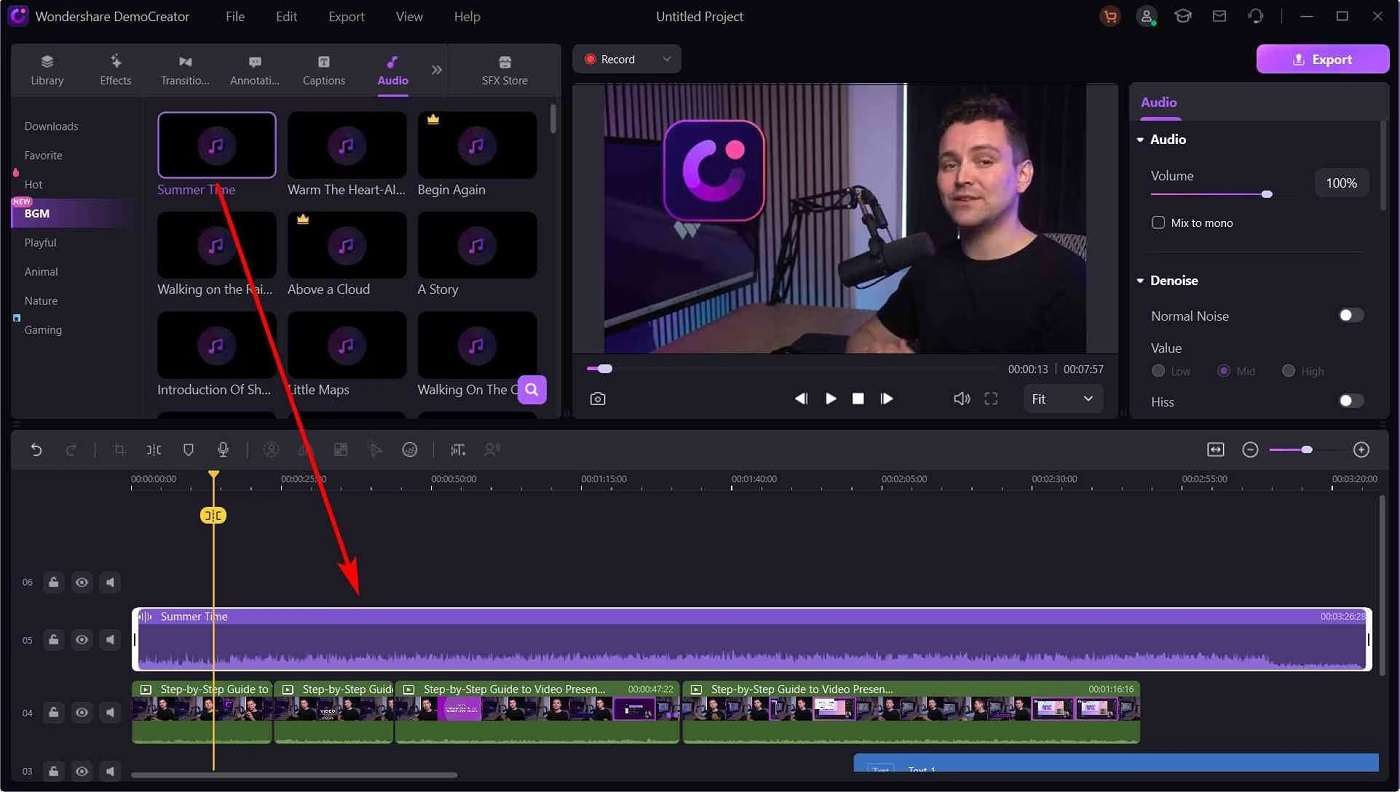
Step 4: Preview your content for any finishing touches. Once done, save the final product in your preferred format, and share it with your audience.
Pricing Plan
If you’re interested in giving DemoCreator a try, here are its pricing plans:
- Free version available
- Cross-Platform Quarterly Plan. $29.99/qtr
- Cross-Platform Yearly Plan. $59.99/yr
- Perpetual Plan. $79.99 one time
Method 3: Use an Online Tool for Voice Recording
DemoAir is a convenient online tool for quick voice recordings without software installation. It’s DemoCreator’s online alternative and is ideal for creatives on the go. Let’s discuss its key features:
- Web-based. No installation is needed; it is accessible from any browse.
- Instant sharing. Easily share recordings via URL.
- Basic editing. Includes simple tools for trimming and adjusting audio.
Here are the steps to start using DemoAir for your audio recordings:
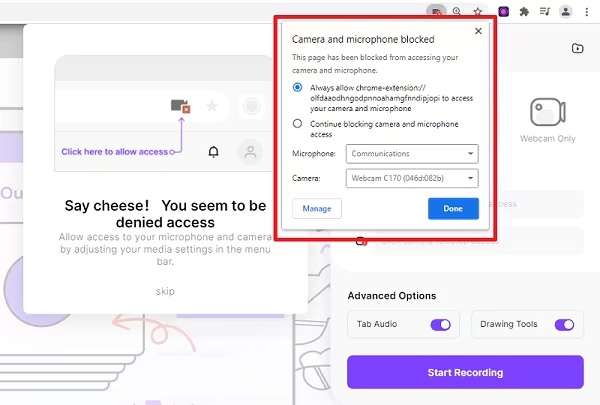
Step 1: Go to DemoCreator Online or the Chrome Web Store to download the extension. Launch the platform and click Audio Only. Choose other recording modes depending on your preferences.
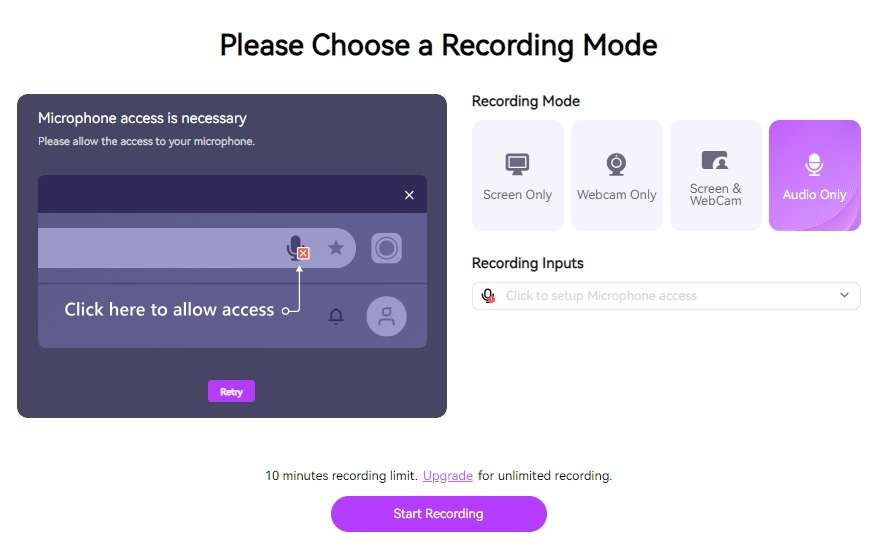
Step 2: Click Start Recording and allow microphone access. Press the record button to begin.
Step 3: Click the stop button to end recording. You can trim the audio if needed. Save and share your work once done.
Method 4: Record Audio From Laptop With Audacity
Audacity is a free, open-source software known for its powerful audio recording and editing capabilities. The platform can be launched on Windows, macOS, and Linux to help you record audio from your laptop. Here’s a rundown of its features:
- Multi-track editing. Record and edit tracks simultaneously.
- Effects and filters. Wide range of audio effects and noise reduction tools.
Here are the steps to start using the tool:
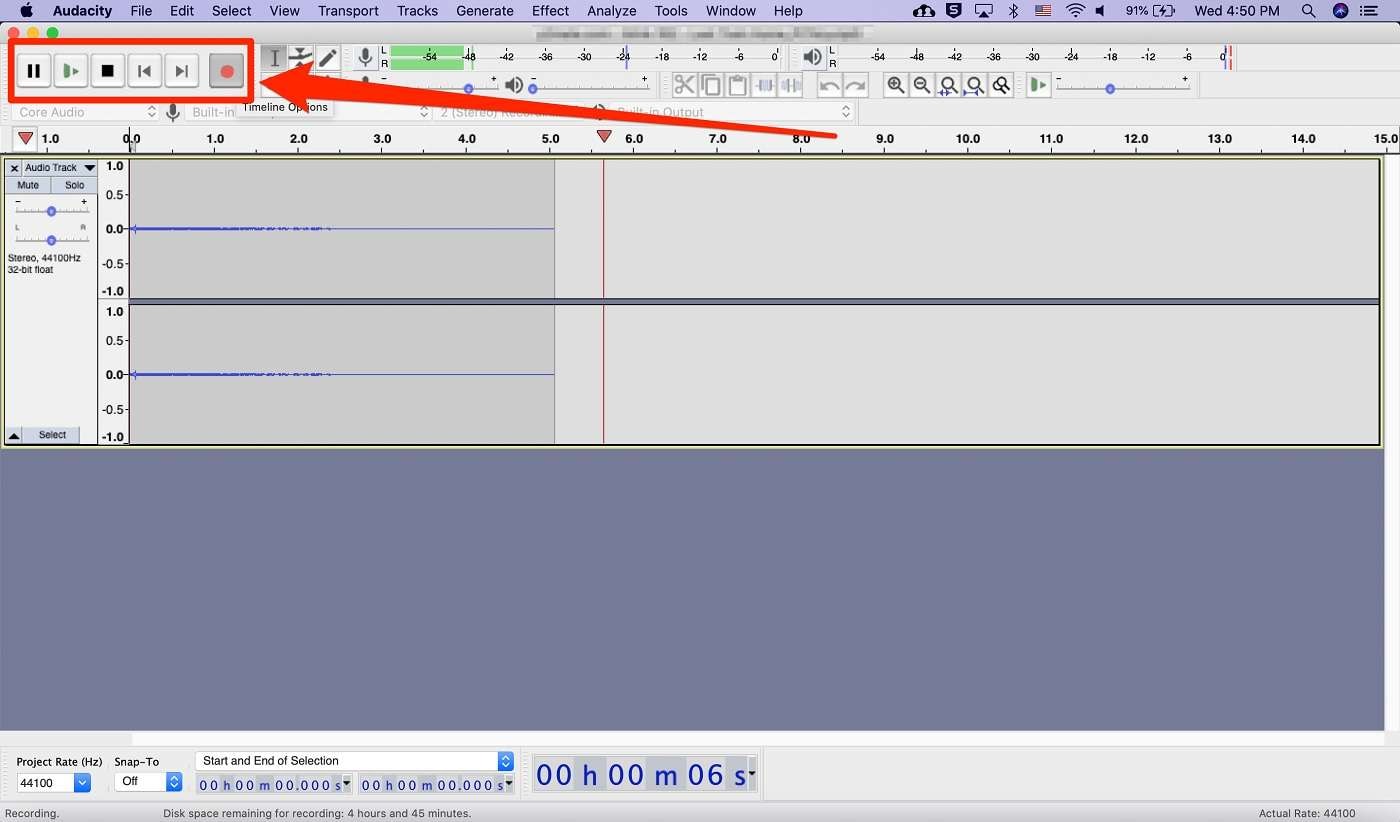
Step 1: Download and install Audacity on your computer. Connect your microphone and configure it according to your preferences. Choose the Built-in Microphone to start audio recording.
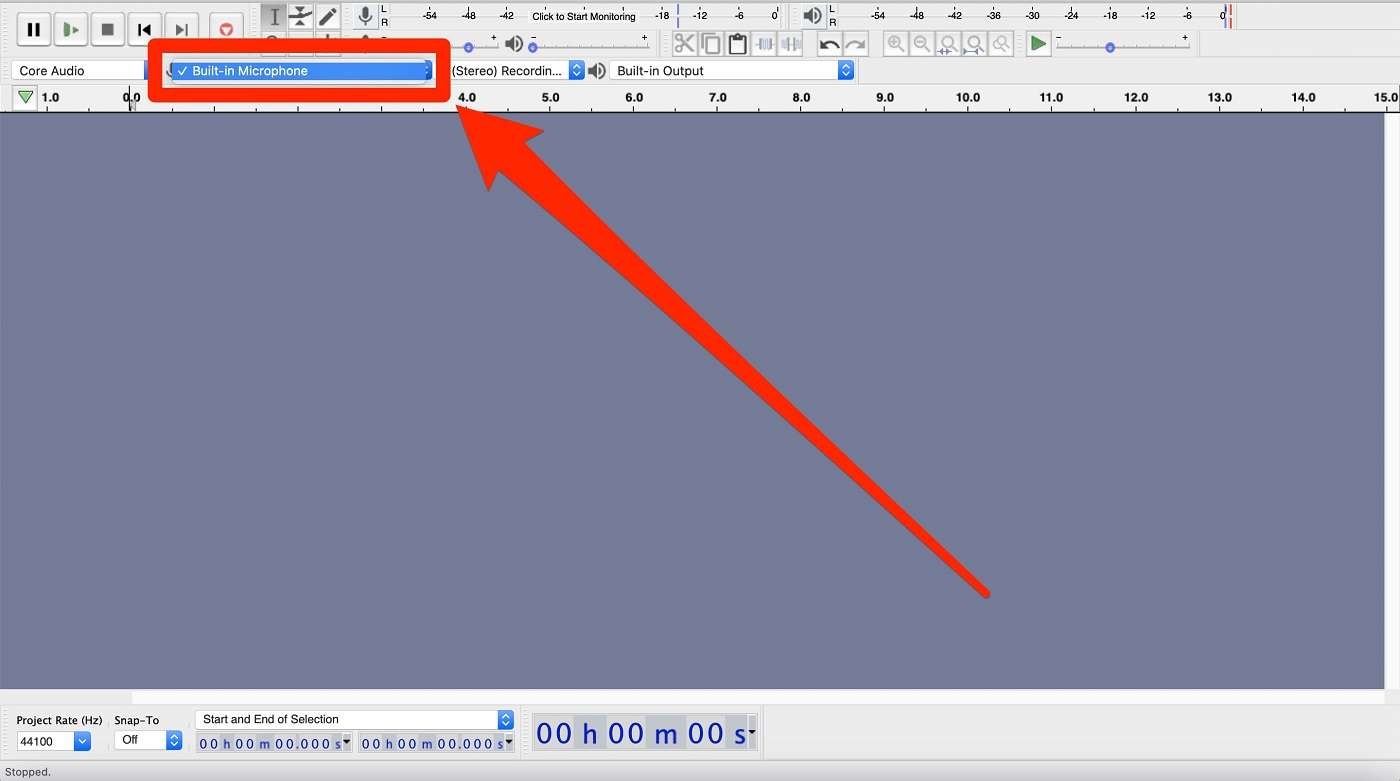
Step 2: Click the record button to begin. Once done, use the editing tools to enhance your recording. Save it in your desired format.
Method 5: Record Audio Using QuickTime for Mac Users
QuickTime Player is a built-in tool for macOS that allows for simple audio recordings. It uses a straightforward interface ideal for quick recordings. Here’s how to use QuickTime for your audio recording needs:
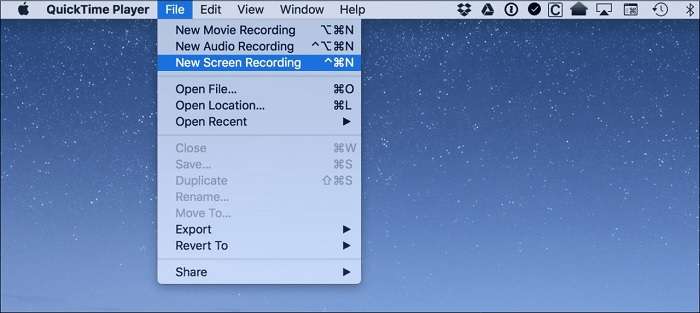
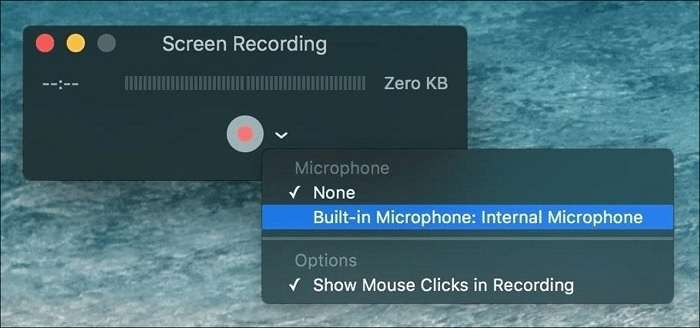
Step 1: Search for and open QuickTime Player on your Mac. Next, choose File > New Audio Recording.
Step 2: Go to the red record button to begin. Click the stop button to finish the recording. Save it to your desired location.
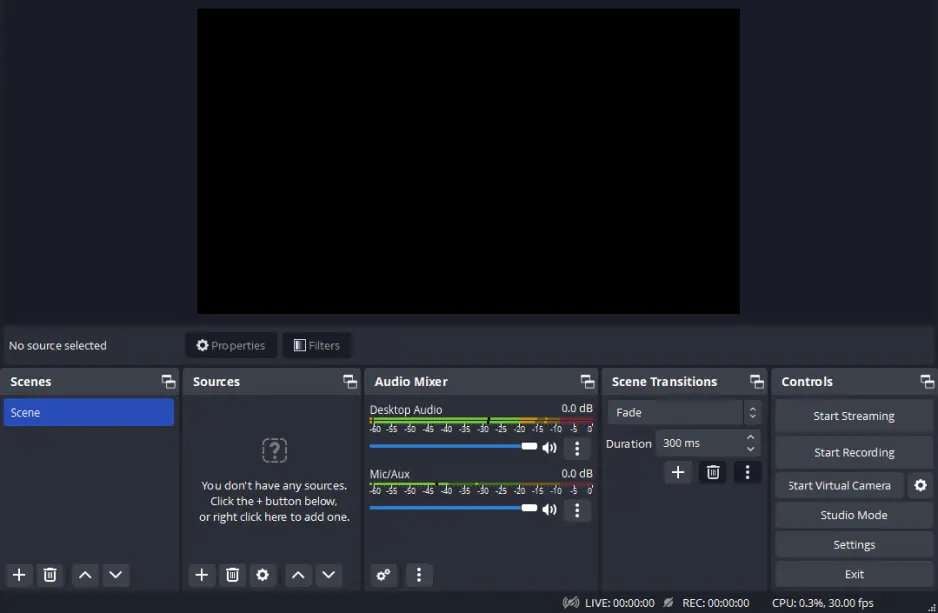
Method 6: Record Audio on a Laptop Using OBS Studio
OBS Studio is a free, open-source tool widely used for both screen and audio recording. It supports high-definition audio and video recording. There are extensive settings for audio inputs, outputs, and formats. The tool also supports simultaneous recording from many audio sources. Here are the steps to start using the tool:
Step 1: Download and install OBS Studio on your computer. Next, go to Settings > Audio to configure your microphone and other audio sources.
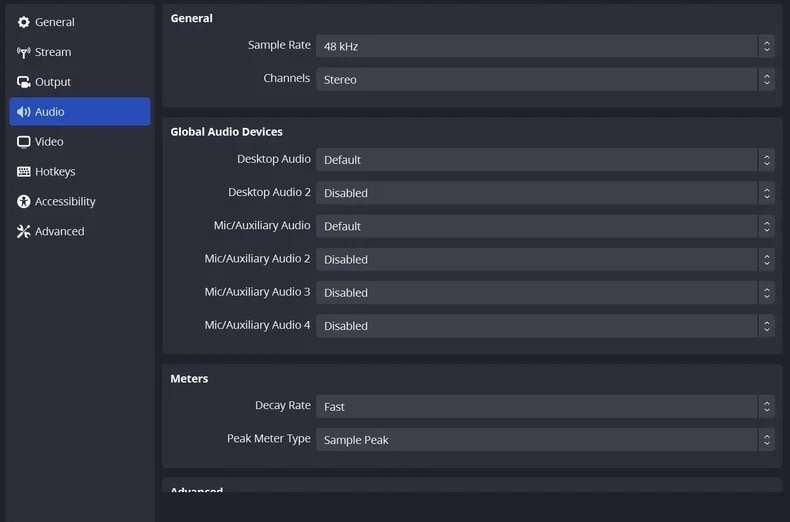
Step 2: Set up a new scene. Add an audio input capture source. Click Start Recording to begin. Once done, stop the recording and save the file. Edit your audio recording using OBS or another software.
Bonus: How To Use AI for Audio Recording on Laptop
The trend of using AI in content creation is gaining popularity. People are now using AI to change voices in videos for fun. The innovative approach allows for a wide range of creative possibilities. If you’re interested, DemoCreator can record audio on your laptop using different voices. The platform offers AI voice changers that can enhance your projects. DemoCreator’s AI-powered voice changer can:
- Change your voice into different characters
DemoCreator can] transform your voice into a variety of characters. They range from fictional personas to different accents and styles. It’s ideal for podcasts, video dubbing, and creative audio projects.
- Support many video/audio formats
The feature is compatible with many formats, including MP3, WAV, MP4, and AVI. It ensures seamless integration with your existing media files and projects.
- Provide up to 40 AI voices to choose from
DemoCreator’s diverse selection of AI-generated voices allows you to find the perfect match for your content. It offers flexibility and creativity in voice selection, enhancing the quality of your recordings.
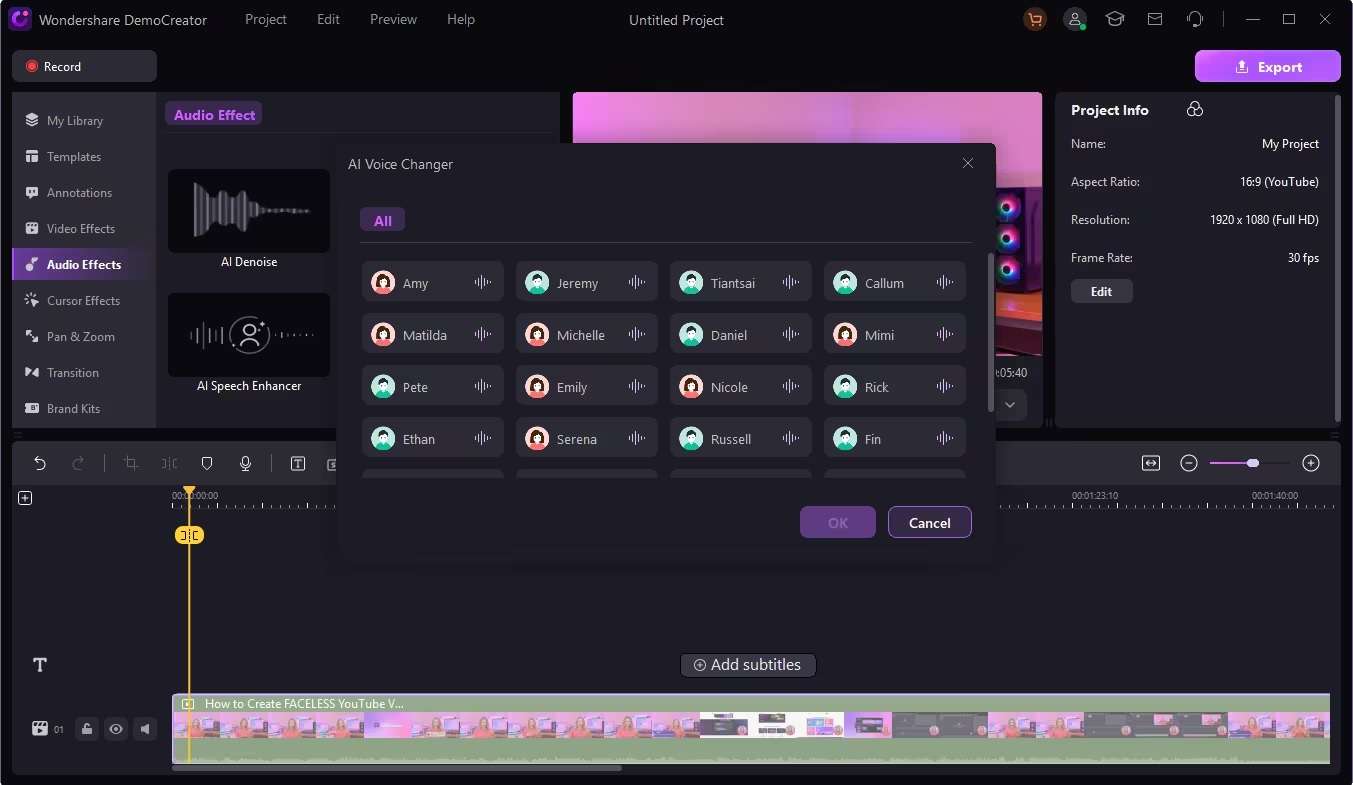
How To Use DemoCreator’s AI-Voice Changer?
Here’s how to use DemoCreator’s AI voice changer tool:
Step 1: Start by opening DemoCreator. Import the audio file you want to edit by clicking the Import button. Select your file from your computer.
Step 2: Once your audio file is loaded, go to the AI Voice Changer tool. Choose from a variety of AI voices. Select the one that best fits your project.
Step 3: After choosing your voice, preview it to ensure it sounds the way you want. If you’re satisfied with the results, save the edited audio file. Share your creation or export it for use in other projects.
Conclusion
Knowing how to voice record on the computer is easy with the right tools. The methods listed above are all beginner-friendly. They represent the best voice recorder software you can try right now. You’ll find it simple to start recording high-quality audio from your laptop.
If you’re looking to elevate your audio recording on a laptop, you can start with DemoCreator. Its comprehensive feature list makes it an excellent platform for audio recording on a laptop. With it, you can take your audio projects to the next level. Happy recording!
FAQ
-
How do I record my computer screen with audio?
You can use tools like Audacity, QuickTime Player, or DemoCreator to record your screen with audio. Note that the built-in voice recorder app cannot do this. Unlike the built-in voice recorder app, these programs capture both video and sound. -
How do I edit and enhance recorded audio?
To edit and enhance your recorded audio, use dedicated software like DemoCreator. The tool offers a variety of voice effects and comprehensive editing features. DemoCreator allows you to fine-tune your recordings and make them sound professional with low effort. -
What settings should I adjust for optimal audio recording on my laptop?
Adjust the mic sensitivity, bitrate, and sample rate for optimal audio recording. These settings impact the clarity and quality of your recording. Experiment with different combinations to achieve the best sound. Ensure your recordings are clear and free from unwanted noise.


