

When you take a screenshot on a Mac, where does it go? This question baffles many Mac users or, more precisely, those who have changed the default location of their captures and can't remember where they've put them.
Don't worry; we'll show you where to find screenshots on a Mac and change their location to a more convenient directory.
Table of Content
The Default Location of Mac Screenshots
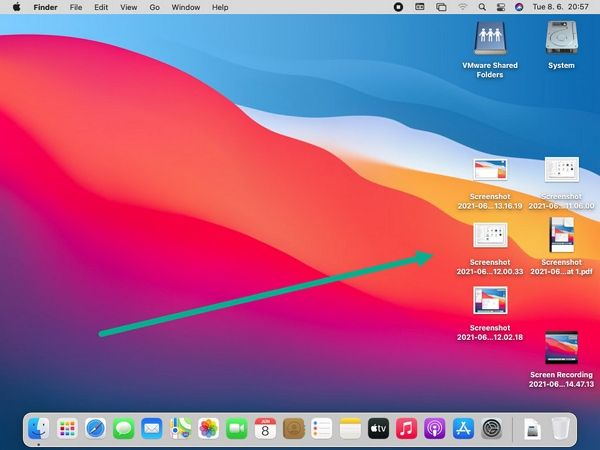
"Where can I find screenshots on a Mac?" If you're asking this question, you've changed the default Mac screenshot location at some point, and your chosen directory has slipped your mind. How do we know? Because your screenshots would otherwise be right before your eyes—on your desktop.
What if your screenshots aren't in their default spot? Where do MacBook screenshots go if they don't appear on the desktop? Don't worry; they're not gone. Your Mac doesn't throw them in the Trash folder without asking you first.
How To Find Saved Screenshots on a Mac
You don't need to know where screenshots go on a Mac because you can locate them quickly. That's where the Finder and Spotlight come into play.
Here's how to find a screenshot on a Mac:
- If you've recently taken or edited a screenshot, open the Finder and look it in the Recents tab. You can sort files by type or the date you've last opened them.

- If your capture isn't there, type "Screen Shot [year]" in the search box because that's how your Mac names screenshots. You can also append the exact date. If you've changed the desired picture's name, type it if you remember it.

- Another way to find screenshots is to open Spotlight from the menu bar (or using Command + Spacebar) and type the exact text as above in the search box.

- You can also type "screenshot" in Spotlight to locate and preview all your captures. Click Show All to view all screenshots.

You may also like: how to record the screen with sound on Mac
How To Change the Save Location on a Mac
Changing your screenshot save location on a Mac differs among macOS versions. It's straightforward in all systems, but those before macOS Mojave require using the Terminal. Here are the steps for each.
Change Screenshot Location on macOS Mojave or Newer
Apple introduced the Screenshot toolbar in macOS Mojave, which enables users to change the default screenshot location. Here's how:
- Press Shift + Command + 5 to open the Screenshot toolbar and click Options > Other Location.

- Click New Folder or pick an existing one, and hit Choose. Your Mac will save your new screenshots there from now on.

Change Screenshot Location on macOS High Sierra or Older
If you still use macOS High Sierra or older, follow these steps to change your screenshot location:
- Launch the Terminal and run the following command: defaults write com.apple.screencapture location ~/[your desired file path]. For instance, you can type ~/Documents/Screenshots. Here's a time-saving trick: drag and drop the new folder next to the "location" parameter to avoid typing the file path.
- Run this command to enforce the change: killall SystemUIServer. Your future screenshots will now be in the designated folder.

How To Preview and Manage Mac Screenshots
Now that you know how to find your Mac screenshots and change their location, it's time to see how to preview and manage them for better access and organization. The following steps are an excellent starting point.
View Your Screenshots With Quick Look or Preview
Here's how to preview your screenshots:
- If you use macOS High Sierra or older, open your screenshots folder, select one or more images, and hit the Spacebar. Quick Look will open, enabling you to browse, share, or open screenshots with Preview.

- If you have macOS Mojave or newer, launch the Finder, open your screenshots folder, and click View > Show Preview to open the Preview pane.

- Convert, print, or share your images, add tags, and view their metadata. Click More to rotate your pictures, use markup tools (e.g., to create notes), and customize the Preview Options.

- Tick the desired checkboxes to view more image information in the Preview pane.

Manage Screenshots From Thumbnails
The Screenshot toolbar in macOS Mojave or newer lets you choose where to view and edit each screenshot when you take it. Here's how:
- Press Shift + Command + 5 to open the Screenshot toolbar and click Options > Show a Floating Thumbnail.

- Hit Shift + Command + 3 to capture your entire screen or Shift + Command + 4 for a selected portion. Then, right-click or Control-click the thumbnail in the bottom right corner. Be quick because it will disappear in a few seconds.

- Open the screenshot in Mail, Messages, Preview, or Photos. Alternatively, save it directly to your Desktop, Documents, or Clipboard, show it in the Finder, edit it with Markup, or delete it.

Organize Screenshots With Tags
Tags are perfect for organizing photos on a Mac [Making Your Workflow Easier: Best Photo Management Software for Mac] and locating them quickly. Here's how to add them to your screenshots and search for captures by tags:
- Launch the Finder and click Finder > Settings (or Preferences in macOS Ventura or newer). Switch to the Tags tab and choose what to show in the sidebar. You can also create new tags by clicking the Plus sign.

- When saving a new screenshot, hit the Tags box to pick a desired tag. You can also right-click any file and click Tags to select one.

- Once you tag your screenshots, you can search for them by tag in the Finder or Spotlight.

Place Your Screenshots Folder in the Dock
Putting your screenshots folder in the Dock provides fast access, preventing you from searching forever for desired shots. Here's a trick for organizing them better:
- Drag and drop your screenshots folder to the Dock, placing it to the right of the divider.

- Right-click it and choose a Fan view. Then, click Sort by Date Modified to show the latest edited screenshots first.

- Whenever you take a screenshot, your folder's icon in the Dock will morph into that image. Clicking it makes it look like a Downloads icon and opens your latest screenshots in a Fan view. You can open them in the Finder directly.

You may also be interested in: how to use the snipping tool on Mac
Can't Find the Screenshots on a Mac - What to Do
If you can't find screenshots on a Mac, you might want to check the Trash folder because you may have accidentally deleted them. You can also restore them from a Time Machine backup (if you've created one).
Have you changed the pictures' names and the search methods above don't work? You can find them with the "kMDItemIsScreenCapture" flag. All screenshots since macOS Mountain Lion have it, making locating all your captures seamless.
Here's what to do in all these situations.
Use the "kMDItemIsScreenCapture" Flag in the Finder
Follow these steps to find your screenshots in the Finder:
- Open the Finder and click File > Find.

- Click This Mac to scour your hard drive and type "kMDItemIsScreenCapture:1" in the search bar.

- Click Image to filter the results by format.

- Change the view in the toolbar to visually browse the screenshots. You can choose an Icon, List, Column, or Cover view.

- Click Save to access your custom search later from the Finder. Name it, pick a location (Saved Searches is the default), tick the Add to Sidebar checkbox, and hit Save.

Use the "kMDItemIsScreenCapture" Flag in Spotlight
Here's how to find screenshots with this flag in Spotlight:
- Open Spotlight from the menu bar (or use Command + Spacebar) and type "kMDItemIsScreenCapture:1" in the search bar. Browse and preview the screenshots with your keyboard's arrow keys or click Show All in Finder.

- Use the "name" parameter if you know a specific screenshot's name. For instance, type "Image name" to find screenshots from February 2024. You can use any string if you recall how you named the picture.

- Use the "kind" parameter to look for screenshots by format. You can type "kind:.pngkMDItemIsScreenCapture:1" to display all PNG images.

Restore Deleted Screenshots From the Trash
Follow these steps to check the Trash for deleted screenshots and restore them:
- Open the Trash folder.
- If you find your lost screenshot, right-click it and select Put Back. That will restore it to its original location, so use the methods above to find it if you don't know where it was before deletion.

Restore Lost Screenshots From a Time Machine Backup
If you've created a Time Machine backup, follow these steps to restore your lost screenshots:
- Connect your backup drive to your Mac.
- Go to the Apple menu > System Settings (macOS Ventura or newer) or System Preferences (macOS Monterey or older) > Time Machine and tick the Show Time Machine in the menu bar checkbox.

- Enter Time Machine from its icon in the menu bar.

- Open the folder with your lost screenshots and browse the previous versions. Then, preview the pictures with the Spacebar, choose what to retrieve, and click Restore.

Conclusion
Where do Mac screenshots go? You have the answer now. They're on your desktop by default, but you can find them quickly with Spotlight and the Finder if you've moved them someplace else. You can also change the location and restore them in case of accidental deletion.


