
Knowing how to record a video on Windows 10 can come in pretty handy. After all, whether you’re an up-and-coming gaming content creator, an educator, a marketer, or anything in between, if you want to publish high-quality videos, you first need to know how to capture them.
Fortunately, Windows makes this pretty easy. It offers useful built-in tools that simplify screen recording and give you full creative freedom. However, if you need more robust features and capabilities, more flexibility, and more control over your content, you might need an alternative solution for video recording on Windows.
In this article
What Is the Built-in Screen Recorder on Windows 10?
If you have a PC with this operating system, you don’t necessarily need to buy new tools and software for video recording. You’ll have the built-in Game Bar that comes pre-installed with your operating system.
The Game Bar was specifically developed for recording gameplay videos on your Xbox console or PC. However, you can easily use it for more than that. It’s also useful for recording numerous applications and programs and your internet browser.
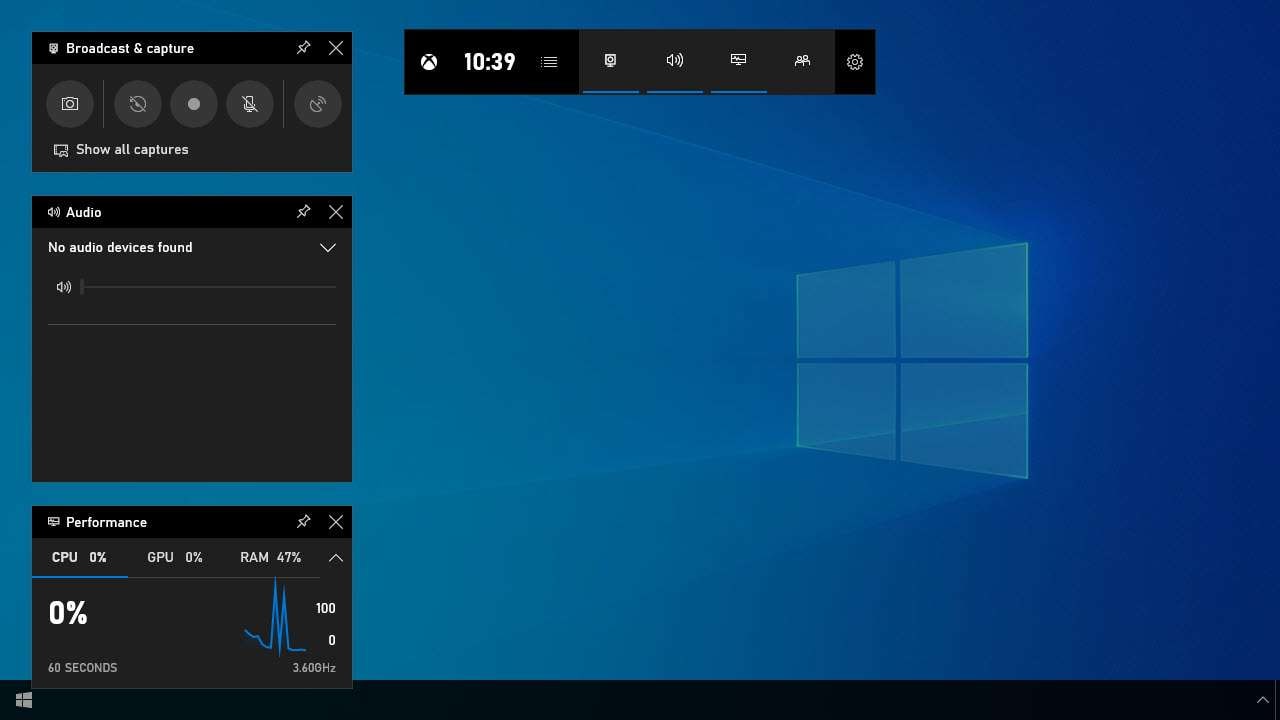
You can use it to capture your screen, camera, system audio, and microphone. Moreover, you can easily take screenshots with it, hide/uncover your cursor, and more.
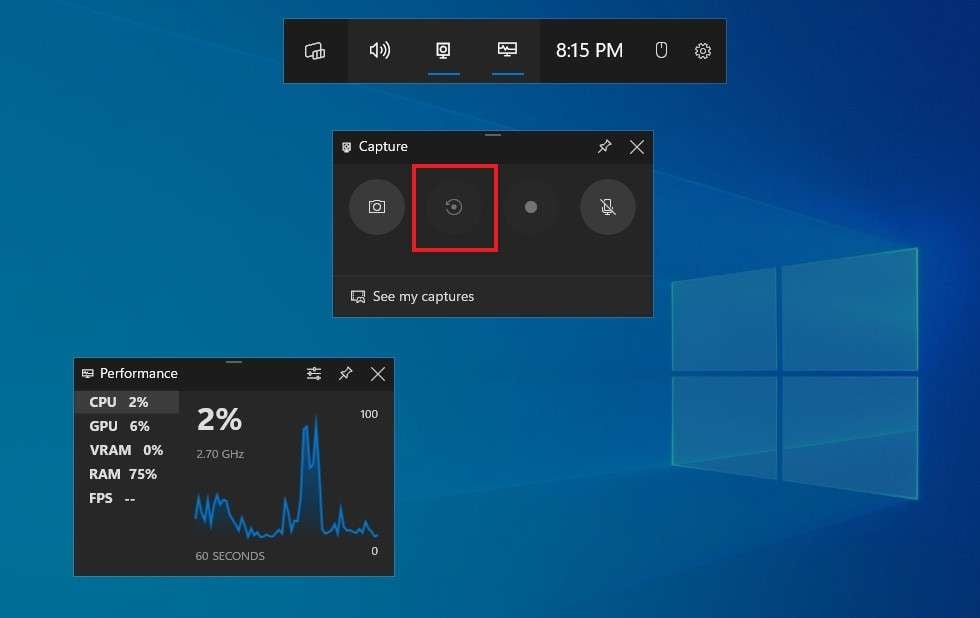
The Game Bar is interesting because it has a built-in performance monitor that can help you monitor your CPU, GPU, and RAM usage, among other things. It lets you gauge your computer’s overall health while running resource-intensive apps, which could potentially warn you of any underlying issues your PC may have.
The Limitations of Xbox Game Bar for Screen Recording
Though quite useful, the Game Bar isn’t always the ideal tool for recording videos on Windows 10. It has some serious limitations that could impact the overall user experience.
Primarily, it has a default recording time limit of just 30 minutes (which can be adjusted to 1, 2, or 4 hours). The recording will automatically stop as soon as the 30 minutes are up. 😣What’s worse is that you might not even catch that the tool has stopped recording, especially if you’re gaming in fullscreen.
The problem is that while the Game Bar is visible if you’re in windowed mode, it disappears as soon as you go fullscreen. That can be problematic for stopping and even starting your recordings.
After all, the only “notification” you get that the Game Bar has started recording while in fullscreen mode is a subtle darkening of your screen for a moment. It might be a while before you notice that the recording hasn’t started (or that it’s stopped).
Other significant limitations include the relatively low fps (frames per second) and incompatibility with platforms like Twitch and YouTube.
You can only record at 30 fps or 60 fps😣, meaning that your videos will be of a somewhat lower quality, especially if you want to catch action shots in your games.
Regarding Twitch and YouTube compatibility, streaming to these platforms from the Game Bar directly is impossible. You can only stream to Microsoft’s Mixer. At least all your videos will be saved in MP4 format, so you can easily upload them to other platforms later.
A Better Alternative to Consider - DemoCreator✨
Considering the many limitations of the Game Bar, an alternative solution is often necessary if you want to perfect your screen recordings. And there’s no better alternative than Wondershare DemoCreator.
Designed to deliver high-quality videos and offer users incredible flexibility, it comes jam-packed with powerful features that simplify video creation and editing.
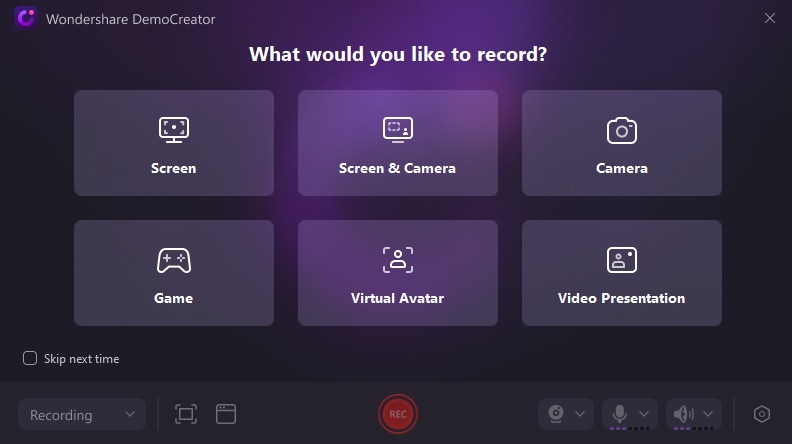
🔥It has six different screen recording modes for creative flexibility – screen, screen and camera, camera, and game recorder, as well as a virtual avatar and video presentation recorder.
There’s no limit on how long your recording can be (it all depends on your available storage). You can use it to live stream on virtually any platform of your choice – YouTube, Twitch, TikTok, or anything in between. The best part? It records in up to 120 fps and 8K, mankind it ideal for high-quality videos and action shots.
Though its abilities to record video on Windows 10 are impressive, Wondershare DemoCreator truly stands out with its built-in editor. You can use this tool to edit your audio and video, play around with different effects, add smooth transitions, remove background noise, etc.
Powered by advanced AI, this tool also automates tasks like subtitle generation and background removal.
If you’re interested in giving Wondershare DemoCreator a try, here’s how to record a video on Windows 10 with it:
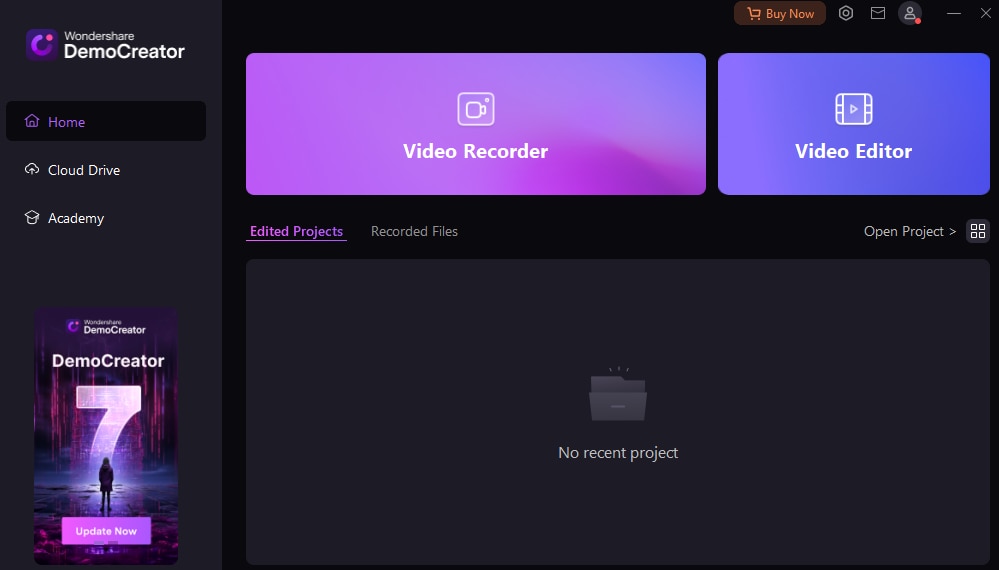
Step 1: Download and install Wondershare DemoCreator on your PC;
Step 2: Register your account and sign in;
Step 3: Go to Video Recorder and select your preferred recording mode;
Step 4: Customize your recording settings (set recording area, turn camera and microphone on/off, etc.);
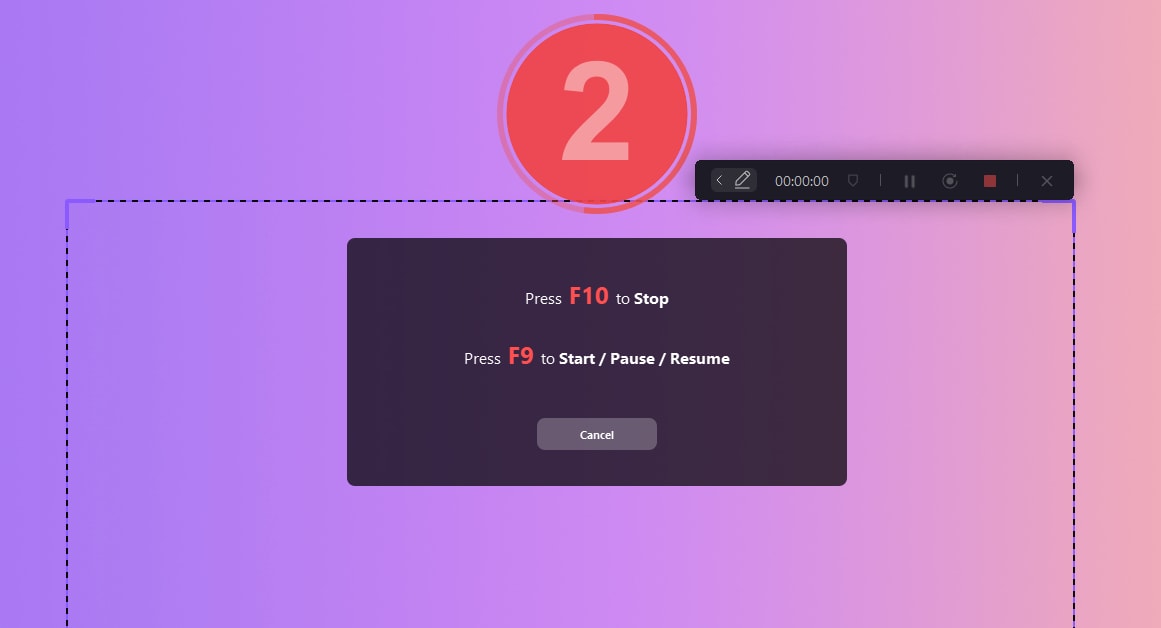
Step 5: Click the red Rec button to start recording or press the F9 key;
Step 6: Press the F10 key to stop recording.
From there, you can export your video and audio (together or separately) and edit them directly in Wondershare DemoCreator.
How to Enable Game Bar to Record a Video on Windows 10
If you’re still interested in trying Game Bar despite its limitations, you’ll need a few pointers before using this tool. Fortunately, it’s relatively easy to set things up, though you’ll first need to enable Game Bar to start recording:
Step 1: Click on the Start button and go to Settings;
Step 2: Go to Gaming > Game Bar;
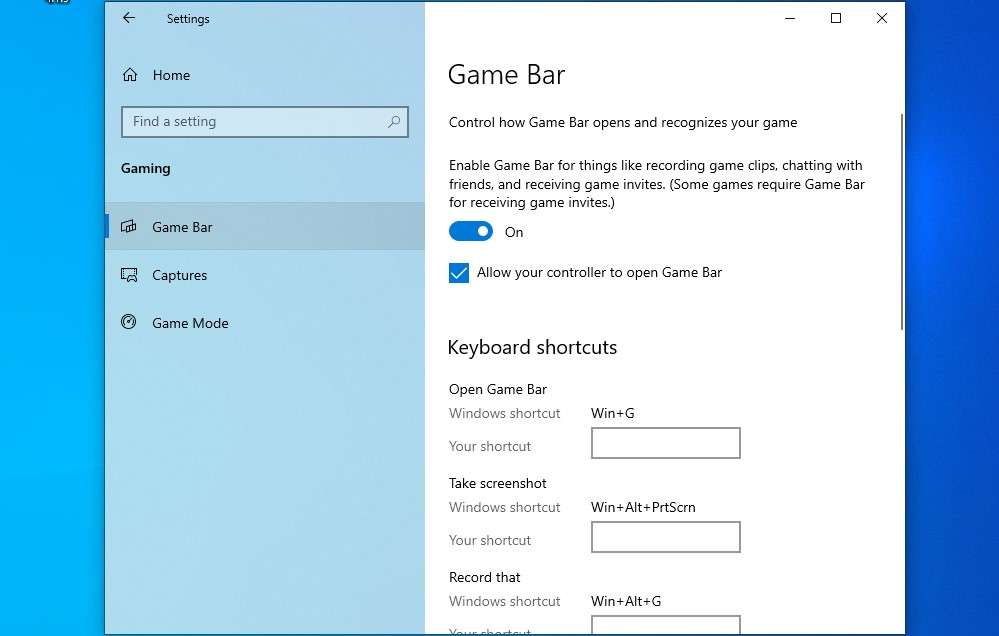
Step 3: Make sure that the slider for recording game clips, chatting with friends, and receiving game invites is turned On;
Step 4: If you’re using a controller, check the box to Allow your controller to open Game Bar.
Only after enabling Game Bar to record videos on your PC can you start using everything this tool offers.
How to Record Videos on Windows 10 With Xbox Game Bar
Once you’ve enabled Game Bar to record, you can start using it to create videos on your PC. Here’s how:
Step 1: Close all the windows you don’t want to record (Game Bar will record all system sounds, so if other windows have sounds, it will appear in your recording);
Step 2: Open the window/app/game/etc. you want to record;
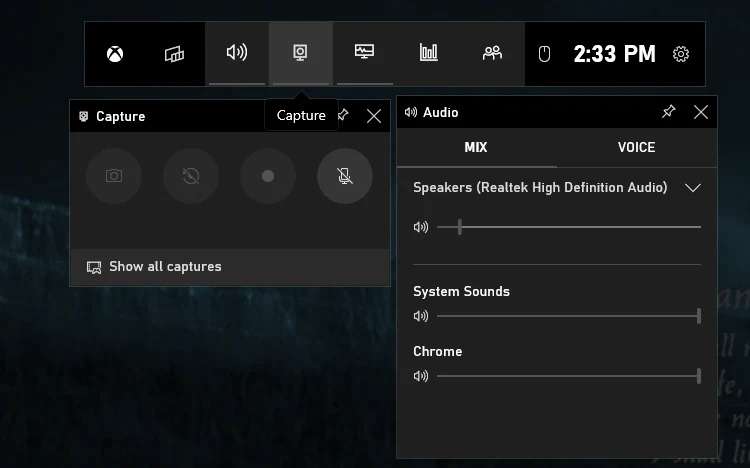
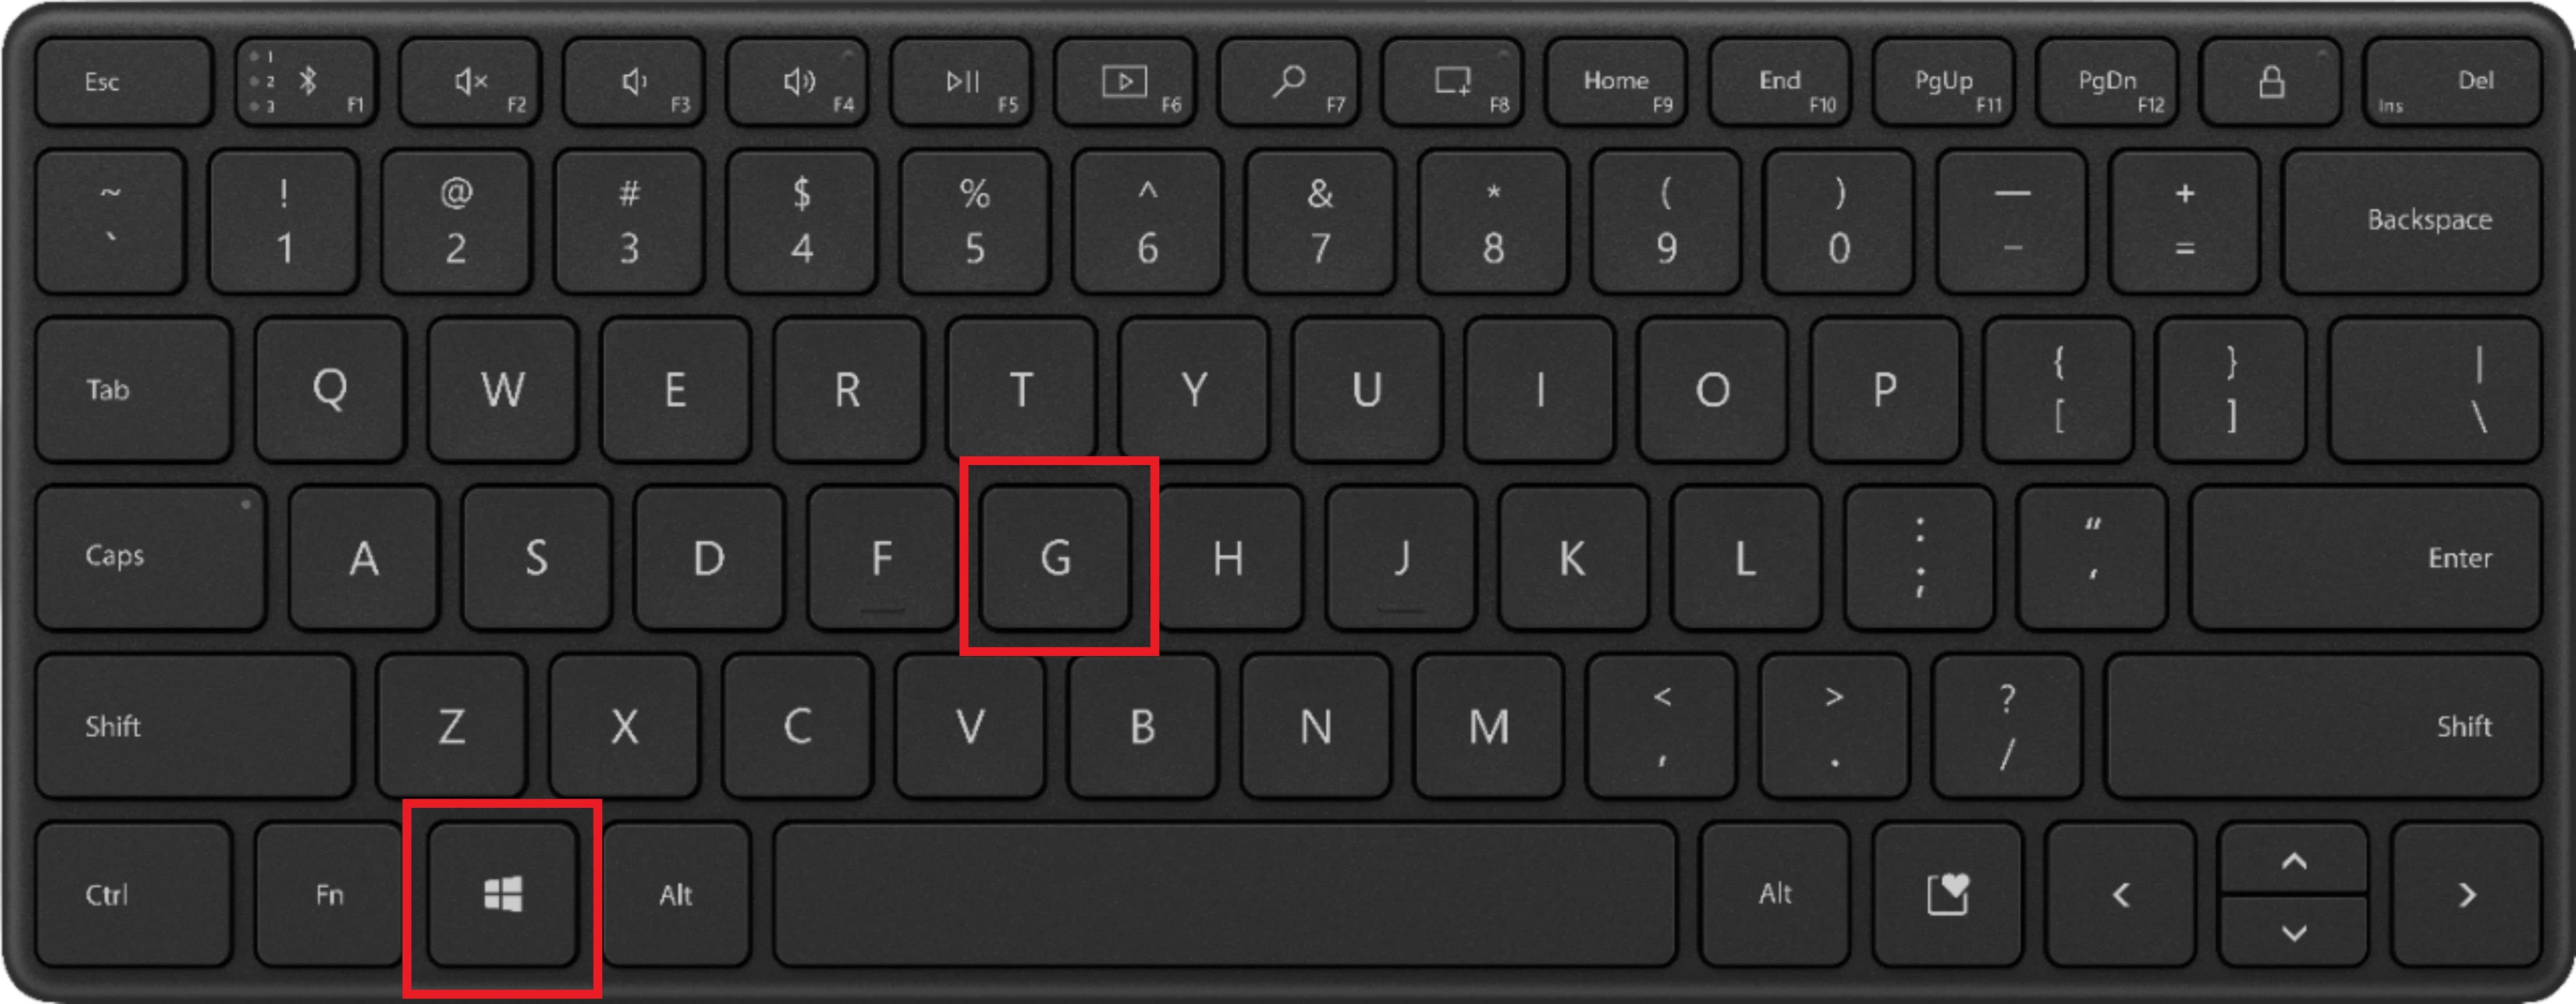
Step 3: Press the Windows key + . to start the Game Bar;
Step 4: Customize recording settings (audio, system sounds, etc.);
Step 5: Click Record or press the Windows + Alt +R keys to start recording;
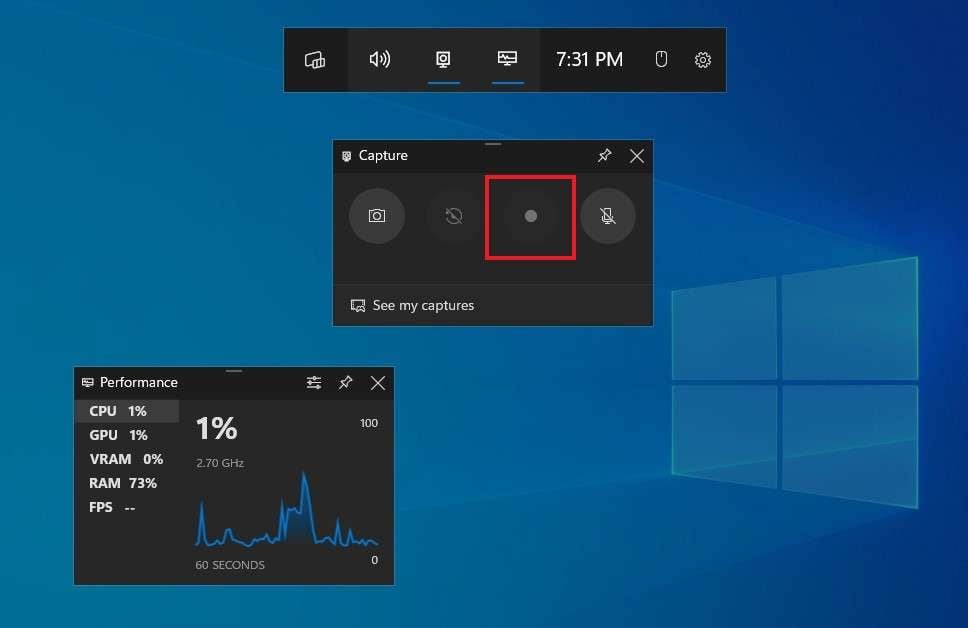
Step 6: Click Stop or press the Windows + Alt +R keys to stop recording.
You’ll get a notification that your screen capture has been recorded. You can click on the notification to open it or access the clip later by going to This PC > Videos > Captures.
How to Enable Background Recording on Windows 10
In addition to creating longer screen recording videos using the Game Bar, you can enable background recording for shorter content. Especially useful for gamers who want to create action shots, background recordings can capture and save the last 15 seconds to 10 minutes of your gameplay.
To enable background recording, you’ll want to follow these few steps:
Step 1: Click on the Start button and go to Settings;
Step 2: Go to Gaming > Captures;
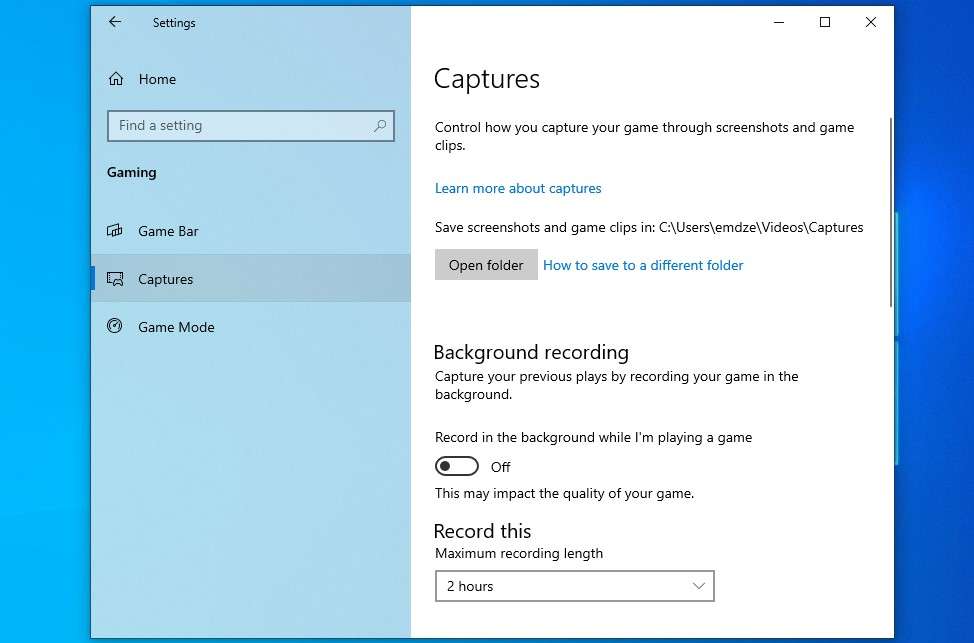
Step 3: Toggle the slider to On under Background Recording;
Step 4: Select the length of your background recording under Record the last (you can choose 15 seconds, 30 seconds, 1, 3, 5, or 10 minutes);
Step 5: To create a background recording while playing, press the Background button on the Game Bar or press the Windows + Alt + G keys.
Customization Options and Features of Game Bar
Despite being somewhat limiting, Game Bar offers several customization options and convenient features that make recording videos on Windows 10 easier:
- Convenient keyboard shortcuts – start and stop recordings, create background recordings, and more by pressing just a few keys on your keyboard;
- Take screenshots – in addition to recording videos, you can also use the Game Bar to take screenshots;
- Performance monitor – keep an eye on CPU, GPU, and RAM usage while playing and recording;
- Resources – take a look at programs that are taking up your computer resources and end tasks that are too consuming directly from the Game Bar;
- Xbox social – send messages to your gaming friends or start a party and use voice chat;
- Widgets – install additional widgets that improve your gameplay directly from the Game Bar;
- Recording customization – set recording time limit (from 30 minutes to 4 hours), choose whether to record audio and microphone, adjust the audio quality, set your preferred fps and video quality, and more.
The Game Bar can be a handy tool for recording videos on Windows 10. However, it’s far from ideal if you want to improve the quality of your content.
Conclusion
Recording videos on Windows 10 is straightforward if you’re using the right tools. Despite its lack of features and customization options, the Game Bar offers a seamless way to capture important moments.
Still, you’ll need a tool like Wondershare DemoCreator to take your videos up a notch and record and edit them like a pro.
FAQ
What are the best screen recorders for Windows 10?
These include the Game Bar and Wondershare DemoCreator. The Game Bar comes pre-installed with your operating system so you can use it immediately. DemoCreator is compatible with Windows and Mac systems, giving you more control over your recordings and editing capabilities.Can I record gameplay on Windows 10?
Yes, you can record gameplay on this operating system using either the Game Bar or Wondershare DemoCreator.What are the shortcuts for recording videos on Windows 10?
In the Game Bar, there are several shortcuts you could use:- Windows + G keys to open Game Bar;
- Windows + Alt + G to create a background recording;
- Windows + Alt + R to start/stop recording;
- Windows + Alt + PrtScr to take a screenshot.
Can I edit recorded videos using the Xbox Game Bar?
No, you cannot edit your videos directly in the Xbox Game Bar. However, you can use any video editor of your choice to edit the captured videos since the Game Bar saves them in the MP4 format.


