Video conferencing platforms like GoToMeeting are not just limited to video calls only. They come along with many features that make remote collaboration easier. I've been using Zoom for work meetings and discovery calls for two years. I've also been invited to many GoTo Meetings and organized as well.
GoTo Meeting has a built-in meeting recorder, but it has some limitations. You can record Go To meetings and save it on your device or on the cloud. However, the recording feature is only accessible if you have a pro account and the admin’s permission. That’s why attendees struggle with recording meeting sessions.
But the good news is: you don't have to worry about those issues anymore. Because you can easily record meetings using Democreator. You can also edit, and share your meetings easily.
In this guide, I'll share the simple steps on how to record GoToMeeting sessions on different devices. Let’s begin!
In this article

Part 1: Can I Record GoToMeeting Sessions as An Attendee?
Not everyone has the aaccess to the GoTo recording feature. To be more specific, only organizers and co-organizers can record the meeting sessions without any watermarks. And if you’re an attendee, you can’t record meetings without the host's permission. Organizers can make it available for other attendees to view later.
When a GoTomeeting is recorded, the presenter's screen, audio, and any shared applications are included in it.
Although hosts can record GoToMeeting sessions, it's better to use a reliable screen recorder such as DemoCreator with automatic recording and editing features.
Part 1. How to Record GoToMeeting Sessions on iPhone/iPad?
GoTo Meetings have improved over time and it’s not just a video call platform. It has many extra features that help people and teams to collaborate and communicate remote setups.
The first and most helpful feature that I like the most about this app — is the go to recording feature. It's pretty easy to use, and the ''Record' option is available right after you start your meeting. But remember, only the host/organizer can record the video conferencing calls with the built-in GoToMeeting recorder. Here, I'll explain how to record Go To meeting on your mobile phones.
Steps to Record Go To Meeting on iPhone:
Follow these steps to record GoTo meeting sessions on iPhone :

Step 1: Open> iPhone settings and select> 'Control Center.' Click> '+' icon located next to 'Screen Recording' to enable the feature.
Step 2: Open> GoTo Meeting app on your iPhone or iPad. Start/join> GoTo Meeting session to record.

Step 3: Swipe up from the bottom of the screen and find > Red dot.' Press and hold the button for a few seconds and turn on> microphone audio.

The screen recording of GoTo Meeting will start. It will be automatically saved in the 'Photos' app. You can also share the recording with all attendees .
Part 2. How to Record a GoToMeeting on Android Devices?
You can use the built-in screen recorder of your android phone to record GoTo Meeting sessions and share it with the attendees. Nowadays most android devices have recording features that can help you record your meetings without any hussle. It is quite easy to use.

Here is how to record a GoToMeetings Android device:
Step 1: First, start/join the GoToMeeting on your Android device.
Step 2: Swipe down the screen to select> 'Screen Recorder.'

Step 3: Click> Start Recording and GoTo recording will start on your Android phone.
Step 4: When the meeting ends, select> 'Leave' icon and click> ‘Stop’ to stop recording. Meeting recordings will be saved in your phone’s 'Gallery' app.
Part 3. How to Record a GoToMeeting Session on Windows/Mac?
You can record GoToMeetings with its built-in recorder and save them for future reference. However, its built-in recorder is only accessible if you're a meeting host. Plus, you'll need a Pro account to enable the recording feature. These limitations make it a less ideal choice for most people.
Follow these steps for go to recording on laptop or mac:
Step 1. Start or join a GoToMeeting by clicking> "Meetings" and "Create".

Step 2: Select> "Record" to start go to recording

Step 3. To pause or stop recording,Select> "Stop Record".

Step 3. Once the recording is over, you can access the recording through meeting ID or notes. If you’re using the local recording function, recorded sessions will be saved as a WEBM file.
Part 4. Best Way to Record GoTo Meetings (Recommended)
DemoCreator- a nice alternative to GoToMeeting’s built-in recorder, is the best option for GoTo recording. You can record high-quality meetings with just a few clicks.DremoCreator Key Features & Advantages
- Six distinct recording modes
- 4K/8K recording at up to 120 fps
- Wide range of screen drawing tools
- Record screen and audio tracks separately
- Separate audio and video recording for more
- Advanced editing options
- Text-based editing
- Easy to use
Steps to Record GoToMeeting with DemoCreator
Step 1: Download and Install DemoCreator

First, you need to download this software tool from the buttons given below:
After the download finishes, now you need to install it so you can record GoToMeeting.

Step 2: Open Screen Recorder
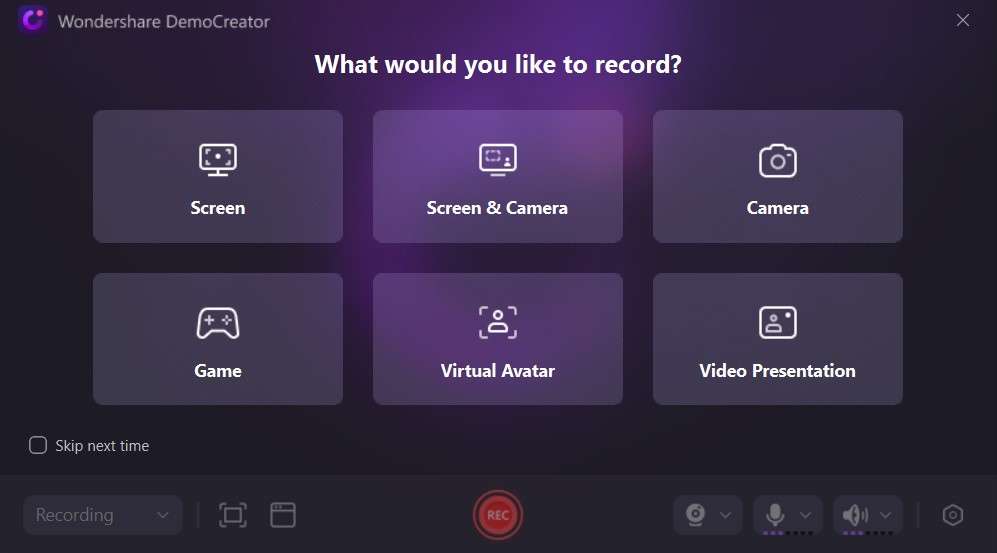
In the next step, you need to launch the software tool, so you can start recording the screen without any hassle. To start with it, simply click> Record Screen in the start-up window, and go to recording will start automatically:

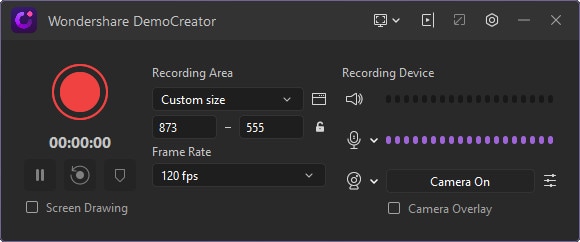
Step 3: Customize the Recording Source
In DemoCreator, you can fully customize your screen recordings. You can also select the desired source of your audio i-e microphone, system sound of both, and the Webcam to include that in your recordings as well.


Step 4: Start/Stop Screen Recording
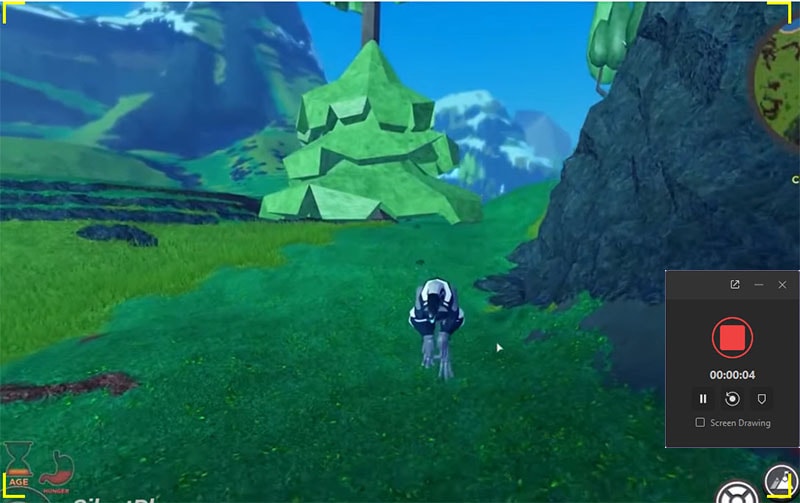
After you're done with Go To recording, Click> Red circled recording button which will eventually start the recording of your audio.
To stop the recording, tap> Square-shaped button that will stop the recording of your laptop screen.

Step 5: Preview your recording
Once you’re done with Go To recording, now you can preview your recorded meeting.

Step 6: Edit your recording
Enter> DemoCreator Editor to edit your recordings


Step 7: Save the Recordings
Click> Fast Export to save and download your recording

Conclusion
GoToMeeting is a popular video communication platform with unlimited cloud storage, recording and transcribing options, and even robust security controls. While you can record GoToMeeting sessions with a built-in recorder, the feature is only accessible to the meeting organizers.
After reading this article, now you’re aware of how to record Go To meetings using its built-in recorder with basic features. If you're an attendee or you want a high resolution recording with clear audio, you can use an advanced tool such as DemoCreator. It is a great choice to schedule or attend meetings on video conferencing platforms like GoToMeeting, Zoom, Microsoft Teams, Google Meet, and even Webex. Moreover, it is easy to use_ and it supports automatic recording and editing features. Download it to have a try now!
FAQ
Can I record GoTo meetings?
Yes, you can record GoToMeeting sessions using built-in recorder and third-party apps. DemoCreator is the most suitable and easy to use recorder that can record and save your go to meetings.How to download a GoToMeeting recording?
If you’re using the built-in recorder, find GoTo recording locally on your laptop or in the GoTo application. And check the document folder for local recordings. For cloud recordings, download files in MP4 format via accessing the dashboard. Or go to the Video Library and Click>More, then Click> Download.Can GoToMeeting Detect Screen Recording?
Yes, GoToMeeting can detect the screen recording as well as it notifies all the participants that the meeting is being recorded.You may try a reliable third-party screen recorder like DemoCreator if you want to record Go To Meeting secretly.


