

Knowing how to record MP4 on Windows can always come in handy. Perhaps you’ll need to record an online class for easier note-taking or an online meeting for an important project. You might need to create a video presentation for your class or a software tutorial for your client. You might even decide to try your hand as an online content creator.
Whatever the case, the sooner you learn how video recording works on your PC, the easier it will be for you when you actually need this skill.
The following guide will take you through the best types of MP4 screen recorders for PC and help you choose the most suitable option for you.
In this article
Comparing the Methods for Recording MP4 on Windows
| MP4 Screen Recorder for PC |
Ease of Use | Video Recording Length |
Video Format | Price | Best for |
| Game Bar | ⭐ ⭐ ⭐ ⭐ | 2 hours | MP4 | Free | Game recording |
| Wondershare DemoCreator | ⭐ ⭐ ⭐ ⭐ ⭐ | No limit | AVI, DV, FLV, MKV, MP4, M4V, 3GP, MOV, MPG, MPEG, VOB, DAT, TS, TP, TRP, M2TS, WMV, ASF, DVR-MSAVI | Quarterly Plan – $29.99 Yearly Plan – 59.99 Perpetual Plan – 79.99 |
All-purpose recording |
| Screen Recorder | ⭐ ⭐ ⭐ ⭐ | No limit (based on internal storage) | MP4 | Free | Browser tab recording |
How to Record MP4 on Windows?
While many different solutions will let you record MP4 on Windows, they can all be divided into three broad categories – built-in tools, third-party suites, and web-based recorders.
Each category has unique strengths and weaknesses that might affect the overall user experience and make a specific tool more suitable for different uses.
1. Record MP4 on Windows With Built-in Recorder - Game Bar
If you’re on a budget and need to record a video on your desktop quickly, you’ll probably be best off using the built-in Game Bar. Pre-installed on all Windows 10 and 11 machines, it’s easy to use, convenient, and most importantly – free.
While primarily made for recording gameplay videos on your computer, it can serve its purpose as any run-of-the-mill screen recorder. It can simultaneously record your screen and camera, capture your entire screen, a single window, or a specific portion of your desktop, catch system and microphone audio, and more.
If you’re using it for gaming, you’ll also enjoy its Xbox social feature, which lets you send texts, enter group chats, and stay in touch with your gaming community.
All your videos will be recorded in the MP4 format, allowing you to share them using any platform or channel.
Here’s how to record MP4 on Windows using the built-in Game Bar:
Step 1: Open the game/program/window you want to record;
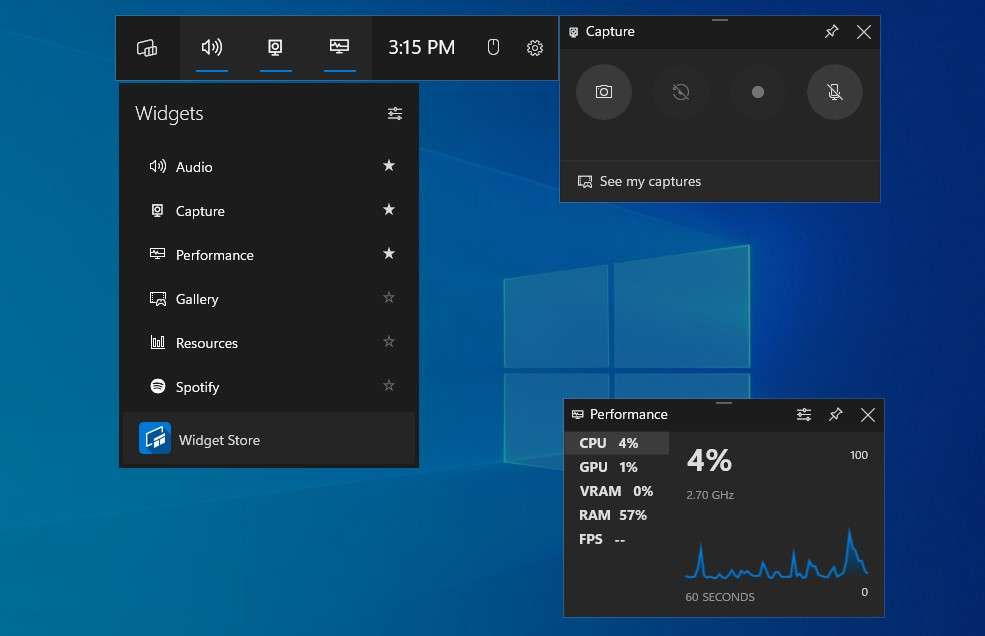
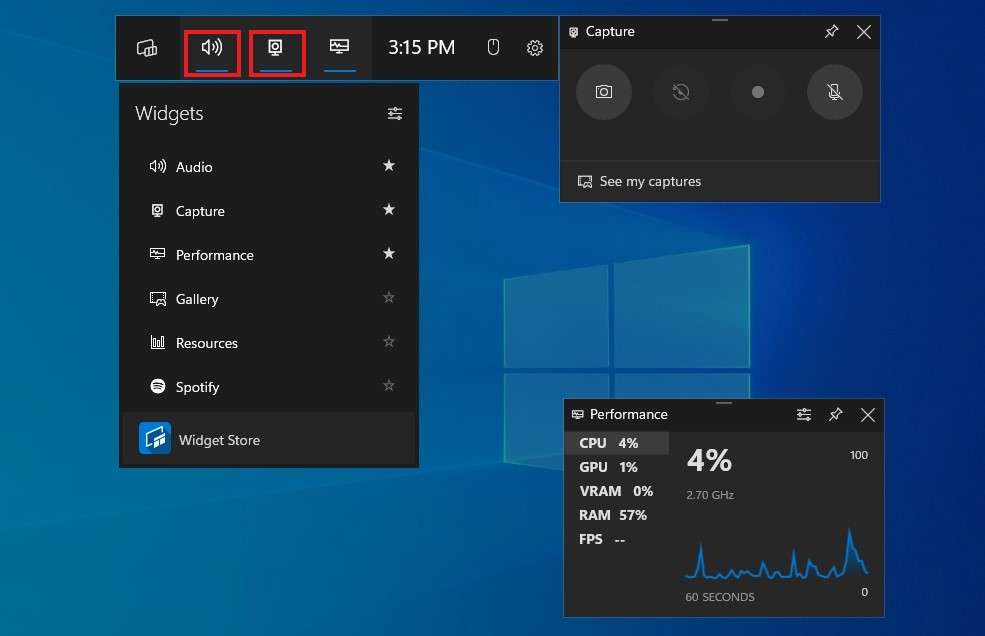
Step 2: Press the Windows + G keys to open the Game Bar;
Step 3: Use the Audio and Capture tabs to customize recording settings (turn the microphone on/off, enable camera, etc.);
Step 4: Click the white Circle icon or press the Windows + Alt + R keys to start recording;
Step 5: To stop recording, click the white Square icon or press the Windows + Alt + R keys.
You’ll be able to see your recordings under the See my captures tab. If needed, you can edit them using any video editing tool of your choice or immediately share/upload them wherever you’d like.
2. Record MP4 on Windows With Video Recorder Software - DemoCreator

While convenient, built-in tools like the Game Bar leave much to be desired. They lack any advanced features that can make your videos look more professional. So, if you’d like to create higher-quality content and have full creative freedom, your best option would be a third-party video recorder like Wondershare DemoCreator.
An all-in-one recorder and editor, DemoCreator is the go-to choice for virtually any purpose. Whether you’re creating corporate videos, educational tutorials, entertaining social media content, or anything in between, you can rely on this tool to ensure flawless videos.
It is fully customizable to suit your unique needs and preferences. Boasting no less than six distinct recording modes, you can use it to schedule your recordings, live stream, capture screen, camera, system audio, and microphone with the utmost ease, and more.
It has many convenient features – from virtual background creation to voice changer and AI avatar recorder.
Here’s how to record MP4 on Windows using Wonderhsare DemoCreator:
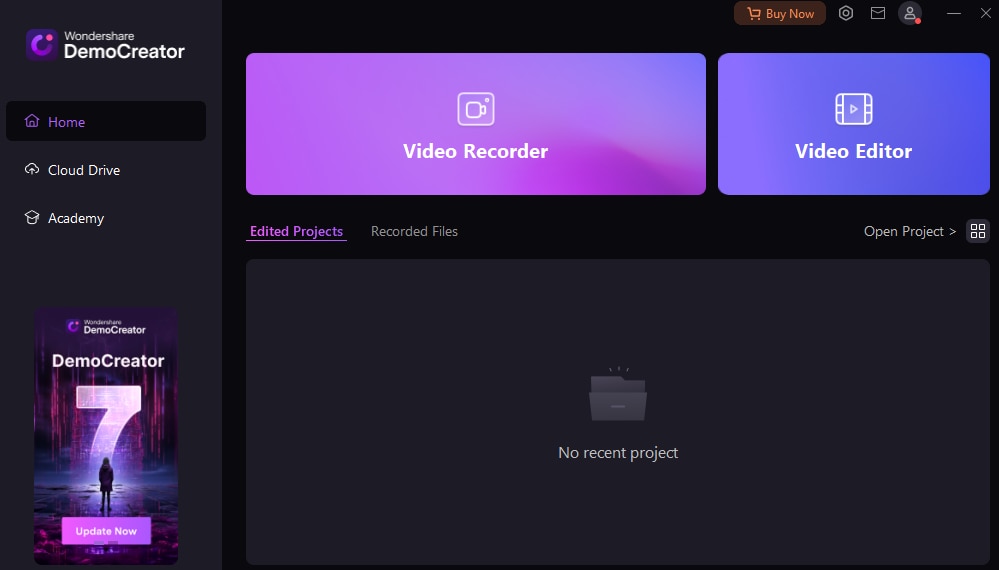
Step 1: Download and launch Wondershare DemoCreator on your PC;
Step 2: Open the window/program/game you want to record;
Step 3: Navigate to Video Recorder;
Step 4: Select your preferred recording mode based on your needs;
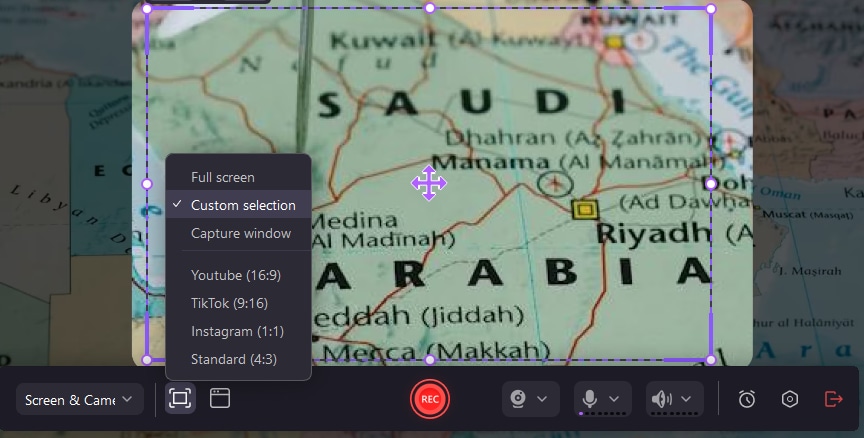
Step 5: Customize recording settings – enable/disable webcam, microphone, and system audio, specify your recording area, and more;
Step 6: Choose your Export Configuration – Fast Merge (to keep audio and video recordings combined) or Track Separation (to keep recordings separate for easier editing);
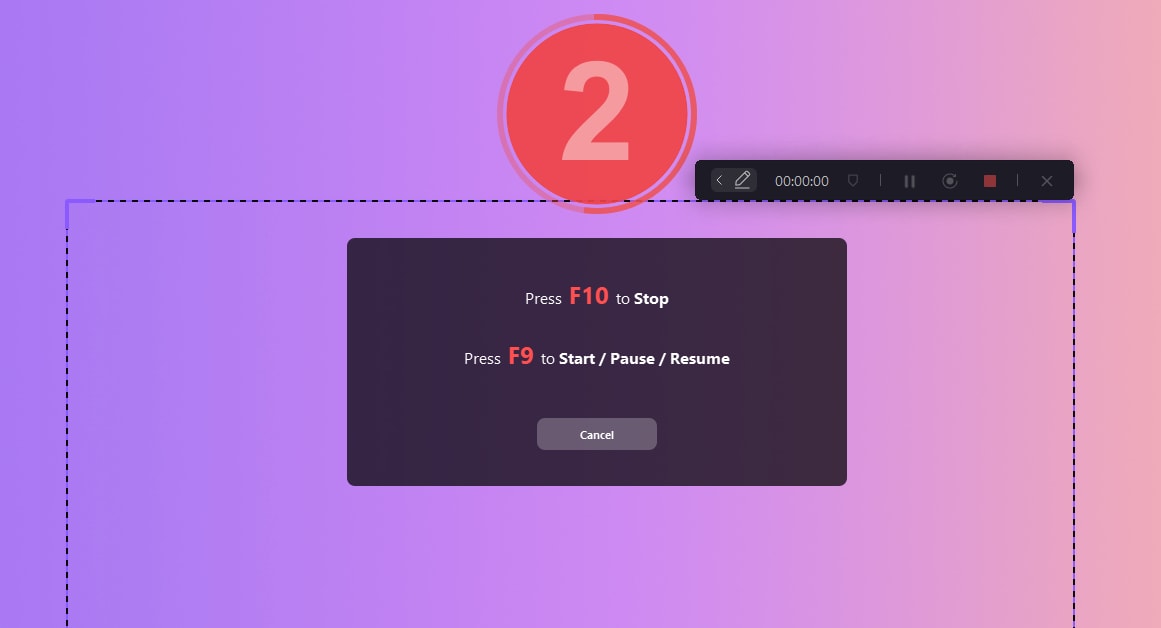
Step 7: Click the red Rec button or press the F9 key to start recording;
Step 8: Click the white Stop button or press the F10 key to stop recording.
Once you’re done recording, you can stay in Wondershare DemoCreator to edit your video. It offers countless video and audio editing features, AI tools, and creative assets, allowing you to perfect every minute aspect of your recordings.
3. Record MP4 on Windows With an Online Tool - Online Screen Recorder
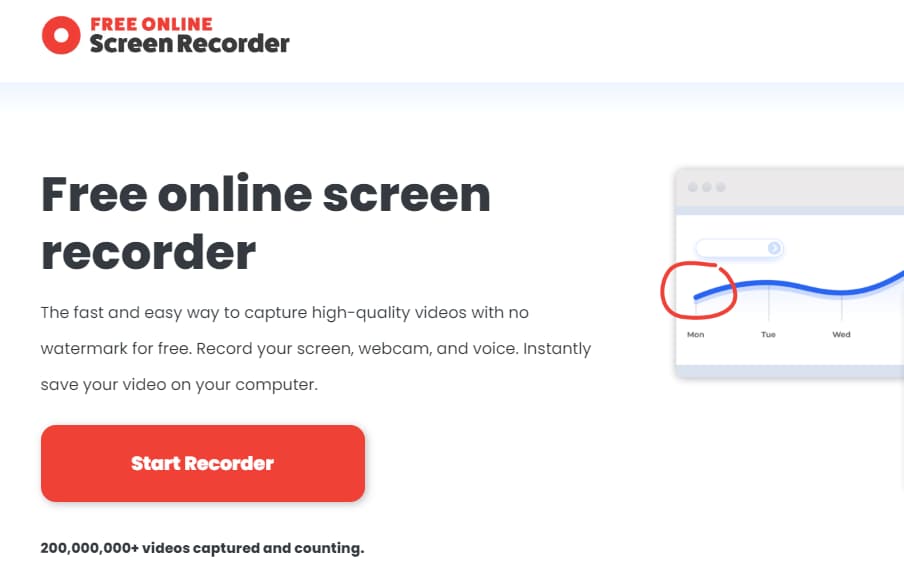
Finally, if neither of the options above suits you, you might want to give an online screen recorder a try. Tools like Screen Recorder allow you to record a browser tab, window, or desktop without requiring you to download or pay for anything.
You don’t even have to sign up to start recording your video.
Screen Recorder allows you to capture both your webcam and computer screen and your audio. It also comes with some basic video effects, such as screen drawing and zoom, that let you emphasize important parts of your recording or add more visual interest.
Here’s how to record an MP4 on Windows using Screen Recorder:
Step 1: Open the browser tab/window/screen you want to record;
Step 2: Visit the Screen Recorder website and click the Start Recorder button;
Step 3: Select what you want to record (browser, window, full screen) and click Share;
Step 4: Mute/unmute your microphone and turn your webcam on or off;

Step 5: Click the red Rec button to start recording;
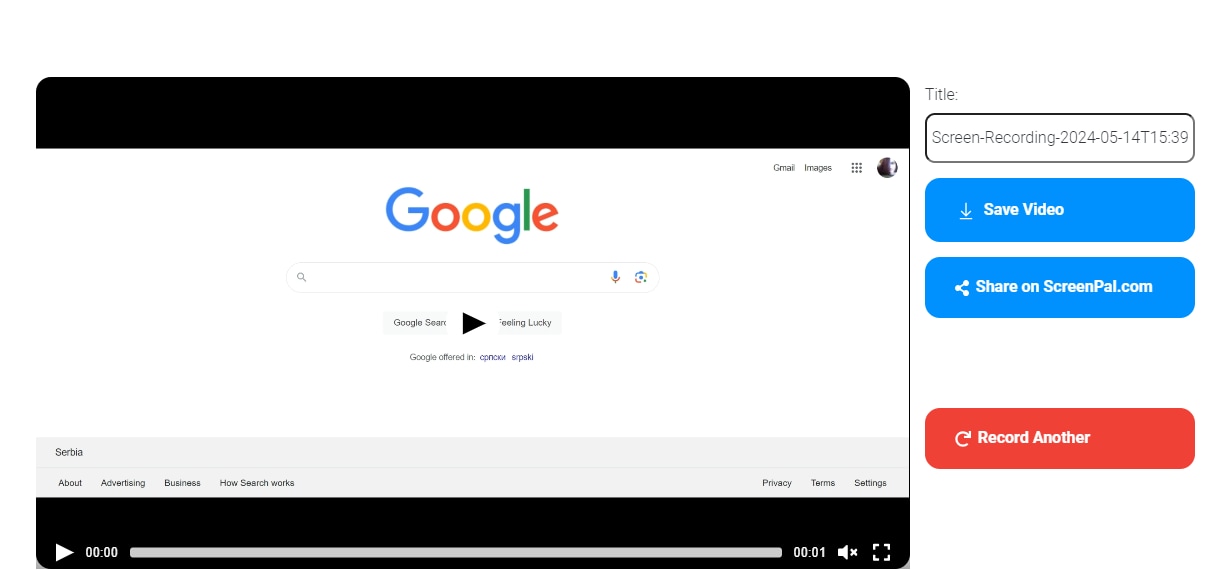
Step 6: Click Done Recording when you’re finished;
Step 7: Select Save Video to download it to your local storage.
Ensure you have enough space in your local storage to download your video without issues.
How to Pick the Right Option for Recording MP4 on Windows
Choosing the right MP4 recorder could be confusing. Here’s what you’ll want to keep in mind when making your decision:
- Your recording purpose – free recorders like the Game Bar and Screen Recorder could be suitable if you just need a quick video to share with friends. However, if you need more professional-looking videos for presentations, meetings, online content, and more, you’ll be better off with a dedicated recorder and editor like DemoCreator;
- Available features – if you want higher-quality videos, you’ll need tools that have advanced features for easier recording and editing;
- Price – you don’t want to spend a fortune on a screen recorder, but you’ll usually have to pay for it if you need access to better features;
- Ease of use – the easier a tool is to use, the more you’ll get out of it;
- Video quality – for professional content, you’ll need tools like DemoCreator that can record in up to 4K and 120fps. For personal uses, tools that have lower video quality could be suitable.
Ideally, you’ll want to test out a few different options to see which one suits you best. Wondershare DemoCreator has a free trial, while Game Bar and Screen Recorder are free to use, so you won’t have to spend a penny to test them all out and determine the best choice for you.
Tips for Using an MP4 Screen Recorder for PC
Using a screen recorder is typically a no-brainer. However, there are a few things you could do to improve the quality of your recordings:
- Close all apps/windows/tabs you’re not using – not only will additional apps/windows/tabs be confusing while you’re recording, but they’ll also reduce your computer’s performance and potentially affect the quality of your video;
- Use good lighting – if you’re recording your webcam, use good lighting to remove distracting shadows and remain visible in your recordings;
- Record in a quiet environment – if you’re using video narration, record in a quiet environment to avoid distracting noise that could be difficult to edit;
- Edit your videos – always edit your videos to make them easier to understand and follow.
Following these tips will ensure your content looks good, engaging, and professional.
Conclusion
Windows users have plenty of different options for recording MP4 videos. Whether you go for built-in tools like the Game Bar, dedicated solutions like Wondershare DemoCreator, or online tools like Screen Recorder, you’ll get high-quality videos with minimal effort.
