

Recording your screen with audio can come in handy in numerous scenarios. For instance, if you’re gaming or holding a conference or meeting and want to record some of the most notable moments, you’ll need the help of a reliable screen recording tool.
This guide will show you how to screen-record on Windows 10 with audio to get the best results. We’ll compare some of the most popular solutions and help you select the one suitable for your needs and recording preferences.
In this article
How to Screen-Record on Windows 10 With Audio Using DemoCreator
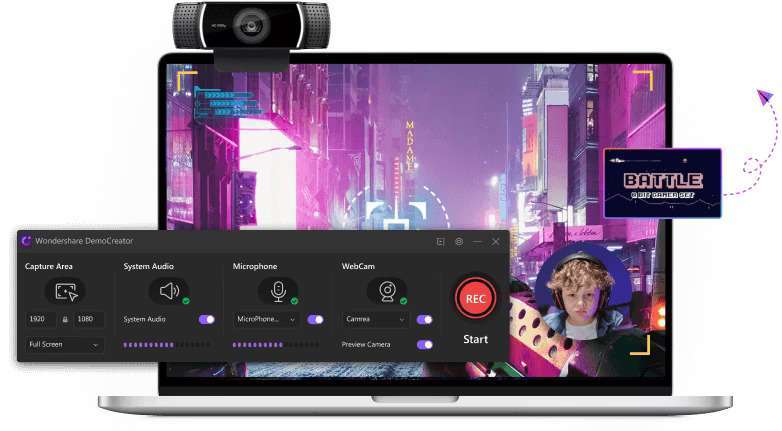
Wondershare DemoCreator is among the market’s most powerful screen and audio recorders. It can record up to 8K, with 120 FPS, making it ideal for any industry, profession, and purpose. This tool is so outstanding that you can easily edit your videos in post-production, add auto-captions, annotations, and effects, change the voices, or use other AI-powered tools to elevate your experience.
To use Wondershare DemoCreator, head to the official website, download the tool to your Windows 10 PC, and follow the guide below to record your screen with audio:
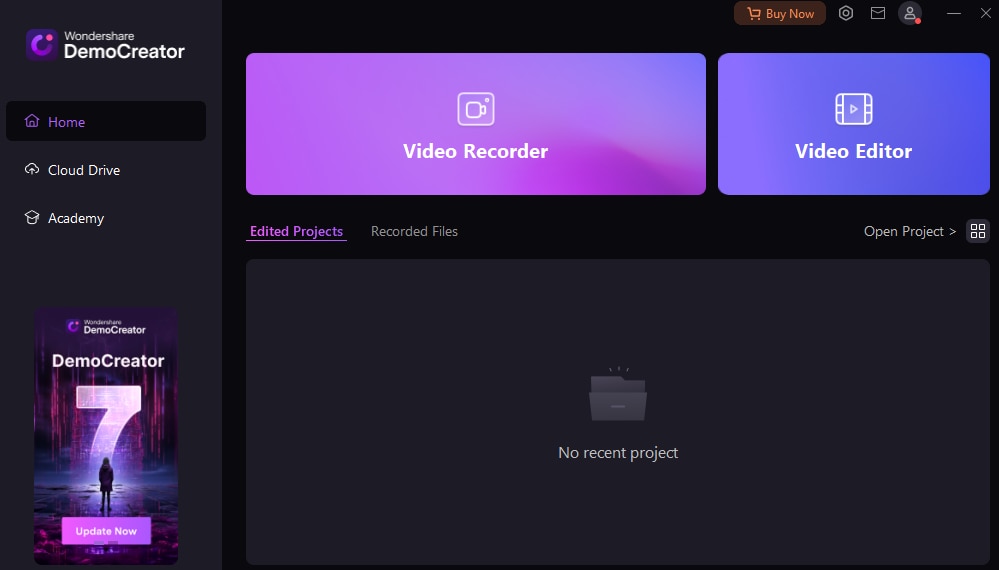
Step 1: Open Wondershare DemoCreator and click the Video Recorder.
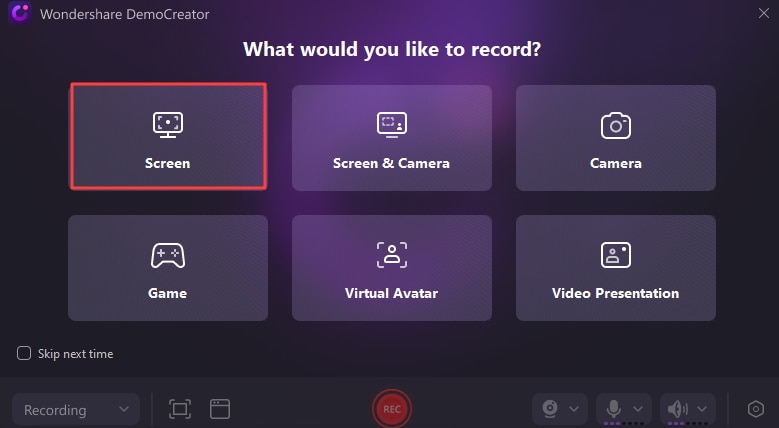
Step 2: Select the recording option (in this case, Screen Recording).
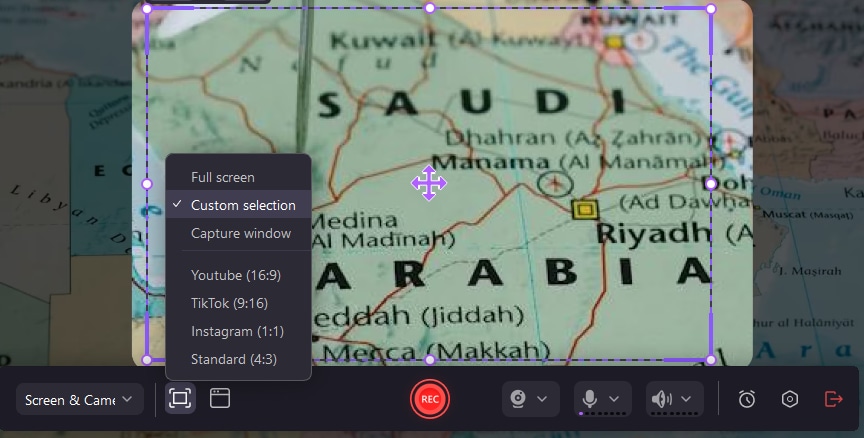
Step 3: Set your recording preferences.
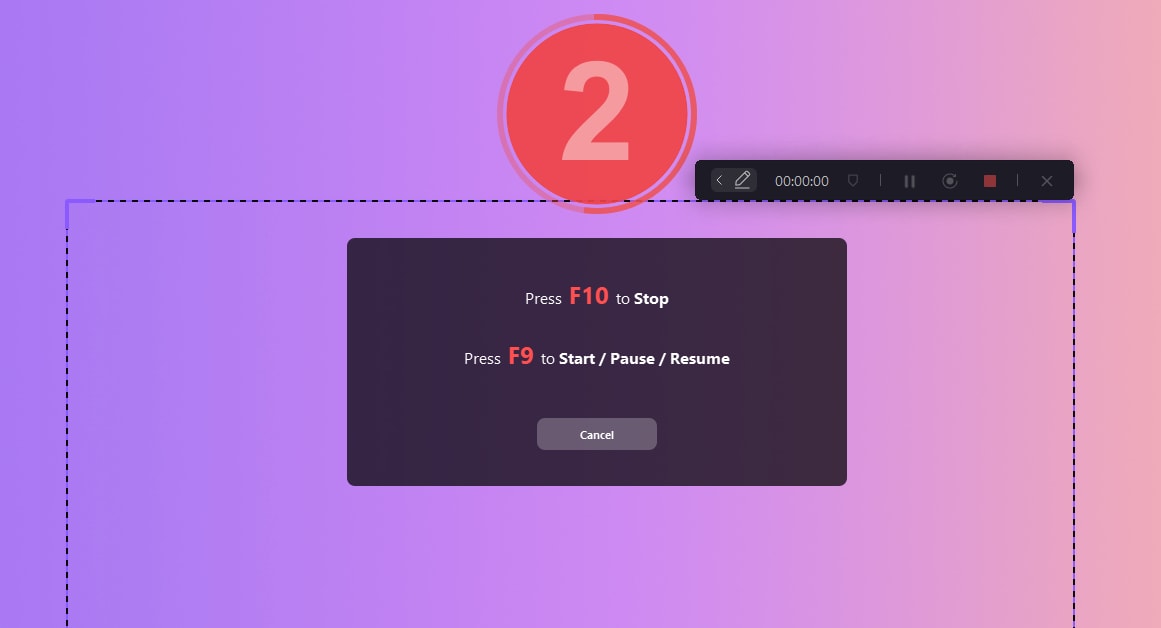
Step 4: Click the REC button to start recording or press the F9 key.
Step 5: Press F9 to pause the recording or F10 to finish the recording process.
How to Record the Screen and Audio in Windows 10 With Xbox Game Bar
Windows devices have built-in screen recording tools to help you capture your favorite computer moments. Microsoft designed the Xbox Game Bar primarily for gaming, but you can also use it for calls, conferences, videos, and other needs and preferences. Below is a guide to using this tool to record your screen with audio on Windows 10:
Step 1: Open the app or program you want to record.
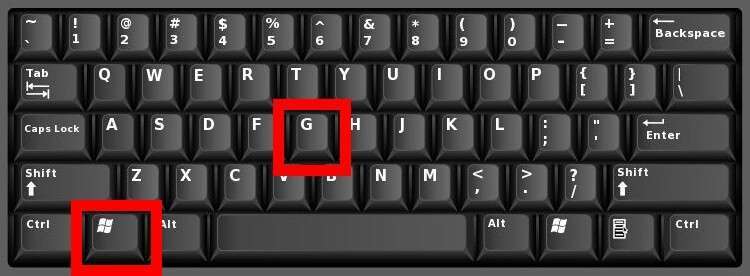
Step 2: Press the Windows + G keys on your keyboard.
Step 3: Click the Menu icon to select recording preferences.
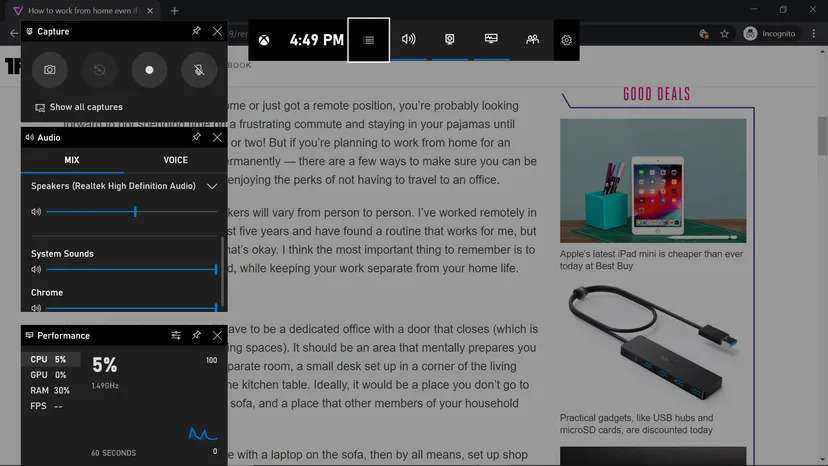
Step 4: Click the Record button to start the process.
Which Option Should You Use to Record the Screen on Windows 10?
Choosing between these two options may be overwhelming, but we’re here to help. Below is a table where you can see all the differences, features, and pros and cons of these tools to determine which solution fits your needs and preferences best.
| Screen recorder | Features | Pros and cons |
| Wondershare DemoCreator | Voice changers, auto-caption, editing tools, annotations, etc. |
👍Pros:
|
| Xbox Game Bar | Audio settings, screenshots while recording, etc. |
👍Pros:
|
As you can see from the table above, the Xbox Game Bar is a simple and lightweight built-in Windows tool that you can easily access. However, it doesn’t provide additional features that may improve your recordings and take your videos to the next level. You can only record and save your videos and use another tool to make the recordings look professional.
On the other hand, Wondershare DemoCreator provides professional tools and features you can use regardless of your skill level. Thus, you can create fantastic screen recordings, edit them, and share them with your close ones without using several tools.
If you’re searching for a tool to maximize your productivity and efficiency, Wondershare DemoCreator is the undeniable winner.
Tips for Recording Your Windows 10 Screen With Audio
Creating professional screen recordings on Windows 10 may be a pain in the neck, especially if you have no experience in the field. You may encounter numerous issues on your journey, such as background noise, which can be overwhelming.
Therefore, check out the tips below to maximize productivity and efficiency for the best recording outcome:
- Record in a quiet environment – Implementing this tip will minimize the need for advanced video denoisers and cut production time.
- Create samples – Before jumping into recording, test the environment and the recording process to ensure you get the best results.
- Review your recordings – Once you finish recording, review the results to see what you can improve the next time and what aspects you can edit.
- Edit the videos in post-production – After recording your screen, use editing solutions to make your videos look and sound professional.
Video Editing Tips to Consider
Once you finish recording, you’ll probably jump into the editing process. Check out the essential tips for getting the best possible results:
- Use annotations – Annotations can emphasize the vital parts of your recordings to help you convey the message of your videos.
- Consider captions – Captions will make your recordings more accessible, so add them to improve your videos’ professionalism.
- Enhance the audio – Editing tools like Wondershare DemoCreator have denoising features to eliminate background noise and improve the audio.
Incorporating these tips into your screen recording journey will help you achieve fantastic results.
What You Need to Record Screen and Audio in Windows 10

Recording your screen on a Windows 10 device is simple, and you won’t need too many tools to start your journey. Below are all the elements you need before you press the REC button:
- Reliable hardware – Ensure you have a processor to support recording and a microphone to pick up audio elements.
- A high-quality recording tool – Your chosen solution will make or break the recording experience, so research the market carefully and select the tool that fits your preferences.
- Post-production tools – You’ll also need tools to edit and prepare your videos for the audience.
As you can see, you won’t need too many elements to ensure the best recording experience.
Conclusion
Screen recording with audio is a phenomenal method for preserving your memories and capturing some of your essential Windows 10 moments. Thus, we’ve researched the market to discover the most reliable recording methods, which we’ve presented in the guide above.
If you’re searching for the most universal yet robust recording software, we recommend checking out Wondershare DemoCreator. It’s an all-in-one tool that can take your videos to the next level.
FAQ
-
How do I record screen and audio on Windows 10?
You can choose between two reliable tools to record your screen and audio on Windows 10: Wondershare DemoCreator and Xbox Game Bar. Both will provide a satisfying experience, but the latter doesn’t have enough advanced features to create professional results. -
What is the best third-party tool for recording video and audio on Windows 10?
Wondershare DemoCreator is the best, most universal third-party tool for recording video and audio on Windows 10. It lets you customize your experience and edit your recordings in post-production to create phenomenal, out-of-this-world results. -
How can I record video and audio separately in Windows 10?
You can use Wondershare DemoCreator to record video and audio separately. Once you finish recording and drag and drop the file into the timeline, the program will separate the video and the audio material so you can edit them accordingly.