
Sometimes you have to teach some people how to do something on a computer but explaining it so many times is quite annoying. Now you are looking for a free screencast tool on Windows 10 or software that allows you to screencast your screen.
While it might seem hard at first, screencast is actually pretty easy. This guide will help you understand what a screencast is and how to do a screencast on Windows.
In this article
Part 1. What is Screencast?
What exactly is a screencast? Well, it is basically recording what's happening on your computer screen, often with added audio to explain things to the viewer. You can save them as videos and share them online or offline. Screencasts on Windows are fantastic for making tutorials, demos, and presentations that teach how to use software, browse a website, or do a particular job.
As online videos gain popularity, screencasts are now a vital resource for producing captivating content and communicating with clarity. And here are the popular ways to screencast on Windows that are often used:
- Educating students through online courses
Screencast can be used for educating students through online courses as it allows instructors to demonstrate concepts, navigate software, and provide step-by-step instructions visually.
- Recording calls and meetings
It helps record online meetings to watch later and share with those who couldn't join. This is especially handy for remote teams in different time zones.
- Avoid unnecessary meetings
Instead of scheduling a meeting for simple tasks, it's better to record a quick video with step-by-step instructions. This lets people revisit the video if they forget and allows for easy sharing.
- Making quick how-to training videos
Screencasts are great for creating simple tutorials by capturing your computer screen, microphone, and even webcam footage. It's cost-effective and useful for businesses of any size.
- Simplifying the process of introducing and training employees
Using screencasts gives new hires a clear understanding of their duties, software usage, and workflows, helping them feel confident and prepared. Additionally, existing screencasts can be repurposed into official training materials, saving time and effort.
There are a few methods that you can use to screencast your Windows screen, like using the built-in features on your computer or using third-party software. In the next section, we will discuss on how to screencast on Windows using its built-in features.
Part 2. How to Record a Screencast Using Windows Built-In Features
1. Xbox Game Bar
You can screencast your Windows 10 and Windows 11 screen by using its built-in feature called Xbox Game Bar. As the name shows, it is actually a tool to record the gameplay of your favorite game and make it into a video. Not only for recording a game, but you can also use this tool to record other apps or software.
Here is how to use Xbox Game Bar to screencast your Windows 10 and Windows 11 screen:
Step 1. Start by opening the screen you want to record.
Step 2. Access the Xbox Game Bar by searching for it directly in the Start menu search box. Alternatively, you can press the Windows key + G on your keyboard.
Step 3. Once the Xbox Game Bar is open, select the recording icon on the Capture menu. This will allow you to record your screen as a video.
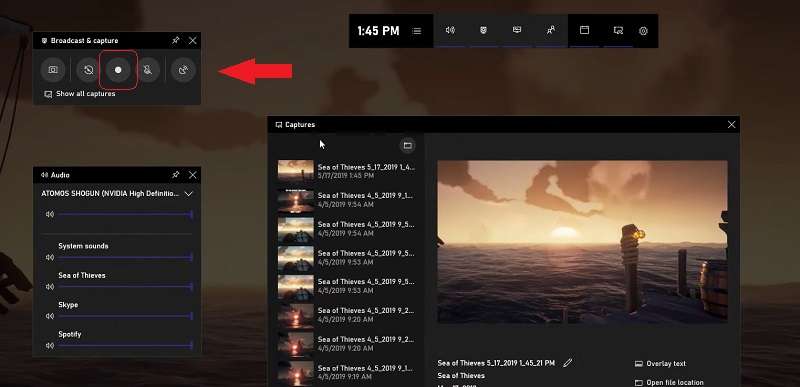
Step 4. Before proceeding with the recording, you need to adjust the Microphone settings. If you’re recording a video and want to include audio, click on the Microphone icon to enable the microphone. Make sure the icon doesn’t have a cross. To disable the Microphone, click the icon once more and the icon will have a cross.
Step 5. When you’re ready to start recording, click on the Record button. Once you’ve finished, click on Stop.
Step 6. To review your recording, select Show All Captures at the bottom of the window. This will allow you to see and access your recorded videos or screenshots.
2. Snipping Tool
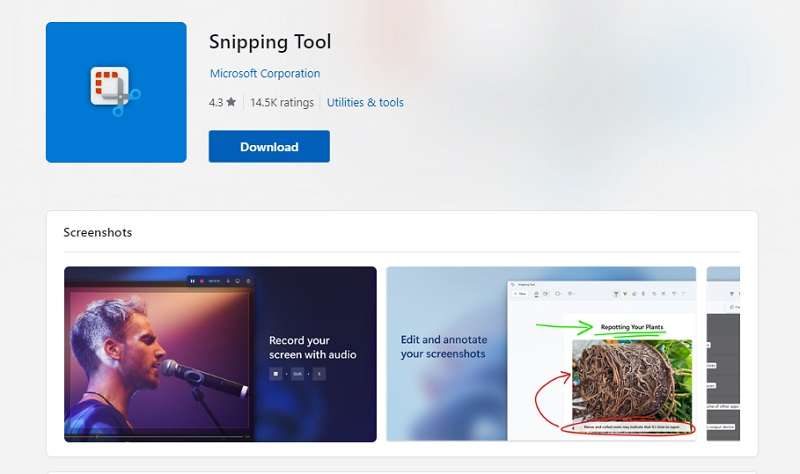
Another built-in feature that can be used for a screencast on Windows is the Snipping tool. But it is only available on Windows 11. Snipping Tool allows you to take an image from your screen, but now it also allows you to select a portion of your screen and start video recording.
Here's how you can record any part of your screen using the Snipping Tool to screencast on Windows 11:
Step 1. Access the Snipping Tool by searching it on the Start menu search box. Most Windows users have already had the tool installed on their PC. But if you can not find it, download it first from the Microsoft Store.
Step 2. Once you have the Snipping Tool open, click on the Record button in the top toolbar, then select New.
Step 3. Select the recording area by clicking and dragging to create a rectangle indicating the area of your screen you want to record.
Step 4. Begin the recording by pressing the Start button, and you will see a 3-second countdown before your recording begins.
Step 5. When you're done, press Stop. You can then copy the recording, share it via the Share dialog, or save it. By default, it saves in the Videos folder.
This method is easy to follow, but it has some limitations to be aware of:
- Currently, the Snipping Tool does not support audio recording or a Spotlight feature.
- The only supported format for recordings is MP4.
- Unlike Snipping (which uses CTRL+Shift+S), there's no keyboard shortcut for directly starting a recording.
Part 3. How to Record a Screencast Using Third-Party Software
The built-in feature for a screencast on Windows only does the recording. If you want to have an all-rounder third-party software that is capable of screencasting as well as editing recorded videos, Wondershare DemoCreator is one of the best software for it.
Key Features
- Recording
It has the ability to record the screen of your video, whether it is your entire screen, specific areas, or using your camera/mic, all with multi-track options.
- Editing
It has video editing tools, so you can directly edit pre-recorded screencast videos here. Supported with AI-powered tools like noise reduction and voice alteration, along with access to traditional options and an effects library.
- Presenting
Keep your audience engaged with annotations, green screen capabilities, and the innovative AI Virtual Avatar, which offers AI-generated voices and avatars.
The prices for the individual's subscription plans are:
- Free version : 7-day free trial
- Quarterly plan : $29.99/quarter
- Yearly plan : $59.99/year
- One-time payment : $79.99
Here is the step-by-step guide on how to do a screencast on Windows using DemoCreator:
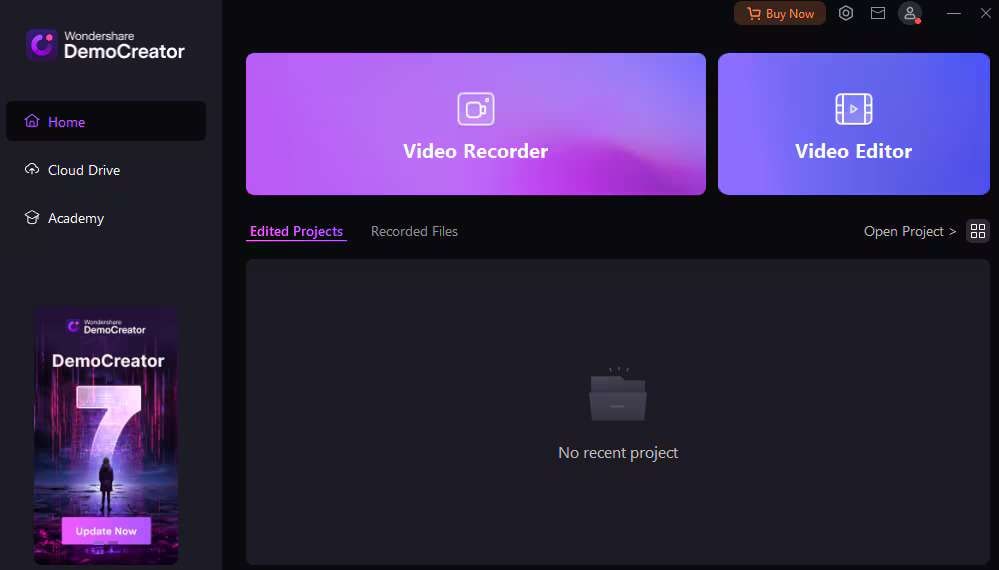
Step 1. Launch DemoCreator and access the Video Recorder feature.
Step 2. Choose between capturing just the screen or both the screen and camera.
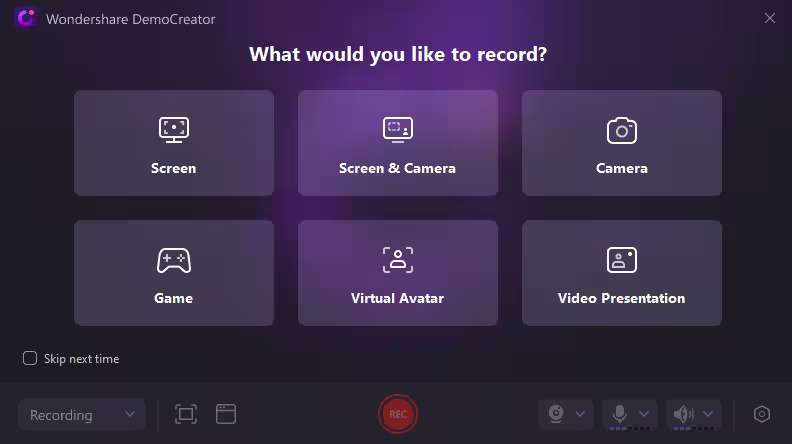
Step 3. Tailor the recording settings to your preferences.
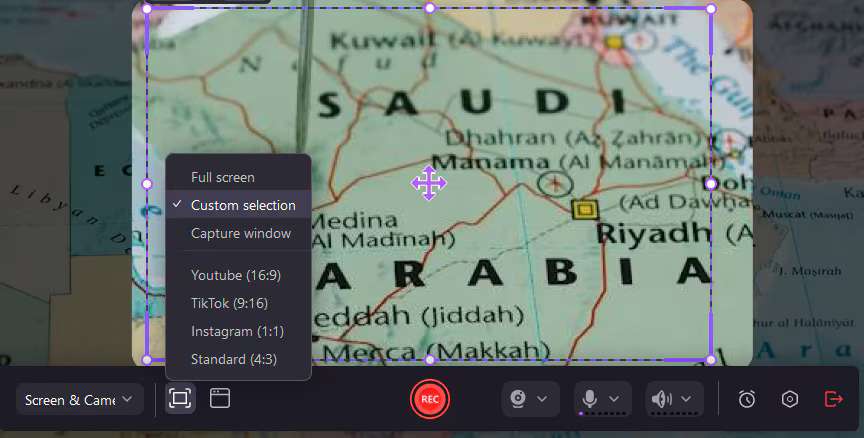
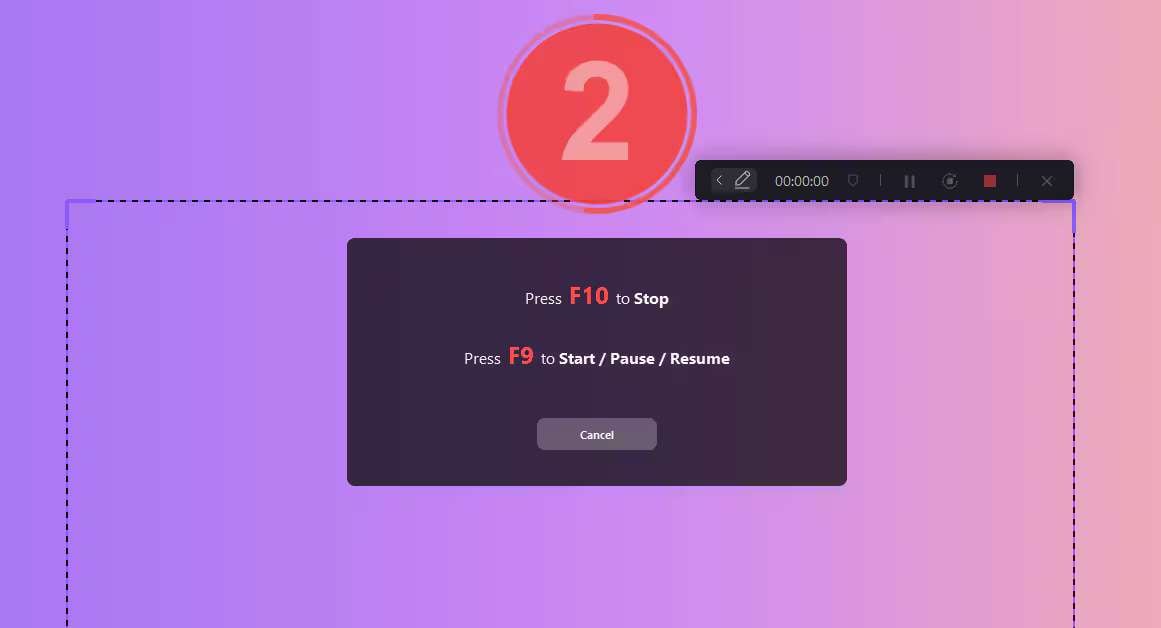
Step 4. Initiate the recording by clicking the REC button or using the F9 key.
Step 5. Pause the recording with F9 or conclude it with F10.
Part 4. Tips When Do Screencast on Windows
Screencast on Windows is a fantastic way for teaching, training, and presenting. However, there's always room to improve! Here are some easy-to-follow tips to enhance your screencasts:
- Write an Outline First
Before recording, create a simple outline of what you want to cover. This keeps your video focused and prevents rambling.
- Choose a Quiet Recording Area
Record in a quiet environment to avoid distracting background noise. Find the best time and place to record, like booking a meeting room or avoiding noisy times at home.
- Practice
Practice makes perfect! Spend some time practicing before recording to boost your confidence and improve your skills.
- Do a Test Run Before the Actual Recording
Familiarize yourself with your recording software to avoid technical issues during recording. A quick software check ensures everything works smoothly.
- Cut Out the Unnecessary Parts
Use editing tools to cut out unnecessary parts of your recording, like loading screens or idle moments. This keeps your video concise and engaging for your audience.
Conclusion
Screencasting on Windows offers a versatile solution for various purposes, from educational tutorials to professional presentations. Learning how to screencast effectively can help you share ideas and information clearly and efficiently, which is important in today’s age.
In this article, we are discussing how to do a screencast on Windows. You can use Windows built-in tools like Xbox Game Bar and Snipping Tool or try third-party software like Wondershare DemoCreator. By following the tips mentioned above, you can make better screencasts.


