
![How To Record System Audio on Mac Using Audacity - [Step-by-Step]](https://images.wondershare.com/democreator/article/record-mac-computer-audio-with-audacity-1.jpeg)
Audacity is a versatile, open-source tool that is excellent for creating high-quality audio recordings. While it requires a third-party plugin to record the internal audio on Mac, it has fantastic audio processing features, supports multi-track audio editing, and has dozens of export options, making it a better tool.
Stay around to learn how to use Audacity to record computer audio on a Mac. We'll review the installation, show you the steps, and provide tips for recording internal Mac audio with Audacity and another alternative to Audacity.
Table of Content
Downloading and Installing Audacity on Mac
Unlike QuickTime Player, Audacity isn't a built-in app on Macs. To use Audacity to record system audio on Macs, you'll first have to download and install the tool, and this section will show you how to do it:
- Visit Audacity's website and tap the Downloads button at the top.

- Look for the macOS Universal Binary option and click it.
- Tap the Download .dmg button next to Universal dmg (recommended).

- Once downloaded, open the installation file on your Mac.
- Follow the instructions on dragging Audacity into your Mac's Applications folder.

How To Record System Audio on Mac Using Audacity
With everything installed, you'd think you can immediately jump into the recording process and use Audacity to record Mac's computer audio, but that's not the case here. Like its built-in QuickTime Player counterpart, recording internal audio on Mac with Audacity also requires installing additional software, also known as an audio driver.
How To Set Up the Additional Software
As macOS doesn't have built-in desktop audio recording capabilities, users will first need to install the Soundflower extension or the BlackHole audio loopback driver. Let's see how you can go about doing that with the Soundflower extension first:
- Head to Soundflower's GitHub page and download the latest version of the .dmg file.
- Follow the website's instructions carefully and install the extension on your Mac.
- Search for Audio MIDI Setup with Spotlight and open the app.

- Tap the Plus button in the bottom left and select the Multi-Output Device option.
- Tick the box under Use and next to Soundflower (2ch). Then, close the Audio Midi Setup app.

- Navigate to Apple > System Preferences > Sound and select the Output tab. Then, click the Soundflower (2ch) option to change the audio output device.

Unfortunately, the Soundflower extension is too old of a tool to use with the newest Macs. Its latest version was introduced a decade ago and doesn't support newer Apple Silicon Macs.
However, the BlackHole audio loopback driver, which was created by the same people that are behind the Soundflower extension, does support newer M1 and M2 Macs, and you can follow these steps to get it instead of Soundflower:
- Visit BlackHole's GitHub page and tap the Download Installer button.
- Add your email address and name, and the website will send you the download link.
- Tap the link in the email to download the BlackHole 2ch, BlackHole 16ch, or BlackHole 64ch version. For this tutorial, we'll use the BlackHole 16ch one.

- Open the downloaded file and install the driver on your Mac.

- Tap the Route System Audio option under Setup to receive instructions for setting up the BlackHole loopback driver on your Mac.
- Follow the website's instructions and launch the Audio MIDI Setup app.

- Tap the Plus button at the bottom left to create a multi-output device and tick the BlackHole option, similar to steps four and five of the Soundflower guide.

- Set up the Multi-Output Device as your output device in System Preferences > Sound > Output.

Unlike Soundflower, BlackHole is compatible with macOS 10.10 or newer systems and works with both Intel and Apple Silicon Macs. Its setup might be more challenging than Soundflower's, but it's necessary if you own an M1, M2, or M3 Mac.
How To Record Internal Audio on Mac With Audacity
Now that you've added desktop audio recording capabilities to your Mac, you're finally ready to use Audacity and record internal audio on a Mac. Here's what you'll need to do:
- Launch the Audacity app on your Mac.
- Tap the Audacity tab, open Preferences, and head to Audio Settings.
- Select BlackHole as the Device in Recording settings and tap OK. (If you've installed the Soundflower extension, use the Soundflower option under Device in the Recording submenu.)

- Tap the red Record button at the top of the screen in Audacity.

- When done, hit the Stop button.
- Adjust your audio export settings, including the Format, Channels, Sample Rate, Bit Rate Mode, and Quality. Then, tap Export to save an audio recording to your Mac.

Tips for Recording Mac Computer Audio Using Audacity
Recording internal Mac audio with Audacity might be more challenging than initially thought. However, it also doesn't need to be as complicated as the first glance over the abovementioned steps might lead you to believe.
To get you started with using Audacity to record internal audio on a Mac, we've also included a few tips to help you create fantastic audio recordings. They include the following:
- Pick the Right Version - While you can download the universal Audacity .dmg file, it would be better to pick a proper Audacity version for your Mac (ARM 64 for M1, M2, and M3 Macs, and x86_64 for Intel-based devices.)
- Configure Audacity - Remember to adjust Audacity's preferences and audio settings and ensure you use the Soundflower extension for Intel Macs or the BlackHole loopback driver for Apple Silicon devices.
- Adjust Sound Levels - Don't drag the audio slider to its maximum. Instead, configure your sound levels properly to avoid high input levels and distorted audio.
- Create a Test Recording - You should always test Audacity's recording features and settings with a short audio recording before using the app for critical recording tasks.
- Preview the Audio File - Before you export the sound recording, play the audio track you've just made and hear how it sounds. High-quality speakers or headphones will help you hear every aspect of the recording before you save it.
- Use Audacity's Editor - The Audacity app offers more than recording tools. It's also a powerful audio editor where you can trim your sound recordings, apply various built-in or user-made filters, reduce noise, equalize the audio, balance the frequencies, and more.
By incorporating these tips into your daily Mac audio recordings, you'll achieve crystal-clear sounds each time you press the record button. Your audio recordings will require minimal editing efforts, and you can almost immediately use, share, or upload them to various sites.
Alternative to Audacity for Internal Audio Recording on Mac
As you can see, macOS' inherent inability to natively record system sounds will make you jump through many hoops before you can capture your Mac's desktop sounds. That's also the case when using Audacity to record system audio on a Mac, but it's not required when using Audacity's alternative, Wondershare DemoCreator.
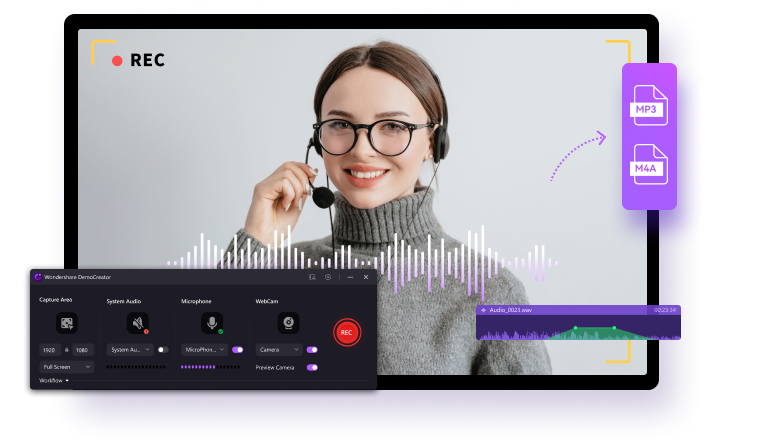
With support for older Intel Macs and the latest M1 and M2 Apple Silicon devices, DemoCreator is a third-party audio and video recorder that requires no elaborate setups and additional software.
Its seamless installation, effortlessly usable interface, and easy-to-learn keyboard shortcuts make it a vastly more capable tool than Audacity. Conversely, its video recording options and a built-in editor that enhances audio/video recordings with AI-powered tools, such as AI subtitle generator, AI voice changer, AI speech enhancer, and many more, take DemoCreator to another level.
- Record desktop screen, audio, and webcam simultaneously or seperately
- Various annotation tools to emphasize important points
- Edit video and audio quickly with a wide range of professional tools
- Export to MP4, MOV, MKV, GIF, MP4, M4A, and multiple formats

How To Record Computer Audio on Mac in DemoCreator
Unlike Audacity, recording Mac's system audio with DemoCreator is much more effortless. Here's everything you'll need to do:
- Launch the DemoCreator app on your Mac and select the All-in-One Recorder option.

- Under Capture Area, choose the Don't record screen option and turn the WebCam recording mode off to focus on audio-only recordings.
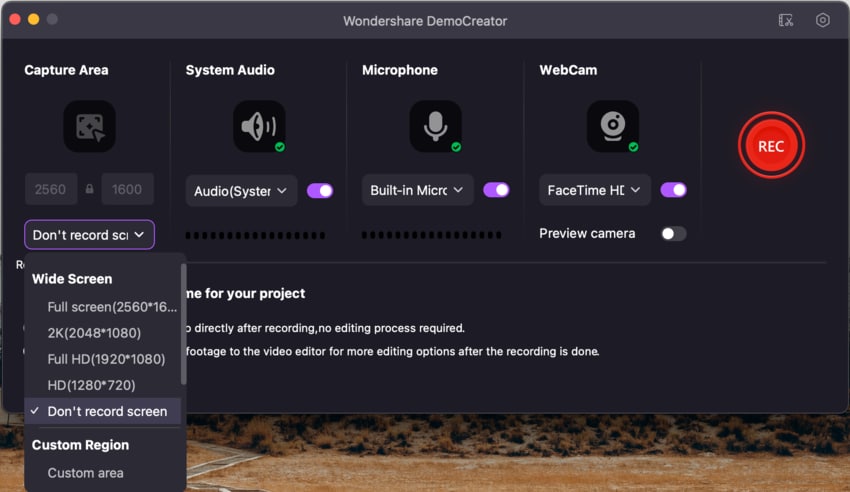
- Enable and adjust the System Audio option to record your Mac's internal audio. You can also turn the Microphone recording mode on and off depending on whether you'd like to talk during these audio recordings.
- Choose a Recording Scheme by selecting Export Express or Edit Recordings.

- When ready, tap the bit red REC button or hit OPTION + COMMAND + 2 on the keyboard to start recording your Mac's system audio.
- Use the same key combination to pause and resume the recording.
- Once done, tap SHIFT + COMMAND + 2 or click the Stop button in DemoCreator's menu bar to end the system audio recording on your Mac.
If you've used the Export Express option under the Recording Scheme, the app will export your Mac's system audio recording as soon as you stop it.
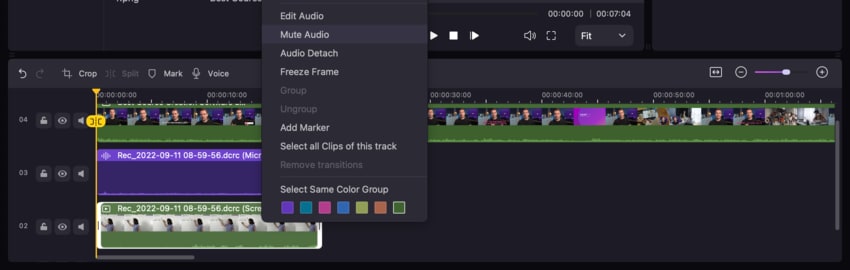
On the other hand, if you've picked the Edit Recordings option, DemoCreator will launch its built-in editor, where you can trim and cut the recording, denoise it with the app's AI-powered feature, and apply various sound effects before you export the audio recording.
Conclusion
Due to the limitations of the built-in QuickTime Player, many Mac enthusiasts are turning to Audacity to record system sounds on a Mac. Yet, like the QuickTime Player, Audacity also requires using a loopback cable or installing additional software to bypass macOS' inability to record desktop audio natively.
We've shown you how to download and install Audacity on your Mac and set up the additional software, including the Soundflower extension for older Intel-based devices and the BlackHole audio loopback driver for newer M1 and M2 Macs.
Furthermore, we've included a detailed step-by-step guide on using Audacity to record computer audio on Macs and provided tips for creating efficient sound recordings in Audacity.
However, if you'd like to avoid such a complex setup, you can also use Wondershare DemoCreator, a powerful Audacity alternative for recording audio on Macs. After all, this robust tool works regardless of your Mac's hardware architecture and age without requiring additional software like Soundflower or BlackHole driver.
Its effortless user interface, clever keyboard shortcuts, and simple yet powerful editor equipped with AI features make DemoCreator a far better option than Audacity for recording internal Mac audio.


