

I've recently tried to record audio using GarageBand on my Mac but couldn't find my way around it. Can anyone help?
Yes, we can! The GarageBand audio recorder is fantastic for recording audio narration, voiceovers, music, or podcasts.
GarageBand is a built-in audio recorder you can find on all macOS devices. Its recording and editing capabilities give you creative freedom and help fine-tune your recordings in post-production.
Since it's cross-compatible with other audio recording and editing platforms, you can rely on it to capture audio and vocals reliably and effectively. We'll walk you through everything about GarageBand voice recording, from setting up a new project to recording audio or vocals.
Table of Content
What to Do Before Recording Audio or Vocals on a Mac Using GarageBand
Below is your introduction to everything you must prepare before recording audio or vocals on your Mac using the GarageBand audio recorder.
Get All the Necessary Equipment

Before recording, prepare all the necessary equipment for recording audio or vocals on your Mac. Get a microphone with the appropriate equipment for vocals, a pop filter, and a pair of headphones.
You can use a USB mic like the Blue Yeti if you're new to recording vocals. If you're an experienced vocalist, go with an XLR mic. However, you'll need additional equipment for an XLR mic, such as a mic stand, an XLR cable, and an audio interface.
Connect Your Equipment
The next step is to connect everything correctly, including the XLR microphone to the audio interface and the interface to your Mac computer.
If you're using a USB mic, connect it directly to your Mac. Plug the headphones into your audio interface, microphone, or Mac, and place the pop filter between your mic and you.
Adjust Input and Output Devices in GarageBand
The last step before recording is to select and adjust the input and output devices in GarageBand.
Here are the steps:
- Launch GarageBand on your Mac and click New Project > Empty Project.

- Choose the output and input devices and test GarageBand to see if it's detecting your mic and if you can hear the audio.
- Navigate to GarageBand > Preferences > Audio/MIDI.

- Choose a USB mic or audio interface in the Input Device section.
- In the Output Device section, select your headphones (if you're recording using headphones connected to your USB mic or an audio device).
- Go to the Choose a track type menu and choose the Mic or Line option.
Now that you've created a new audio channel in Garageband to record your audio or vocals, it's time to move on to the recording phase.
How To Record Audio or Vocals Using GarageBand on Mac
Below is a step-by-step guide to recording audio or vocals using the GarageBand audio/voice recorder on your Mac.
Step 1. Enable Recording and Configure Input Monitoring
Before recording audio or vocals, configure your vocal channel and enable recording to capture the best possible take. Here's how:
- Once you click Mic or Line, you'll see a new window with multiple options. Click the recording track in the timeline, go to the Buttons section, and check the Record Enable and Input Monitoring options.

- Click Smart Controls > Track > Recording Settings to toggle monitoring on and off according to your needs.
Enabling recording should bring up a record button in your track header.
Step 2. Select and Configure a Vocal Preset
Selecting and adjusting your vocal preset lets you experiment with different EQ settings and vocal effects. Here are the steps:
- Click Voice in the Library section and select the desired vocal preset from the list.
- Check the EQ settings of the selected vocal preset by navigating to Smart Controls > Track > Controls.
- Customize the EQ plugin effects, including reverb and master echo.

Step 3. Set up a Backing Track
If you wish to record with a backing track, drag and drop the selected audio to the GarageBand timeline or hit CMD + Option + N to create a new track.

If you wish to customize your backing track, click it and adjust the reverb, echo, and EQ according to your preferences.
Step 4. Record Vocals or Audio in GarageBand
Once you set up everything, you can record your audio or vocals. Here's what to do:
- Press R or the Record button (red with a white circle) to start recording.
- Hit Enter to return to the beginning and restart, or use the playhead to move between specific points in the recording timeline.
- Adjust the length of the recorded track or use other settings like cutting, copying, pasting, and track splitting to edit your recording.

Pros and Cons of Recording Audio or Vocals in GarageBand on a Mac
GarageBand is excellent for music creation and podcast production. Many audio professionals love it, primarily for multi-track and multi-take recording and editing.
However, recording audio and vocals in GarageBand isn't a walk in the park. Its interface isn't user-friendly, making it challenging for newbies.
Let's explore the pros and cons of using GarageBand to record audio and vocals on a Mac to help you make an informed decision.
An Alternative to Consider: Wondershare DemoCreator
GarageBand offers a full-tier music creation studio for making high-quality music and recording podcasts. However, this unique audio/video recorder is available only on Mac computers and isn't the go-to solution for beginners.
A solution like Wondershare DemoCreator might be more appropriate for creating professional audio and voiceover recordings for online courses, product demos, and explainer videos or recording calls or online songs.
With DemoCreator, you can tap into unlimited audio recording time, separately or simultaneously capture system sounds and your voice, use advanced editing tools to get top-quality audio, add multiple audio effects, and much more.
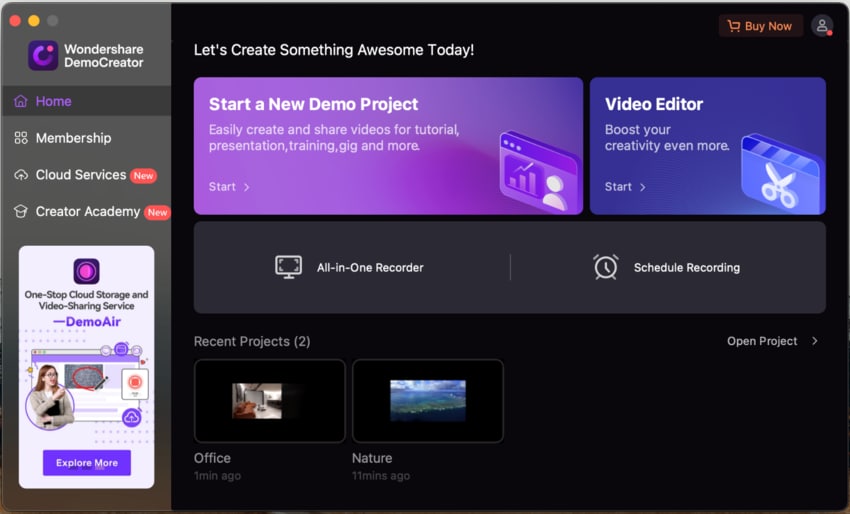
Download and install DemoCreator on your Mac, then follow the steps below to record audio:
- Launch DemoCreator and navigate to the All-in-One Recorder.
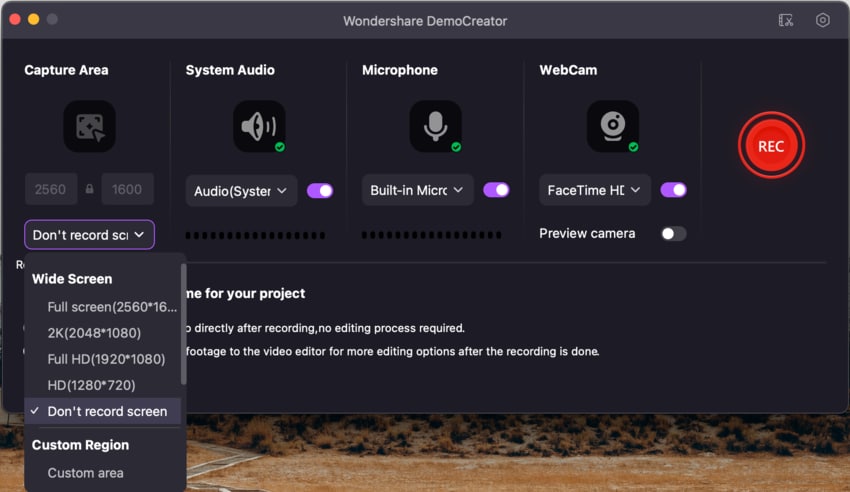
- Click Don't record screen in the Capture Area section, turn off your webcam (if any), and select your system audio device (optional) and microphone. Finally, click the REC button.
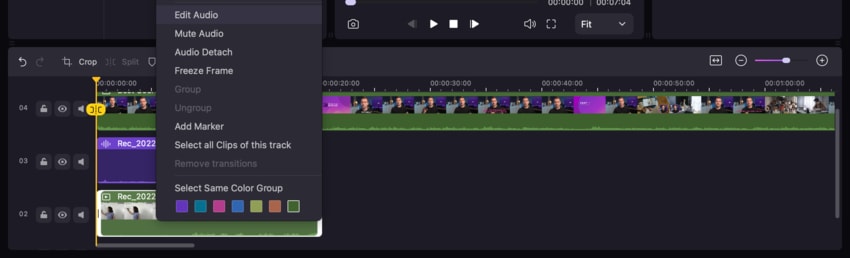
- Once you finish recording, open your audio file from Recent Projects in the startup panel to launch the Video Editor. Drag the audio recording to the timeline, right-click it, and select Edit Audio.
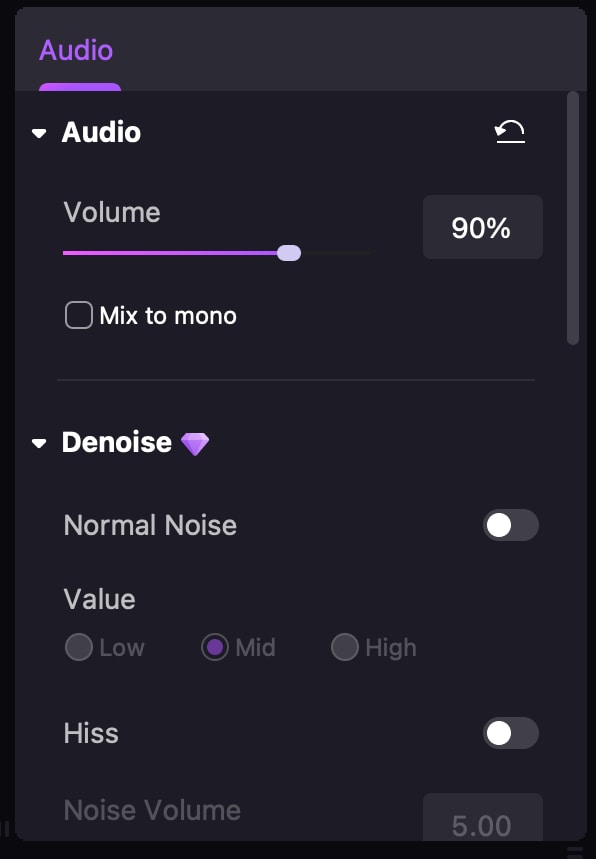
- Click the Audio tab in the right-hand Properties panel to denoise your recording.
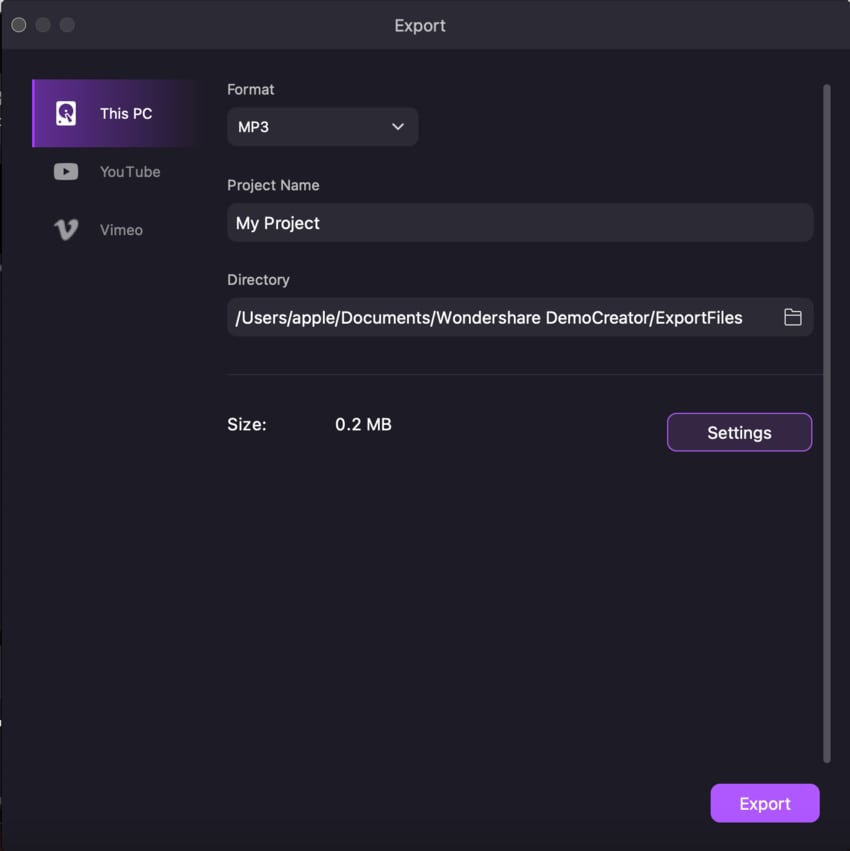
- Once you complete your audio recording, click Export to download the recording to your device.
- Choose a file format like MP3 and click Export to save your audio recording to your Mac.
Conclusion
GarageBand audio recorder is a user-friendly, intuitive audio/voice recording tool to capture system audio and vocals in a home-made recording environment on your Mac computer. All Apple users have access to this built-in recording software.
However, GarageBand is ideal for those with sound editing experience or a musical background because its many features may be intimidating for beginners. Still, despite its cross-compatibility and audio recording and editing capabilities, GarageBand has many shortcomings to consider when recording audio or vocals.
For starters, the tool is only available to Apple users. It doesn't support remote recording and can get confusing when you tweak the EQ settings. If that's a deal-breaker for you, we recommend considering an alternative solution like the Wondershare DemoCreator audio recorder and editor.
DemoCreator is a professional tool that supports Mac and Windows operating systems, top-grade audio quality, and multiple audio formats and recording modes. It lets you capture high-quality microphone and system sound recordings in a few simple clicks.
FAQ
-
Does GarageBand have a recorder?
Yes, GarageBand has an audio recorder that lets you record system sounds, an instrument, or your voice on all Apple devices. -
Is GarageBand good for recording voice?
GarageBand is an excellent tool for recording vocals over a keyboard, but it may be challenging for beginners. However, seasoned professionals find the platform's audio/voice recorder intuitive, letting them capture their voice with a few clicks. -
Is GarageBand still free?
Yes, GarageBand is still free. -
Do I need a microphone to record with GarageBand?
If you plan to use GarageBand to record a voiceover or your vocals for a song, you'll need a USB or XLR microphone to capture your voice. -
Can GarageBand record MP3?
Yes, you can export the audio recording file as an MP3 by following the steps below:- Navigate to the Toolbar > Share > Export Song to Disk.
- Click Save As and select MP3.
-
How do you record internal audio in GarageBand?
Here are the steps:- Launch GarageBand and navigate to the Audio menu.
- Click the Sound tab and select the audio source (microphone, system audio, or both).
- Click OK > REC to record internal audio.
-
Can you record takes in GarageBand?
Yes, you can. GarageBand lets you record multiple takes using the Multi-Take Recording option. -
How can I record over an existing track in GarageBand?
Here's how to record multiple tracks in GarageBand:- Go to the Tracks panel, click the track header, and select the original track.
- Place the playhead at the start of the original track and click the red REC button to start recording.
- A new recording will overwrite the original take. However, it will also automatically save the original take as an additional track.
- You can list all the saved/recorded tracks by clicking the number in the top left corner of the recorder track.
-
Does GarageBand allow multi-track recording?
Yes, it does. You can enable multi-track recording in Garageband by turning on Multi-Take Recording:- Navigate to the Control bar.
- Click any track in the timeline.
- Click Track Settings > Recording and toggle on the Multi-Take Recording option.


