

You’ve just bought a new microphone for your Mac, but you need help setting it up for recording. Whether you’re a podcaster or musician or need to capture audio clearly, using an external mic is crucial for professional-quality sound. This article will guide you through connecting and configuring your microphone on your Mac to ensure high-fidelity recordings.
This article will cover the steps to select the correct input source, adjust microphone levels, and troubleshoot any issues you might encounter. By the end, you’ll have the knowledge to harness your external microphone’s full potential and elevate your projects’ audio quality. Get started by reading to learn how to record audio on a Mac with an external mic.
In this article
Part 1. First Step: Setting Up Your Microphone in macOS
Before recording with your new external microphone, you must set it up properly in macOS. While most microphones are plug-and-play, meaning they should be recognized by your Mac automatically, you might need help with the mic not being detected in certain apps.
It’s always a good idea to check with your microphone’s manufacturer for specific setup instructions, such as downloading companion apps or installing drivers. Some microphones may require additional software to unlock advanced features or customize settings.
Checking if Your Microphone Is Connected
Generally, setting up your microphone on a Mac is a straightforward process. Here’s how you can do it:
Step 1: Connect your microphone to your Mac using the appropriate cable or input (USB, XLR, etc.).
Step 2: Open the System Preferences app and click the Sound icon.
Step 3: In the Sound preferences window, select the Input tab.
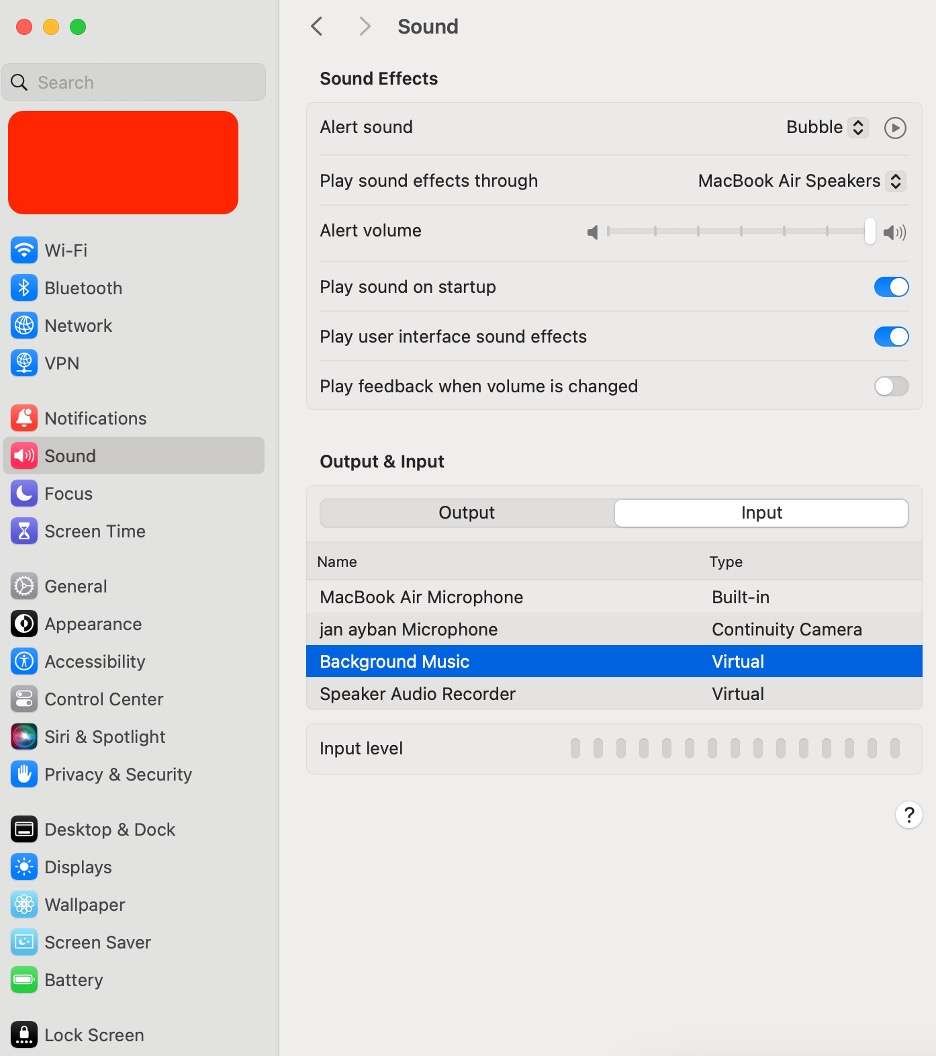
Step 4: Select your microphone from the list of available input devices to see if it’s working. Ensure it’s properly connected and powered on if you don’t see it listed.
Step 5: Some apps may prompt you to allow input permission for the microphone. Make sure to grant permission when prompted.
Testing Your Microphone With Voice Memos
To see if your microphone is working as intended, you can use the Voice Memos app:
Step 1: Launch the Voice Memos app through your Launchpad.
Step 2: Hit the red Record button and speak into the microphone.
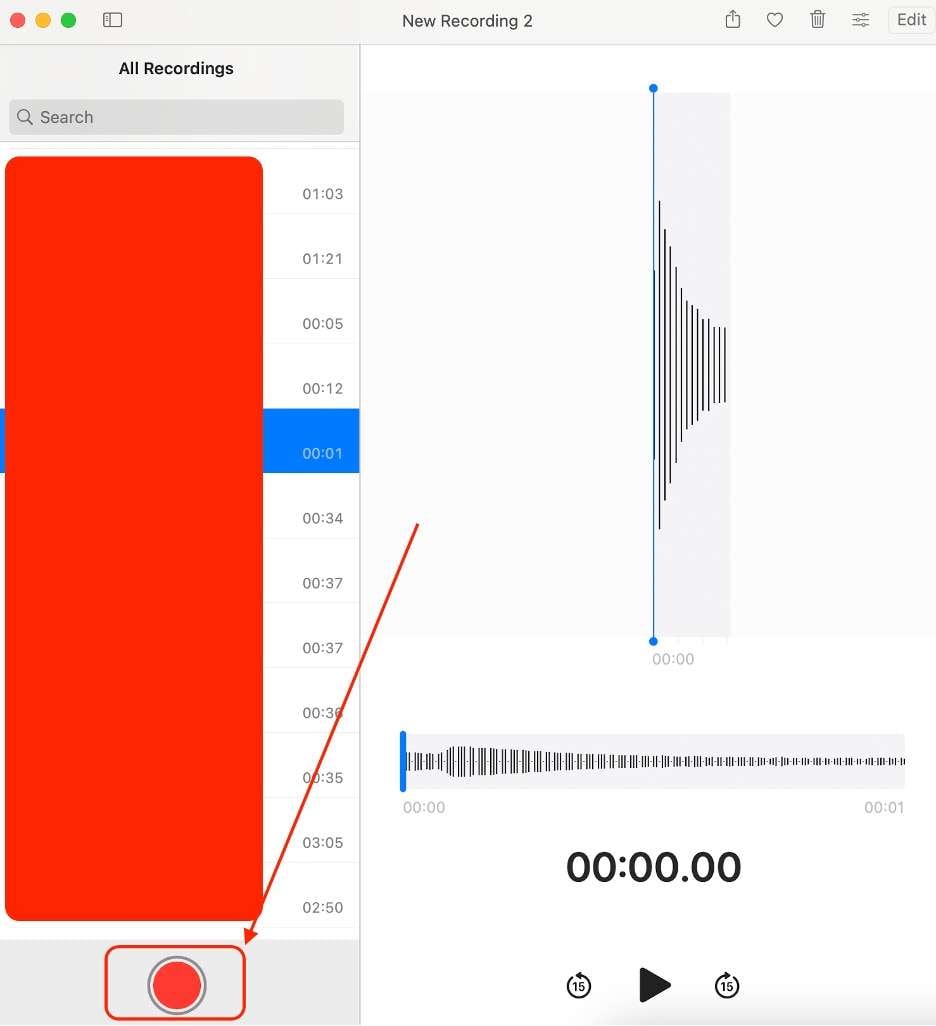
Step 3: Stop and play the recording back to ensure the audio is captured correctly.
If you can hear your voice clearly, congratulations! You are now set for recording audio on a Mac with an external mic.
After this initial setup, your external microphone should appear as an input option in compatible apps like GarageBand and Audacity or video conferencing software like Zoom or Skype. Select your microphone from the input device dropdown menu within these apps, and you can record high-quality audio.
Part 2. Using Your Microphone With a Dedicated Recording App: DemoCreator
While an external microphone can significantly improve audio quality, pairing it with a dedicated recording app will unlock its full potential. This combination lets you capture high-fidelity audio while leveraging advanced features tailored for content creation, presentations, and more.
Introducing Wondershare DemoCreator
Wondershare DemoCreator is an excellent choice for Mac users among the many recording applications available. This software has versatile tools for screen recording, video capture, and audio recording, making it powerful for recording audio on a Mac with an external mic.
Wondershare DemoCreator is a robust screen recording software that provides an intuitive and seamless experience for video capturing on your Mac. Its main functions include screen recording, screen and webcam recording, game recording, and even avatar recording for creating animated video presentations.
Key features of DemoCreator that make it a standout option include:
- Screen recorder. This mode allows you to record a part of your screen selectively, the entire screen, or just the webcam feed, making it perfect for recording presentations, tutorials, or video calls.
- Cross-platform availability. DemoCreator is available for Windows and Mac, ensuring you can use it regardless of your OS.
- High-quality recordings. It supports up to 4K resolution at 60fps, ensuring crystal-clear video and audio quality for your recordings.
- Editing tools. DemoCreator has powerful editing capabilities, including trimming, annotating, and AI-powered features to enhance your recordings further.
- Instant sharing. Once your recording is complete, you can easily share it via email, cloud storage, or social media platforms.
Use-Cases for Wondershare DemoCreator
With DemoCreator, you can use your external microphone for a wide range of use cases, such as:
- Recording presentation. Capture your screen and audio simultaneously while delivering a presentation, creating engaging training materials, or online courses.
- Game recording. Record your gameplay footage with crystal-clear audio, perfect for creating walkthroughs, tutorials, or sharing your gaming experiences.
- Various screen recording. Create instructional videos and software demonstrations, or capture any on-screen activity while narrating with your external microphone.
- Content creation. Utilize DemoCreator’s editing tools and audio recording capabilities to produce high-quality podcasts, voiceovers, or audio-visual content.
How To Use DemoCreator With Your External Mic for Audio Recording
To start with DemoCreator and your external microphone, launch the app, select your microphone as the audio input source, and follow the on-screen prompts to begin recording. With its user-friendly interface and comprehensive features, DemoCreator will help you unlock the full potential of your external microphone and take your audio recordings to the next level.
Here’s a specific step-by-step method to use your microphone with an external mic.
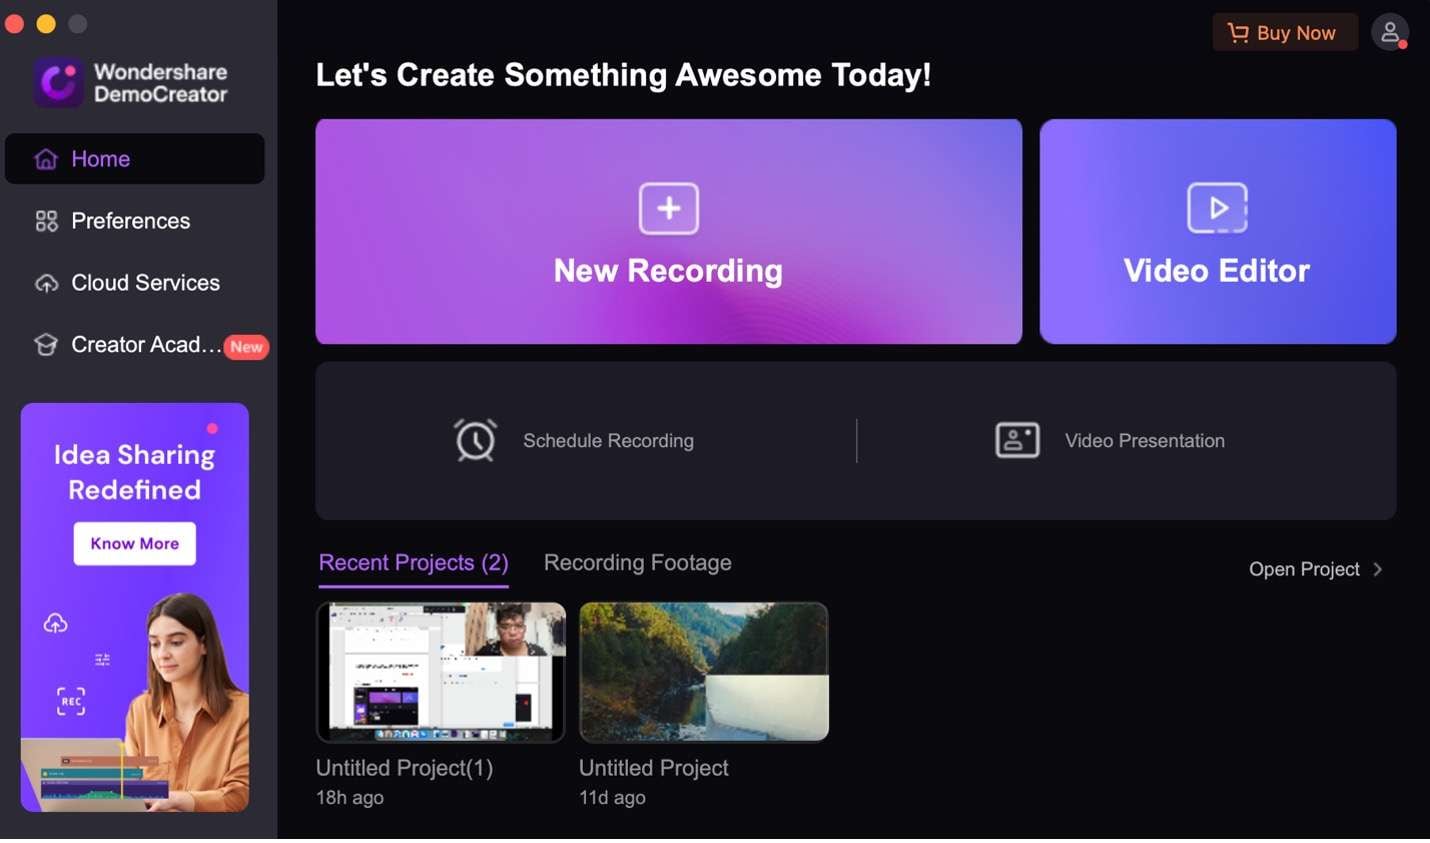
Step 1: Install, download, and launch Wondershare DemoCreator.
Step 2: Go to New Recording.
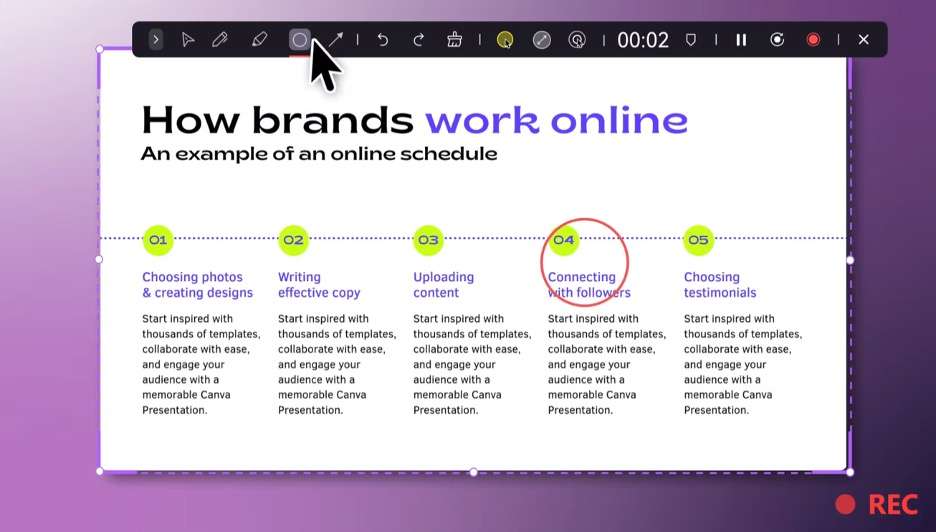
Step 3: You will see a Microphone tab on the recording interface. Click the dropdown menu and find your mic on the options.
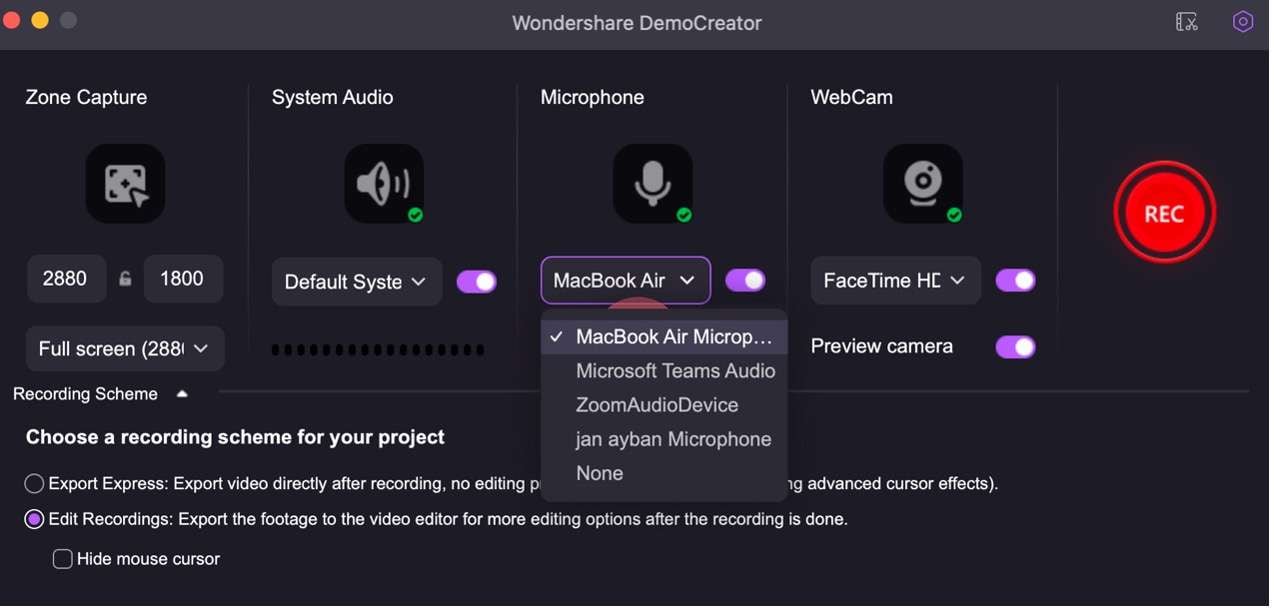
Step 4: Hit REC to begin and F10 on your keyboard to stop recording.
Part 3. Tips for Great External Mic Recordings on Your Mac
While an external microphone can elevate the audio quality of your recordings, it’s essential to recognize that they are more prone to potential issues compared to the built-in microphones on your Mac. The built-in mics are optimized and calibrated precisely for your computer’s hardware and software.
To ensure you capture the best possible audio with your external microphone, consider the following tips:
- Proper mic technique. Position the microphone appropriately from your mouth, typically 6-12 inches away. Avoid speaking directly into the mic to prevent plosives (bursts of air) and maximize clarity. Additionally, try to minimize background noise as much as possible for a cleaner recording.
- Acoustic treatment. Consider treating the recording space with acoustic panels or sound-absorbing materials if feasible. This can help reduce unwanted echoes, reverberations, and ambient noise, resulting in a more professional-sounding recording.
- Use a pop filter. A pop filter is a cheap accessory that can significantly improve the clarity of your audio by removing harsh sounds. Simply position the pop filter between your mouth and the microphone.
- Monitor audio levels. During the recording process, watch the audio levels to ensure they remain within an optimal range. Ideally, you want to avoid clipping (distortion caused by excessively high levels) or capturing too quiet audio. Many recording apps, including DemoCreator, provide visual level meters to help you monitor and adjust the input levels as needed.
- Editing and post-processing. Even with the best recording setup, some post-processing may be necessary to achieve professional-quality audio. DemoCreator offers powerful editing tools that allow you to trim, split, and merge audio tracks and apply filters and effects to enhance clarity, reduce noise, and refine the overall sound.
By following these tips and taking advantage of the features provided by dedicated recording apps like DemoCreator, you can maximize the potential of your external microphone and capture exceptional audio recordings on your Mac.
Conclusion
Recording audio on your Mac with an external microphone is a straightforward process that can greatly enhance the production value of your projects. By setting up your microphone correctly in macOS and utilizing a dedicated recording app like Wondershare DemoCreator, you’ll be able to harness the full potential of your external mic.
Remember to follow best practices, such as proper mic technique, acoustic treatment, and audio monitoring, to ensure optimal audio capture. With its powerful features, user-friendly interface, and comprehensive editing tools, DemoCreator is an excellent choice for elevating your external mic recordings to professional standards. Unlock the world of exceptional audio quality and take your content creation to new heights.


