
As Chromebooks gain popularity among students, professionals, and content creators, the need for screen recording has also surged. Whether it's for creating tutorials, recording video calls, or capturing presentations, knowing how to screen record on a Chromebook is essential. In this blog post, we’ll guide you through the official methods and explore third-party applications that can help you capture high-quality video and audio. We’ll also recommend Wondershare DemoCreator as an excellent third-party solution for enhanced recording capabilities.
In this article
Part 1: Official Way to Record on Chromebook (Using Built-In Screen Recording Feature)
Recording your screen on a Chromebook is easy with its built-in screen recording feature. This method doesn't require additional software and is perfect for quick, simple recordings. In this section, we will walk you through the official ways to start recording on your Chromebook.
Method 1: Using keyboard shortcut
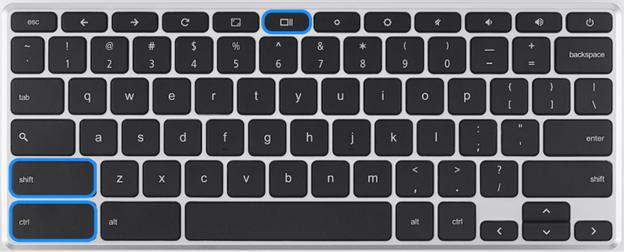
Step1Press the Keyboard Shortcut
To activate the built-in screen recording tool, press Ctrl + Shift + Overview (the Overview key looks like a rectangle with two lines next to it) on your Chromebook's keyboard. This will open up the screen recording toolbar.
Step2Choose What to Record
Once the toolbar appears, you will have the option to select whether to record the entire screen, a specific window, or a region of the screen. Click on the option that suits your needs, and the recording will begin.

Step3Start Recording
Click the Record button on the toolbar to begin recording. When you're finished, click the Stop button in the toolbar or press Ctrl + Shift + Overview again to stop the recording.
Method 2: Using built-in screen recorder
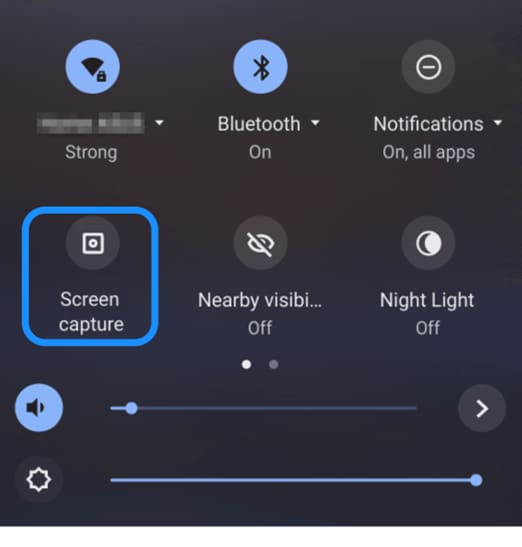
Step1Open the Screen Capture Toolbar
Click the clock in the bottom-right corner of your Chromebook to open the quick settings panel. Then, click the Screen Capture button to open the screen capture toolbar.
Step2Choose Your Recording Settings
In the screen capture toolbar, select whether you want to record the full screen, partial screen, or entire window. Click the Settings (gear) icon to enable the microphone if you want to record audio along with your screen.
Step3Start and Stop the Recording
Click the Record button (video icon) to begin capturing. Once finished, click Stop to end the recording. Your video will automatically be saved to your Downloads folder. You can later move it to cloud storage or external storage as needed.
Part 2: How to Record a Video on Chromebook (With Third-Party Apps)
1. Editor’s Recommendation: Wondershare DemoCreator Chrome Extension
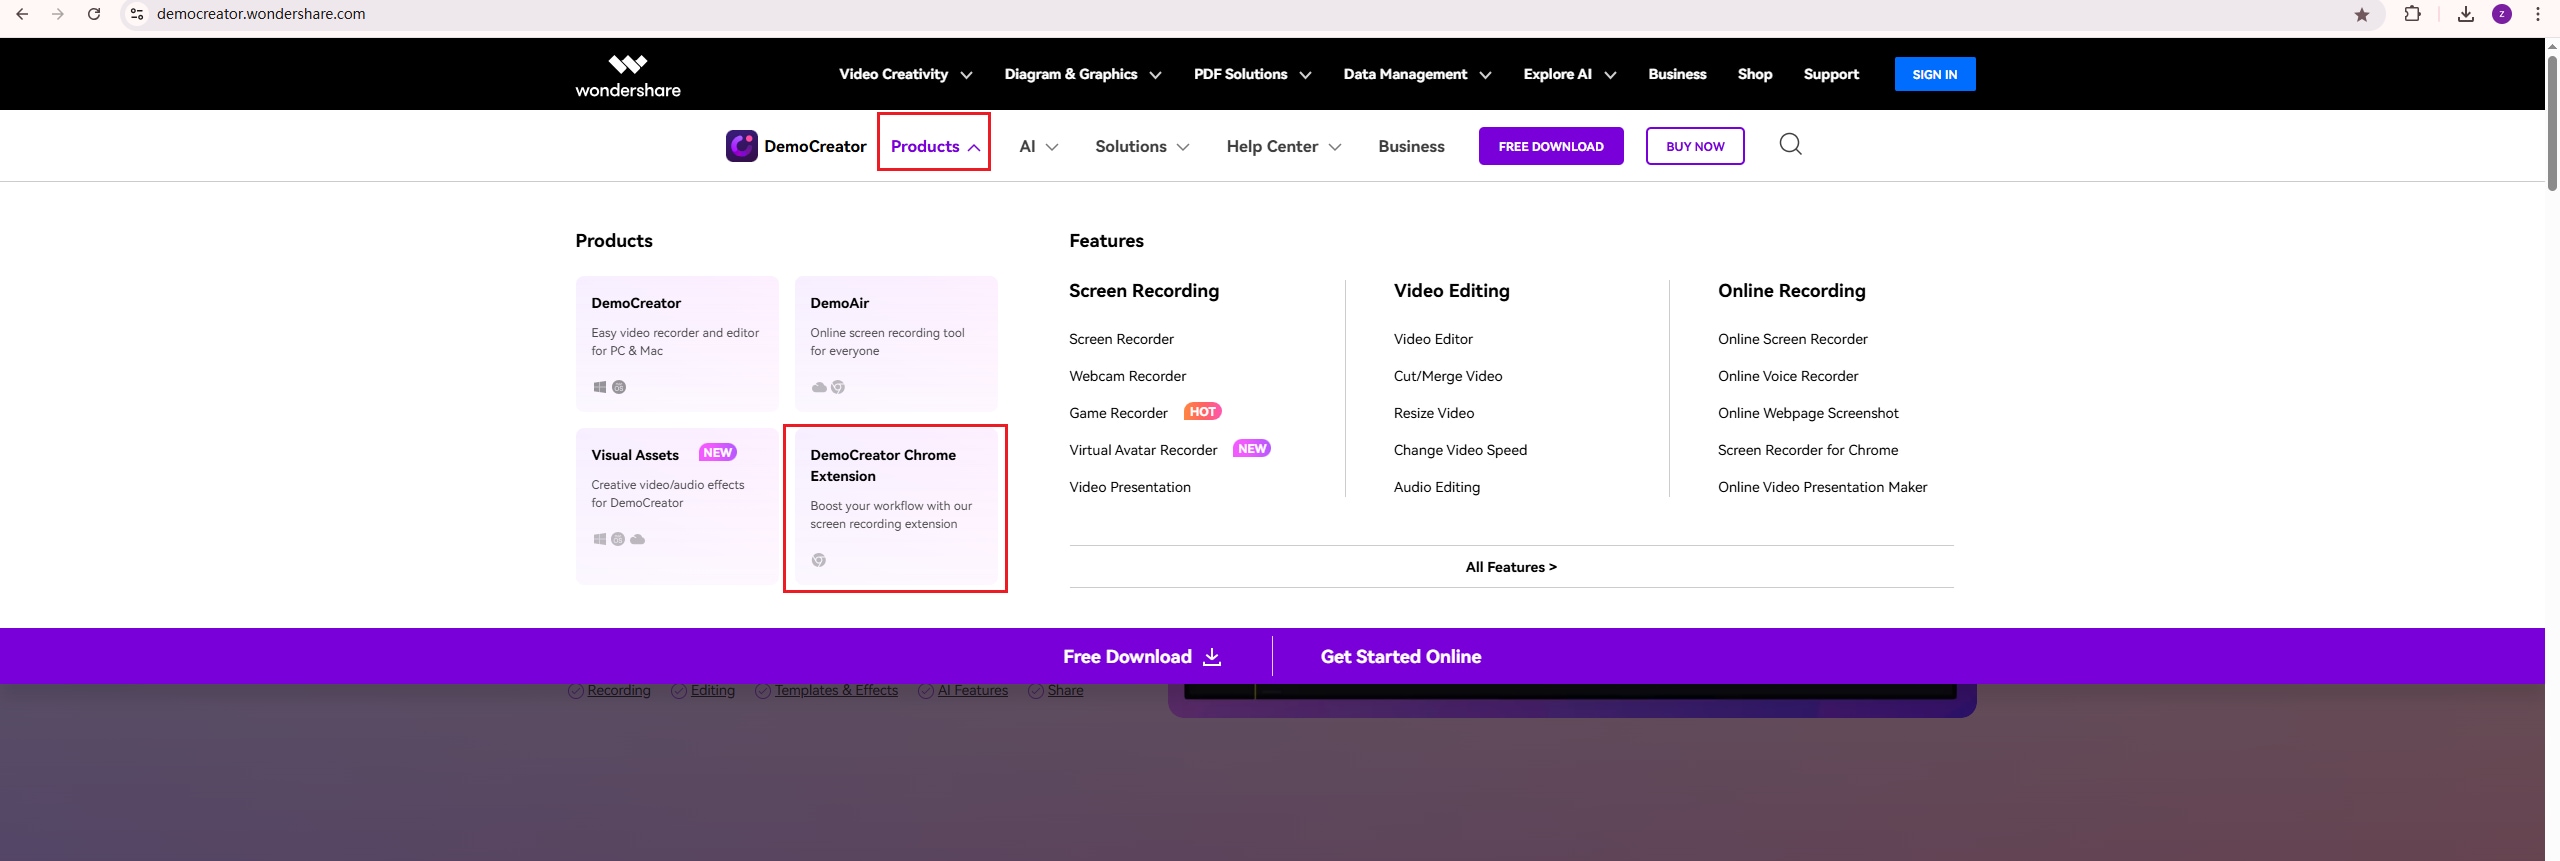
Wondershare DemoCreator is a versatile screen recording software that provides high-quality video and audio capture, making it an excellent choice for Chromebook users. Although DemoCreator primarily functions as a desktop application, it also offers a Chrome extension that allows seamless screen recording directly within the browser. This extension provides an easy-to-use interface and robust features, making it ideal for creating professional tutorials, product demos, presentations, and even gaming content.
With DemoCreator's Chrome extension for screen recording, users can capture screen activity, audio, and webcam footage simultaneously. Whether you're making instructional videos, app demos, or live presentations, DemoCreator offers powerful editing tools to refine and enhance your recordings before sharing them.
Key Features & Use Cases:
- Record High-Quality Video & Audio Simultaneously: Capture video and audio seamlessly, perfect for making tutorials, app demonstrations, and presentations on your Chromebook.
- Professional Editing Tools: Edit your recorded video with built-in editing tools to trim, add effects, and enhance your videos before sharing them.
- 4K Video Capture: Record in high-definition (4K) at 120 FPS for smooth and crystal-clear videos, ideal for professional use.
- Live Audio & Voiceover Capabilities: Add real-time voiceovers while recording, perfect for creating engaging instructional videos and personal content.
- Instant Export and Sharing: Easily export your recordings in MP4, MOV, or AVI formats and share them on social media or store them for future use.
How to Use Wondershare DemoCreator on Chromebook (Chrome Extension)
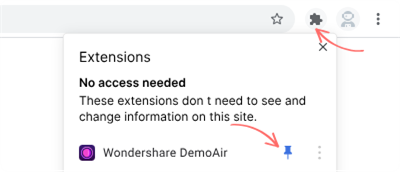
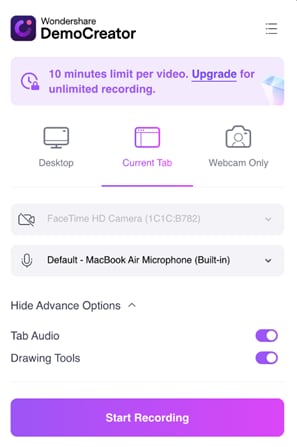
Step1Install the DemoCreator Chrome Extension
Go to the Chrome Web Store and search for Wondershare DemoCreator. Once you find the extension, click "Add to Chrome" to install it. After installation, the DemoCreator icon will appear in your browser toolbar.
Step2Start Recording
Click on the DemoCreator icon in the toolbar. A pop-up menu will appear, allowing you to select your recording preferences, such as whether to capture the screen, audio, or webcam. Choose the settings that suit your recording needs, and then click "Start Recording" to begin.
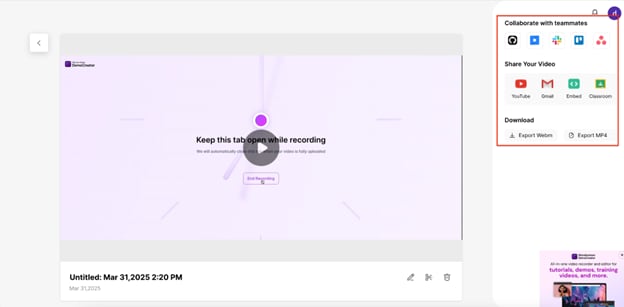
Step3Export Your Recording
Once you've finished recording, click the "Stop" button. Your recording will open in a new tab where you can review and edit it. Then, choose your preferred file format (MP4, MOV, or AVI) and export the video. You can also share it directly to platforms like YouTube or Google Drive.
2. Screencastify
Screencastify is a popular Chrome extension for screen recording, used by educators, professionals, and content creators. It allows you to capture your screen, webcam, and microphone audio with ease. Screencastify is known for its simple interface, making it perfect for users who need to quickly create tutorials, presentations, or product demos. It also integrates well with Google Drive for easy sharing and storage.

Key Features:
- Screen Recording: Capture your entire screen, a specific browser tab, or a webcam-only recording.
- Webcam Recording: Allows recording of webcam footage to include personal presence in tutorials.
- Audio Recording: Capture both your system and microphone audio during screen recordings.
- Editing Tools: Built-in tools for trimming, annotating, and adding voiceovers to recordings.
- Cloud Integration: Directly saves recordings to Google Drive for easy access and sharing.
3. CamStudio
CamStudio is a free and open-source screen recording software for creating high-quality videos, especially for tutorials and educational content. It offers the ability to record both video and audio from your screen, and it’s a simple tool that doesn’t require complex setups. CamStudio is ideal for those looking for a lightweight and cost-effective screen recording solution. It allows users to save videos in AVI format, which can then be converted to SWF for web use.
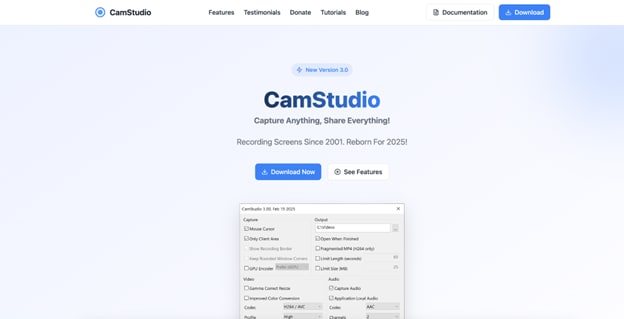
Key Features:
- Screen Recording: Capture your entire screen or specific areas of your screen.
- Audio Recording: Records both system and microphone audio simultaneously.
- Video Output Options: Saves recordings in AVI format, with the ability to convert to SWF for web use.
- Customization: Customizable recording area, with options for high-quality video capture.
- No Watermarks: Unlike other free tools, CamStudio doesn’t add watermarks to the recorded videos.
4. FlashBack Express
FlashBack Express is a free, powerful screen recording tool designed for creating tutorials, presentations, and instructional videos. It offers an easy-to-use interface with the ability to record screen activity, webcam footage, and audio. While it is a free version of the paid FlashBack Pro software, it still comes with a decent set of features that are perfect for beginners or anyone who needs to capture their screen without complexity.
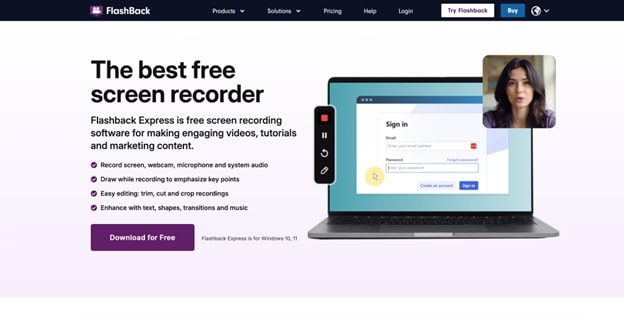
Key Features:
- Screen Recording: Record your entire screen or selected regions.
- Webcam Recording: Capture webcam footage along with screen recordings for more personalized content.
- Audio Recording: Record both system audio and microphone input simultaneously.
- Export Options: Export videos in multiple formats like AVI, MP4, and FLV for easy sharing.
- No Watermarks: FlashBack Express allows you to record and export videos without watermarks, even in the free version.
5. OBS Studio
OBS Studio (Open Broadcaster Software) is a powerful and free open-source software for video recording and live streaming. It is widely popular among gamers, content creators, and professionals for its flexibility and customization options. OBS Studio allows you to record high-quality screen captures and stream directly to platforms like YouTube, Twitch, and Facebook Live. Despite its feature-rich design, it comes with a steep learning curve, which might be challenging for beginners.

Key Features:
- Screen & Window Capture: Record your entire screen, specific windows, or application captures.
- Webcam Integration: Supports webcam input for overlaying your face on screen recordings or live streams.
- Audio Mixing: Full audio mixing capabilities with filters, noise suppression, and sound balancing.
- Live Streaming: Seamlessly stream to various platforms such as Twitch, YouTube, and Facebook.
- Customizable Layouts & Scenes: Create different scenes for various recording setups and quickly switch between them during streaming.
Conclusion
In this guide, we’ve covered the different ways to record your Chromebook screen, from using the built-in screen capture tools to third-party applications. While the built-in methods are great for quick recordings, third-party tools like Wondershare DemoCreator, Screencastify, and OBS Studio offer advanced features such as high-quality video capture, real-time voiceovers, and professional editing. Wondershare DemoCreator, in particular, stands out with its Chrome extension, providing seamless screen, webcam, and audio recording with powerful editing tools. Depending on your needs—whether for simple tutorials or high-quality content—choosing the right recording solution will help you create engaging videos effortlessly.
FAQs
-
Why is my recording freezing?
Ensure your Chromebook has sufficient resources (memory/CPU) to handle screen recording. Close unnecessary applications to free up system resources.
-
Can I record video and audio at the same time on my Chromebook?
Yes, third-party apps like Wondershare DemoCreator and Screencastify allow you to record both video and audio simultaneously on a Chromebook.
-
How can I enhance the quality of my Chromebook screen recording?
For higher quality recordings, consider using Wondershare DemoCreator, which supports 4K recording and advanced editing features to enhance your videos.
-
Can I add a voiceover during screen recording on Chromebook?
Yes, Wondershare DemoCreator and other advanced apps like Screencastify allow you to add voiceovers while recording your screen on a Chromebook.


