

If you've recently begun your audio recording journey on Mac, you've likely encountered iShowU Audio Capture and wondered whether you should use it on your day-to-day recording basis. If so, you've come to the right place.
We'll discuss how to download, install, and use the tool for your recording experience and cover the advantages and disadvantages of iShowU Audio Capture for Mac.
Table of Content
iShowU Audio Capture Overview
iShowU Audio Capture is an extension for iShowU Instant and iShowU Studio. It isn't a standalone tool, so if you've already downloaded iShowU Instant and Studio, you can integrate iShowU Audio Capture and improve the quality of the audio experience. It enhances your microphone or other audio recording devices, delivering better recording results. Check out more details below.
Primary Features of iShowU Audio Capture
iShowU Audio Capture doesn't provide many features. After all, it's an extension, not an independent tool, so you can't expect it to work wonders and provide advanced solutions. Here are some of the features you'll find on the platform:
- Workspace support — if you change to another workspace or account, the program will automatically switch your input device and settings and return to them when necessary;
- Volume support — you can control the audio experience and make it as smooth as possible;
- Stability — if the application crashes, all your settings will be saved, and you can return to your preferences once the platform is back up.
Supported Devices and OS Versions
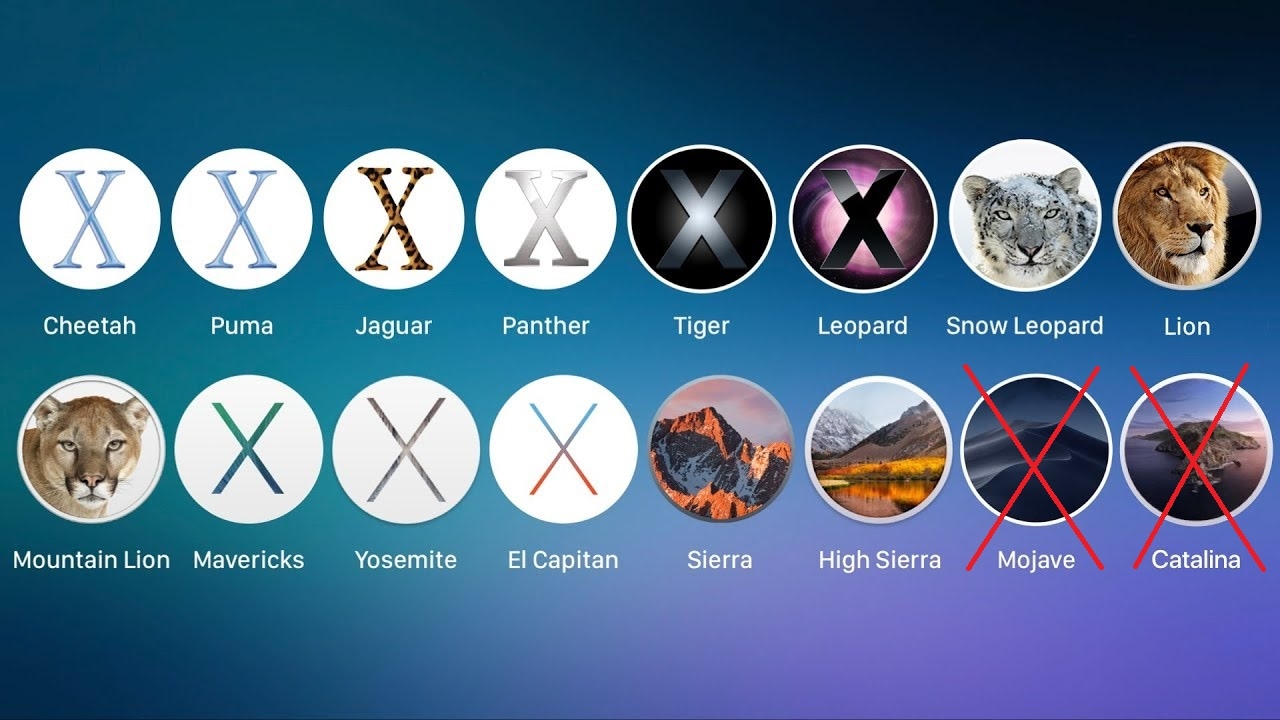
iShowU is available only for Mac devices. If you're a Windows or Linux user, you can't use the solution to improve audio quality and gain sound control. Moreover, due to operating system restrictions, only some macOS users can get iShowU Audio Capture up and running on their devices.
iShowU Audio Capture is available for macOS 10.13 (High Sierra) and earlier. Thus, if you have an operating system version higher than High Sierra, you'll be unable to use the tool, even though you can still download it to your device.
iShowU Audio Capture Pricing
One advantage of iShowU Audio Capture is that it is free to download and use. You don't have to pay and overspend on your audio journey to get the best recording results and provide high-quality content.
How To Download iShowU Audio Capture
Downloading iShowU Audio Capture is straightforward. Follow the guide below to ensure the best experience and quickly get the tool on your Mac.
- Visit the shinywhitebot website and click Download Installer.

- Choose where to save the file.
After that, the download process will begin.
How To Install iShowU Audio Capture
Installing iShowU Audio Capture may take a few minutes. To avoid potential issues, follow this detailed step-by-step guide to install and set up the program.
- Once you download the program to your Mac device, double-click it to start the installation process.

- Go through the prepared prompts to learn how to use the tool. You'll also have to input your password to unlock the program.

- Once you see the green tick sign, you've successfully installed the program on your device.

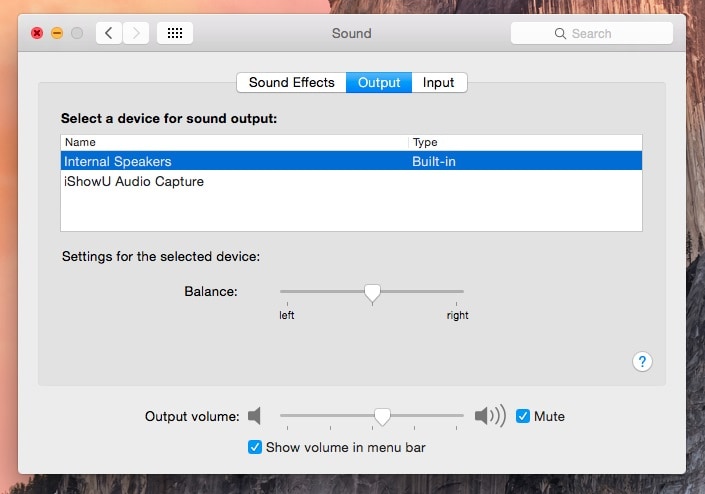
- Go to System Preferences > Sound and Output and select iShowU Audio Capture as the default option.
How To Use iShowU Audio Capture
Once you install the program, you can master its features and begin your audio journey. Here's a step-by-step guide to help you navigate the iShowU Audio Capture experience.
- Open the Audio MIDI Setup app on your device.

- Hit the + button in the bottom left corner and click Create Multi-Output Device.

- Tick the Built-in Output and iShowU Audio Capture checkboxes under Use.
- Tick the Built-in Output checkbox under Drift Correction to prevent sync issues.

- Go to System Preferences > Sound > Output and select your Multi-Output Device.

- Launch OBS Studio, go to Settings > Audio, and select iShowU Audio Capture as one of the Mic/Auxiliary Audio Devices.

After completing these steps, you'll successfully set up your iShowU Audio Capture program.
Pros and Cons of iShowU Audio Capture
Every digital tool has positive and negative sides. Choosing the one with disadvantages you can discard to have the best experience tailored to your needs is crucial. Thus, let's check out the pros and cons of iShowU Audio Capture to help you determine whether it fits your preferences.
Best Alternative to iShowU Audio Capture: Wondershare DemoCreator
Although iShowU Audio Capture may be convenient for current iShowU users, it isn't the best audio-quality solution. It's an outdated program that may have suited your needs 5–10 years ago. If you want to keep up with the modern market and create professional video and audio content, Wondershare DemoCreator may be a better option.
This all-in-one screen recorder and editor provides everything you need to make video and audio content in one program. Moreover, it has even more capabilities and features than iShowU Audio Capture, so you can customize your workflow.
We'll discuss below why Wondershare DemoCreator is more convenient and better than iShowU Audio Capture.
How Is DemoCreator Better Than iShowU Audio Capture?
Wondershare DemoCreator is a modern recording, video editing, and audio-capturing tool that provides everything you need to create breathtaking content. Here are some reasons it's a better solution than iShowU Audio Capture:
- Space usage — Instead of downloading two or three iShowU programs to your Mac and taking up half of your memory, you can simply download one tool and save space on your device.
- Advanced features — Unlike iShowU Audio Capture, Wondershare DemoCreator provides advanced, AI-powered features to take your video and audio to the next level. For instance, you can remove background noise, change the voices in your recordings, and add auto-captions.
- Ease of use — iShowU Audio Capture doesn't have a graphical user interface, making navigation complex. On the other hand, Wondershare DemoCreator has a modern, sleek look, and you'll master it within minutes of becoming a user.
- Tutorials and guides — Wondershare DemoCreator provides guides and tutorials on all its features and tools. On the other hand, you'll have to learn how to navigate the iShowU Audio Capture alone since tutorials and guides are scarce.
- Speed — Wondershare DemoCreator caters to the needs of the modern market, making it as fast as possible. On the other hand, iShowU Audio Capture was popular 5–10 years ago and may be slower than most modern solutions.
How To Use Wondershare DemoCreator
Wondershare DemoCreator is easy to use. First, head to the official website and download the software to your Mac. Then, follow this guide to record your screen and get the best audio experience:
- Open Wondershare DemoCreator and click the All-in-One Recorder option.

- Customize the recording settings, such as audio output. Select"Don't record screen" in the Capture Area if you only want to record audio on your Mac.

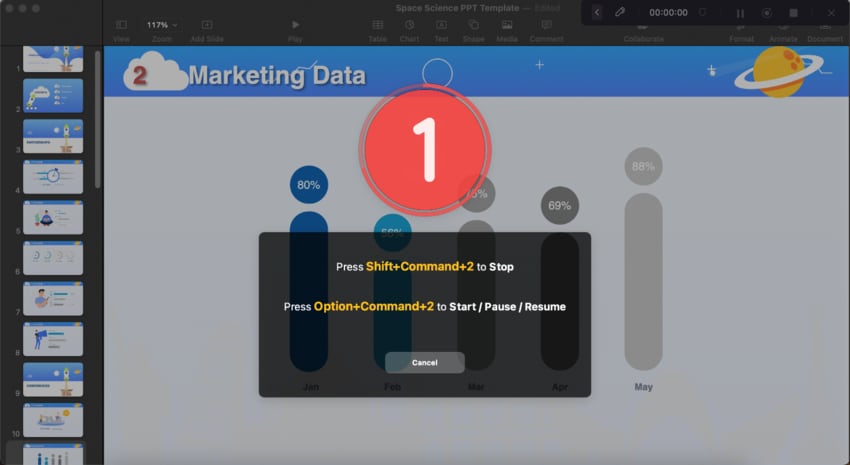
- Click the REC button to start recording, or press the Option + Command + 2 keys.
- Click End Recording or press Shift + Command + 2 to stop recording.
- After the recording, you can edit the recorded video or audio in DemoCreator's Video Editor.
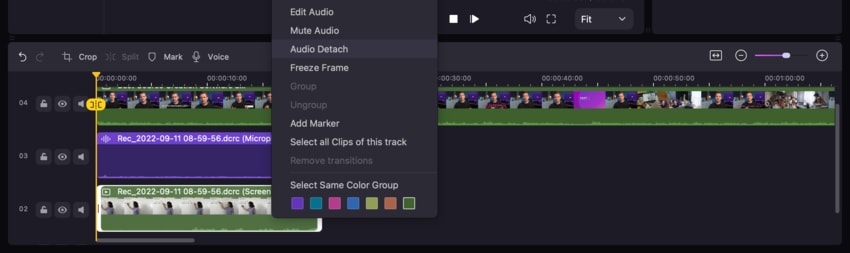
- You can add audio fade-in and fade-out effects by right-clicking the audio and selecting Edit Audio.
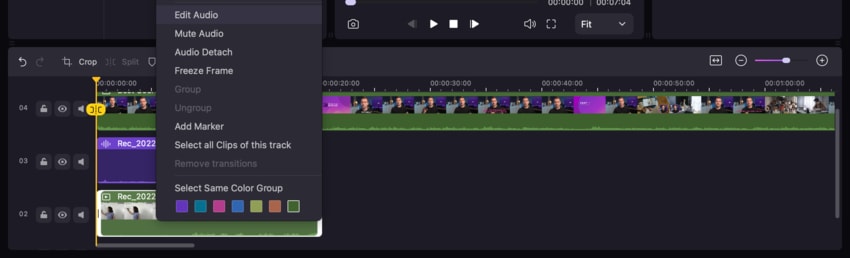
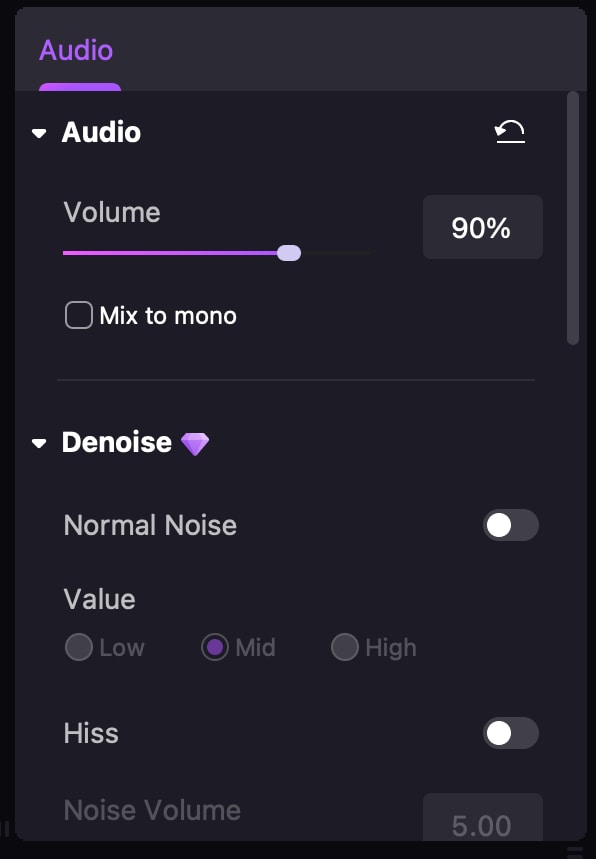
- Click the Audio tab in the Properties panel on the right and toggle the Denoise switch to remove background noise using AI.
The list of audio changes you can make continues, but this guide will help you navigate the software and master the art of recording and audio editing.
Conclusion
Starting your professional recording and audio editing journey can be complex, so you need all the tools you can find to master this art and create professional content. While searching for your ideal solution, you may have encountered iShowU Audio Capture and wondered whether it was worth your time. Our review will help you determine whether you should use this platform.
If you don't like iShowU Audio Capture, check out Wondershare DemoCreator. It's an all-in-one solution to fit all your recording and editing needs, even if you have no experience in the industry.


