There could be various reasons why you would want to screen record FB story. Whether you want to save a precious moment shared by your friend or you want to capture some content for future reference, screen recording Facebook stories is really helpful. In this guide, we will explore various reasons where recording a Facebook story could be helpful and discuss ways you can do the same easily and seamlessly.
In this article
Part 1: Why Screen Record Facebook story: Brief Explanation of Reasons in points
Screen Record Facebook Story could serve important for several purposes:
- To save content— The Facebook story is only available for 24 hours. So, if you see some content in the story that you might want to use later, the only option left is to record and keep it. Screen Record Facebook Story can help you do so easily.
- Sharing— If you see a Facebook story that you might want to share with someone who doesn’t have access to Facebook or isn’t friends with the person sharing the story and hence can’t see the same, then sharing the recording is the only option.
- Documentations— Many digital campaigns now happen through Facebook. Recording a Facebook story could be useful for businesses or influencers to document their social media campaigns.
- Analysis— Digital marketers may want to record competitors' stories to analyze their impact and form future strategies.
- Memory– You might want to save a memory shared by a friend or relative through the Facebook story.
Part 2: Can you Screen Record Facebook stories? Is it Legal?
Many people wonder if it is legal to record Facebook Stories. Does it violate any privacy issues? Then here is the answer to it. The legality of the screen recording of Facebook Stories depends on various factors:
- Content Ownership: The person sharing the story is the legal owner of that content. If you record the content and share it as yours without seeking their permission, you are infringing on intellectual property rights, and you may get in trouble.
- Terms of Service: Facebook’s terms of service mention that copying or modifying content without permission is strictly prohibited. Screen recording could violate this term of service.
- Jurisdiction: Laws differ from country to country. What might be permissible in one place might be illegal in another. Check with your local jurisdiction to find out whether it is legal to screen-record a Facebook Story.
So, yes, you can screen-record Facebook stories, but it is always advisable to seek the owner's permission before doing so. Besides, if you use the content for personal memory and won’t share it anywhere, it is permissible, and no one can stop you from doing that.
Part 3: How to Screen Record Facebook Story
Several free screen recorder software available on the market can help you screen record Facebook stories with great ease without that person even knowing.
Method 1: Use DemoCreator to screen record FB story
Wondershare DemoCreator is one the best software for recording and editing. Besides being AI-enabled, recording and editing a video feels like a cakewalk. Let us explore the key features of DemoCreator and see the steps to record FB stories using DemoCreator.
Features:
- Six recording options for a dedicated, high-quality recording experience.
- Dedicated editing for fast and easy video creation.
- Polish your recorded videos with ample visual assets and give them a feel of studio recording.
- AI power is available for recording, video, and audio editing.
- Advanced version 8.0 amplifies the entire recording and editing experience.
How can I Screen Record Facebook Stories using DemoCreator?
Step 1: Download and install Wondershare DemoCreator from the link above.
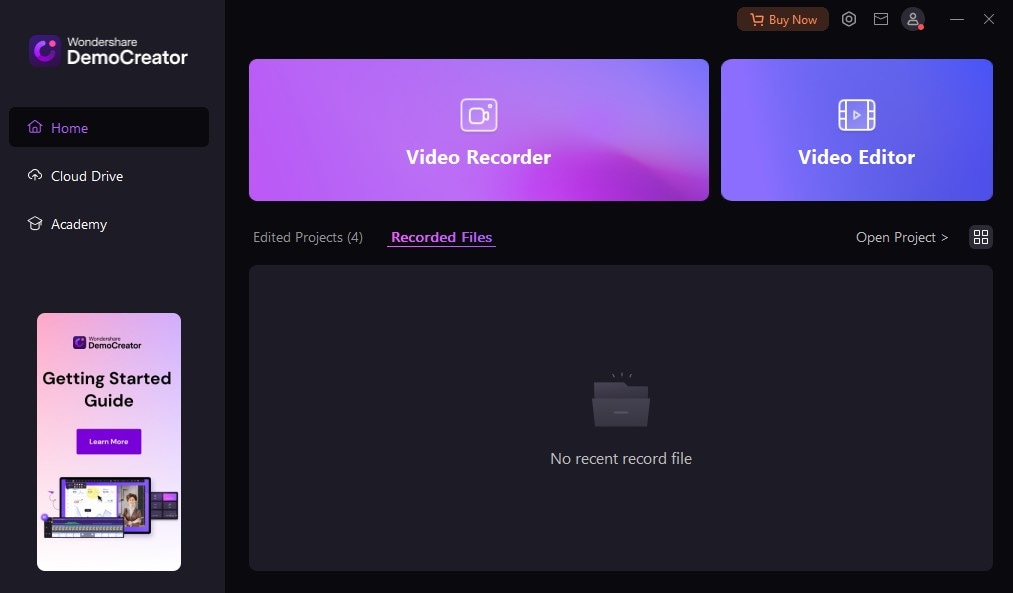
Step 2: Open the DemoCreator software on your PC by double-clicking on it. Now you can see two options – Video Recorder and video Editor. Click on Video Editor.
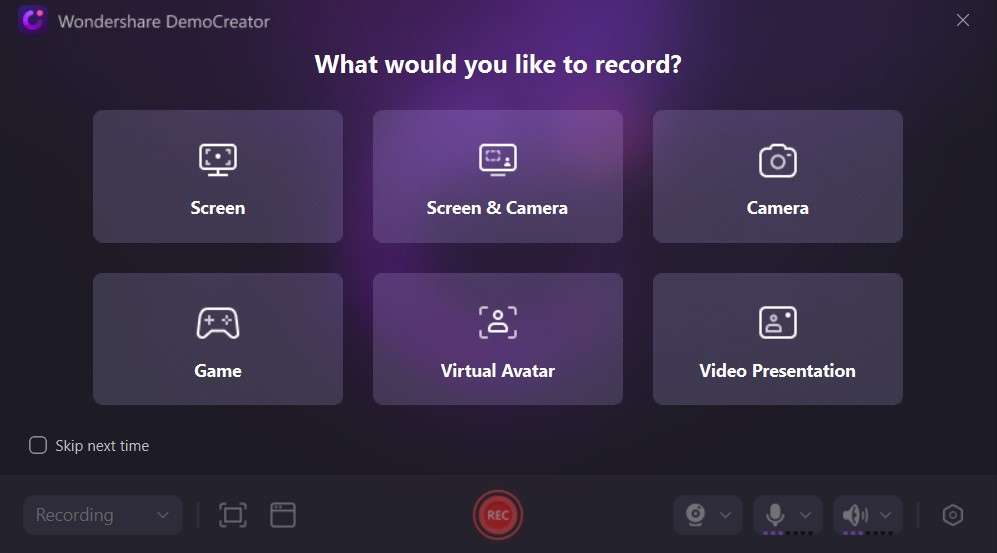
Step 3: DemoCreator offers six different recording options for dedicated recording. Because we are looking for a Screen Recording Facebook Story, selecting Screen would be best. Click on Screen.
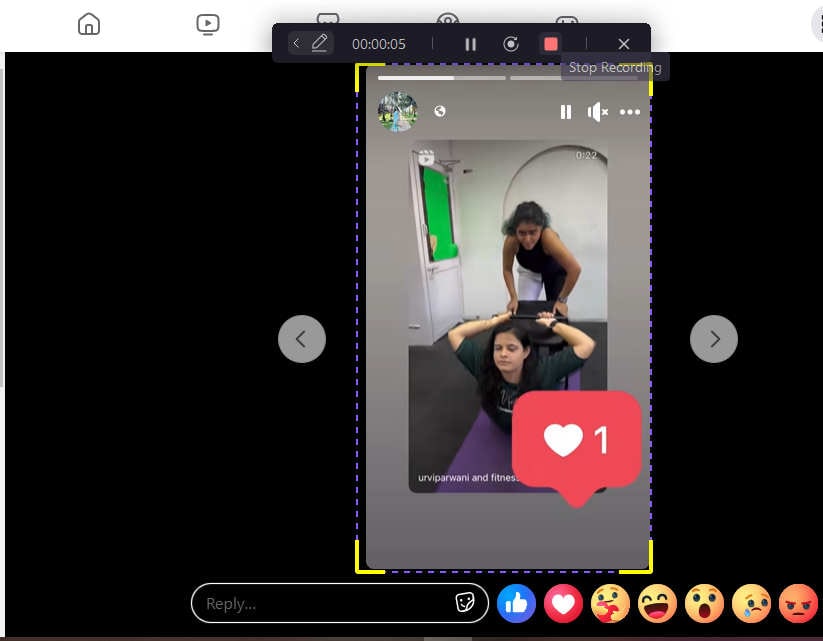
Step 4: You will now see a dotted box opening up. That is the area of the screen that will be recorded. Open your Facebook account and select the story that you wish to record. Adjust the box to the corners of the Facebook story. Now click on the record button and run the story. Once the story is completed, click on stop recording.
Step 5: Edit the story—Once you click on stop recording, you will automatically be taken to the DemoCreator Video Editor, where your last recording will appear in the library. Here, you can playback the recording and preview it to see if it has been correctly recorded. If not, you can re-record the story by going back to the recording button. You can also edit the recording here, such as adding effects, renaming the recording, etc.
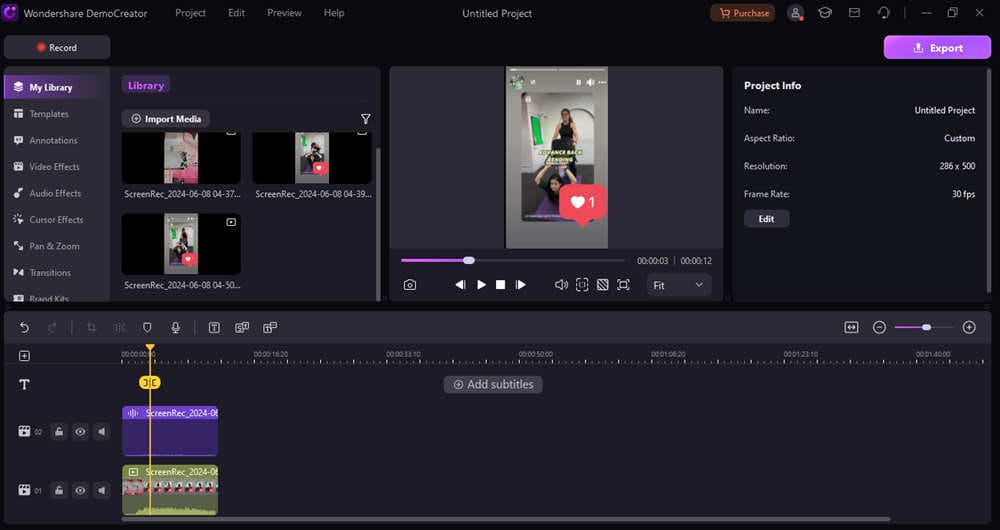
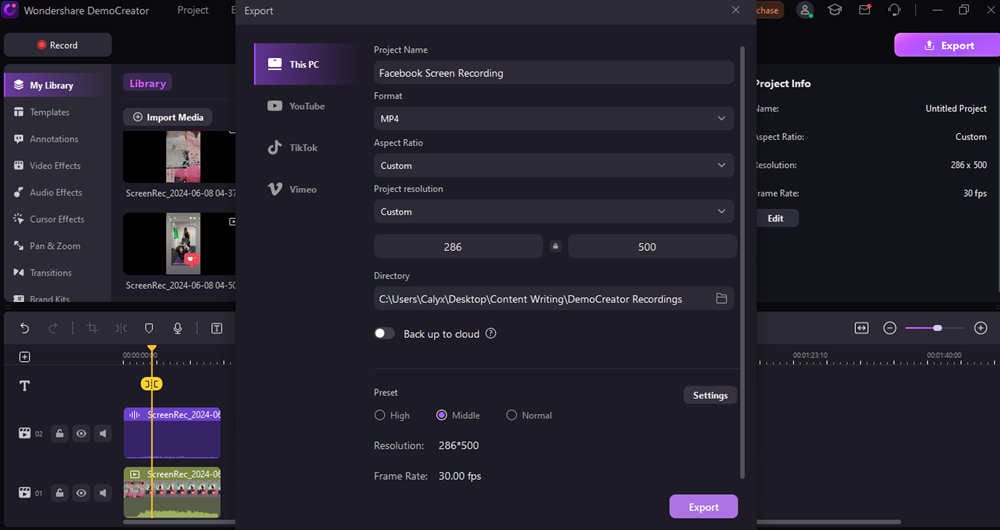
Step 6: Once you are satisfied with editing, click on export. Decide the format in which you want to save the recording and add the path where you want to save it. Once all the settings are done, click on export again.
- Record customized screens with audio and edit them in different tracks.
- Capture gaming videos, tutorials, and presentations and then edit them in one tool.
- Built-in unlimited editing templates, special effects, and other sources.
- Supported export to MP4, MOV, MKV, GIF, and other formats.

Method 2: Use iTop Screen Recorder
iTop Screen Recorder is another software that can help you record Facebook stories with great ease.
The following are the steps to screen record a Facebook story using iTop Screen Recorder.
Step 1: Click on Free download to download and install the iTop Screen Recorder.
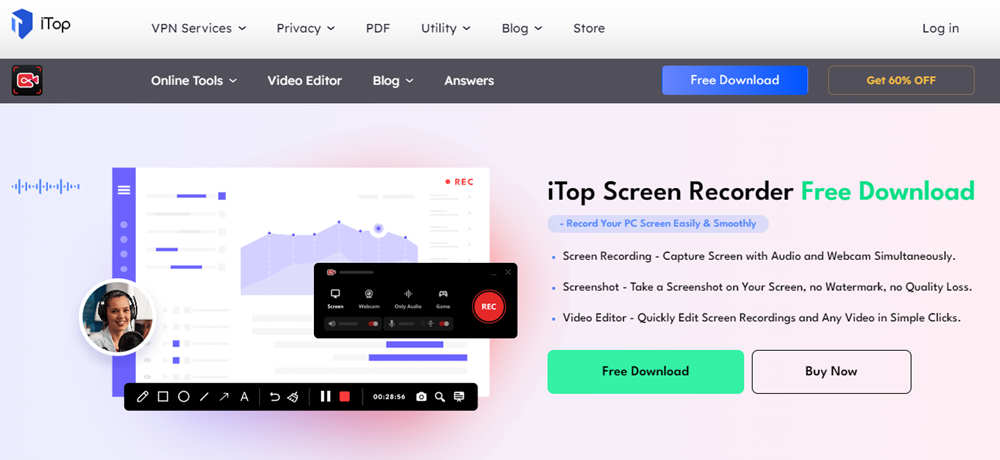
Step 2: Customize the recording settings. By default, the videos will be saved in MP4 format, and audio will be saved in MP3 format. You can customize the recording settings by going on the three lines tab at the top left corner of the screen and going to settings.
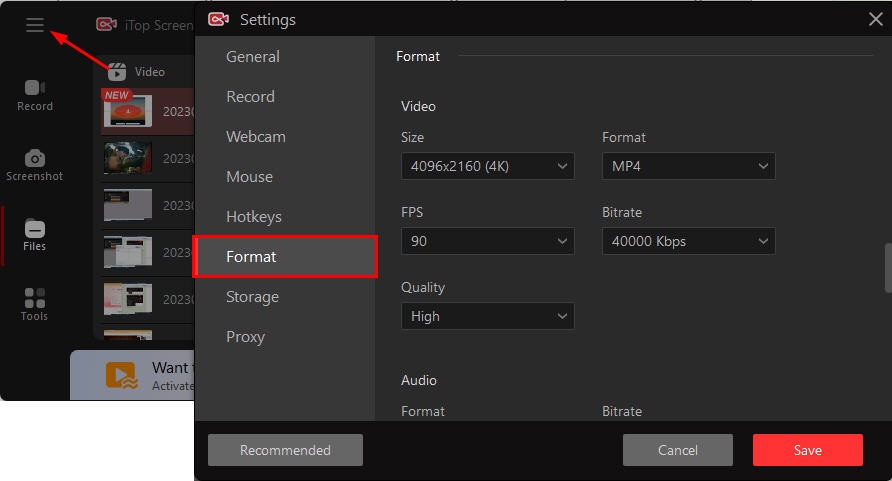
Step 3: Save the changes and return to the recording screen. Open the Facebook App and select the story you want to record. Select the area to record and click on the Record button.
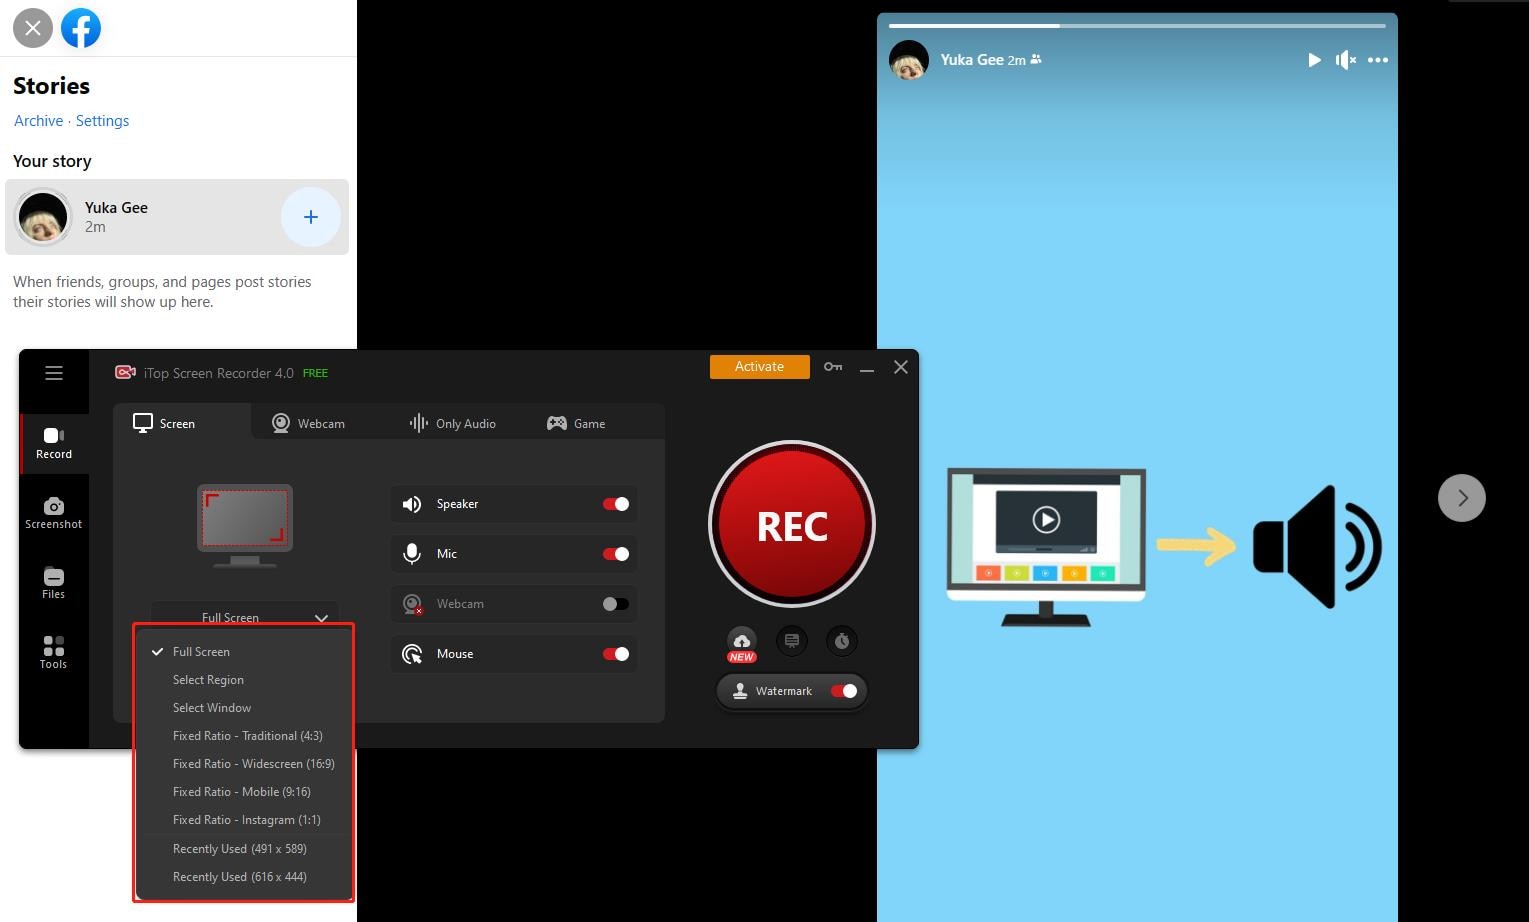
Step 4: Once the recording is done, click on stop recording. You can now preview and edit the recording and save it at the desired location.
Method 3: Use DemoAir Free Online Screen Recorder
DemoAir is a free online Video recording and presentation tools from the kitty of Wondershare. The following are the steps to record a Facebook Story using DemoAir Online Screen Recorder.
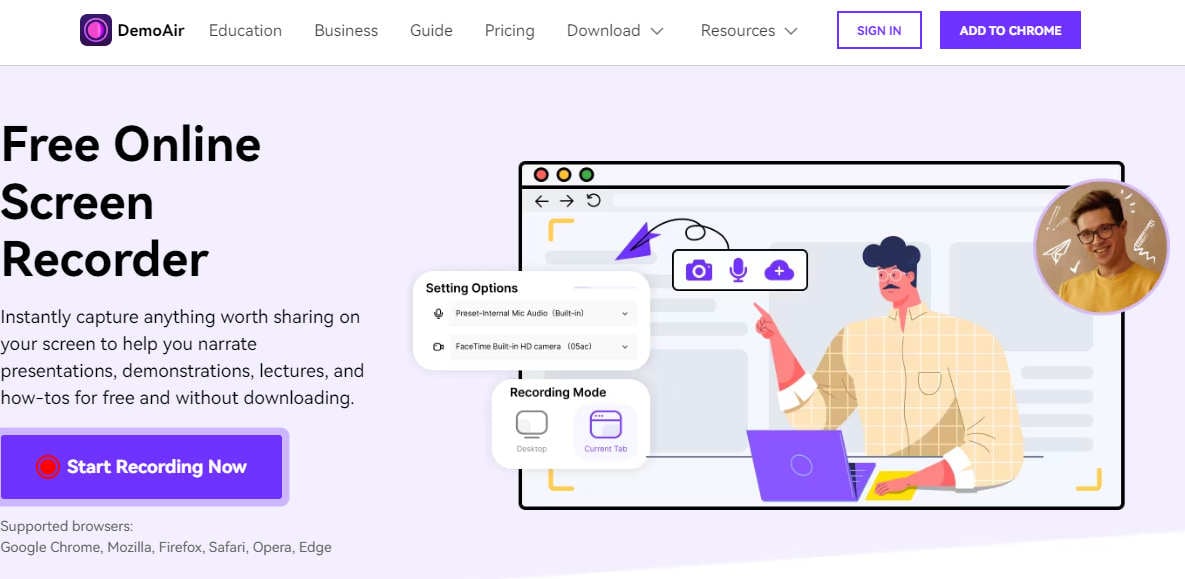
Step 1: Open the DemoAir Screen Recorder and click on Start Recording Now.
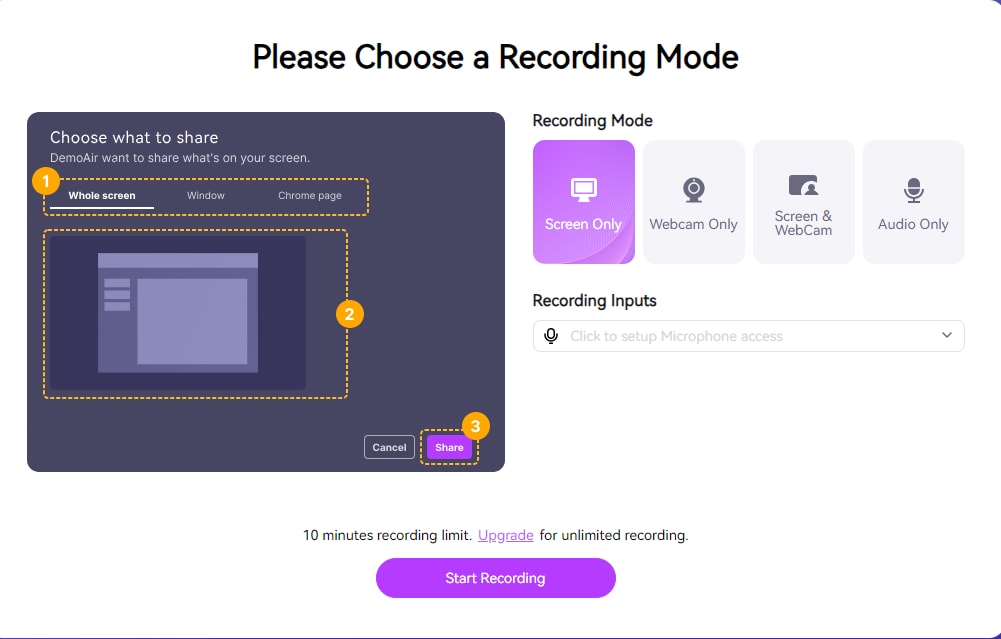
Step 2: Choose the recording mode.
Choose the recording mode. For recording the Facebook Story choosing Screen only is apt.
Step 4: Stop Recording
Once you click on share the DemoAir will begin recording of your Facebook page. Once the recording is completed click on Stop.
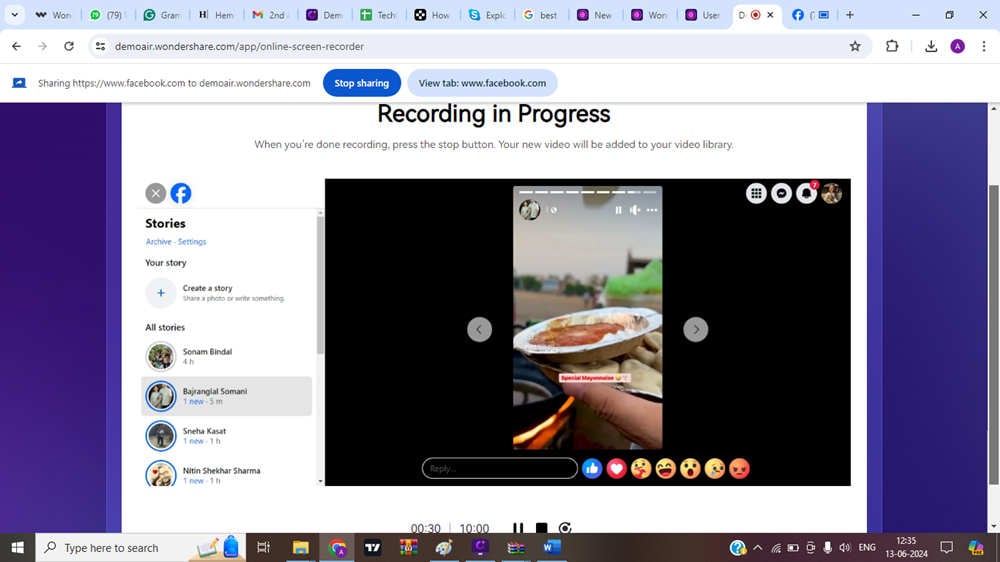
Step 4: Save/ Download/ Share
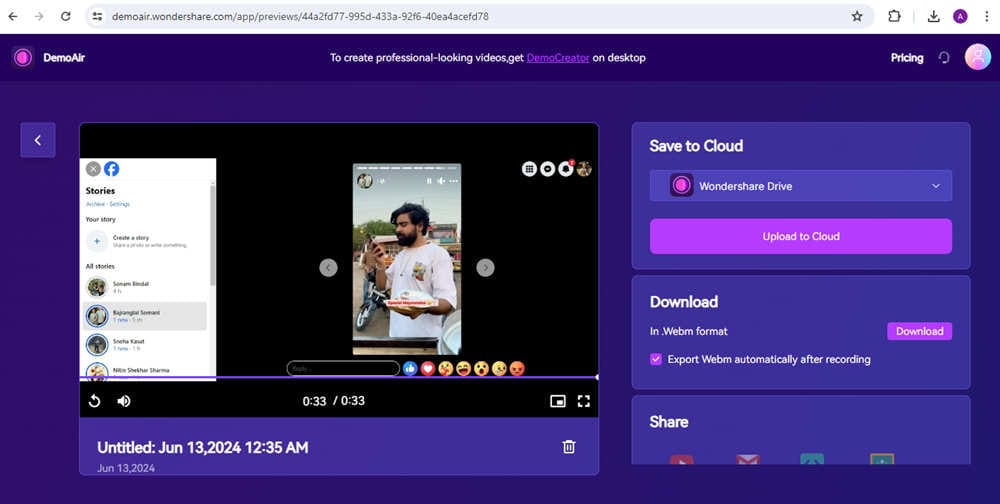
Once you are done with recording you can preview the same. You can save the video on cloud or download it on your PC. You can also share the recording on Youtube or other social media sites.
Method 4: Use OBS Studio to Screen Record Facebook Story
OBS Studio is one of the oldest software programs for recording and editing screens. Although numerous settings need to be done for a perfect capture, you may use the Auto-configuration Wizard to do that for you. Let us see how screen recording Facebook stories can be achieved using OBS Studio.
Step 1: Download and install the OBS Studio on your PC.
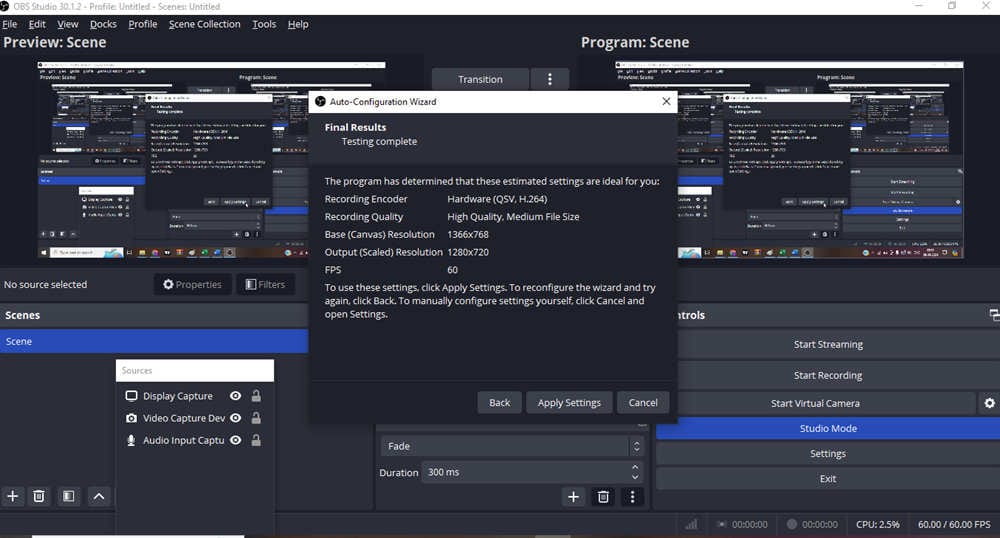
Step 2: Use the Auto-Configuration Wizard to set up your scene. Go to Tools > Auto-Configuration Wizard > Specify what you want to use the program for (for recording a Facebook story, select the second option, optimize just for recording; I will not be streaming) >Next > Specify the video settings > Apply Settings.
Step 3: Set up your recording settings. To do so, go to Settings > Recording and provide the path to save the recording.
Step 4: Open your Facebook page and select the story you want to record. Go back to the OBS studio and click on start recording. Once your recording is complete, click on stop recording. You can go back to the path you set earlier to check the recording. Here, you can trim and edit the recording.
Part 4: Tips and Techniques to Record Facebook Stories Like a Pro
The following are some tips and techniques that will help you record the Facebook story like a pro:
- Always keep the Facebook app open and handy so that there is not much extra recording. This will reduce the need for editing.
- Try using Wondershare DemoCreator. Editing is very easy and handy. You can crop unwanted parts with a few clicks.
- Set the recording area properly so that an extra part of the screen is not recorded unnecessarily. DemoCreator allows you to select the recording area.
Conclusion
You can easily screen-record a Facebook story using the various methods stated above. There are other applications, too, but I personally prefer Wondershare DemoCreator because of its simplicity of interface. It’s easy to use and self-directed. Besides, you can select the specific part of the screen that you need to record and save.
FAQ
-
Q1: Does the other person come to know when you screen-record a Facebook story?
A1: No. Facebook doesn’t notify the person if you record their Facebook story; hence, he can never know that his story has been screen-recorded. -
Q2: Can I stop my Facebook Story from getting screen-recorded?
A2: Once you have shared a story on Facebook, depending upon your privacy settings, many people can view your story. You cannot control your Facebook story from being recorded or taken screenshots.


