
You don’t need to rely on formal presentations just like we are watching since after invention of personal computers. And in this age, where everything has become digitalized, online presentation of your job is at its peak. You need to be more productive. In this regard, we are introducing such a phenomenal, stunning application that is more comfortable to use and quite the restrictions that other software usually applies to us. It demands in every field, especially in the online business.
PREZI Video Presentation software makes you comfortable enabling face-to-face interaction with your audience creating your presentation tremendous and many more. Don’t you get boredom with traditional software which just allows you to share your screen with the permission of the owner? If you want to get rid of this embarrassment and make your work more presentable then this article is truly written for you.
In this article
Part 1: What is Prezi virtual camera?
Prezi an incredible software that was launched in 2005 in Hungary. Unlike conventional presentation software it allows you to avail advance features in your presentations. Besides creating presentation, it has many more elements such as virtual camera, transition effects, connection with zoom, meet, DemoCreator and other software, etc. That is the reason till 2021 Prezi engaged 100 million people worldwide.
Part 2: Why we use Prezi Virtual Camera and presentation?
There are several key benefits of this emerging application. It gives you a good opportunity to make your presentation catchy and extraordinary so the listeners will never get exhausted. Moreover, it has an amazing feature to share your presentation live on zoom, google meet, or any other application such as DemoCreator. You can also introduce your face while presenting your topic.
Here are some peculiarities of Prezi:
- Prezi is an all-in-one type of software. In addition to presenting your work it excesses you to some advanced features just as slide show effects, Prezi graphic designing, detailing of each picture, and many more.
- It contains the slide show canvas which is an outstanding approach while making a slide show. All the immense features such as zooming on topics, free movements and zoom reveal lie within this canvas.
- More creativity makes a more amazing Prezi presentation. You need to be more creative and ingenious to utilize this application solely. Use advanced technology and transitions while presenting video presentations on any platform.
- Unlike traditional presentations that merely contain pictures on picture slides, Prezi provides you with the feature of showing your face to interact with your listeners. You can share figures, charts, graphs, and so on with your audience.
- Prezi extends its installations to smart tools. So you can engage with it skilfully. Such tools include Live Prezi, voice-over, and presenter view.
The presenter view shows a brief list of what you have to share with others. It is only visible on your screen and no one can see it.
- It is not hard and fast that you must create a Prezi presentation. You can also continue with the previous presentation made by PowerPoint.
Part 3: How to set Prezi virtual camera in a video presentation
The favourable thing about this software is that it can be installed both on laptops and Mac. To set Prezi virtual camera in video presentation you need to follow the following steps.
Step 1Download and install Prezi virtual camera
To avail of this software, you must meet these systems to run the application appropriately.
OS: Microsoft Windows 10
Processor: Intel-based 64-bit processors (32-bit and ARM-based systems are incapable to support this application).
Price: Prezi is 100 percent free of cost but it does not give you complete excess to all features. To get complete command on it you must purchase the application which demands $159/per year.
To install first of all you have to download it from Prezi's official website which is www.prezi.com. After completion of downloading, you have to install it on your computer, it may take 4 to 5 minutes.
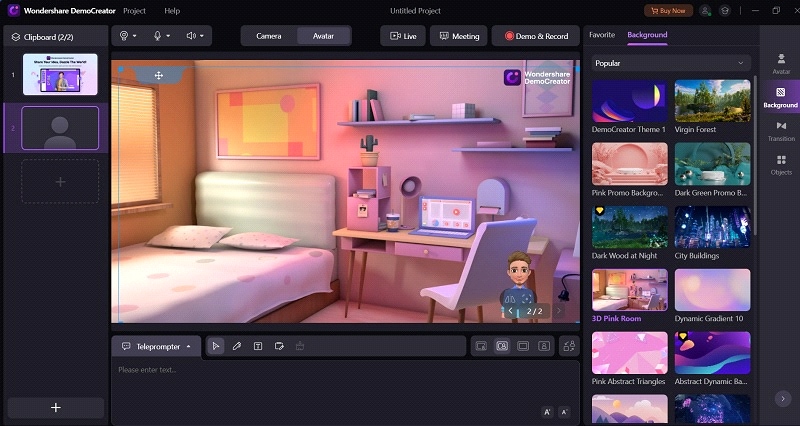
Step 2Select a room
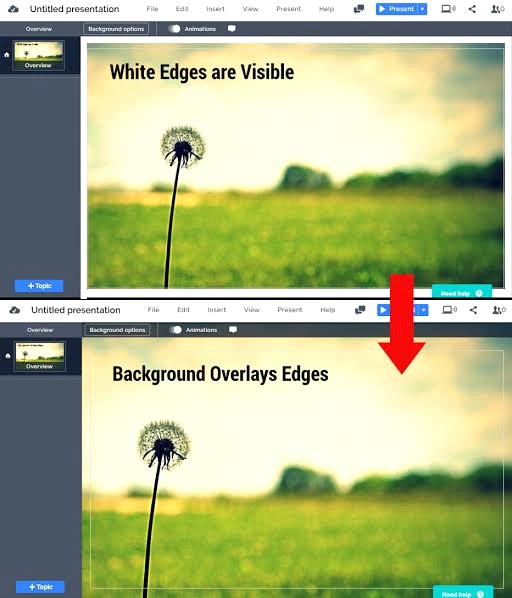
Prezi virtual camera contains several fantastic backgrounds, in Prezi's language we termed them “rooms”. Select your preferable room by clicking on the option of room on your screen.
Add pictures as background:
You can use image as a background by dragging it to the background.
Dynamic backgrounds:
The advanced feature of Prezi includes dynamic 3D backgrounds. This will provide a fascination that will engage your listeners.
Step 3Adjust your screen
Now you can adjust different settings that are available on the screen. You can turn on the microphone, set your voice on video, and adjust the green background. Set the zoom level, etc.
Step 4Add content on Prezi presentation
Add your slides to make your work effective and productive. Add text on them with different transition effects. By clicking on the slides option Prezi will provide you with different options including text slides whiteboard, Prezi camera, etc.
Here are the options to resize the text, and style the appearance of your slide to make your presentation more advance and cooler.
Step 5Export and share video
If you have already installed this application on your computer then you can export it via going to publish button. Give your video a title, and short description. Then give it a thumbnail so the internal data will be determined by it. After this save the video it will create a link that you can share with your friends.
Step 6Connect it to other devices like Wondershare DemoCreator
Prezi virtual camera and video presentation can be linked to any other platform just like Wondershare DemoCreator, Google Meet, Ms teams, and many others. Follow these three steps to connect it with other platforms just like DemoCreator.
- Open Prezi
- Launch your DemoCreator
- Choose Prezi as a camera input in DemoCreator
Part 4: How to input Prezi virtual camera in DemoCreator new demo mode
It is an advanced feature known as DemoCreator v6. This will allow you to create a presentation with PowerPoint, can capture the screen, and can do the live streaming.
An essential demo-making tool that helps learners, educators, freelancers, and gamers to take idea-sharing to the next level.

Here, we will guide you that how you can avail of this software efficiently.
After starting this software click on start a new demo project. Here they provide the opportunity to upload all the projects including pictures, and previously created slides that may contain videos, images, and other files. Sharing live your screen with other people is also present.
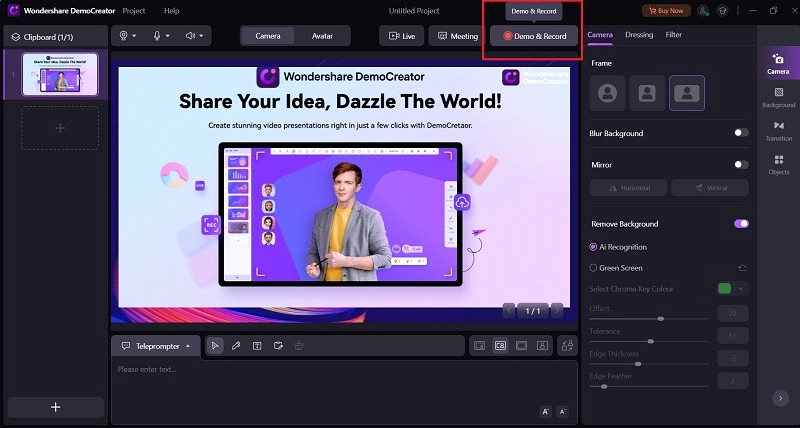
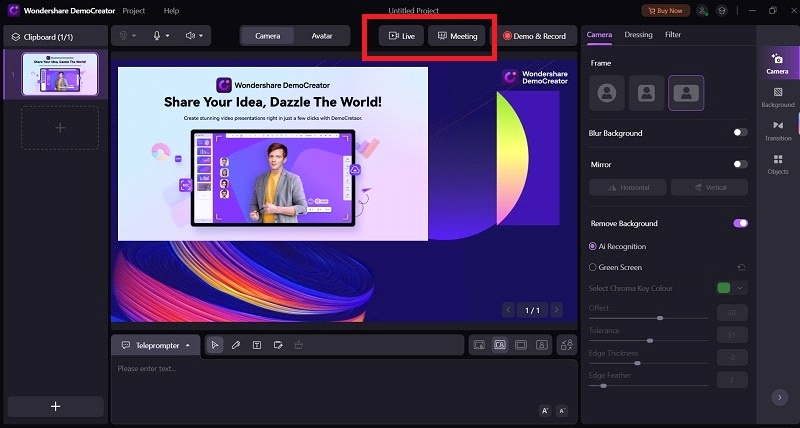
- Here is the interface of the new demo mode. You can see two options.
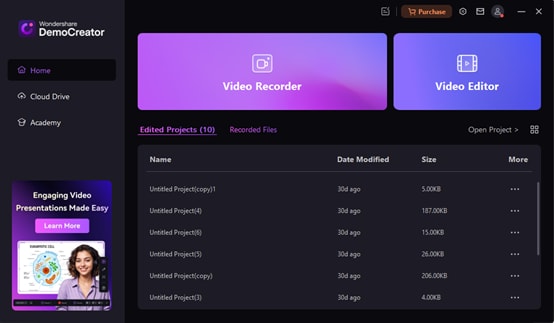
- After opening the software, you will find the demo and record option at the top right.
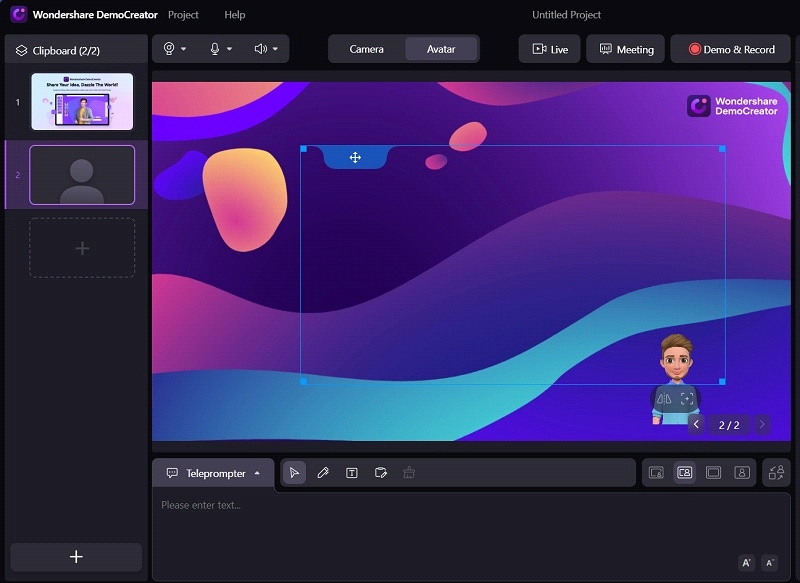
- The application allows you to create your avatar if you don't want to reveal your face to others. Different avatars are present in this regard.
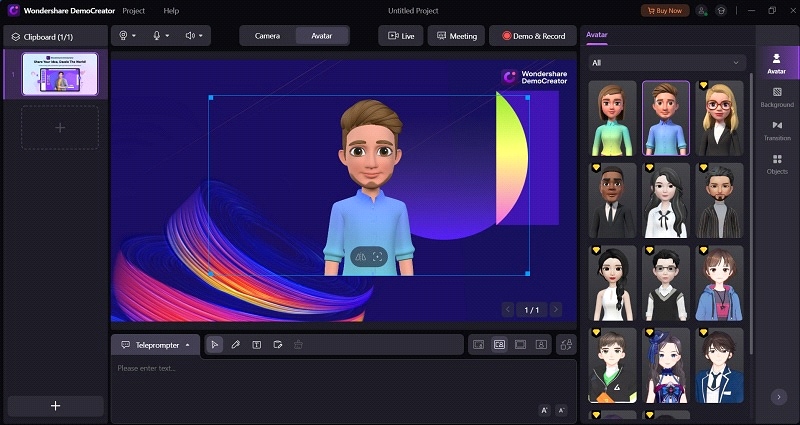
- Your avatar can be resembled to your personality. Just like if you are a female speaker, you can choose your favourite female avatar.
- Select the avatar and resize it according to your presentation. Keep in mind your avatar must in right side so it will give sufficient space to add test and slides.
- Add a background by clicking Background button that locates in top right bottom.
- Adjust the size of the screen according to your will. You can adjust it by dragging the square shown in the picture.
- The best goal of this is you can share the live recording with your listeners. These are the two options here.
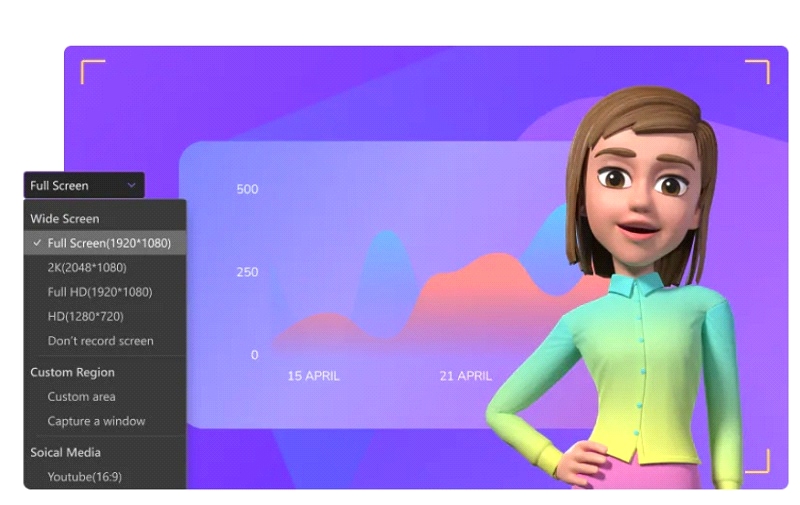
- Set your resolution here for the quality content of your own will. Normally, we choose 1280*720 resolution.
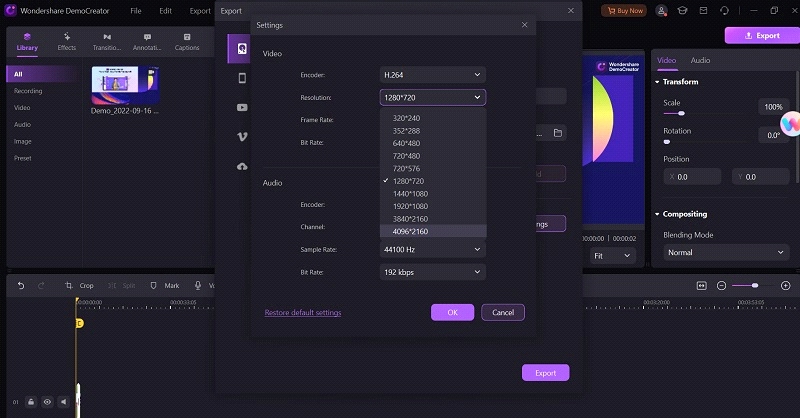
- Add clips of your choice. You can see the multiple options such as crop, split, add photo resolution and many more.
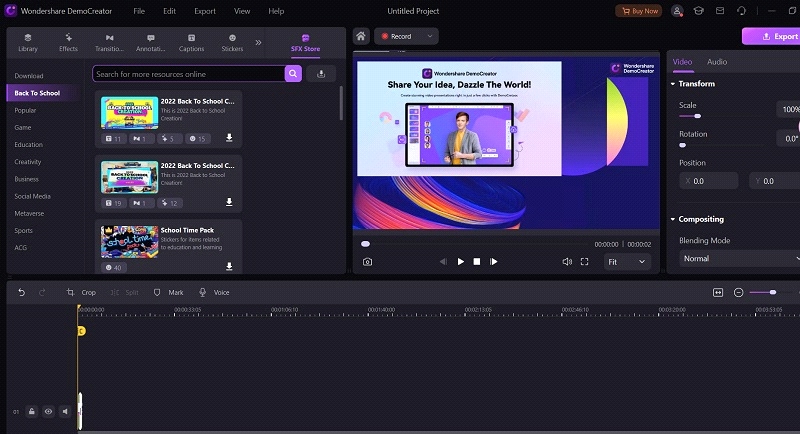
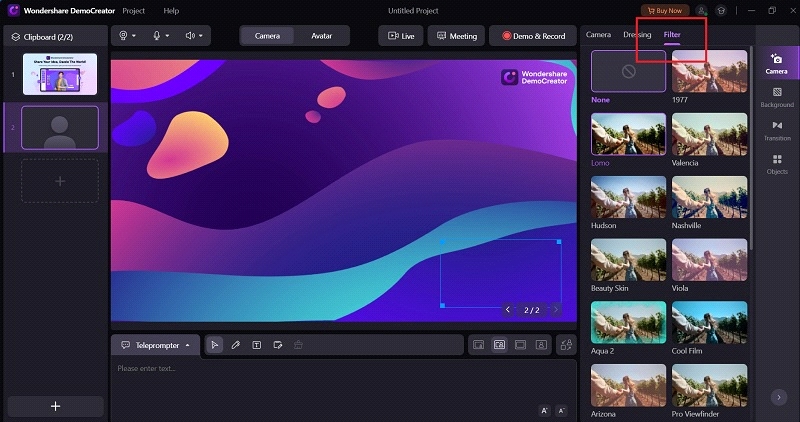
- Add filters to your presentation by clicking on Filter button. Add filters of your choice to enhance quality of your presentation.
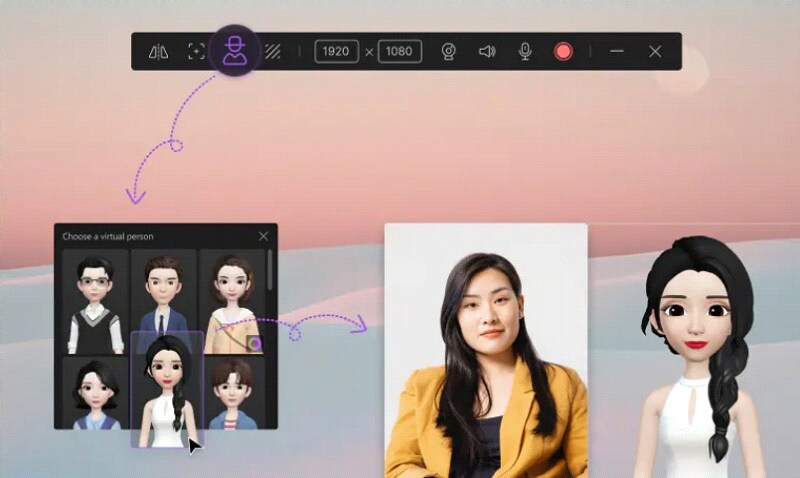
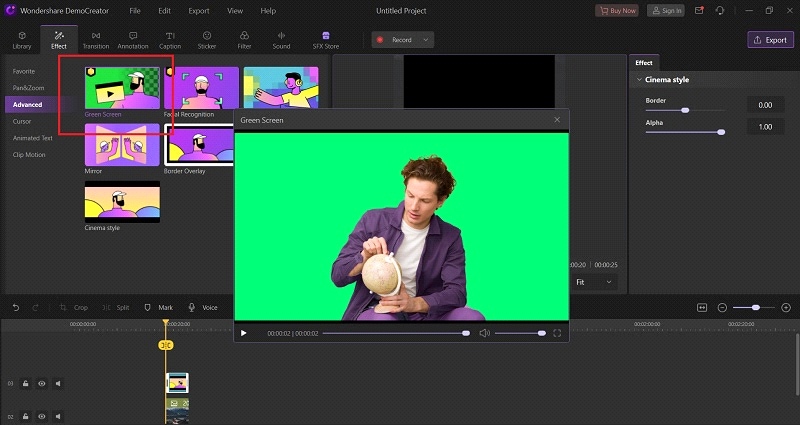
- Most influencer use black background to add more fascination to their work. For this go advance options. Then add green screen background video and adjust it with your original video.
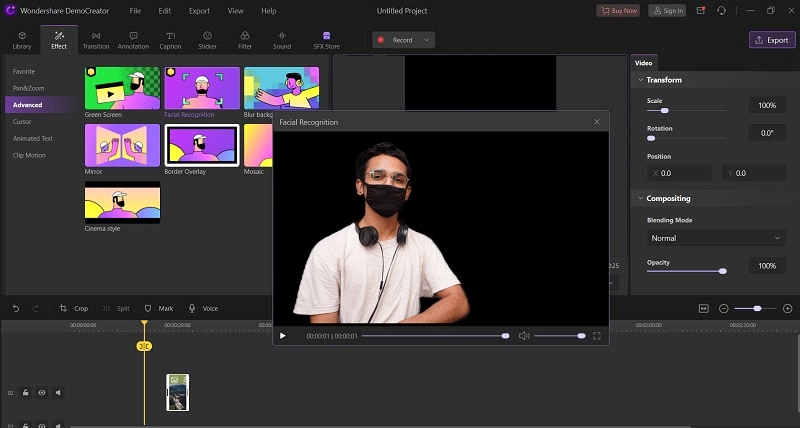
- The final result of your black background video will be just like you can see in this picture.
After completing the editing your final presentation video will be amazing. Click on the Export button that is in on top right corner so that your video will be exported to your gallery.
Advantages to use Prezi as a virtual camera and video presentation
By mentioning the above-advanced features we can say it has many different and advanced features such as:
- Cooler filters you can make your video more intriguing using effects
- Transitions showing picture after picture slide seem to be old-fashioned. By adding transitions your work seems to be more professional and captivating
- Record, save, and share
After editing or creating any video you can give a voice-over to it. After saving it generates a link so that you can share it with your friends.
Conclusion
Summarizing the whole discussion, Prezi virtual camera and presentation work more efficiently than other applications. Your work remains secure and becomes more advanced than other people. Besides in the trading world, you can also use this software in school, and college presentations. In this age, everyone is working online. So, it is compulsory to present your work as distinguished and tremendous.


