

Platforms like Zoom gained traction and took over in-office meetings, replacing them with virtual calls where users could join meetings from their homes.
Today, even after the pandemic, Zoom remains a go-to tool for almost all school and business-related video calls. After all, it has improved its functions and now lets users easily annotate Zoom meetings.
If you’re not up-to-date with the latest tools and tricks, this guide aims to help. Stay around to learn more about it, as we’ll show you how to annotate on Zoom and explain all the different tools.
In this article
Requirements for Annotating in Zoom
Annotation in Zoom meetings is only possible if you’ve checked all the requirements for the app’s screen annotation tools in virtual meetings. These include the following:
- Zoom App – The Zoom client must be installed on your device, regardless of whether you’re using Windows, macOS, Linux, Android, or iOS. You’ll also need at least the global minimum version of the app to use Zoom annotation tools.
- Annotation Enabled – You can’t annotate in Zoom if the meeting host has disabled attendee annotation. This setting can be entirely turned off, enabled for the host only, or enabled for everyone, and you should check with the meeting host if it’s on.
Once you have these prerequisites, you can proceed to the guide.
Sharing Your Screen to Annotate in Zoom
Before using Zoom’s annotation tools, you’ll first need to share your screen with the other meeting participants, so let’s dig right into the steps on how to do that:
Step 1: Download and install the Zoom app on your device. Then, launch the app. (We’ll use the Windows version for this guide.)
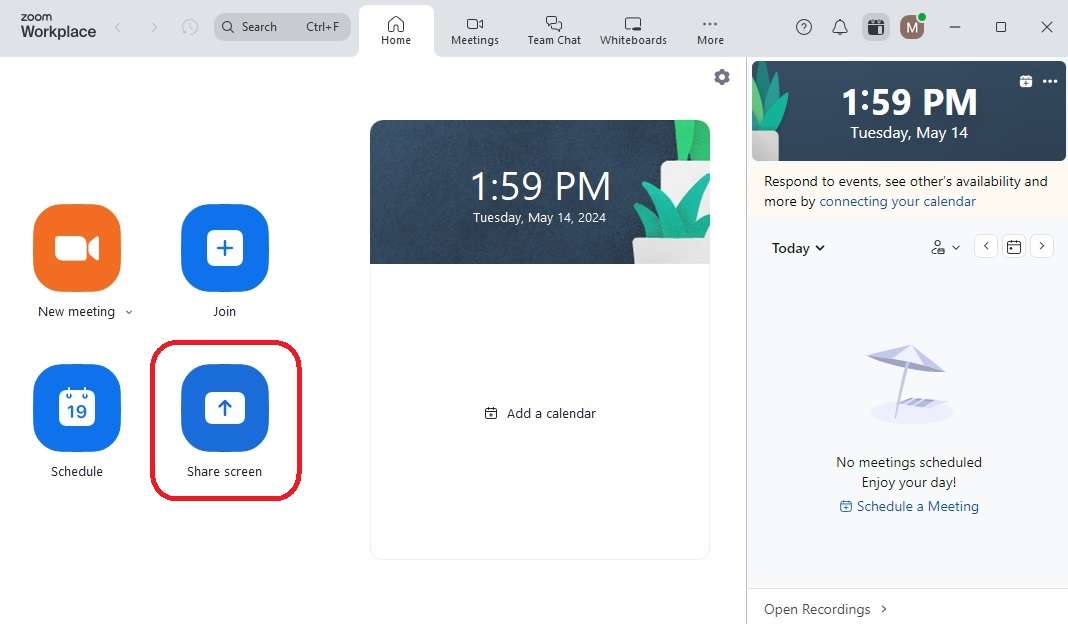
Step 2: If you’re joining someone else’s meeting, tap the Share screen button and enter the meeting ID.
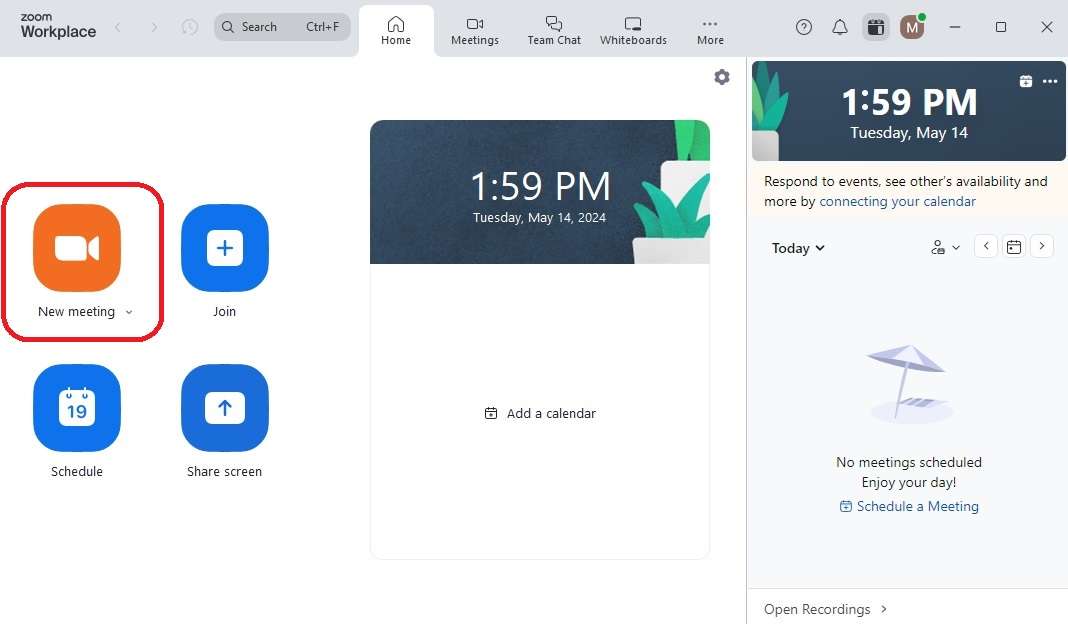
Step 3: If you’re hosting, tap the New meeting button and adjust your audio and webcam settings.
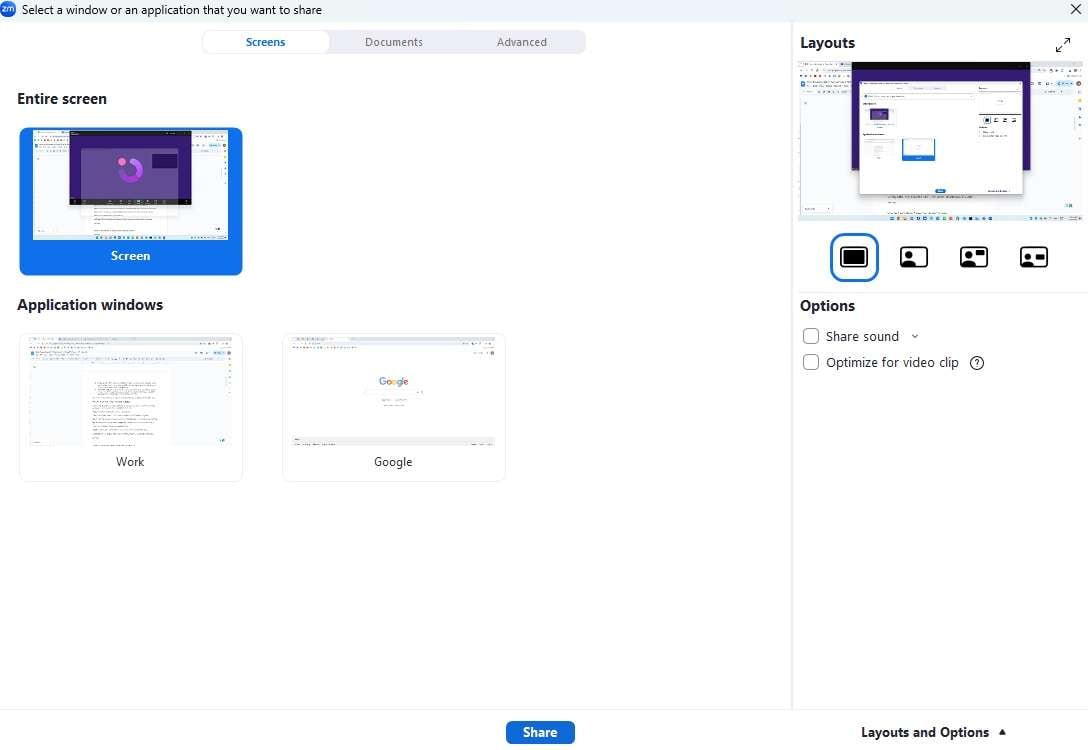
.tep 4: Click the Share button or press the ALT + S keys.

Step 5: Choose between specific windows and the entire screen and press Share again.
Your screen will now be shared; you should always verify that with other participants.
Letting Other Participants Share Their Screen to Annotate in Zoom
As a Zoom meeting host, you can turn the Zoom annotate tools on or off for all other meeting participants. If they’re off, enabling them is effortless, and here’s how you can do that:
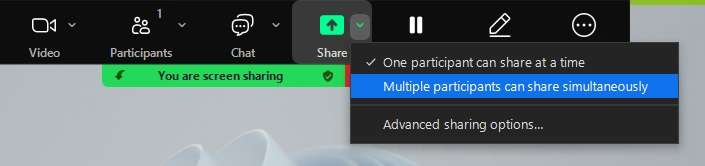
Step 1: Tap the tiny Arrow next to the Share button and choose the “Multiple participants can share simultaneously“ option.
Step 2: Inside a meeting, mouse over Zoom’s menu bar and tap the More menu.

Step 3: Find and click the Enable annotation for others option.
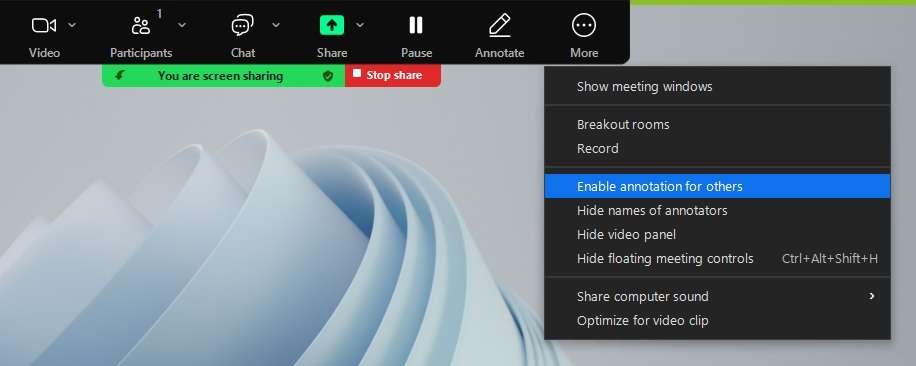
In just two simple steps, you’ve enabled annotation in Zoom meetings for all participants.
How to Annotate in Zoom Over Shared Screen
Once you’ve shared your screen in a Zoom meeting, accessing Zoom’s annotation tools becomes a breeze. Here’s how you can do that:
Step 1: Hover over Zoom’s menu bar to access it.
Step 2: Tap the Annotate button.

Step 3: Optionally, tap the Three Dots button and click the Dock toolbar option to prevent it from disappearing.

You can also move the Annotation toolbar to all four sides of the screen by clicking and dragging it.
All Annotation Tools in Zoom and How They Work

Once you open Zoom’s annotation tools for the first time, you gain access to dozens of options that might seem overwhelming to a beginner. That’s why we’ll explain what each of these tools does, so let’s dig in:
- Mouse – It activates and deactivates Zoom’s annotation tools. When they’re deactivated, the button is blue.
- Select – This tool lets you select, move, and resize your annotations.
- Text – As its name suggests, this button lets you add textual annotations to your Zoom meetings. Use it with Color to change the font color and size, or use Bold and Italic.
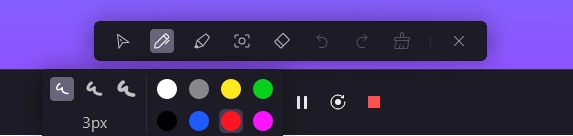
- Draw – This button lets you access Zoom’s Pen, Vanishing Pen, Highlighter, and Smart Pen and change the line width and shape.
- Stamp – It lets you add a Tick, Stamp Arrow, Cross, Star, Heart, and Question Mark.
- Spotlight – Use this tool to draw attention to a particular part of the screen by putting it into the Spotlight or adding an Arrow with your name next to it.
- Eraser – This one lets you erase annotations if you make mistakes.
- Color – While normally greyed out, this button works with Text, Draw, and Spotlight, allowing you to personalize your annotations.
- Undo and Redo – These tools allow you to return one step or restore an item you’ve accidentally removed.
- Clear – As you would have guessed, Clear lets you remove all annotations. You can remove your, your viewers’, or everyone’s drawings.
- Save – This button lets you save your annotations as a PNG image or a PDF document.
You’ll get the hang of all these tools quickly with some practice.
Benefits of Annotations in Zoom Meetings
Once you master Zoom’s annotation tools, they can be pretty beneficial for your virtual meetings, bringing the following advantages:
- Clarifying Content – Zoom’s annotation tools significantly enhance communication, explaining complex topics and helping visual learners understand what’s being discussed.
- Highlighting Vital Parts – Annotations make finding vital information effortless, allowing users to skim through large documents and focus only on the essential parts.
- Brainstorming Together – Zoom screen annotations are fantastic for collaboration when they’re enabled for all participants, as they allow users to share ideas and brainstorm quickly.
Overall, annotations in Zoom meetings are undoubtedly a fantastic feature that can significantly improve the quality of your video conferencing calls.
Alternative Annotations Tools to Consider: DemoCreator
While Zoom’s annotation tools are excellent for drawing and highlighting during virtual meetings, they require that you be present in the meeting, whether as a host or a participant. That makes Zoom’s annotation tools less than ideal if you want to create tutorials and explanations and share these outside of a live meeting.
Fortunately, Zoom isn’t the only app with annotation tools, as many alternatives are available online. Wondershare DemoCreator is one of these annotation tools, and its lack of limitations undoubtedly makes it a worthy alternative to Zoom.
Its support for multiple distinct recording modes, cross-screen capture, long recordings of up to 24 hours, and high-quality videos with up to 8K resolution and 120FPS make DemoCreator a vastly more powerful screen annotation tool than Zoom. You can even connect DemoCreator with Zoom to create seamless presentations during meetings.
Thanks to the app’s simple and intuitive interface, even beginners will quickly learn how to use it, and here’s how you can, too:
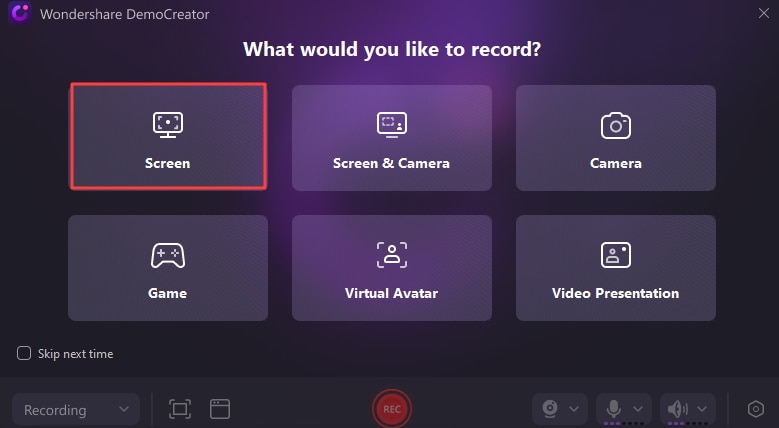
Step 1: Launch DemoCreator, click Video Recorder, and select a recording mode. (We’ll use the Screen recording mode for this guide, but the app’s annotation tools are also available in the Video Presentation mode.)
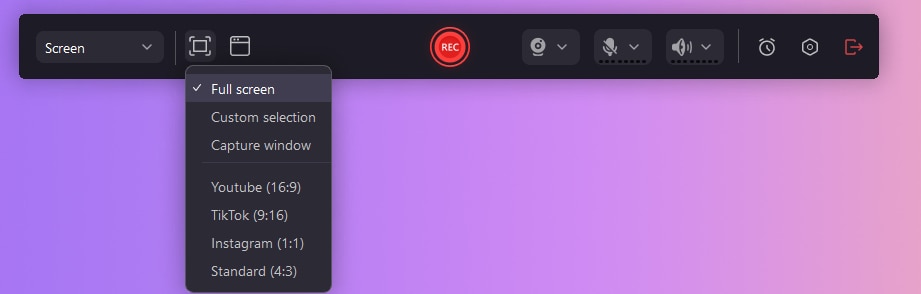
Step 2: Customize your recording area by choosing between full-screen, custom selection, specific window capture, and particular social media resolutions.
Step 3: Adjust the Webcam, Microphone, and Sound settings to your liking.
Step 4: Hit REC or tap the F9 key to record. Use the same button to pause or resume recordings.
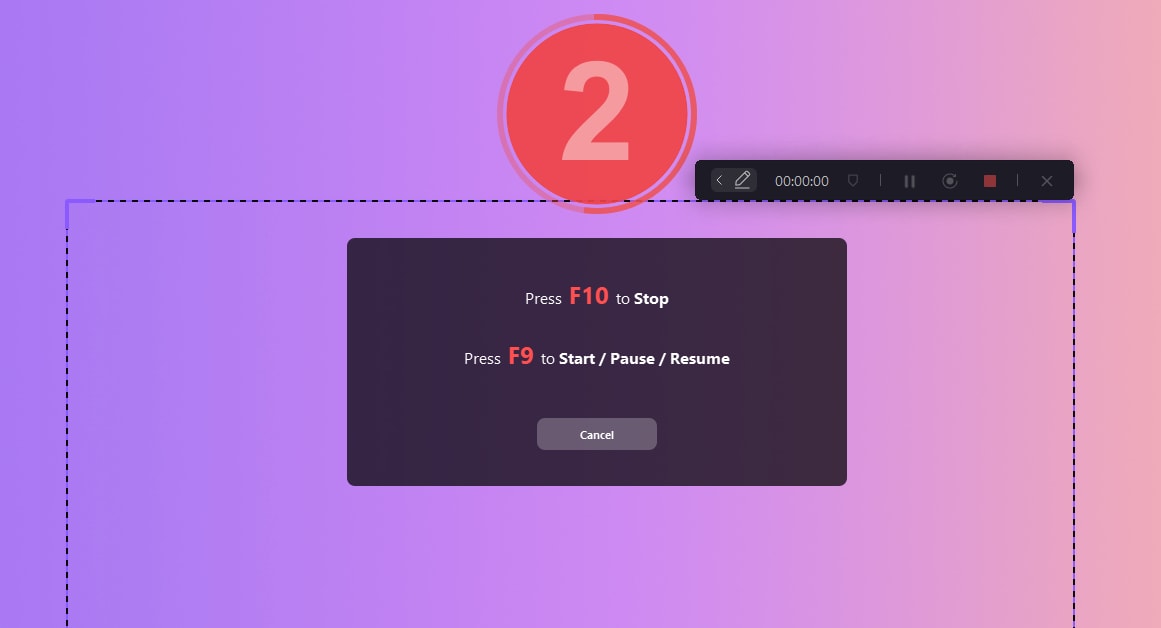
Step 5: Tap the Drawing Tools button in DemoCreator’s menu bar to access the annotation tools and draw freely during your screen or presentation recording.
Step 6: When you’re done, press Stop or tap the F10 key to stop recording.
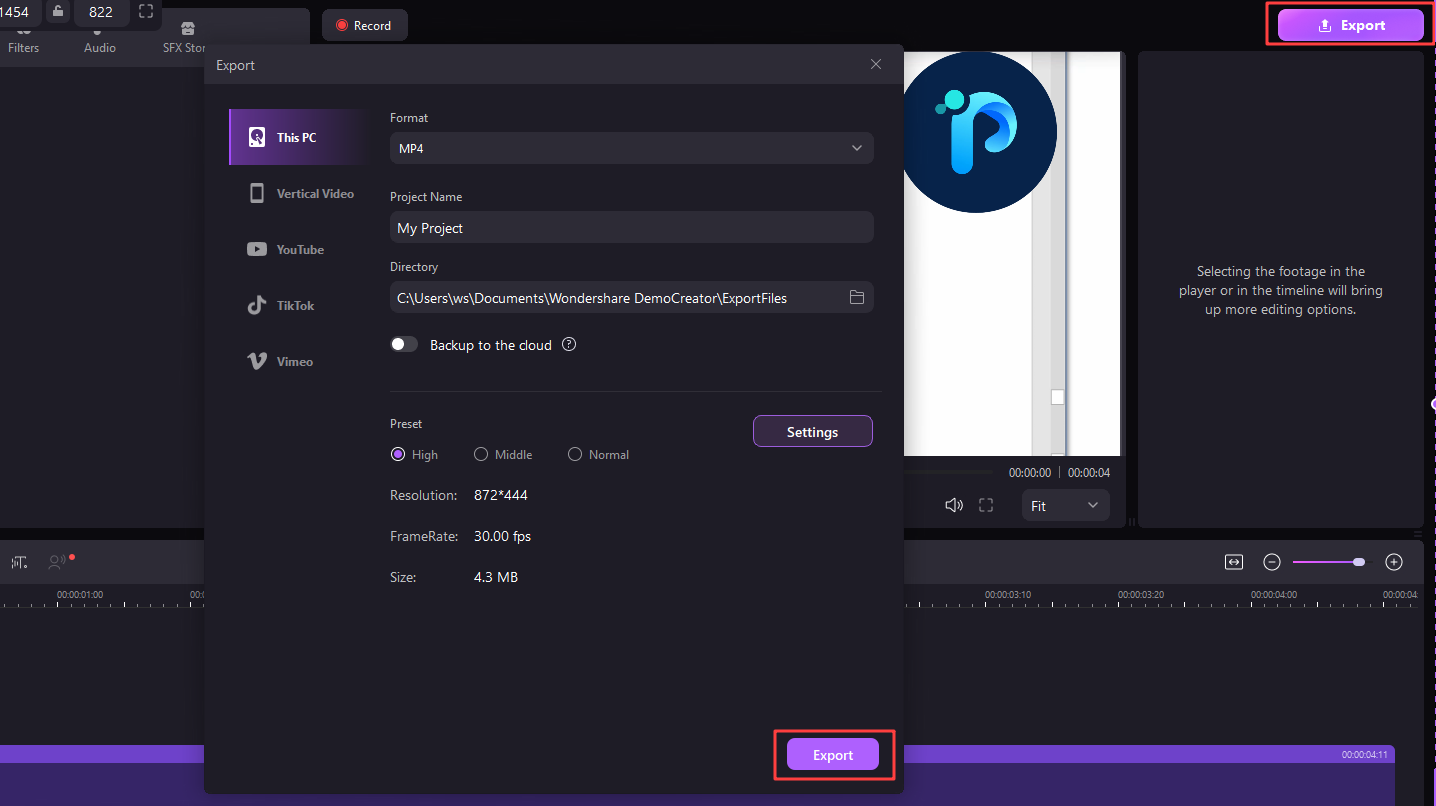
Step 7: Depending on your Recording Scheme settings, the app will offer to export the recording or import the clip into its built-in editor. After editing, click the Export button to save the clip.
While the abovementioned steps are for the Screen recording mode, the app’s Drawing Tools are also available in DemoCreator’s Video Presentation mode, and you can find the detailed steps on it official drawing tool guidance page.
Conclusion
Annotations in Zoom meetings are a terrific feature that lets users clarify complex topics, highlight the vital parts, and share ideas during video conferencing. Using them requires running the global minimum version of the Zoom app, starting or joining a Zoom meeting, and enabling annotation tools in Zoom.
If you dislike Zoom or its limitations or want an app that can annotate outside video meetings, Wondershare DemoCreator is a fantastic alternative. It’s your best bet at making high-quality recordings with drawings of all shapes and sizes.
Its annotation tools are available in Screen and Video Presentation recording modes, allowing users to create seamless educational videos or tutorials with annotations, edit them in the built-in DemoCreator editor, and share them directly to YouTube, TikTok, Vimeo, and any other platform.


