

Mac computers let users record sound using a built-in app to capture audio on any Mac device. With it, you get a useful tool for recording voice memos anytime, anywhere, to create personalized sound chronicles you can use for multiple purposes.
Today, we'll delve deeper into the perks of a built-in Voice Memo Recorder app on your Mac and give you some tips to record, edit, enhance, replace, and trim voice memos on your Mac computer.
Table of Content
About the Voice Memos App on Mac
Your Mac has a built-in voice recorder, called Voice Memos, which you can use to turn your computer into a recording device. The app lets you capture audio clips of your voice using an external mic, a supported headset, or the built-in microphone.

Aside from capturing voice memos, the app lets you play your recordings and make basic edits to your audio files such as:
- Change audio quality by selecting Lossless (larger files, higher quality) or Compressed (smaller files, lower quality);
- Replace part of a voice memo recording to overwrite existing audio;
- Trim a voice memo to delete excess audio;
- Adjust the playback settings without altering the original recording;
- Duplicate a voice memo to save time and effort on copying multiple files;
- Rename a recording for safekeeping and better file organization;
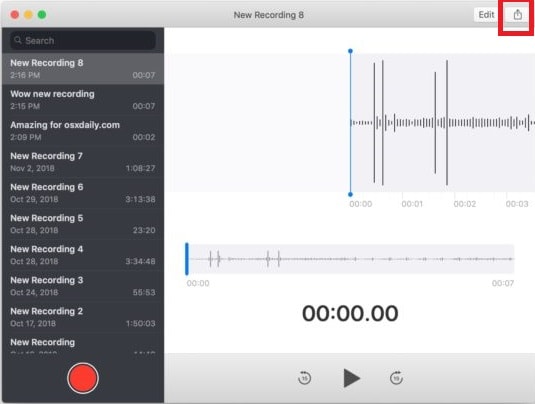
- Share a recording on your Mac device.
The Voice Memo Recorder app is an excellent tool to record and save important information. You can rely on it to record multiple audio files instead of typing them down. Once you finish recording, you can play the file to listen to your voice memo on any device with the same Apple ID.
After recording and editing, you can use your voice memos as a shareable and downloadable message or audio file. Now, let's see how to record a voice memo on a Mac using the Voice Memos Recorder app.
How To Record a Voice Memo on Mac Using the Voice Memos App
Below are the steps you need to complete to capture voice memos using the Mac Voice Memos app.
- Turn on your MacBook and navigate to the Applications folder;
- Select Voice Memos to launch the recorder app;

- Once the app starts, you'll see the interface with available recording features;
- Click the red Record button to start recording your voice;
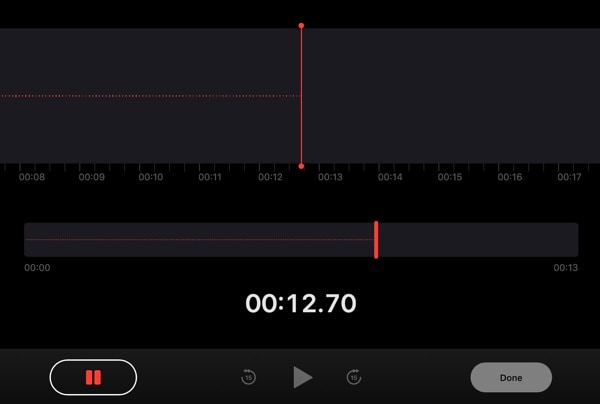
- Click Done when you finish recording;
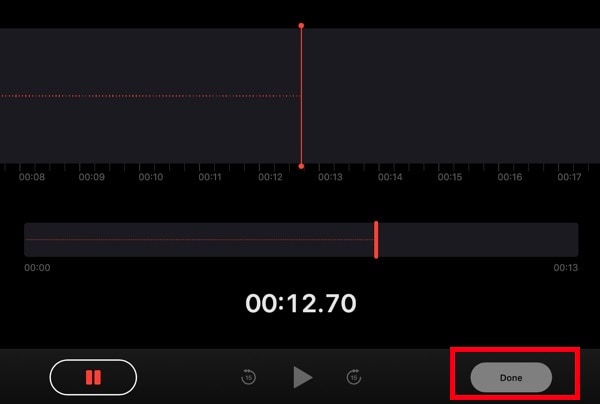
- Save the recording on your computer and click the Share icon to share the file directly to social media, online platforms, etc.
How To Change the Name of Recorded Voice Memos on Mac
If you wish to rename a recording, find the file under the New Recording name in the Save location (select Location-based Naming in Settings) and simply assign it a new name.
If you can't find the recording with the name of your location, allow the Voice Memos app to automatically detect the location on your Mac (Apple menu > System Settings > Privacy & Security > turn on Location Services).
Here's how to rename the recorded voice memos on Mac:
- Open the Voice Memos app;
- Select the recording(s) you want to rename:
- Click the recording's name in the list and type a new name;

- Hit Return.
How To Enhance Recorded Voice Memos on Mac
The Voice Memos app enhances the recorded audio files by adjusting multiple playback settings without altering the original recording.
Here's how:
- Open Voice Memos;
- Select the recording you want to enhance and click the Playback Settings icon in the upper-right corner;
- Toggle the Enhance Recording on to reduce reverberation and background noise;

- Click the Close (X) button, then hit Play to listen to the enhanced recording.
How To Replace Voice Memos on Mac
The Replace feature allows you to overwrite existing audio by replacing part of a recording.
Here's how to use it:
- Launch the Voice Memos app and select the recording you want to replace;
- Select the Edit button;
- In the Edit window, drag the playhead (blue vertical line) left or right to edit the waveform overview;

- Hit Replace > Record to replace the existing audio with a new recording;

- Press Done to save the new recording.
How To Trim Voice Memos on Mac
The Trim feature lets you remove excess audio to make your audio files sound more compact and professional.
Here's how to trim your voice memos on a Mac to repurpose your recordings for sharing and safekeeping:
- Go to the Voice Memos app and select the audio file for trimming;
- Select the Edit button and click Trim;

How To Duplicate Voice Memos on Mac
The Duplicate feature is an excellent audio editing tool you can rely on to create voice memo backups or edit the voice recording without altering the original audio file.
Here's how to duplicate voice memos on a MacBook:
- Open the Voice Memos app on your computer;
- Right-click the voice memo you want to duplicate;
- Select Duplicate.

The Downsides of Using the Voice Memos App on Mac
Though the Voice Memos app packs quite a punch and is as straightforward as it gets, the tool has a few flaws you should know about.
The downsides include:
- The app doesn't support recording the macOS internal audio; You can only use it to record voice from a microphone on Mac.
- There's no option to transcribe audio to text:
- The app is prone to software bugs and glitches;
- Playback issues arise when playing the recordings;
- Editing shorter voice memos can lead to app crashes;
- Recording audio longer than 90 minutes may cause the app to freeze or shut down unexpectedly.
Though the app is as user-friendly as possible, it isn't perfect. That's why you should consider using an alternative solution. Keep reading to learn more.
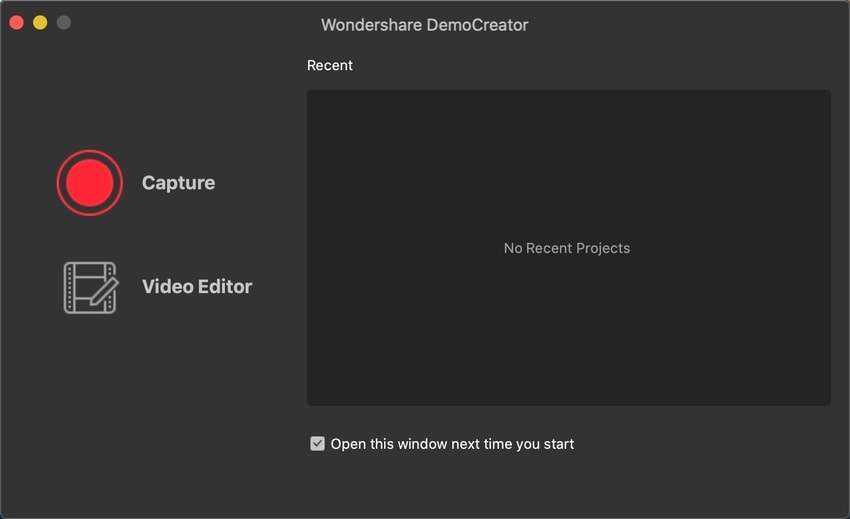
A More Powerful Alternative to Consider: DemoCreator
Wondershare DemoCreator is the best alternative to the Voice Memos app for recording voice memos and capturing system and mic audio on a Mac.

Aside from being a user-friendly voice recorder, DemoCreator is an AI-powered audio editor with advanced audio editing and enhancing features.
In addition to streamlined audio recording and enhancing capabilities, DemoCreator also supports screen drawing, screen/webcam recording, avatar recording, and more.
Advantages of Using Democreator to Record Voice Memos on Mac
DemoCreator recorder is a simple, user-friendly, professional voice memo recording software with AI-powered audio/video editing capabilities. The recorder can help Mac users capture professional-quality audio clips effortlessly.
The software packs a wide range of advanced features, all packed in an intuitive, automated, and unified interface. Because of that, DemoCreator gives users quite a few advantages:
- Support for Windows and macOS;
- The free trial version lets you explore audio recording and editing capabilities;
- Captures system and microphone audio;
- Records audio in ultra-high quality;
- Supports an array of file formats and the option to import audio, music, and other media files;
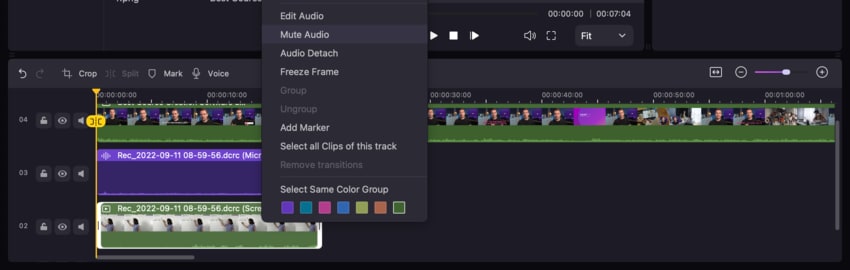
- Over 100 advanced editing options for professional-quality audio;
- Tap into a vast selection of audio effects to enhance your voice notes, memos, recordings, and updates;
- Edit voice recordings in different tracks;
- One-click transcription of voice memos;
- Powerful DemoCreator Voice Changer lets you add different voice effects;
- Advanced exporting options let you export audio files without quality loss.
How to Use DemoCreator
Download and install DemoCreator voice memo recorder on your Mac computer, then follow the steps below to record a voice memo:
- Launch DemoCreator and navigate to the main menu;
- Select All-in-One Recorder from the main interface;
- Check the system audio options and enable or disable System Audio according to your needs.
- Connect your microphone and enable Microphone audio;
- In the Capture Area pane, select Don't record screen from the dropdown menu;
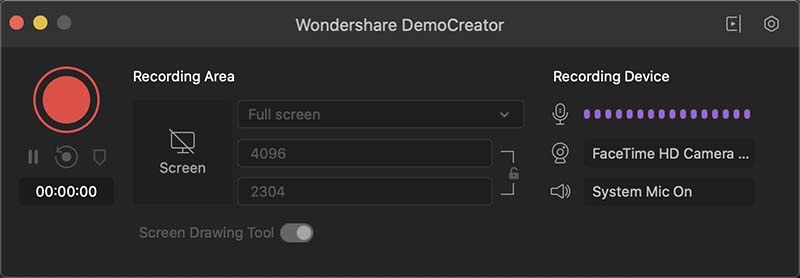
- Click the red Capture button to start recording;
- Click Export to save the voice memo on your Mac in a preferred audio format like MP3. Alternatively, you can go to the Video Editor to optimize its quality.
Conclusion
Though your Mac has a built-in voice memo recorder, the app only supports basic audio recording capabilities and offers limited audio editing and enhancing features.
While you can use the Mac voice memo recorder to capture multiple voice memos that you can rename, change, trim, enhance, and duplicate according to your needs, the tool is prone to various software issues, playback glitches, app crashes, etc.
Suppose you're looking for an all-encompassing software solution to solve all these problems and give you access to advanced AI voice recording and audio editing features. In that case, you should give Wondershare DemoCreator a try.
DemoCreator Voice Memo Recorder for Mac is the ultimate solution for recording your voice with webcam and audio and tapping into an extensive selection of advanced audio editing tools to capture high-quality audio files.
FAQs About Recording a Voice Memo on Mac
-
Where do I find voice memos on my Mac?
You can find your voice memos on a Mac by following the steps below:- Go to the Apple menu;
- Select System Settings and click (your name);
- Select iCloud;
- Navigate to Options to access Voice Memos and your recordings.
-
Are voice memos saved on iCloud?
Yes, iCloud automatically saves and backs up your voice memos if you have enabled iCloud Backup on your Mac. -
Can you save a voice memo as a File on Mac?
Yes, you can. Here's how:- Locate the specific voice memo in the Voice Memos app;
- Click Share and select Save as copy;
- Select MP3 as the default format option to save a voice memo as an audio file.
-
How long can you record a voice memo on Mac?
You can record audio on a Mac using the Voice Memos app without any time limit. -
Why are voice memos not recording on Mac?
The Voice Memos app may not record due to several factors:- You may not have enough storage space;
- You might be using an outdated version of the Voice Memos app;
- Your Apple user account may have irregular settings and permissions;
- You haven't enabled the built-in microphone on your device;
- The mic is damaged;
- Software glitches or failure may cause system issues;
- Your Mac may have been infected with a virus or malware infection;
- App freezes due to software issues.
-
How do I convert a voice memo to an audio File on a Mac?
Follow the steps below to convert voice memos to audio files:- Select the voice memo you want to convert;
- Import it into the Music app;
- Select the memo and navigate to Music Menu File > Convert to MP3.
-
Do Apple voice memos expire?
The voice memos you record with the Voice Memos app on a Mac only expire if you delete them permanently. However, voice messages automatically self-destruct two minutes after listening to them on your iPhone. You can prevent them from expiring by saving the memos on your device.


