Designed to be a lightweight and beginner-friendly video editing app for Macs and, later, iPhones and iPads, iMovie has been a go-to editing tool for home users since its release in 1999. Its accessible user interface makes it a fantastic choice for amateur video editors. But is it also a recording tool, and can you record videos in iMovie?
This guide aims to answer that and examine the app's recording capabilities. Stay around, and we'll show you how to record a video in iMovie on Mac and iOS devices and provide an alternative solution that might be better for macOS users.
Table of Content
Recording Functions of iMovie
Although it's primarily a highly simplified and free video editing app for Macs, iMovie also has some essential recording features, which include the following:
- Video Recording - iMovie lets users record clips via the Mac's built-in FaceTime HD Camera and the iPhone and iPad's front and back cameras.
- Voiceover Recording - Mac users can also access iMovie's voiceover function and record narrations and commentaries as long as they have a video in the project timeline.
Of course, you can easily edit the available audio and video recordings with iMovie's accessible editing tools, as iMovie is primarily a beginner-friendly video editing app for Mac users. However, this app also has a significant disadvantage, making it less than ideal for specific situations.
Namely, iMovie doesn't have screen recording features, as those recording functions are reserved for Apple's QuickTime Player app. Therefore, since the iMovie app can only record what your Mac's webcam sees, it's only suitable for users who want to add a video of themselves as an overlay to their iMovie projects.
How To Record a Video in iMovie on Mac
Thanks to its remarkably simplified user interface, figuring out how to record in iMovie on Mac is effortless. Nonetheless, we've included detailed step-by-step instructions for recording a webcam video with iMovie. Here's a quick guide on how to record a video using iMovie on your Mac:
- Launch the iMovie app through your Mac's Applications folder.
- Tap the My Movie button in the Project Media section and click the Import Media button.

- Tap the FaceTime HD Camera in the Cameras section at the top left.

- Click the large Record button in the middle when your webcam preview appears.

- Press the same button again to end the recording.
Once done, your FaceTime HD Camera recordings will automatically be imported as projects. You can also find them in a folder specified in the Import To menu at the top of the screen.
How To Record a Video in iMovie on iPhone/iPad
Contrary to popular belief, the iMovie app isn't exclusive to Macs. Its iOS version was released in 2010, coinciding with the release of the iPhone 4. Thus, you can also capture videos in iMovie on an iPhone or iPad. Here's a quick guide on how to record videos with iMovie on iOS:
- Open the iMovie app on your iPhone or iPad.
- Pull from the bottom of the screen to Start New Project and choose the Movie option.
- Tap the Create Movie button. (You may have to select at least one video clip to create a new movie project. You can later remove it when you add a camera recording.)
- Tap the Plus button and select the Camera. Then, choose the video option and record a clip like you would in the default Camera app on iOS.

- If you're satisfied with the video, tap the Use Video option. Otherwise, click Retake to try again.
While you can easily record a video in iMovie on an iPhone or an iPad, capturing video clips with your iPhone or iPad's default Camera app will provide more customization options for your videos. You can then easily import these video clips into the iMovie app on iOS devices.
Downsides of Using iMovie for Recording Videos
Judging by the looks of the screenshot depicting the iMovie app on iOS, it's clear that recording videos in iMovie isn't perfect, especially on iPhones and iPads. However, these aren't the only downsides of capturing videos in iMovie, as this method has a few other drawbacks:
- Limited Recording Capabilities - The app's recording features are limited whether you use iMovie on macOS or iOS. You can't pause or resume a recording or adjust the focus, exposure, or white balance when you access the camera through the iMovie app.
- Lack of Screen Recording - While you can access your Mac's FaceTime HD or your iOS device's camera in iMovie, you can't record your screen, limiting the app's use for gaming videos, walkthroughs, tutorials, demos, etc.
- Low Video Quality on Macs - Although it's not the case when capturing videos in iMovie on iPhones and iPads, it's undoubtedly a downside for macOS users. After all, a Mac's camera is weak, and you'd be far better off recording on an iPhone and then importing this clip.
As a free and highly simplified video editor for macOS and iOS, iMovie has its purpose. However, suppose you're trying to create high-quality social media content, educational videos, training lessons, tutorials, or gaming walkthroughs.
In that case, you'd be far better off with a dedicated third-party video recorder.
A Professional Alternative to iMovie for Video Recording Worth Considering
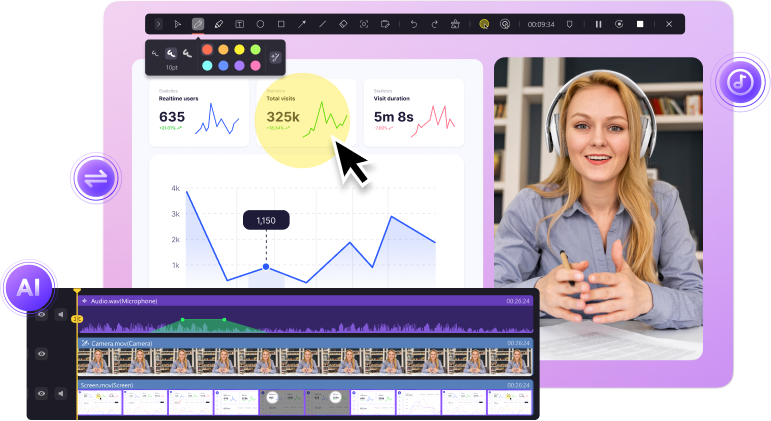
Supported by most older Intel-based Macs and the latest Apple Silicon devices, Wondershare DemoCreator is a third-party macOS video recording and editing app that'll work better than many native Apple apps.
Unlike iMovie, DemoCreator has no limitations regarding its recording capabilities. Its seamless screen, camera, mic audio, and system sound recordings make it a powerful alternative and a worthy tool to consider instead of the built-in iMovie.

It's characterized by a remarkably straightforward and beginner-friendly user interface, simplified keyboard shortcuts for effortless video creation, and a built-in video editor that enhances recordings through AI-powered editing tools.
How To Record a Video With the iMovie Alternative
While learning how to record a video using iMovie is effortless, doing so with DemoCreator is even easier. Here's everything you'll need to do:
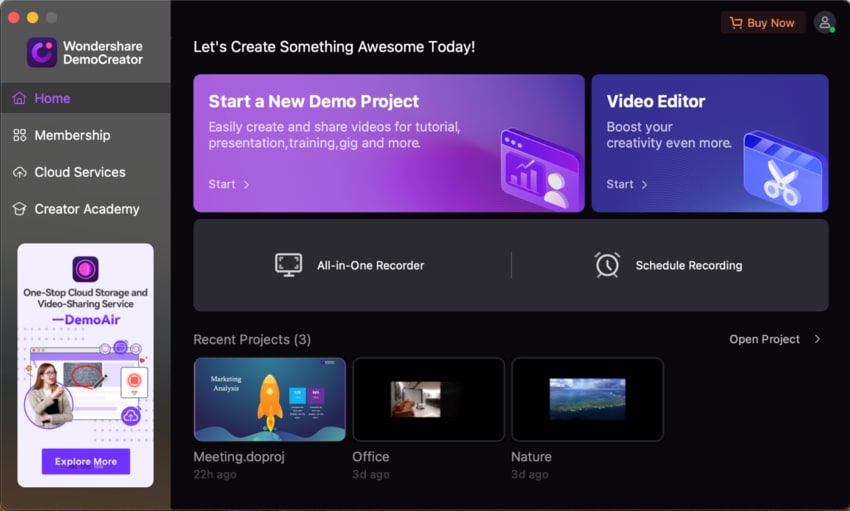
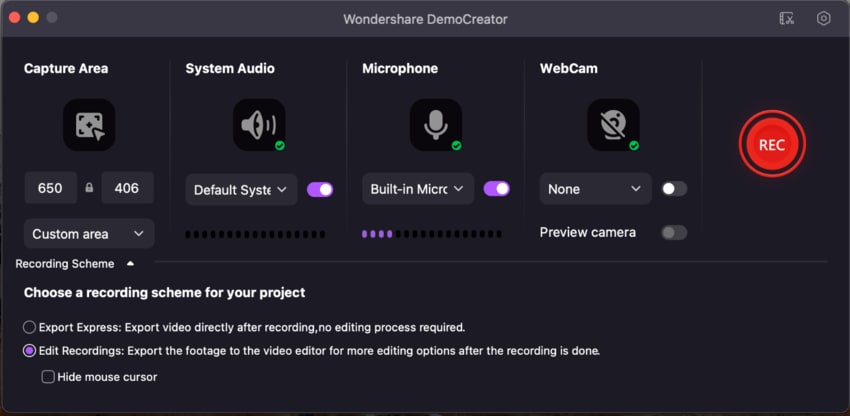
- Launch DemoCreator and tap the All-in-One Recorder option.

- Customize the Capture Area to adjust your recording mode. You can set a custom resolution or choose a specific window.

- Enable and adjust System Audio, Microphone, or both, depending on the type of audio you'd like to include in your recordings.
- To capture a video of yourself alongside a screen recording, you should also enable the WebCam option and adjust it to use your primary camera.

- Select a Recording Scheme. Choose Export Express to record a simple video or Edit Recordings to open the app's editor after recording.
- Once everything is set to your liking, click the red REC button or press the OPTION + COMMAND + 2 keys to start a recording. Press the same key combination to pause and resume recordings.
- When you're done, press SHIFT + COMMAND + 2 to stop the recording.
With the Export Express option under the Recording Scheme, DemoCreator automatically exports your recording as a single file with combined video and audio tracks.
However, if you've picked Edit Recordings, you'll be taken into DemoCreator's video editor, where you can apply dozens of fantastic video edits and take your recordings to another level with the app's AI-based features.
Conclusion
Figuring out how to record a video using iMovie is effortless, regardless of whether you're using a Mac, an iPhone, or an iPad. After all, this macOS and iOS app was designed to be a highly simplified video editing tool with essential recording capabilities.
However, iMovie's limited recording functions are also prompting many users to look for alternative video recording and editing tools for macOS, and that's precisely where Wondershare DemoCreator comes in.
Unlike iMovie, this intuitive yet robust macOS video recorder can record screens, cameras, system sounds, and microphone audio separately or simultaneously. It offers better customization options and features a built-in video editor with AI tools, making it a far more powerful alternative to iMovie.
FAQs
-
Does iMovie allow screen recording?
Unfortunately, iMovie doesn't let users capture screen recordings. However, while there's no native support for these, especially on iPhones and iPads, Mac users can bypass this limitation by capturing their screens with QuickTime Player, the Screenshot toolbar, or a third-party app like DemoCreator. -
Can you record a video of yourself on iMovie?
Yes, you can record yourself in iMovie. Although it's an editing app, iMovie lets users access their Mac's built-in FaceTime HD Camera and record a video instead of importing an existing clip for a video editing project. -
How do I allow iMovie to use a microphone?
Your Mac's privacy settings sometimes block voiceover recordings in iMovie, and to fix that, you'll need to allow the iMovie app to use your device's microphone. Here's how:- Launch System Preferences from the Apple menu.
- Tap Security & Privacy and select the Privacy tab.
- Scroll the list on the lift and choose Microphone.
- Tick the box next to iMovie to give the app access.
- Once done, head back to iMovie and try its voiceover recording tool to test things.


